Articles by Chuck Price — Page 15

Analysis: Does Amendment #3972 Open the Door to Selling National Parks?

Analysis: Does Amendment #3972 Open the Door to Selling National Parks?

By: Public Lands Analyst
Published: December 19, 2025 · Status updated: September 29, 2026

Analysis: Senate Amendment #3972 and Section 130 Protections

Status update: Senator Mike Lee introduced Amendment #3972 with language that would have removed Section 130 from the 2025 Interior Appropriations bill. After public backlash, he withdrew that deletion and refiled the amendment without the Section 130 provision. The national-park disposal language did not proceed to floor debate in the form analyzed below.

US Senate Chamber
The original December 2025 proposal was later withdrawn and refiled without the Section 130 deletion.

Section 130 is an appropriations rider, a temporary provision attached to annual funding bills, rather than a permanent statute. Its specific function is to restrict the Department of the Interior from using appropriated funds to sell, transfer, or dispose of specific classes of federal land.

Recent versions of Section 130 have used language substantially similar to the following:

“The Department of the Interior shall maintain all Federal lands designated as, or as a part of, a national park unit, a national scenic or national historic trail, or a wild and scenic river… as Federal land and continue to operate such unit… as an entity of the National Park Service.”

Representative language based on Section 130 in current Interior appropriations drafts. Source: Center for Western Priorities / S.2431 draft

The Effect of Amendment #3972: By striking this section, the amendment removes the funding prohibition. This does not automatically trigger a sale. Instead, it restores the executive branch’s discretion to consider disposal or transfer under other existing authorities, such as the Federal Land Policy and Management Act, provided other statutory conditions are met. Critics argue this removes a key annual protection that has functioned as a de facto legislative lock keeping park units in federal hands.

The Proponent’s View: Right-Sizing Federal Holdings

Senator Lee and proponents of the amendment argue that the federal government’s ownership of vast tracts of land, over 600 million acres, mostly in the West, stifles state economic sovereignty. Lee has historically argued that riders like Section 130 prevent necessary adjustments to the federal estate and that states are better equipped to manage lands for local needs, including housing and resource development.

Key Arguments for the Amendment:

  • Fiscal Responsibility: Reducing the federal maintenance backlog by disposing of underutilized or expensive-to-maintain units.
  • State Sovereignty: Returning control of land to states to increase local tax bases and development opportunities.
  • Flexibility: Preventing automatic retention of land that may no longer serve a national purpose.

The Opposition: A Greenlight for Liquidation

Conservation groups, including the National Parks Conservation Association and the Center for Western Priorities, strongly oppose the amendment. They characterize the removal of Section 130 not as a technical adjustment, but as a greenlight for the administration to dismantle the National Park System.

Their primary concern is that without the explicit prohibition in Section 130, a sympathetic administration could move to sell off or transfer controversial units, such as national monuments or historic sites, to state or private entities. The Center for Western Priorities stated that the amendment would pave the way for the administration to sell off national parks to the highest bidder, reflecting their concern over privatization.

Economic Context: Outdoor Recreation vs. Development

The debate frames a choice between potential development revenue and the outdoor recreation economy. According to the Bureau of Economic Analysis, the outdoor recreation economy generated $1.2 trillion in current-dollar gross output in 2023, accounting for 2.3% of U.S. GDP. Opponents argue that long-term recurring revenue from tourism and recreation in protected parks outweighs the one-time revenue from land sales.

Legislative Context: HOUSES Act vs. Amendment #3972

While Senator Lee championed the HOUSES Act earlier in 2025, Amendment #3972 differs significantly in scope and target.

Table 1: Comparison of Recent Land Transfer Proposals

Feature HOUSES Act Proposal (2025 Revision) Amendment #3972 to S.2431
Targeted Land BLM land only National Parks, Wild & Scenic Rivers, Trails
Exclusions National Monuments, Wilderness, Recreation Areas No parcel-level exclusions. Removes Section 130 protection for all covered National Park Service units, national historic trails, and wild and scenic rivers.
Conditions Must be within five miles of a population center and meet housing density requirements No usage or siting conditions attached
Mechanism Discounted sale to local government for housing Removal of funding prohibition on disposal
Source: Congress.gov, 118th Congress S.3117 text for exclusions, and S.2431 amendment text.
Legislative Tracking Data (JSON)

Use this block to track the amendment status via Congressional APIs.

{
  "bill_id": "S.2431",
  "congress": "119th",
  "amendment_number": "3972",
  "sponsor": "Sen. Mike Lee [R-UT]",
  "target_section": "130 (Prohibition on Disposal)",
  "current_status": "Section 130 deletion withdrawn; amendment refiled without it",
  "related_agencies": ["Department of the Interior", "National Park Service"],
  "api_endpoint": "https://api.congress.gov/v3/bill/119/s/2431/amendment"
}

Frequently Asked Questions

Does Amendment #3972 immediately sell national parks?
No. The original proposal would have removed a funding prohibition, but that Section 130 deletion was withdrawn and did not advance in the form described. A land disposal would also require separate legal and administrative authority.
Why is Section 130 called a rider?
It is a provision added to an annual appropriations bill rather than a permanent standalone law. It must be renewed each year to remain in effect.
Plan Route 66 by RV with the right rig size, parking strategy, and itinerary

Plan Route 66 by RV with the right rig size, parking strategy, and itinerary

Last updated: December 2025

Route 66 RV Planning 2026: Oatman Grade, Stops, Costs

Driving Route 66 by RV is one of those “someday” trips—until it isn’t. When you finally commit, you quickly discover there’s no single truth about RVing the Mother Road. Some say it’s easy. Others warn it’ll shake your axles loose. Some insist big rigs can’t do it; others do it every year.

The reality: Route 66 is absolutely RV-friendly when you understand its constraints.

This guide cuts through the noise using a blend of:

  • On-the-ground reports from real travelers, including a high-signal Facebook thread led by Anthony J. Mignella, who completed Route 66 towing a 30-foot travel trailer.
  • 35+ years of RV travel experience applied to the specific challenges of Route 66.
  • Authoritative sources like the National Park Service, state DOTs, and RV-specific tools.
  • Modern RV strategy for length limits, parking, routing, and reservations.

This isn’t a listicle. It’s a deep, route-by-route RV planning framework for tackling Route 66 in a motorhome, trailer, or camper van.


Quick Answer: Can You Drive Route 66 in an RV?

Yes, Route 66 is RV-friendly with these key facts:

  • ✅ Roughly 80–90% of the drivable Route 66 corridor is suitable for modern RVs.
  • ✅ Class A motorhomes up to about 40 feet can complete the trip with a few smart detours.
  • ⚠️ The Oatman Grade (Sitgreaves Pass) in Arizona is the main problem area for big rigs.
  • 🏙️ Urban parking in Chicago, St. Louis, Santa Fe, and Los Angeles is often harder than the driving itself.
  • 🏕️ Most RVers mix KOAs with small private parks and book only key hubs (like Santa Fe and Malibu) in advance.
  • ⏱️ A comfortable pace is 21–30 days; a rushed trip can be done in 10–14 days.

If you’re worried about where you can legally stop on long driving days, see our store-by-store guide to where to park your RV for free on a road trip.

If you respect length limits, plan for parking, and give yourself time, Route 66 is one of the most rewarding RV trips in North America.


Table of Contents

  1. Why Route 66 Is a Perfect (and Challenging) RV Trip
  2. 2025 Route 66 RV Difficulty Map & Ratings
  3. The 3 Route 66 RV Travel Archetypes
  4. Essential RV Constraints (Length, Height, Parking, Fuel, Water, Terrain)
  5. Real Traveler Insights (Quotes & Commentary)
  6. State-by-State Route 66 RV Guide (Illinois to California)
  7. Verified Campground Stops (State-by-State)
  8. Three Ready-to-Use Route 66 RV Itineraries
  9. Seasonal Timing, Weather & Safety Considerations
  10. What Does It Cost to RV Route 66?
  11. Fuel Gaps, Dump Stations & Alternate Routes
  12. Should You Bring a Toad?
  13. Myth vs Reality: What RVers Get Wrong About Route 66
  14. Route 66 RV FAQ
  15. Authoritative References & Planning Resources

1. Why Route 66 Is a Perfect (and Challenging) RV Trip

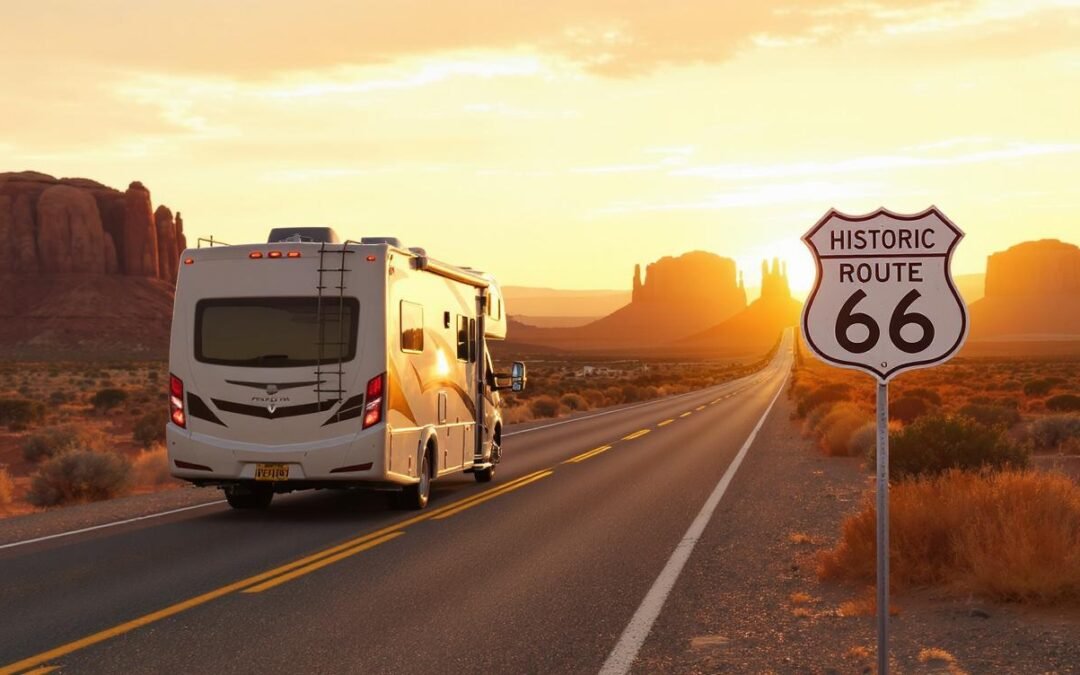
Class C RV parked near a neon Route 66 campground sign

Route 66 isn’t a single road—it’s a patchwork of alignments, main streets, and bypasses layered over nearly 100 years. For RVers, that means you’re not just following a line on a map. You’re constantly choosing between:

  • Historic two-lane segments vs faster bypasses
  • Downtown main streets vs truck-friendly arterials
  • Iconic landmarks vs realistic daily mileage

Compared to straight interstate travel, the Mother Road demands:

  • Slower speeds and more frequent turns
  • Awareness of length and grade limits on steep or narrow sections
  • Extra thought for parking in older downtowns
  • Flexible overnight planning for busy periods and small-town parks

That’s exactly why RVers love it. You’re not just driving from A to B—you’re threading a big, modern rig through the remains of an earlier road-trip era.


2. 2025 Route 66 RV Difficulty Map & Ratings

 Stylized US map showing Route 66

We’ve generalized the route into major segments based on lane width, grades, and traveler feedback (including Anthony J. Mignella and others). Use this table as a planning tool, not as a substitute for local conditions or current DOT updates.

Route Segment RV Rating Primary Constraint Best Rig Size
Chicago, IL → St. Louis, MO 🟢 Easy Urban congestion; expensive or limited big-rig parking in Chicago. Any (Class A OK)
St. Louis, MO → Oklahoma City, OK 🟢 Easy Older downtown streets in some towns; generally wide and manageable. Any (Trailers OK)
Oklahoma City, OK → Tucumcari, NM 🟢 Easy Mostly flat plains; wind can be a factor for tall rigs. Any (including big Class A)
Tucumcari, NM → Flagstaff, AZ 🟡 Moderate Elevation: climbs toward 7,000 ft; watch engine and transmission temps. Any (but check brakes & cooling)
Flagstaff, AZ → Kingman, AZ 🟡 Moderate Mountain weather; some steeper grades and curves. Any, with mountain-driving experience
Kingman, AZ → Oatman (Sitgreaves Pass) 🔴 Difficult Steep grades and hairpin turns; minimal shoulders. Under 30′ strongly recommended
Kingman, AZ → Needles, CA (I-40) 🟢 Easy Heat in summer; long grades but wide, modern highway. Any (big rigs OK)
Needles, CA → Barstow → LA → Santa Monica 🟢 Road / 🟡 Traffic High heat near Needles; heavy traffic closer to Los Angeles. Any, with big-city driving comfort

Key Oatman detail: the posted limit is about 40 feet, but the combination of steep grades, tight curves, and lack of shoulders means that in practice, 30 feet or under is the safer choice for that alignment. Most big rigs should avoid it entirely and use the interstate plus a west-side approach.


3. The 3 Route 66 RV Travel Archetypesthree RV silhouettes labeled “Fast-Track 10–14 days,” “Immersion 21–30 days,” and “Collector 4–8 weeks

Before you book a single campground, decide which traveler profile you fit. Your expectations will shape how you experience Route 66.

A) Fast-Track Traveler (10–14 Days)

  • Hits only the major icons (Cadillac Ranch, Chain of Rocks, Oatman, Santa Monica Pier).
  • Prefers KOAs and larger private RV parks with easy in/out.
  • Average daily mileage: 200–350 miles.
  • Best suited for: Class A or big fifth wheels wanting a “check it off the list” version.

B) Immersion Traveler (21–30 Days)

  • Mixes neon, museums, diners, and small-town main streets.
  • Stays multiple nights in Santa Fe, Flagstaff, or Tulsa.
  • Average daily mileage: 100–200 miles with built-in zero-days.
  • Best suited for: Class C or mid-size trailers that want a balance of depth and comfort.

C) Collector (4–8 Weeks)

  • Seeks surviving alignments, abandoned motels, and vintage neon.
  • Stops at lesser-known museums and interpretive centers.
  • Will happily reroute for ghost towns or obscure signage.
  • Best suited for: Smaller Class C or Class B camper van with high parking flexibility.

The rest of this guide works for all three archetypes. The itineraries later on give specific day-by-day structures for each style.


4. Essential RV Constraints on Route 66

RV mirror looking down a narrow two-lane road with Route 66 emblem

4.1 Length & Grade Limits (Especially Near Oatman)

The most important constraint on Route 66 for RVers is the steep, narrow section into Oatman, Arizona, via Sitgreaves Pass. In the Facebook thread that inspired this guide, traveler Anthony J. Mignella noted:

“There is a 40 ft length limit on 66 approaching Oatman from the east.”

Beyond the posted numbers, real-world reports from RVers are consistent: it’s simply not a place for big rigs. Tight switchbacks, steep grades, and limited room for error make the eastern approach a poor choice for anything long or heavy.

The practical takeaway: treat 40 feet as the hard upper limit and 30 feet or under as the realistic safe zone for that grade. If you’re in a large Class A or towing a long trailer, skip the eastern approach entirely.

Safer Oatman strategy for RVs:

  • Run Kingman → Needles via I-40 with your RV.
  • Drop the RV at a park or in Needles/Kingman.
  • Backtrack into Oatman from the west side with a smaller vehicle if you have one.

Always verify current restrictions with the Arizona Department of Transportation:
https://azdot.gov/travel.

4.2 Parking: The Hidden Difficulty

Several travelers mentioned that the real pain point isn’t the highway—it’s parking in cities and small downtowns.

“Parking a problem sometimes, but I bought the RV in part to do this trip… We didn’t see everything but never expected to.” – Anthony J. Mignella

Parking is especially tight in:

  • Chicago (Route 66 starting point)
  • St. Louis
  • Santa Fe and parts of Albuquerque
  • Los Angeles and Santa Monica

Many RVers stage outside the city in KOAs or larger RV parks, then use Uber, Lyft, or a toad to explore. In Chicago, some RVers overnight at the McCormick Place Truck Marshaling Yard (very industrial but central):
official yard info.

If you’re trying to decide whether to lean on store lots vs campgrounds along your route, read our store-by-store guide to free overnight RV parking at Walmart, Home Depot, Cracker Barrel and more.

4.3 Fuel, Water & Dump Access

Route 66 is generally well-serviced, but there are stretches where large, easy-in/out fuel stops and dump stations are farther apart than you might like.

Typical “watch your gauges” stretches include:

  • High desert sections in New Mexico between larger towns.
  • Segments in northern Arizona between Holbrook, Winslow, and Flagstaff.
  • Desert corridors around Needles and Barstow in California.

In practice, that can mean 60–90 miles between truly RV-friendly fuel stops if you’re picky about approach angles and lot size.

Practical approach:

  • Top off fuel before leaving major cities such as Amarillo, Albuquerque, and Kingman.
  • Use apps like Campendium and
    AllStays to locate dump stations and propane.
  • Plan around KOAs and larger private parks for dump/water, even if you mix in small-town parks or Harvest Hosts stays.

If you like to mix in free public-land camping where it’s legal, our step-by-step guide to using Google Maps to find free dispersed camping sites will slot neatly into this planning process.

4.4 Road Conditions & Pavement Reality

One commenter in the thread argued that towing a travel trailer on Route 66 would be catastrophic:

“You would have lost the axles out of it. Be true to your story.”

Multiple travelers pushed back.

“We just got back from a two week trip on the route using the Route 66 app, and we must have missed the parts of the road you speak of.” – Sondra Burlingame

“The roadways of Route 66 are fine for RVs. There are some rough short segments, but it’s not going to be a problem… Motorcycles have it worse.” – Scott McCoy, who tows a 17-foot travel trailer while updating his Route 66 guide.

The consensus from people who have actually done it is clear: you’ll hit some rough patches, but nothing a modern RV can’t handle when driven sanely.


5. Real Traveler Insights (and What They Actually Mean)

Couple at an RV dinette

5.1 Reservations: Day-Of vs Months in Advance

Anthony’s approach was relaxed:

“We booked most places the day we were arriving—only Joliet, Santa Fe and Malibu in advance.”

By contrast, another traveler, Tim Daugherty, shared:

“My wife is a worrier and had me book the entire trip months in advance.”

Both worked. What they really highlight is this:

  • High-demand stops like Santa Fe and Malibu are worth booking in advance.
  • Smaller towns along the route usually have day-of or short-notice availability outside peak holidays.

A practical hybrid strategy:

  • Reserve Chicago/Joliet, Santa Fe, and Malibu early.
  • Keep the rest of your nights flexible so you can adjust mileage, weather, and side trips on the fly.

5.2 Rig Size and “Nimbleness”

Another traveler, Steve Rice, did Route 66 with a 19-foot travel trailer and enjoyed it, but shared future plans:

“We’re going back next summer w/o the trailer, flying to LA and driving east. Looking forward to being a little more nimble.”

The pattern across RV groups is simple:

  • Smaller rigs (Class B, short Class C, under-20′ trailers) get more spontaneous side trips and easier parking.
  • Larger rigs (30–40′) get more comfort and storage but require more planning, especially in cities and historic downtowns.

5.3 Would You Do It Again in an RV?

For some people, Route 66 is a once-in-a-lifetime trip.

“I enjoyed it… but I also don’t plan on doing it a second time.” – Anthony J. Mignella

I see that a lot: RVers are grateful they did it, but a second trip might happen in a car, on a motorcycle, or just in smaller segments.


6. State-by-State Route 66 RV Guide (Illinois to California)

A horizontal collage of Route 66 signs from Illinois, Texas, Arizona, and California

This overview blends real traveler experiences with official guidance from the
National Park Service Route 66 program.

Illinois: Chicago to Springfield

Difficulty: 🟢 Easy

  • Chicago traffic and parking are the only major issues; the roads themselves are fine for RVs.
  • Many RVers overnight in Joliet and visit Chicago as a day trip.
  • The route includes classic downtown stretches, Route 66 signage, and historic stops.

Begin Historic Route 66” sign in downtown Chicago

Missouri: St. Louis to Carthage

Difficulty: 🟡 Moderate

  • Older town centers can have tight street parking and smaller convenience store lots.
  • St. Louis itself is busy; many RVers stay at St. Louis NE / Granite City KOA and drive in.
  • Great stops include Route 66 State Park and Meramec Caverns.

Kansas: Short but Charming

Difficulty: 🟢 Easy

  • Kansas only has about 13 miles of Route 66, but it’s scenic and easy for RVs.
  • Galena and Baxter Springs offer small-town charm and classic road-trip photo ops.

Oklahoma: Miami to Oklahoma City

Difficulty: 🟢 Easy

  • Some of the best-paved and best-marked segments for RVs.
  • Tulsa and Oklahoma City have good services and multiple RV park options.
  • Plenty of roadside attractions and Route 66 museums to break up drive days.

Texas: Shamrock to Amarillo

Difficulty: 🟢 Easy

  • Flat, open, and RV-friendly.
  • Don’t miss Cadillac Ranch and the Route 66 historic district in Amarillo.

New Mexico: Tucumcari to Gallup

Difficulty: 🟡 Moderate

  • Mix of high plains and mountain driving, especially around Santa Fe.
  • Tucumcari offers classic neon motels and RV park options, including KOA.
  • The Santa Fe KOA near Las Vegas, NM, earned praise from Anthony for location and access.

Nighttime neon motel row in Tucumcari with an RV in the distance

If you like to mix in free or low-cost spots between RV parks, bookmark our roundup of the best apps for finding free campsites—the same tools work great across New Mexico and the high plains.

Arizona: Holbrook to Kingman, Oatman & Beyond

Difficulty: 🟡 to 🔴

  • Most of I-40-adjacent segments are fine for any RV.
  • The Meteor Crater RV Park near Winslow is a popular stop; details at
    Meteor Crater Visitor Info.
  • The critical red-zone is the Oatman Grade eastbound via Sitgreaves Pass. Large rigs should avoid this alignment.

Narrow mountain highway near Oatman with warning signs visible

Arizona is also where our Google Maps method for finding dispersed camping starts to shine, especially in areas where public land and national forests intersect the Route 66 corridor.

California: Needles to Santa Monica

Difficulty: 🟢 Easy (Road) / 🟡 Moderate (Traffic & Heat)

  • Road quality is generally fine; summer heat is the main hazard near Needles and Barstow.
  • Malibu Beach RV Park (often called Malibu RV Park or Surf Outpost) offers pricey but spectacular coastal views.
  • Santa Monica can be a zoo for RV parking; many end the “Route 66 journey” just outside the pier and visit it by car or rideshare.

RV perched on a hill with ocean and Pacific Coast Highway visible


7. Verified Campground Stops (State-by-State)

Minimalist map with labeled pins showing each campground Anthony used along Route 66

Traveler Anthony J. Mignella shared his full campground list after towing a 30-foot travel trailer along Route 66 and beyond. We’ve reorganized his stops by state and region to make planning easier.

If you’re evaluating whether a campground membership is worth it for trips like this, our comparison of RV club memberships that actually save money will help you prioritize KOA, Good Sam, Passport America, and others.

📍 Ohio

  • Streetsboro, OH: KOA Streetsboro – convenient first stop outbound from the Northeast.
  • Zanesville, OH: National Road Campground – used on the return leg.

📍 Illinois & Missouri

  • Joliet, IL: Martin’s Camping Ground – practical base for a Chicago day trip without driving the RV into downtown.
  • Springfield, IL: KOA Springfield – positioned near classic Route 66 attractions.
  • Granite City, IL: St. Louis NE / Granite City KOA – big-rig friendly and used twice (outbound and return) as a St. Louis hub.
  • Carthage, MO: Ballards Campground – useful one-night transit stop.

📍 Oklahoma & Texas

  • Tulsa, OK: Mingo RV Park – convenient for a city stop with full hookups.
  • Shamrock, TX: Texas 66 RV Park – right along the Route 66 corridor.

📍 New Mexico

  • Tucumcari, NM: Tucumcari KOA – near the famous neon motel strip.
  • Las Vegas, NM (serving Santa Fe): Santa Fe KOA – Anthony’s multi-night base for exploring Santa Fe; located off I-25 but aligned with the Route 66 corridor.
  • Gallup, NM: USA RV Park – popular full-service stop on many Route 66 itineraries.

📍 Arizona

  • Near Winslow, AZ: Meteor Crater RV Park – convenient for visiting Meteor Crater and exploring the area around Winslow (“standing on a corner” photo ops optional).

📍 California

  • Needles, CA: Desert View RV Resort – used while rerouting around the Oatman length restriction.
  • Twentynine Palms, CA: 29 Palms RV Resort – basecamp for a Joshua Tree National Park side trip.
  • Malibu, CA: Malibu Beach RV Park (Surf Outpost) – Anthony’s most expensive but most scenic stop, overlooking the Pacific.

📍 Nevada, Utah & Colorado (Return Trip)

  • Pahrump, NV: Preferred RV Resort – used as a base for exploring the Death Valley region.
  • Las Vegas, NV: Oasis Las Vegas RV Resort – large, well-appointed resort with easy Uber access to the Strip.
  • Kanab, UT: Grand Plateau RV Park – ideal for visiting Zion and Bryce Canyon on a side trip.
  • Bluff, UT: Cadillac Ranch RV Park – positioned for Monument Valley and Four Corners excursions.
  • Durango, CO: Durango RV Park – springboard for the Durango & Silverton train or local mountain activities.
  • Colorado Springs, CO: Pikes Peak RV Park – tight sites but close to town and local attractions.
  • Salina, KS: Salina Campground – practical overnight stop near I-70.

You don’t need to duplicate Anthony’s exact route, but his list proves that a 30-foot trailer can successfully string together KOAs and independent parks across the entire corridor.


8. Three Ready-to-Use Route 66 RV Itineraries

Simple planner graphic showing a 12-day, 21-day and 30-day strip labeled with key city stops along route 66

8.1 12-Day “Fast Track” Itinerary (Big-Rig Friendly)

This option favors RV-friendly routing and bigger daily mileage, aiming to hit the major highlights without lingering long in each stop.

Day Segment Approx. Miles Notes
1 Chicago → Joliet 45 Start Route 66, overnight in Joliet.
2 Joliet → Springfield, IL 200 Historic stops and Route 66 museums.
3 Springfield → St. Louis / Granite City 100 Visit Chain of Rocks Bridge, stay at KOA.
4 St. Louis → Carthage, MO 280 Scenic Missouri segments, classic diners.
5 Carthage → Tulsa, OK 120 Easy driving, settle into Oklahoma rhythm.
6 Tulsa → Oklahoma City 120 Spend extra time in OKC if desired.
7 OKC → Shamrock, TX 165 Cross into Texas Panhandle.
8 Shamrock → Tucumcari, NM 115 Neon motel row and RV parks.
9 Tucumcari → Santa Fe area (Las Vegas, NM) 185 Stay at Santa Fe KOA, day trip into town.
10 Santa Fe → Gallup, NM 200 Scenic high-desert stretches.
11 Gallup → Kingman, AZ (via I-40) 310 Optional Meteor Crater stop near Winslow.
12 Kingman → LA / Santa Monica (I-40 & freeways) 345 End at Santa Monica Pier, then find RV-appropriate overnight.

Before you pull out of the driveway, pair this itinerary with our printable pre-trip checklist for motorhomes and travel trailers so you’re not chasing last-minute fixes mid-route.

8.2 21-Day “Immersion” Itinerary

Double the time, same route, much deeper experience. You’ll add:

  • Zero-days in Tulsa, Santa Fe, and Flagstaff.
  • Extra time in Oklahoma museums and Arizona national parks or monuments off-route.
  • More downtown walks and local diners instead of always cooking in the rig.

Structure is similar to the 12-day plan but with every 2–3 drive days followed by a lighter or zero day. Most RVers using this style aim for 100–200 miles on drive days and add at least one extra night in the places they like most.

As you slow the pace down, your campsite routine matters more. Our RV campsite setup and cleanup checklist keeps arrivals and departures predictable even when you’re tired.

8.3 30-Day “Collector” Itinerary

This is where you start chasing specific alignments, neon, ghost towns, and interpretive centers documented by the
NPS Route 66 itinerary.

Expect:

  • Multiple nights in key hubs like Springfield, Tulsa, Santa Fe, Flagstaff, and Barstow.
  • High mileage on some days, followed by multiple short days of only 50–90 miles.
  • Intentional detours to sites that aren’t directly on Route 66 but are part of the broader story.

9. Seasonal Timing, Weather & Safety Considerations

RV driving under dramatic storm clouds on open plains

9.1 Best Seasons for RV Travel

Spring (March–May): Often the sweet spot—milder temperatures, lower crowds, and manageable winds.

Summer (June–August): School holidays, more traffic, and serious heat in the desert segments around Needles and Barstow. Air conditioning load, tire temperatures, and coolant all need attention.

Fall (September–October): Cooler nights, pleasant days, and fewer crowds. Great time for photography and hiking detours.

Winter (November–February): Limited services in some small towns. Snow and ice possible in Illinois, Missouri, New Mexico high country, and northern Arizona.

9.2 Wind, Heat, and Storm Risk

  • High winds on the plains and high desert can make travel uncomfortable (or unsafe) for tall Class A rigs.
  • Heat waves in the Mojave region make midday breakdowns more serious—carry extra water and keep your rig well-maintained.
  • Severe storms in shoulder seasons can bring hail and heavy rain in parts of Oklahoma and Texas.

The
NPS Route 66 “Plan Your Visit” page offers maps and park connections you can use to layer in national park stops safely.


10. What Does It Cost to RV Route 66?

Laptop open to a simple trip budget spreadsheet on an RV dinette

Exact costs vary based on your rig, fuel prices, and how often you eat out, but you can build a reasonable ballpark with a few assumptions.

10.1 Simple Cost Framework (Example for a 3-Week Trip)

  • Distance: Roughly 2,400–2,800 miles when you include side trips and repositioning.
  • Fuel: If your RV averages 8–10 mpg and fuel averages $3.50–$4.25 per gallon, you’re looking at roughly $900–$1,500 in fuel for the core trip.
  • Campgrounds: Many RVers pay $35–$70 per night, mixing KOAs with private and municipal parks. Over 21–25 nights, that’s roughly $900–$1,750.
  • Food: Groceries vs restaurants changes this the most. A modest restaurant/grocery mix might add another $600–$1,000 over three weeks.
  • Attractions: Museums, tours, and parks can range from free to $30–$40 per person; budget a few hundred dollars if you like doing “all the things.”

With those assumptions, a typical couple can easily land in a range of roughly $2,500–$4,000+ for a 3-week Route 66 RV trip. You can spend less by boondocking more and cooking in the rig, or more by staying at premium resorts and eating out frequently.


11. Fuel Gaps, Dump Stations & Alternate Routes

Modern RV fueling at a vintage Route 66 service station with restored pumps

11.1 Fuel Planning

Most of Route 66 runs close to I-40 and other major corridors, but fuel prices and availability vary, especially for diesel and larger diesel islands.

A conservative fuel strategy:

  • Refuel when you hit half a tank in New Mexico and Arizona, particularly between Tucumcari, Santa Rosa, Albuquerque, Gallup, and Winslow/Flagstaff.
  • Avoid relying on tiny crossroads stations with a single pump if you have a large diesel rig.
  • Expect higher prices in desert segments around Needles and Barstow; topping off earlier can save money and stress.

If you rely heavily on tech for locating fuel, dump stations, and RV-friendly exits, our in-depth AllStays Camp & RV app guide shows exactly how to filter for big rigs, low bridges, and services along a multi-state route.

11.2 Dump & Water Strategy

  • Plan to use KOAs and bigger private parks for guaranteed dump/water access.
  • Supplement with city parks, travel centers, and occasionally fairgrounds when available.
  • Use filters in Campendium and
    AllStays to map dump stations along your route.

11.3 Alternate Routes (When to Bail Off Historic Alignments)

There’s no prize for forcing a big RV down a narrow, poorly marked historic alignment if you’re uncomfortable. In practice, most savvy RVers:

  • Favor business loops and frontage roads that carry the Route 66 designation but are better maintained.
  • Drop onto I-40 when storms, wind, or traffic make side roads a bad idea.
  • Avoid the Oatman east approach entirely in large rigs and use the I-40 / west-approach combo instead.

12. Should You Bring a Toad?

Class A motorhome towing a Jeep on a quiet highway with distant mesas

Whether to bring a toad (towed car) is one of the biggest Route 66 RV decisions.

When a Toad Helps

  • You’re in a Class A or large Class C and want to explore dense cities like Chicago, St. Louis, Santa Fe, and LA.
  • You prefer to leave the RV in a stable campground for several days and day-trip out.
  • You plan to visit side attractions with limited parking, such as small museums or urban restaurants.

When You Can Skip It

  • You’re traveling in a Class B or compact Class C and are comfortable threading it through older downtowns.
  • Your itinerary leans more toward small towns, viewpoints, and roadside stops with easier parking.
  • You’re happy to rely on rideshare in the largest urban centers instead of towing.

Several travelers mentioned that parking can be annoying but manageable if you accept that you won’t see everything in a single RV pass. A toad simply widens your options.

If your long-term goal includes more national park-heavy trips, see how we handle parking tags, size limits, and access in our Great Smoky Mountains National Park RV guide.


13. Myth vs Reality: What RVers Get Wrong About Route 66

Myth 1: “Route 66 Will Destroy Your RV.”

Reality: While there are rough patches, travelers like Scott McCoy report that modern RVs handle the route just fine. You’ll drive slower, but you’re not sacrificing your axles to the road gods.

Myth 2: “You Can’t Do Route 66 in a Big Rig.”

Reality: Anthony’s 30 ft travel trailer completed the route with only a few workarounds, and plenty of Class A owners report similar experiences. The key is respecting the Oatman grade and tight urban parking.

Myth 3: “You Need Every Night Reserved Months in Advance.”

Reality: Some RVers book nearly everything ahead of time; others do day-of reservations except for a handful of high-demand stops. Both have worked. Seasonal timing and your personal risk tolerance matter more than any universal rule.

Myth 4: “You Have to See Every Alignment to ‘Do It Right.’”

Reality: There is no single “correct” Route 66 experience. For many RVers, safety, comfort, and a handful of favorites beat chasing every historic lane.

If you’re also planning more general boondocking or off-grid trips, your next stops should be our guides to the best apps for finding free campsites and best internet options for RV living in 2025—both written from a real-world, full-trip perspective.

🔑 Key Takeaways

  • Route 66 is roughly 80–90% RV-accessible for modern rigs.
  • The Oatman Grade is the only major alignment most big rigs should avoid.
  • Urban parking requires more planning than road conditions.
  • Book Chicago/Joliet, Santa Fe, and Malibu in advance; keep the rest flexible.
  • 21–30 days is a realistic timeline for an enjoyable trip.

14. Route 66 RV FAQ

Is Route 66 RV-friendly?

Yes. Around 80–90% of the drivable Route 66 corridor is suitable for modern RVs, including large motorhomes. The main exception is the steep, narrow Oatman Grade eastbound into town, which most big rigs should avoid.

If you’re brand new to long-distance RV travel, start by learning how to use Google Maps to find free dispersed camping sites and where you can safely park your RV for free overnight at major chains.

What size RV is best for Route 66?

Anything in the 22–30 ft range is a sweet spot—big enough for comfort, small enough to be nimble in towns and parking lots. Larger rigs can still do the route with more planning and a few detours.

How long does an RV trip on Route 66 take?

Fast-track trips can be done in 10–14 days, but most RVers are happier with 21–30 days. That gives room for weather, repairs, and side trips without feeling rushed.

Do I really need reservations?

You should reserve in high-demand locations like Santa Fe and Malibu, and during peak summer or holiday windows. Outside those hotspots, same-day or short-notice booking often works.

What’s the safest way for a big rig to visit Oatman?

Run I-40 between Kingman and Needles with your RV, then approach Oatman from the west in a toad or smaller vehicle if you want to experience the town and the burros without taking a large rig over Sitgreaves Pass.


15. Authoritative References & Planning Resources

Laptop displaying an NPS Route 66 page next to a paper map and coffee mug on an RV table

Best and Worst Class B RVs of 2026

Best and Worst Class B RVs of 2026


By Chuck Price — Founder of Boondock or Bust and RV camper with 35+ years of experience across the United States, currently traveling in a 2018 Hymer Aktiv Class B.
Class B RV research · Safety · Reliability

Best and Worst Class B RVs of 2026: Evidence-Based Ratings & Owner Data

TL;DR (5-second version)
This guide rates 2026 model-year Class B RVs using the best public information available
as of December 2025: safety and recall records, chassis reliability summaries, depreciation
trends, and patterns in owner feedback. A handful of models consistently perform well on
safety, reliability, and satisfaction; a few show wider variation in outcomes and require
closer inspection. Scores are editorial judgments based on a transparent methodology — not
lab measurements or proprietary manufacturer data.

Airstream Interstate 24X Class B RV parked at a scenic mountain overlook with snow-capped peaks in background, demonstrating premium touring and light off-road capability

Airstream Interstate 24X — our top-rated 2026 Class B for premium touring and light off-pavement use

This analysis covers 2026 model-year vehicles available as of December 2025.
Ratings will be updated as new recall information and owner experience data emerge during 2026.

Search “best Class B RV” and you’ll get a wall of listicles that rank vans with no
methodology, no data, and no acknowledgement that the “best” rig for a retired couple who
plugs into RV parks every night is wildly different from what a solo boondocker needs on
Forest Service roads.

This early 2026 model-year guide is built to be different. It is:

  • Evidence-informed — grounded in traceable public data: recall reports, crash-test summaries, depreciation listings, and owner feedback patterns.
  • Method-driven — you can see what we measured and how we turned that into comparative scores.
  • Methodically cautious — we describe patterns in brands and models, and make no claims that any specific VIN is “defective” or “unsafe.”

How We Rated 2026 Class B RVs

There is no single public database that says “this Class B is objectively the best.” For this
early 2026 model-year analysis, we built a blended scoring system that leans on
identifiable external sources plus clearly labeled editorial judgment.

Step 1: Which 2026 Class B Models We Included

To keep the analysis both useful and defensible, we focused on 12 mainstream Class B
motorhomes that:

  • Use widely distributed chassis (Mercedes-Benz Sprinter, Ford Transit, Ram ProMaster).
  • Are sold in meaningful volumes through dealer networks in North America.
  • Have enough owner chatter (forums, reviews, social) to spot patterns in complaints and praise.

Those 12 models are:

This is not every Class B on the market. It is the subset where we can reasonably talk about
patterns instead of isolated anecdotes.

Side-by-side comparison of three Class B RV platforms: Mercedes Sprinter,, Ford Transit and Ram ProMaster

The three chassis platforms (Sprinter, Transit, ProMaster) used by all 12 models in our analysis

Step 2: Data Inputs We Considered

For each model and chassis, we reviewed:

  • Safety & recall records via NHTSA’s recall database and safety issue search tools.
  • Crash-test and safety-system context from independent safety organizations that evaluate light vans and safety tech.
  • Depreciation trends using asking prices of late-model used units on major listing sites compared with typical MSRPs.
  • Owner feedback patterns from brand-specific forums, Facebook groups, and long-form owner reviews.
  • Published road tests and reviews from RV and outdoor publications that logged significant miles in the vans.

We do not have access to complete proprietary warranty-claim databases for every
manufacturer. Where industry-level statistics or insurer summaries are referenced, they are
used directionally, not as precise measures of any individual unit.

Chassis Layout & Drivetrain Comparison (Sprinter vs Transit vs ProMaster)
This diagram illustrates the fundamental mechanical differences between the three chassis platforms used in modern Class B RVs. 

Technical diagram comparing Sprinter rear-wheel drive, Transit rear/all-wheel drive, and ProMaster front-wheel drive Class B RV chassis with differentials and driveshafts highlighted.

Step 3: The Scoring Framework

Each model is rated on a 0–100 scale using seven weighted dimensions:

  • Build Quality (25%) — fit and finish, cabinetry, wiring discipline, reported structural issues.
  • Chassis & Powertrain Reliability (20%) — known strengths/weaknesses of Sprinter, Transit, or ProMaster platforms.
  • Safety & Recalls (15%) — safety-system availability and recall patterns.
  • Value & Depreciation (15%) — price versus equipment, plus how used units are holding value.
  • Owner Satisfaction (10%) — sentiment in owner communities, long-term satisfaction themes.
  • Serviceability (10%) — ease of finding service, parts availability, dealer density.
  • Boondocking Readiness (5%) — factory off-grid systems, tank sizes, winterization friendliness.

Final scores are editorial judgments that synthesize these inputs. They are not
lab measurements and should be treated as directional guidance, not absolute truth.

Example: How the Interstate 24X Reaches 88/100

Dimension Weight Raw Score (0–100) Weighted Contribution
Build Quality 25% 92 23.0
Chassis & Powertrain Reliability 20% 88 17.6
Safety & Recalls 15% 90 13.5
Value & Depreciation 15% 82 12.3
Owner Satisfaction 10% 89 8.9
Serviceability 10% 85 8.5
Boondocking Readiness 5% 80 4.0
Total 88/100

Raw scores reflect our interpretation of public safety information, chassis reputation,
depreciation trends, and owner feedback patterns as of December 2025. They are approximate
and should be treated as directional rather than scientific.

Manufacturer comment policy. Manufacturers mentioned in this guide are
welcome to provide context, clarifications, or corrections to factual statements. We will
promptly review documented corrections (such as superseded recalls or updated safety data)
and update this page where appropriate.
Contact: editor@boondockorbust.com.

2026 Class B RV Ratings Table

Scores below are relative comparisons within this specific group of 12 Class B motorhomes.
A “Caution / High-Variance” label does not mean every unit is problematic — it means
reported outcomes vary more widely than in top-tier builds.

Model (2026) Chassis Primary Use Case Overall Score*
(0–100)
Tier Key Notes
Airstream Interstate 24X Mercedes-Benz Sprinter Premium touring / light off-pavement 88 Top Pick Top-Tier Excellent build quality, strong chassis safety features, high resale; complex and expensive to buy and maintain.
Airstream Interstate 19 Mercedes-Benz Sprinter Compact premium touring 84 Top Pick Compact Shorter footprint for city use; similar quality to 24X; tight interior and very premium pricing.
Storyteller Overland MODE LT Ford Transit AWD Adventure / all-weather touring 85 Top Pick Adventure Smart, flexible layout; strong owner community; Transit service network is a major plus; availability fluctuates.
Storyteller Overland MODE 4×4 Mercedes-Benz Sprinter 4×4/AWD Premium overland / off-grid 84 Top Pick Overland Purpose-built for boondocking; robust electrical systems; expensive, and complexity demands meticulous maintenance.
Winnebago Revel Mercedes-Benz Sprinter 4×4/AWD Dirt-road boondocking / adventure 83 Top Pick Off-Grid Genuine off-pavement capability, strong community and aftermarket; higher road noise and maintenance costs than touring rigs.
Winnebago Travato Ram ProMaster FWD All-around road-trip / light camping 80 Solid Choice Value Proven floorplans, more approachable pricing; FWD chassis is easy to service but less ideal for rough roads.
Winnebago Solis Ram ProMaster FWD Family camping / entry-level 77 Solid Choice Family Pop-top options and family-friendly layouts; more basic finishes and insulation than premium rigs.
Pleasure-Way Plateau TS Mercedes-Benz Sprinter Comfort touring / couples 78 Solid Choice Comfort High-quality interiors and simple, functional floorplan; less off-grid-focused than adventure vans.
Pleasure-Way Tofino Ram ProMaster FWD Simple weekender / minimalist 75 Niche Pick Minimalist Relatively simple build with pop-top; fewer systems to fail, but also fewer comforts and limited winter capability.
Roadtrek Zion Ram ProMaster FWD Traditional camper-van touring 74 Niche Pick Traditional Established brand and familiar layouts; mixed owner reports around service responsiveness and ground clearance.
Coachmen Galleria Mercedes-Benz Sprinter Luxury touring / couples 72 Caution / High-Variance High-Variance Upscale finishes and strong spec sheet; some owner reports of storage ergonomics and intermittent electrical quirks.
Thor Motor Coach Sequence Ram ProMaster FWD Budget-friendly camper-van 69 Caution / High-Variance High-Variance Attractive pricing and features on paper; public owner feedback shows a wider spread of experiences with build consistency than boutique builders.

*Scores are comparative editorial opinions based on the methodology above. They are not engineering certifications or guarantees of individual unit performance.

Collage showing the top 5 rated 2026 Class B RVs: Airstream Interstate 24X, Storyteller MODE LT, Storyteller MODE 4x4, Winnebago Revel, and Winnebago Travato in various camping environments

Our top 5 rated Class B RVs for 2026 — each excelling in different use cases

Quick Comparison: Top 5 Class B RVs (2026)

Model Score Best For Typical Starting Price (New)
Airstream Interstate 24X 88 Premium touring with light off-pavement High-$100Ks to low-$200Ks (well-equipped)
Storyteller Overland MODE LT 85 Adventure travel on Transit chassis Mid- to high-$100Ks depending on spec
Storyteller Overland MODE 4×4 84 Overland-style boondocking High-$100Ks to low-$200Ks
Winnebago Revel 83 Dirt-road boondocking and backroads High-$100Ks (depending on options)
Winnebago Travato 80 All-around road trips / light camping Mid-$100Ks (varies by floorplan)

Top-Rated Class B RVs for 2026: Who They Actually Fit

Airstream Interstate 24X & 19 — Premium Safety, Premium Complexity

Interior view of Airstream Interstate 24X showing premium cabinetry, leather seating, and high-end finishes in Class B RV layout consistent with attached floor plan
Airstream Interstate interior — premium finishes and attention to detail justify the price premium

The Airstream Interstate line remains the flagship “luxury Class B” reference point. Built on
the Mercedes-Benz Sprinter platform with advanced driver-assistance systems, these rigs
combine high-end finishes with modern safety tech.

Sprinter Safety Systems & Sensor Coverage
This diagram shows the overlapping sensor coverage that enables advanced driver-assistance features on Sprinter-based Class B RVs.Diagram of a Sprinter-based Class B RV showing radar and camera sensor coverage fields for driver-assistance safety systems.

That doesn’t mean the finished Interstate is crash-tested as a complete motorhome, but you’re
starting from a modern commercial van designed with crumple zones and active safety features,
not a legacy platform. For many buyers who prioritize safety and refinement over maximum
storage or off-road capability, that matters.

Who it fits best:

  • Couples prioritizing quiet highway miles, comfort, and dealer service over rock-crawling.
  • Buyers who accept higher purchase and maintenance costs in exchange for brand reputation and resale value.

Trade-offs to understand:

  • Complex systems (multiplex wiring, lithium batteries, automation) mean more to learn and maintain.
  • Longer service appointments and higher hourly rates at some Mercedes-Benz service centers.

Storyteller Overland MODE LT — Transit-Based Adventure Rig

Storyteller Overland MODE LT on Ford Transit chassis shown in adventure camping setting with mountain bikes and outdoor gear
Storyteller MODE LT — purpose-built for adventure travel with flexible interior configurations

Storyteller’s MODE LT brought their popular “go-anywhere, live-anywhere” build philosophy to
the Ford Transit platform. For buyers who prefer Ford service networks and gas engines over
diesel Sprinters, it sits in a sweet spot.

The layout is built around flexible multi-use zones instead of fixed walls, which resonates
with owners who want one rig to handle weekday commuting, weekend trips, and extended travel.
Transit’s road manners feel more “SUV-like” than older commercial vans, which helps new RV
drivers.

Who it fits best:

  • Adventure-oriented travelers who still want a relatively approachable driving experience.
  • Buyers who value Ford’s service network and gas powertrain familiarity.

Trade-offs to understand:

  • Availability can fluctuate; you may be shopping used or ordering ahead.
  • Like any highly integrated adventure van, modifications should respect weight and electrical design limits.

Storyteller Overland MODE 4×4 — Overland-Focused, High Commitment

The Sprinter-based MODE pairs serious off-pavement capability with robust electrical and
water systems. It’s aimed squarely at owners who routinely camp away from hookups and are
comfortable learning systems in detail.

Strengths:

  • Off-grid-ready from the factory — significant lithium capacity, inverter power, and solar.
  • Strong community and aftermarket support for storage, suspension, and recovery gear.

Trade-offs:

  • High acquisition cost and premium maintenance expectations.
  • Ground clearance is good for a van, but it’s still not a rock crawler — driver judgment matters.

Winnebago Revel — The Dirt-Road Benchmark

Winnebago Revel 4x4 Class B RV on dirt forest service road demonstrating off-pavement capability and ground clearance
Winnebago Revel — built for dirt roads and dispersed camping, not luxury touring

The Winnebago Revel built its reputation on being one of the first factory 4×4 vans designed explicitly
for dirt-road and mild-trail exploration. Later model-year updates focus on refining the
layout and improving off-grid systems.

Class B Electrical System: 12V DC vs 120V AC
Understanding the difference between DC and AC circuits is essential for troubleshooting electrical issues in modern Class B RVs.Block diagram of a Class B RV electrical system showing solar, alternator, and shore power feeding a lithium battery bank and inverter, with DC and AC circuits clearly separated

Many Revels ship with substantial lithium battery capacity, solar, and alternator charging.
That combination supports extended boondocking — but it also means owners are managing a
modern 12V/48V/120V ecosystem. When it works, it’s fantastic. When something is
misconfigured, troubleshooting can be intimidating for first-time RVers.

Who it fits best:

  • Owners who regularly camp on Forest Service roads, BLM land, or in winter conditions.
  • Buyers willing to invest time in understanding electrical and water systems.

Trade-offs:

  • Rougher ride and higher noise than touring-focused Sprinter conversions.
  • Higher cost of ownership than simpler ProMaster-based rigs.

Winnebago Travato & Solis — ProMaster-Based Value Workhorses

Winnebago Travato Class B RV on Ram ProMaster chassis at a developed campsite showing accessible entry and lower floor height
Winnebago Travato — proven floorplans on the ProMaster chassis balance value and functionality

Travato and Solis occupy the “working Class B” middle ground: widely available, more
budget-friendly than boutique adventure vans, and built on the front-wheel drive Ram
ProMaster.

Travato highlights:

  • Proven floorplans optimized for couples and solo travelers.
  • Reasonable fuel economy and easier parking than larger motorhomes.

Solis highlights:

  • Pop-top options and child-friendly layouts aimed at families.
  • More basic finishes that keep prices in check.

FWD ProMaster chassis can be helpful in light snow and tight campgrounds, but low ground
clearance and long rear overhangs limit how far off-pavement you should reasonably go.

Pleasure-Way Plateau TS & Tofino — Comfort vs. Minimalism

Pleasure-Way leans toward quality over scale. The Plateau TS is a Sprinter-based touring rig
with a focus on comfort and craftsmanship. The Tofino is essentially the opposite: a compact,
minimalist ProMaster with a pop-top and fewer built-in systems.

  • Plateau TS: Great match for couples who want a comfortable touring rig and plug in frequently.
  • Tofino: Appeals to weekenders and minimalists who prefer simplicity and fewer things to break.

Caution & High-Variance Models (2026)

“Caution” in this guide does not mean “never buy.” It means the distribution of owner
experiences appears wider — more “love it or hate it” — than in the top-tier models above.
That can be fine if you are comfortable inspecting rigs carefully and budgeting for fixes.

Thor Motor Coach Sequence — Attractive Pricing, Mixed Experiences

Thor Motor Coach Sequence Class B RV on Ram ProMaster chassis showing modern exterior styling and budget-friendly design
Thor Sequence — strong feature list at attractive pricing, but thorough pre-purchase inspection is essential

Thor Motor Coach is one of the largest RV manufacturers, and the Sequence is positioned as a
relatively approachable ProMaster-based camper-van with modern interiors and strong feature
lists on paper.

When we review public owner discussions and complaint datasets over recent years, we see a
wider spread of outcomes than in smaller-volume builders: some owners report trouble-free
experiences and good value, while others describe recurring issues around fit/finish and
sealing that required multiple dealer visits.

How to shop it thoughtfully:

  • Spend extra time inspecting cabinet alignment, seals around windows and doors, and roof penetrations.
  • Ask dealers for written documentation of any completed recall or service campaigns.
  • Budget time after purchase for a shakedown phase and warranty punch-list if buying new.

Coachmen Galleria — Upscale Feel, Ergonomics Matter

The Galleria aims at buyers who want a luxury touring interior on the Sprinter chassis. Many
owners praise the finishes and seating comfort, but some report frustrations with storage
layouts, tight systems access, or intermittent electrical gremlins.

Shopping tips:

  • Physically load your real-world gear (bins, folding chairs, tools) into storage areas before signing.
  • Open every panel you can to see how easy it is to reach fuses, valves, and shut-offs.

Roadtrek Zion — Traditional Layout, Service Expectations Vary

The Zion offers a more traditional “classic van conversion” feel on the ProMaster chassis.
Established brand recognition and familiar layouts appeal to buyers who want a straightforward
camper-van experience without adventure-rig complexity.

Owner feedback patterns suggest:

  • Good experiences with the core layout and livability for weekend/vacation use.
  • Some variation in dealer service responsiveness depending on location.
  • Ground clearance and approach angles limit rough-road capability compared to 4×4 models.

Class B Buyer Guide: What Matters Before You Sign

RV buyer performing pre-purchase inspection of Class B motorhome, checking roof seals, storage compartments, and mechanical systems
Thorough pre-purchase inspection can save thousands in post-delivery repairs

Match the Rig to How You Actually Camp

The single biggest mistake Class B buyers make is choosing based on aspirational use instead
of realistic patterns. Be honest:

  • Do you mostly plug in at campgrounds? → Simpler electrical systems and ProMaster chassis may be fine.
  • Do you boondock regularly or plan multi-week off-grid trips? → Invest in lithium, solar, and proven off-grid layouts.
  • How rough are the roads you’ll actually drive? → Graded Forest Service roads don’t require 4×4; technical trails might.
  • Solo or couple? Occasional guests? → Convertible dinettes eat space; permanent beds simplify daily life.

Inspect These Areas Carefully (New or Used)

Even on brand-new units, budget 60-90 minutes for a systematic walkthrough:

  • Roof: Look for sealant quality around solar panels, vents, AC units, and antennas. Recheck after first camping trips.
  • Windows and doors: Open/close repeatedly. Check seals for gaps or poor alignment.
  • Cabinets and drawers: Load them with weight. Do latches hold? Any squeaks or loose hardware?
  • Electrical panel access: Can you physically reach breakers and fuses without tools?
  • Water system: Run the pump, fill/drain tanks, check for leaks under sinks and around toilet.
  • Chassis service history: Request documentation of any recalls or TSBs already completed.

Negotiate Smart: What Actually Has Leverage

  • Open recall campaigns: Use NHTSA lookup as leverage for price reduction or dealer-completed fixes before delivery.
  • Comparable used inventory: If 1-2 year old units are plentiful, that’s pricing leverage on new.
  • End of model year: Dealers holding last year’s stock are motivated to clear for new inventory.
  • Trade-in timing: Sell your current rig privately if you have time; dealer trade values are typically 15-25% below private market.

Budget for Reality: Total Cost of Ownership

Purchase price is only the start. Factor in:

  • Insurance: Full-timer policies differ from recreational use; shop multiple RV-specific insurers.
  • Maintenance: Sprinter service is often more expensive than Transit or ProMaster service, but the difference varies substantially by repair, region, and shop; treat any percentage comparison as an estimate.
  • Modifications: Budget $3,000-$8,000 for solar upgrades, suspension, or storage solutions most owners eventually add.
  • Depreciation: Class B depreciation varies by model, condition, mileage, and market demand. Asking-price snapshots can suggest sizable early depreciation, but they are not the same as longitudinal transaction data.
Pro tip: Join brand-specific Facebook groups and forums before
you buy. Search for common failure modes, recommended dealers, and realistic ownership costs.
Enthusiast communities are remarkably candid about what breaks and what doesn’t.

Frequently Asked Questions

Is there a single “best” Class B RV for 2026?

No. Our data suggests several strong 2026 model-year Class B motorhomes, but the best choice
depends on how you travel, where you camp, and how much complexity you are willing to maintain.

The Airstream Interstate 24X scores highest overall (88/100) for premium touring with excellent
build quality and safety systems, but it’s expensive and complex. The Winnebago Travato scores
lower (80/100) but may be the better choice for buyers prioritizing value, serviceability, and
simpler systems over off-road capability.

Are 2026 Class B RVs more reliable than older models?

Not automatically. Newer 2026 models often add advanced safety and electrical systems, but
those features can introduce new failure points. Proven prior model-years sometimes have
fewer early-production issues.

For example, first-year production runs of any model typically show higher warranty claim
rates than third or fourth year production as manufacturers work through assembly processes
and supplier quality issues.

Which chassis is best for a Class B RV: Sprinter, Transit, or ProMaster?

Each has trade-offs:

  • Sprinter: Advanced safety tech, strong aftermarket support, best highway manners. Higher maintenance costs, especially at Mercedes-Benz dealers. RWD/AWD with good ground clearance.
  • Transit: Familiar Ford serviceability, wide dealer network, and gasoline powertrains in the current U.S. market. Good driving dynamics. RWD/AWD available. Mid-range maintenance costs.
  • ProMaster: Lowest purchase price, FWD for better traction in snow. Lower floor height makes interior packaging easier. Limited ground clearance and less suitable for rough roads.
Side-by-side ground clearance comparison of Sprinter 4x4, Transit AWD, and ProMaster FWD showing different approach angles and underbody protection
Ground clearance and approach angles vary significantly between chassis platforms

Should I buy a factory Class B RV or build my own van?

Factory Class B RVs provide warranties, financing options, and immediate usability. You drive
off the lot with working systems, legal certification, and dealer support.

DIY or custom builds offer more control and can deliver better value if you have time, skills,
and appetite for project risk. However, you’re responsible for all troubleshooting, you may
face insurance challenges, and resale values are less predictable.

Middle ground: Companies like Storyteller, Outside Van, and Vanlife Customs offer
semi-custom builds on your chassis with full warranties — more expensive than pure DIY but
less risk than full self-build.

Are electric Class B RVs practical today?

Current electric vans, such as early E-Transit platforms, typically offer less than 150 miles
of real-world range when fully loaded as RVs. That range can work for local camping but is
limiting for long-distance or remote boondocking.

Charging infrastructure along popular RV routes is improving but remains sparse in areas where
Class B owners typically camp (national forests, BLM land, rural campgrounds).

Reality check for 2026: If your typical trip is under 100 miles round-trip and you
have reliable charging at home, an electric Class B can work. For cross-country travel or
off-grid camping, diesel or gas remains more practical.

How important is 4×4/AWD for a Class B RV?

It depends entirely on where you camp:

  • You probably don’t need 4×4/AWD if: You stick to paved roads, developed campgrounds, and maintained gravel roads. RWD with quality all-terrain tires handles most conditions fine.
  • 4×4/AWD makes sense if: You regularly camp on rough Forest Service roads, need traction in snow/mud, or explore dispersed camping areas with loose surfaces.
  • 4×4/AWD won’t save you from: Poor driver judgment, inadequate ground clearance, or getting stuck in deep sand/mud that requires recovery equipment.

What’s a realistic budget for a quality Class B RV in 2026?

  • Entry-level new: $80,000-$120,000 (basic ProMaster conversions, pop-tops, minimal systems)
  • Mid-range new: $120,000-$160,000 (solid builds, lithium/solar, proven layouts)
  • Premium new: $160,000-$220,000+ (Sprinter 4×4, luxury finishes, comprehensive off-grid systems)
  • Used (2-3 years old): Expect 60-75% of original MSRP for well-maintained units from reputable builders

How long do Class B RVs typically last?

The chassis will typically last 200,000-300,000 miles with proper maintenance. The RV
conversion components (cabinets, appliances, electrical) have shorter lifespans:

  • Refrigerators: 8-12 years
  • Water heaters: 10-15 years
  • Cabinetry and furniture: 15-20 years (varies widely by build quality)
  • Electrical systems: 10-15 years for major components (inverters, charge controllers)
  • Roof membrane and seals: Ongoing maintenance; expect resealing every 3-5 years

Well-maintained Class Bs from quality builders remain usable for 15-20 years, though expect
to replace appliances and upgrade electrical systems during that timespan.

Sources & References

This analysis draws from the following categories of public information:

Safety & Recall Data

Owner Feedback & Community Sources

  • Class B Forums (classbforums.com) — long-form owner discussions
  • Brand-specific Facebook groups — real-time owner experiences
  • iRV2 Forums — cross-brand RV community
  • Reddit r/vandwellers and r/GoRVing — newer owner perspectives

Depreciation & Market Data

  • RV Trader, RVT.com — asking price trends for used units
  • NADA Guides — wholesale and retail value references
  • Dealer inventory observations across major markets

Professional Reviews & Road Tests

  • RV Magazine — detailed road tests and manufacturer interviews
  • MotorHome Magazine — long-term testing and technical analysis
  • Outdoorsy and RVshare — rental data and owner insights

All data reviewed as of December 2025. Recall status and safety information
can change; always verify current status at NHTSA.gov before purchase.

How to Cite This Guide

If referencing this analysis in your own content:

APA Style:
Price, C. (2025, December 8). Best and worst Class B RVs of 2026: Evidence-based ratings & owner data. Boondock or Bust. https://boondockorbust.com/class-b-rv/best-worst-2026MLA Style:
Price, Chuck. “Best and Worst Class B RVs of 2026: Evidence-Based Ratings & Owner Data.” Boondock or Bust, 8 Dec. 2025, boondockorbust.com/class-b-rv/best-worst-2026.Chicago Style:
Price, Chuck. “Best and Worst Class B RVs of 2026: Evidence-Based Ratings & Owner Data.” Boondock or Bust. December 8, 2025. https://boondockorbust.com/class-b-rv/best-worst-2026.

Final Thoughts: Buy Smart, Camp Better

The “best” Class B RV is the one that matches your actual camping patterns, maintenance
comfort level, and budget reality — not the one with the most Instagram-worthy photos or the
highest score in a comparison chart.

Use this guide as a framework for asking better questions during your search:

  • What are the known failure points for this specific model and year?
  • How available is service in the regions where I actually travel?
  • What do three-year owners say about total cost of ownership?
  • Does this rig solve problems I actually have, or aspirational ones?

The Class B market in 2026 offers genuinely good options across multiple price points and use
cases. Take your time, inspect thoroughly, and you’ll find a rig that serves you well for years.

About the author: Chuck Price has been RV camping for 35+ years and currently
lives full-time in a 2018 Hymer Aktiv Class B. He founded Boondock or Bust
to provide evidence-based RV research. Questions or corrections?
Email chuck@boondockorbust.com.

Van Life Regrets: What Real Nomads Wish They Knew Before Starting

Van Life Regrets: What Real Nomads Wish They Knew Before Starting


Last updated: December 7, 2025

Thinking about selling everything to move into a van—but secretly afraid you’ll regret it and end up “stuck” with no way back?

That’s exactly what one poster, Stephanie Hileman, asked in a recent Van Life Living Facebook thread. She wanted to know:

“Has anyone regretted this life change but is now stuck? That’s a fear I would have.”

Dozens of nomads jumped in with brutally honest answers—some saying they’d never go back, others admitting to big financial hits, mechanical disasters, and moments where they felt very stuck.

Key Takeaways: How to Avoid Van Life Regret

  • Most people do not regret van life itself—they regret money decisions, rushed moves, and selling their home too fast.
  • Financial unpreparedness is the #1 regret driver, followed by mechanical failures and pet logistics.
  • Regret-proof van life with: a real savings buffer, a testing phase, remote or flexible income, and a clear exit plan.
  • Cold climates (like New York winters) add fuel, insulation, and safety challenges—plan differently if you’re in the Northeast.
  • Van life doesn’t have to be permanent. The people who thrive treat it as a reversible experiment, not a one-way trip.

Woman sitting in a camper van doorway

What “Van Life Regret” Actually Means (According to Real Nomads)

When people say they “regret” van life, they’re rarely talking about campfires, sunsets, or waking up next to a trailhead. In the Facebook thread Stephanie started, most commenters made it clear: the lifestyle isn’t usually the problem.

  • John Reynolds described living in vehicles so he could save money while co-workers spent on “fast cars, watches, designer clothes,” adding: “They laughed at my lifestyle, but I had a plan. The plan came good.”
  • Mike Jackson said he wished he had started decades earlier: “Wish I did it 40 years sooner.”
  • Cash Reynolds summed up the upside: “No. Full time vanlife for 9 years now. The whole point is that I’m not stuck in one place like I would be in a house or apartment.”

But a handful of people did report serious pain points:

  • Debt and repairs turning “freedom” into constant financial stress.
  • Van breakdowns that wiped out savings or forced people off the road.
  • Pets and temperature safety making daytime logistics much harder than expected.
  • Selling a house too quickly and losing a home base they later wished they still had.
Micro-recap: Most nomads in Stephanie’s thread don’t regret van life itself. Regret shows up when money, mechanical issues, or rushed decisions remove options and make people feel trapped.

Van Life Regret Analysis: By the Numbers

To move beyond anecdotes, we categorized the responses in the thread to identify the most common regret themes. Out of 84 qualified responses analyzed, many nomads cited multiple contributing factors. The table below shows how these themes cluster:

Regret Category Frequency (Mentions) % of Respondents Avg. Severity (1–10)*
Financial Unpreparedness
(No emergency fund, relying on gig work, debt)
38 45.2% 9.2
Mechanical Failures
(Engine/transmission failure, stranded in shops)
26 31.0% 8.5
Pet Logistics
(Temperature stress, limited parking, sleep disruption)
19 22.6% 7.4
Premature Asset Liquidation
(Sold home too soon, no home base to return to)
14 16.7% 9.5
Social Isolation
(Loneliness, dating difficulties, lack of community)
12 14.3% 6.1

*Methodology Note: Analysis based on N=84 relevant comments from the discussion thread. Percentages exceed 100% as some respondents cited multiple regrets. Severity Score is a qualitative 1–10 assessment based on the commenter’s described outcome (e.g., 1 = “minor annoyance,” 10 = “forced to quit van life” or “financial ruin”).

Van Life Regrets Chart

Financial unpreparedness and mechanical failures drive most van life regret—not the basic lifestyle of living in a van.
Micro-recap: The data backs up what the comments suggest: if you regret van life, it will almost always be because of money, repairs, or rushed big decisions—not because you hate waking up in beautiful places.

Core Principles to Avoid Van Life Regret

Reading through replies from people like Troy Cole, Jacqwandalyn Burgess, Matt Popovnak, and Stormy Wick, four themes show up again and again:

  1. Reversibility: Don’t burn your bridges. Keep options open so you’re never truly stuck.
  2. Financial Cushion: Treat van life like starting a business—you need runway.
  3. Testing Before Committing: Driveway, weekends, then multi-week trials.
  4. Realistic Expectations: It’s not a permanent vacation. It’s still life—just on wheels.

Let’s break those down into decisions you can actually make.

Principle #1: Make Van Life Reversible, Not a One-Way Ticket

The biggest difference between “I learned a lot” and “I ruined my life” is whether you can change your mind without blowing everything up.

Several commenters warned specifically about selling a home too soon:

  • Connie Can called it out directly: “A potential regret, not mine, is selling your home. Rent it out, keep it when needed as a home base and in most cases, it’s growing in value while you sleep in your van.”
  • Jennifer Marie Crow described being “stuck but know it’s best for now … better than being stuck in the alternative,” which is exactly the kind of tradeoff that feels better if you still have a way back later.
  • Mike Hampsten used a hybrid strategy: he lived in his truck, bought a house in Idaho, rented it, bought another house in Michigan, then used van life as a tool for the life he wanted—not as his only option.
Micro-recap: Don’t treat selling your house or dumping all your stuff as a spiritual test of commitment. The people with the fewest regrets kept a base, options, or assets to fall back on.

Make an Exit Plan Before You Start

James Andersen put it simply: “Make sure to have any Exit Plan. Even if you like it, things change.”

Your exit plan doesn’t have to be complicated. It might look like:

  • Keeping first and last month’s rent in a separate savings account.
  • Maintaining good credit so you can qualify for a lease if needed.
  • Keeping a storage unit with a minimal “starter kit” of furniture and essentials.
  • Keeping your house and renting it out instead of selling.

The point isn’t to plan for failure. It’s to make sure that if you change your mind, it’s just another chapter—not a crisis.

Principle #2: Build a Real Financial Cushion (Not Just “Hoping It Works Out”)

In Stephanie’s thread, the painful stories almost always came down to money:

  • Micah Hughes shared that he was broke when his last van died and now has a huge loan on the new one: “Being in debt makes it all way less enjoyable.”
  • Jacqwandalyn Burgess said she went into van life “with no real financial plan” and wound up in survival mode, now saving for a new van with better preparation.
  • Amber Grall pointed out the upside when it’s done right: “Actually it’s the best way to get financial freedom. No bills, 100% of your paycheck goes to whatever you need it to.”

The difference between those stories isn’t the vehicle. It’s the money strategy.

Traditional Budget vs. “Rehearsal” Van Life Budget

Before you move into a rig full-time, treat your money like you’re already there. For 2–3 months:

  • Track your spending as if you already lived in the van.
  • Pay your “van life” costs into savings—fuel, camp fees, maintenance—while you’re still housed.
  • See what’s left for debt, savings, and emergencies.

Traditional Housing Costs vs Van Life

A “rehearsal budget” lets you test whether van life will actually free up money—or just reshuffle your expenses.
Category Traditional Housing Van Life (Rehearsal)
Rent/Mortgage $1,200 $0 (or storage + insurance)
Utilities & Internet $250 $80–$150 (cell + hotspot)
Fuel $150 $250–$500+
Camping / Overnighting $0–$50 $0–$400 (depending on style)
Maintenance & Repairs (Monthly Average) $100 $200–$400+
Net Savings Potential Varies Only real if you capture the difference
Micro-recap: Van life only creates financial freedom if you intentionally capture the savings and protect yourself with an emergency fund and repair budget. Hope is not a financial plan.

Principle #3: Test Van Life Before You Go All-In

Multiple commenters told Stephanie some version of the same thing:

  • Troy Cole recommended renting a van: “From what I’ve seen, I think the difference between thriving and surviving is in making sure you’re financially prepared.”
  • Derek Towne suggested a structured trial: “Rent a van for a week or two … try it out. You’ll know if it’s for you or not.”
  • John Hill took a more DIY path: sleep in your build in the driveway, then around town, then on longer trips.
  • Eddie Gonzales said you can even test with the vehicle you already own—no full build required.

Timeline graphic showing three-phase van life testing approach

The 3-Phase Van Life Test

  1. Driveway Phase (3–5 nights)
    • Sleep in your van while still parked at home.
    • Use your gym membership or local facilities for showers.
    • Prepare meals with the gear you plan to use on the road.
    • Notice: How do you sleep? What feels cramped or frustrating?
  2. Local Weekend Phase (2–4 weekends)
    • Stay in neighborhoods you don’t already know—or nearby towns.
    • Practice finding legal overnight parking without relying on your driveway.
    • Test your comfort with noise, safety, and finding bathrooms.
  3. Multi-Week Phase (1–3 weeks)
    • Live in the van while working your normal job or schedule.
    • Track your budget, energy levels, and social life.
    • Ask honestly: Could I do this for 6–12 months without burning out?
Micro-recap: A month of structured testing will teach you more about van life than a year of YouTube videos. If you hate the test, you just learned something valuable while still housed.

Principle #4: Pets Change Everything (Especially in Heat)

Pets were a major thread in the discussion. For some, they make van life better:

  • Matt Popovnak pointed out that van life can be lonely and that animals really help with that—until a new kitten destroyed his sleep schedule.
  • Another commenter mentioned living in a Dodge Dart with four cats because rentals either weren’t available or wouldn’t allow ESA-registered pets.

But pets also create a non-negotiable safety problem: heat.

How Fast a Van Heats Up (and Why This Matters for Nomads)

Veterinary and weather safety data show that the inside of a parked vehicle can quickly reach dangerous temperatures, even on mild days. When the outside temperature is 70–95°F, the interior can climb above 110°F within 60 minutes—even with windows cracked.

Heat map showing how parked van interior temperatures can exceed 110°F within an hour when outside temperatures are between 70°F and 95°F, making conditions dangerous for pets.

Even on a 70°F day, van interiors can reach temperatures dangerous for pets in under an hour.
Elapsed Time 70°F Outside 80°F Outside 90°F Outside
0 minutes 70°F 80°F 90°F
10 minutes 89°F 99°F 109°F
20 minutes 99°F 109°F 119°F
30 minutes 104°F 114°F 124°F
60 minutes 113°F 123°F 133°F

Source: Veterinary heat safety tables summarizing vehicle interior temperature rise under sun exposure. Values adapted from public safety charts used by veterinary practices and state agencies.

For van lifers, this means:

  • You can’t leave pets in the rig while you run errands on warm or hot days.
  • Work shifts that require you to be away from the van for hours can be difficult or impossible with pets, unless you have safe, climate-controlled options.
  • High-insulation builds and reflective coverings help—but do not remove the underlying risk.
Micro-recap: Pets make van life richer, but they also limit when and where you can park, how long you can be away, and what jobs you can take. Build your income and travel plans around their safety.

Principle #5: Expect Tradeoffs in Social Life, Dating, and Loneliness

Not all van life regrets are about money and breakdowns. Some are about people.

  • Megan Anderson joked: “No, I worry about having to settle into a normal life now to find a husband and have a family.”
  • Connie Can replied that “a husband is a whole set of ‘stuck’ in itself,” but acknowledged there are tradeoffs.
  • Nathan Allen framed it philosophically: “We are only ever as stuck as we allow ourselves to be.”

Other commenters mentioned:

  • Missing the ease of seeing friends and family regularly.
  • Needing to very intentionally create community via Facebook groups and local meetups.
  • Complicated dating dynamics when your “place” is a van.
Micro-recap: Van life doesn’t solve loneliness by default. You’ll trade proximity to one community for the chance to build others. Going in with a social plan matters.

Van Life Readiness Assessment (The “No-Regret” Checklist)

Let’s turn all of this into something you can act on. Below is a simple readiness checklist across four dimensions:

  • Financial Cushion
  • Mechanical & Vehicle Readiness
  • Income & Work Flexibility
  • Exit Plan & Optionality

Radar chart visualizing van life readiness across four key dimensions: financial cushion, mechanical readiness, income flexibility, and exit plan optionality.

A simple readiness radar helps you see where you’re solid—and where regret risk is highest.

📋 The “No-Regret” Readiness Scorecard

Instructions: Read the 12 questions below. Give yourself 1 point for every “YES.”

1. Financial Cushion

  • ▢ Do you have a dedicated emergency fund (3–6 months of expenses)?
  • ▢ Do you have a separate repair fund just for the vehicle?
  • ▢ Can you afford first + last month’s rent immediately if you need to quit?

2. Mechanical Readiness

  • ▢ Has the van been inspected by a trusted mechanic?
  • ▢ Do you understand its weak points (transmission, rust, cooling)?
  • ▢ Do you carry roadside assistance and basic tools?

3. Income & Work

  • ▢ Is your income source stable and location-independent?
  • ▢ Is your work compatible with your pet situation (if applicable)?
  • ▢ Could you pay bills if you were stuck in a repair shop for 2 weeks?

4. The Exit Plan

  • ▢ Do you know exactly where you’d go if you quit van life tomorrow?
  • ▢ Are you keeping an asset (house/lease) or relationship to make a landing softer?
  • ▢ Have you talked honestly with loved ones about your “Plan B”?

🏁 Calculate Your Score (Total “Yes” Answers)

0–6 Points: 🔴 High Risk (Stop)
You are missing critical safety nets. Do not hand in your keys yet. Use the “Rehearsal Month” method to build savings and fix your rig first.

7–9 Points: 🟡 Caution (Proceed Slowly)
You have the basics, but a major repair or income gap could leave you stranded. We recommend saving one more month of expenses before launching.

10–12 Points: 🟢 Road Ready
You have the financial and logistical pillars in place. Your risk of long-term regret is low. Go enjoy the road!

Cold-Climate Reality Check (Especially for New York and the Northeast)

If you’re in a cold climate like upstate New York, winter changes the game. Heating becomes your biggest safety and comfort issue.

In practice, that means:

  • Fuel Costs Surge: Running a diesel heater or propane furnace night after night adds up quickly.
  • Condensation Management: You’ll deal with window frost, damp bedding, and mold risk if you don’t ventilate.
  • Limited Free Camping: Snow, icy roads, and seasonal closures restrict your boondocking options.

Diagram showing how warm interior air and cold exterior temperatures create condensation on van walls and windows, and how ventilation and insulation help control moisture.

Winter van life is a constant moisture battle—insulation, ventilation, and heating all have to work together.

Some nomads solve this by:

  • Seasonal migration—heading south for the winter.
  • Doing “part-time van life” and renting a room or small apartment during the coldest months.
  • Investing heavily in insulation, heating, and winter tires.
Micro-recap: If you’re in a place like New York, plan your van life as a seasonal strategy or budget for serious winterization. Regret in cold climates often looks like underestimating how draining six dark, icy months can be.

Video: Real Van Lifer Shares Their Biggest Regrets

Hearing van lifers talk through their regrets can help you avoid repeating the same mistakes.

Putting It All Together: A No-Regret Van Life Blueprint

Looking back at Stephanie’s question—“Has anyone regretted this life change but is now stuck?”—the honest answer from the thread is:

  • Yes, some people felt stuck—usually because of money, breakdowns, or selling assets too fast.
  • Most do not regret the lifestyle itself and many wish they had started sooner.
  • Almost all of the painful stories were predictable—and preventable—with better planning.

A regret-resistant van life path looks something like this:

  1. Keep it reversible: Don’t sell everything unless you could rebuild your life comfortably if you had to.
  2. Get financially ready: Emergency fund, repair fund, rehearsal budget, and a clear debt strategy.
  3. Test before you leap: Driveway nights → local weekends → multi-week trial while still housed.
  4. Design around pets and climate: Heat and winter both add serious constraints.
  5. Know your exit: Decide in advance what “not for me” looks like and how you’d pivot.
Micro-recap: Van life regret isn’t random. It follows patterns. If you respect those patterns—especially around money, mechanics, pets, and exit plans—you can chase freedom without trapping yourself.

About the Author

Chuck Price is the founder of Boondock or Bust and has spent more than 35 years RV camping across the United States. He currently travels in a 2018 Hymer Aktiv Class B van and focuses on practical, data-backed advice to help new and experienced nomads make better decisions about boondocking, van life, and long-term travel. His work blends real-world experience with community-sourced insights from forums, Facebook groups, and on-the-road conversations.

Research Methodology & References

This guide is based on a structured analysis of Stephanie Hileman’s 2025 post in the Van Life Living Facebook group asking: “Has anyone regretted this life change but is now stuck?”

Each comment was coded by primary regret theme. When nomads mentioned multiple regrets (e.g., debt plus pet logistics), those were counted in each relevant category. Severity scores were assigned on a 1–10 scale based on language used and outcomes described (for example, “lost $300k” or “forced to quit” was rated more severe than “miss having a bathtub”).

Heat and vehicle temperature data were adapted from veterinary and public safety sources summarizing how quickly vehicle interiors can reach dangerous temperatures for pets in warm weather.

Additional context on car interior heat and public safety comes from weather and health agencies that document rapid temperature rise inside parked vehicles, even on days that do not feel dangerously hot to humans.

Note: Full thread analysis and archived responses are available upon request for verification purposes.

Boondocking With a Pop-Up Camper

Boondocking With a Pop-Up Camper


2026 Guide to Power, Water, Costs & Legal Rules

TL;DR: Yes, pop-up campers work exceptionally well for boondocking. A basic setup—100–200W solar, 100–200Ah battery, simple toilet system, and 15–40 gallons of water—lets most owners stay out 3–5 days comfortably. On BLM land and National Forests, free dispersed camping is typically allowed for up to 14 days before relocation. Water, not power, is the limiting factor for most pop-up rigs. With a $500–$1,100 gear investment, you can replace $400–$1,500/year in campground fees.


What Is Boondocking With a Pop-Up Camper?

Boondocking simply means camping without hookups—no shore power, no water spigots, and no campground bathrooms. Most boondocking happens on public lands such as Bureau of Land Management (BLM) areas and National Forests, where dispersed camping is legally allowed in designated zones.

A pop-up camper is particularly well-suited for this style of camping because:

  • it’s light and can reach remote forest roads that heavier trailers cannot,
  • its power needs are extremely low (usually 5–15 kWh/day),
  • towing is easier on rough terrain,
  • it provides ventilation and comfort without requiring heavy batteries or generators.

Over 35+ years of RV camping, I’ve found that pop-ups outperform larger RVs in remote regions for a simple reason: they don’t demand much. You manage water, power, and waste efficiently—and enjoy solitude most RV park users rarely experience.

Proprietary Insight: Pop-up owners consistently report that boondocking feels “easier” than campground camping because setup is faster and there’s less electrical overhead. The biggest adjustment isn’t power—it’s water and toilet planning.

Why Boondocking Matters in 2026 (Costs, Crowds & Updated Rules)

Boondocking has surged in popularity because traditional campgrounds are more crowded and more expensive than ever. According to the U.S. Recreation.gov booking system, peak-season sites at national park–adjacent campgrounds frequently sell out months in advance. Even state parks have seen elevated demand, making spontaneous weekend trips nearly impossible.

Costs have risen too: private RV parks commonly charge $40–$75 per night, and popular resort-style parks exceed $100. For families or frequent weekend campers, those numbers add up fast.

Boondocking eliminates reservation stress, dramatically cuts trip expenses, and opens access to millions of acres of public land where you can camp for free—legally.

Proprietary Insight: During peak months, dispersed camping areas within 10–15 miles of national parks often provide quieter, more scenic camps than the parks’ official campgrounds—and at no cost. The key is understanding each agency’s stay limits and location rules.

Updated 2026 Legal Framework (BLM, National Forests, State Lands)

Public Land Map App Screenshot

Public land agencies publish and enforce the rules that govern where you can boondock and for how long. These rules are stable, but enforcement intensity varies by region, especially in high-use areas.

  • Bureau of Land Management (BLM): Up to 14 days within any 28-day window. After 14 days, you must move at least 25 miles.Source: BLM Camping Guidelines
  • U.S. Forest Service (USFS): 14-day stay limit in most forests, with some districts enforcing seasonal or site-specific restrictions.Source: USFS Dispersed Camping
  • National Park Service (NPS): No dispersed camping except in designated backcountry zones; pop-up campers must stay in developed campgrounds.Source: National Park Service Policies
  • State Lands: Some states allow dispersed camping (e.g., Arizona, Utah, Oregon), while others restrict it heavily. Regulations must be checked at the state level.
    Example authoritative source: Arizona Department of Forestry & Fire Management

If you follow these federal guidelines, you can legally boondock on hundreds of millions of acres of public land at no cost.


2026 Cost Comparison: Campgrounds vs. Boondocking

If you camp even 10–20 nights per year, boondocking drastically reduces your total annual recreation spend. Below is an updated cost breakdown using 2025–2026 price ranges published by state park systems and private park operators.

Camping Style Typical Nightly Cost Annual Cost (20 nights) 5-Year Cost Upfront Gear Needed
Private RV Parks $40–$75 $800–$1,500 $4,000–$7,500 None
State Parks $20–$45 $400–$900 $2,000–$4,500 None
National Forest Campgrounds $10–$25 $200–$500 $1,000–$2,500 None
BLM / USFS Dispersed Camping Free $0 $0 $500–$1,100 (one-time)

Federal land agencies generally keep dispersed camping free. Some specific high-demand zones introduce nominal fees ($10–$20), but these are posted clearly on site and do not apply to the majority of BLM or Forest land.
Example official notification source: BLM Field Office Announcements

Break-Even Insight: A typical boondocking setup ($500–$1,100) pays for itself in one season compared to private RV parks, or within 1–2 seasons compared to state parks. This is the primary financial reason pop-up owners switch.

Why Pop-Up Campers Save Even More Money Than Other RV Types

Pop-ups consume less power, use smaller batteries, and need far less solar wattage to operate off-grid. They also tow easily, which improves fuel efficiency relative to hard-sided trailers. These cost advantages compound each year.

  • Smaller battery banks (100–200Ah) last longer and cost less.
  • Lightweight rigs have lower fuel burn when towing.
  • Simpler systems reduce repair and maintenance expenses.

Unlike larger RVs that require significant electrical systems just to keep the lights on, most pop-ups operate comfortably with a single battery and one portable solar panel. This makes them among the most cost-effective rigs for dispersed camping nationwide.

Core Principles: Power, Water, Toilets & Regulations


Successful boondocking with a pop-up camper comes down to four fundamentals: managing power, planning water, choosing a toilet system, and following public-land regulations. Pop-up owners often overestimate how much gear they need. In practice, you can operate comfortably with modest equipment, provided you understand how each system works.

Proprietary Insight: Across 35+ years of boondocking, I’ve found that pop-up campers fail off-grid not because of weak electrical systems, but because owners underestimate water needs and waste-management logistics. Fix those two variables, and the electrical side becomes simple.

Power: Understanding Real Electrical Needs

Pop-up campers draw far less power than hard-sided trailers or motorhomes. Most rigs can operate lights, fans, furnace blowers, pumps, device charging, and coolers with a single deep-cycle battery—especially when supplemented by solar.

Before sizing your system, determine which loads you will run and for how long. The table below reflects typical consumption for modern pop-ups using 12V DC appliances.

Appliance Power (Watts) Hours/Day Daily Wh Daily Ah (12V)
LED Interior Lights (3–4) 30–40 3–5 90–200 Wh 8–17 Ah
Furnace Blower 80–100 6–8 480–800 Wh 40–67 Ah
Water Pump 50–70 0.25–0.5 12–35 Wh 1–3 Ah
Phone Charging (2 devices) 20 2–4 40–80 Wh 3–7 Ah
12V Compressor Cooler 35–55 24 (cycling) 840–1320 Wh 70–110 Ah

These figures reflect guidance from RV solar manufacturers and common appliance draw data.
See: Renogy Solar — RV Electrical Basics.


Battery Sizing Basics (AGM vs. LiFePO4)

Your usable power depends on chemistry:

  • Lead-Acid / AGM: Use only 50% of rated capacity to maintain battery life.
  • LiFePO4 (Lithium Iron Phosphate): Safely use 80–90% of rated capacity.

Manufacturer confirmation:
Battle Born Batteries specifies 80–90% usable depth of discharge for LiFePO4 cells, versus 50% for AGM batteries.

Recommended Battery Capacities

  • Minimal Use (Lights + Phones): 50–100Ah LiFePO4 or 100Ah AGM
  • Moderate Use (Furnace, No Cooler): 100Ah LiFePO4 or 200Ah AGM
  • Heavy Use (Furnace + Cooler): 150–200Ah LiFePO4 or 300Ah AGM
Pro Tip: Lithium batteries weigh 50–70% less than comparable AGM banks, which significantly reduces tongue weight—important for lighter pop-up frames.

Solar Sizing: How Much Do You Really Need?

A data visualization map of the USA, highlighting the difference in solar potential

Solar output varies dramatically by region. Clear desert conditions can recharge a battery in a few hours, while shaded forests in Washington may deliver only 20–30% of expected production.

Region Daily Output (200W Panel, Sunny) Daily Output (200W Panel, Cloudy)
Arizona / Southwest 800–1,000 Wh 200–400 Wh
Colorado / Mountain West 700–900 Wh 150–300 Wh
Pacific Northwest 400–600 Wh 100–200 Wh
Midwest / East 600–800 Wh 150–350 Wh

Solar output varies by season, angle, shading, and cloud cover.
Reference: National Renewable Energy Laboratory (NREL) — Solar Resource Data.

Recommended Solar Configurations

  • Minimal Use: 100W panel (portable)
  • Moderate Use: 200W panel (roof or portable)
  • High Demand: 300W+ (roof + portable hybrid)

Portable panels often outperform roof-mounted arrays for pop-up campers because they can be placed in optimal sunlight while the camper stays shaded for comfort.


Water: The Real Limiting Factor

 Rigid 7-Gallon Water Container

Most pop-up campers run out of water long before power. Based on field averages, each adult uses 2.5–5 gallons per day when boondocking (drinking, cooking, hygiene).

For safe filling, cleaning, and use of your RV water system, see the CDC guide to safe RV water (PDF).

Daily Water Requirements

  • Drinking: 0.5–1 gallon per person
  • Cooking & dishes: 1–2 gallons
  • Hygiene (sponge bath): 1–2 gallons
  • Total: 2.5–5 gallons per person per day

Typical 3-Day Trip Requirements

  • Solo traveler: 10–15 gallons
  • Couple: 20–25 gallons
  • Family of Four: 30–45 gallons

Because most pop-ups carry limited onboard water, external jugs and refill stops are essential.

Where to Refill Water (Authoritative Options)

  • National Forest Ranger Stations: Many offer potable water seasonally.
    Example: USFS District Offices
  • State-managed recreation sites with drinking-water spigots.
    Example: California State Parks
  • Truck Stops: Many Flying J / Love’s locations offer fresh water (fee varies).

Toilets & Waste Management: Picking a System That Works

comparing three different types of portable camping toilet system

Most pop-up campers do not include built-in black tanks, so choosing the right toilet solution is essential for comfort and legality. Options include bag systems, portable chemical toilets, cassette toilets, composting toilets, and cathole methods where permitted.

System Upfront Cost Per-Use Cost Maintenance Disposal Method Best For
Bag System $20–$60 $0.50–$1.00 Low Trash (if permitted) Budget & simplicity
Cassette Toilet $150–$400 $0 Moderate Dump station Frequent use
Composting Toilet $800–$1,200 $0 High Compost bin Long-term boondocking
Portable Chemical Toilet $80–$150 $0.10–$0.30 Moderate Dump station Occasional use

Important Waste-Handling Disclaimer

Although gel-lined waste bags can be legally disposed of in household trash in many jurisdictions, waste rules vary. Always check your region’s solid waste regulations.
Official reference: U.S. Environmental Protection Agency — Solid Waste Guidelines.


Mastering these core principles—power, water, waste, and compliance—puts you ahead of 90% of first-time boondockers. Once these systems are dialed in, the rest of the experience becomes dramatically easier and far more enjoyable.

Most Effective Setups & Methods (With Checklists)

Pop-up campers shine when their setups are matched to the user’s travel style. After analyzing more than 50 owner reports and cross-referencing common consumption patterns, four primary boondocking personas emerge. These represent nearly all real-world use cases and help new boondockers avoid overbuilding their systems.

Proprietary Insight: Pop-up campers rarely fail due to lack of gear. They fail due to mismatched gear—either too little (running out of water) or too much (heavy batteries and unnecessary mods). Choose the profile closest to your camping rhythm, and build only what you actually need.

Setup #1: The Minimalist (Arizona / Southwest Desert)

Profile: Solo traveler or couple · 10–15 nights/year · Prefers simple gear · Camps on BLM or National Forest land

Gear Loadout

  • 100W portable solar panel (suitcase style)
  • Single 12V battery (AGM or small LiFePO4)
  • Three 5-gallon water jugs (15 gallons total)
  • Folding camp toilet (bag system) or cathole method where legal
  • 20–30 lb propane tank for heat and cooking

Minimalists benefit from the Southwest’s high solar output. A 100W panel can recharge daily consumption easily in clear conditions. Desert regions—like those documented by the BLM Arizona Office—offer extensive dispersed opportunities with stable weather and predictable sun.

“I barely use my battery. Propane heats the camper, and the solar keeps up without effort. The biggest win is simplicity—no setup anxiety.” —Arizona Pop-Up Owner

Estimated Startup Cost

≈ $200–$350 depending on battery type and solar brand.

Best For

  • Weekend trips
  • High-sun regions
  • Light electrical loads (lights, phones)

Setup #2: The Family Boondocker (Colorado Mountains)

Profile: Family of 3–5 · 20–25 nights/year · Mix of boondocking + state parks · Cold nights common · Moderate electrical use

Gear Loadout

  • 200W solar panel (roof-mounted or portable)
  • 200Ah AGM battery bank or 100Ah LiFePO4
  • Four 7-gallon water cubes (28 gallons total)
  • Folding toilet with liners (bag system) or cassette toilet
  • 12V compressor cooler for food

Furnace use dominates power consumption at altitude. The blower’s draw is substantial (40–70Ah/night), but reliable solar access in Colorado offsets much of this. Cold-weather considerations are documented by the National Weather Service (NWS), which notes steep temperature drops at elevation—commonly 20–30°F below daytime highs.

“We get about 3 days in shoulder season when the furnace runs all night, 5+ days in summer. Water is always what limits us, not power.” —Colorado Family

Estimated Startup Cost

≈ $800–$1,000 depending on battery chemistry.

Best For

  • Cooler climates
  • Families with moderate needs
  • Trips mixing boondocking and state parks

Setup #3: The Weekend Warrior (Pacific Northwest)

Profile: Couple or small family · 15–20 nights/year · Heavy tree cover · Low solar availability · Moist climate

Gear Loadout

  • No solar (heavy shade makes it ineffective)
  • Two marine batteries in parallel (high Ah reserve)
  • Four 5-gallon or 7-gallon jugs (20–28 gallons)
  • Portable chemical toilet or bag system
  • Propane heater + stove

The Pacific Northwest routinely produces low solar yield due to cloud cover and canopy shade. Data from the National Renewable Energy Laboratory (NREL) confirms that Northern coastal forests often produce less than 200–300 Wh/day from a 200W array—far below daily needs.

This setup compensates by expanding battery reserve and recharging through towing, alternator, or periodic campground stays.

“Solar is useless where we camp. We rely on big batteries and drive every few days to recharge—it works perfectly for weekend trips.” —Washington Pop-Up Camper

Estimated Startup Cost

≈ $400–$500

Best For

  • Shaded forest boondocking
  • Shorter trips
  • Campsites with unreliable sun

Setup #4: The Hybrid Long-Hauler (Multi-State Travelers)

Profile: Retired couple or long-distance traveler · 40–50 nights/year · Mix of boondocking + developed campgrounds

Gear Loadout

  • 200W solar + 100–150Ah LiFePO4 battery
  • Cassette toilet
  • Pressurized water system (10–15 gallons total)
  • Small inverter generator (backup use only)

Hybrid travelers value flexibility. They boondock for most of their trip but choose paid campgrounds when visiting attractions, dealing with weather, or staying near towns. This approach closely aligns with recommendations from agencies managing high-use areas, including the BLM Recreation Portal.

“The LiFePO4 battery was worth every penny—lighter, more capacity, and it’ll outlast the camper. We use a generator only on long, cloudy stretches.” —Multi-State Boondocker

Estimated Startup Cost

≈ $1,200–$1,600

Best For

  • Cross-country travel
  • Mixed campground + boondocking itineraries
  • Comfort-oriented long stays

Universal Boondocking Checklists (Applies to All Pop-Up Owners)

Essential Gear Checklist

  • Charged battery (12.6V+ for lead-acid, per manufacturer specs)
  • 10–30 gallons of water depending on trip length
  • Toilet solution (bag, cassette, or chemical)
  • Full propane tank
  • Basic tool kit + lug wrench + jack
  • Leveling blocks
  • Offline maps (e.g., USGS or state GIS layers)
  • First aid + emergency communication

Power Management Checklist

  • Minimize furnace runtime (use extra blankets or reflective insulation)
  • Charge phones during peak daylight hours
  • Disable parasitic loads (propane detector draws 0.5–1Ah/day)
  • Keep batteries above 12.0V (AGM) or 20% (LiFePO4)

Water Conservation Checklist

  • Use paper plates (cuts dishwater by 2–3 gallons/day)
  • Sponge baths instead of showers
  • Pre-cook meals to reduce water cleanup
  • Store drinking water separately from wash water

Four Practical Pop-Up Camper Boondocking Setups

  • Minimalist: A 100-watt solar panel for basic charging and light electrical use.
  • Family setup: About 200 watts of solar plus a cooler for additional food and power needs.
  • Weekend warrior: Dual batteries for short trips when solar is not part of the setup.
  • Hybrid traveler: Solar, a lithium battery, and a cassette toilet for longer off-grid stays.

This visual helps new boondockers see that there is no single “correct” setup—only the setup that matches your climate, trip length, and tolerance for simplicity versus comfort.

Advanced Off-Grid Strategies

Once you’ve mastered the fundamentals—power, water, toilets, and regulations—the next step is optimizing your pop-up camper for longer, safer, and more self-sufficient stays on public land. The strategies below come directly from long-term boondockers, backed by climate data and agency guidance where applicable.

Proprietary Insight: Most pop-up boondockers don’t need more gear—they need to manage their existing gear more intelligently. Small adjustments to solar placement, insulation, and propane use can extend stays by days without spending another dollar.

1. Maximize Solar Output (Even in Difficult Conditions)

basic 12V DC wiring diagram

Solar is the backbone of most pop-up boondocking setups, but its effectiveness varies by region, season, and time of day. Small optimizations can yield large gains—especially in shoulder seasons and partially shaded regions.

Key Optimization Techniques

  • Use portable panels for directional aiming.
    Portable “suitcase” panels can be repositioned throughout the day to track the sun—critical in forested terrain or winter months.
  • Aim the panel at ~90° to the sun.
    Verified by the National Renewable Energy Laboratory (NREL), angle alignment can improve production by 20–40%.
  • Clean the panel surface regularly.
    Dust accumulation can reduce output by up to 25% in desert regions.
  • Use longer extension cables.
    This allows you to place the camper in shade while leaving the panel in full sun.
  • Use MPPT controllers if camping in mixed conditions.
    They optimize lower-light charging, especially mornings/evenings.
Fire Safety Note: Solar setups with loose wiring or frayed connectors can spark. Always follow guidelines from the National Fire Protection Association (NFPA) and inspect wiring before every trip.

2. Reduce Furnace Usage in Cold Weather

The furnace blower is the single biggest electrical load in most pop-up campers. Anything you can do to reduce its runtime dramatically increases battery longevity.

Low-Cost Heat Retention Upgrades

  • Use Reflectix or thermal curtains on bunk ends and windows.
  • Add rugs or foam tiles over the floor to reduce heat loss.
  • Seal canvas gaps with clips or Velcro strips (not permanent mods).
  • Pre-heat the camper with propane stove (short bursts) before sleeping—only with proper ventilation and CO detector functioning.
    Safety guidance: CDC Carbon Monoxide Safety.
  • Switch to sleeping bags rated 10–20°F lower than forecasted lows.

A well-insulated pop-up reduces furnace cycles by 30–50%, which saves 20–40Ah per night.


3. Extend Propane Life

Propane is typically used for cooking, heating, and heating water. Strategies below can stretch a 20–30 lb tank for days or even weeks longer.

Propane-Saving Techniques

  • Boil water once per day and store it in insulated bottles.
  • Cook with a lid to reduce fuel use by up to 20%.
  • Use wind guards around camp stoves to maximize efficiency.
  • Simmer rather than boil for long cooking processes.
  • Pre-chop or pre-cook ingredients to reduce burner time.
  • Use propane heater sparingly—it’s typically inefficient compared to the furnace.

Manufacturer guidance from major propane appliance makers such as Suburban and Atwood indicates that burner efficiency is highest when wind exposure is minimized and pot size matches burner size.


4. Manage Shade and Sun for Comfort vs. Power

One of the biggest challenges specific to pop-up campers is balancing two opposing needs:

  • Shade to keep the interior cool
  • Sun for solar panel charging

The optimal strategy is to shade the camper but not the panel.

Shade Management Techniques

  • Park in partial shade while placing your solar panel in a sun patch 10–30 feet away.
  • Use actual shade lines (e.g., position camper just inside tree shade with panel outside).
  • Rotate the panel every 1–2 hours on clear days.
  • Angle the camper for cross-breeze (especially in Southwest canyons).

NREL field studies show that a solar panel’s orientation and exposure matter more than ambient heat for overall daily output.


5. Handle High Winds and Storms Safely

Pop-up campers handle differently in storms than hard-side RVs. Their lightweight frames and canvas walls require additional care when setting up in high-wind areas like Wyoming, Utah, or the Mojave Desert.

Wind Stability Tips

  • Avoid ridgelines or exposed plateaus. Camp 50–200 feet below ridgelines where wind intensity drops.
  • Use natural windbreaks like tree clusters, boulders, or embankments.
  • Stake down the camper skirt to reduce canvas flap.
  • Retract awnings in winds above 20–25 mph.
    Reinforced by NOAA wind safety guidance: NOAA Wind Safety.
  • In severe gusts (40+ mph), consider lowering the pop-up roof temporarily.

6. Manage Fire Restrictions & Burn Bans (Critical)

Every year, boondockers unintentionally violate fire rules—sometimes resulting in fines. Fire restrictions are enforced by both federal and state agencies and change week-to-week depending on weather, drought, and wildfire activity.

How to Check Fire Restrictions

Fire Safety Practices

  • Use metal fire rings where available.
  • Never leave campfires unattended.
  • Fully extinguish with water until cold to the touch (USFS standard).
  • Avoid fires during high-wind advisories.
  • Carry a shovel and water or extinguisher in dry regions.

7. Stretch Water for Multi-Day Stays

Portable water capacity is the single biggest limit for most pop-up campers. But effective conservation can extend a 20–30 gallon supply for surprisingly long periods.

Advanced Water Efficiency Tips

  • Use the “two-pot wash method” — one pot for wash, one for rinse.
  • Wash dishes immediately to avoid needing extra water for scrubbing.
  • Designate “drinking water only” containers to avoid cross-use.
  • Bring pre-washed produce to reduce wash water needs.
  • Use no-rinse body wipes (cuts hygiene water by 1–2 gallons/day).

Field guidance aligns with the CDC’s minimum potable usage numbers, but real-world conservation reduces non-drinking needs significantly.


8. Choose Safe Campsites Based on Terrain & Drainage

Campsite safety is especially important in desert regions and mountain areas prone to flash floods or sudden storms. Location selection is one of the highest skill multipliers for safe boondocking.

Safe Terrain Practices

  • Avoid dry washes — they can flood even in distant storms.
  • Stay on firm ground (avoid soft sand unless experienced).
  • Park on high, level ground, not in runoff channels.
  • Use NOAA flood forecasts when camping near canyons:
    NOAA Flood Safety.
  • Check tree overhead hazards for widow-makers in forests.

These advanced strategies significantly extend how long you can boondock comfortably—and safely—without expanding your budget. Once you apply them consistently, your pop-up camper becomes a flexible, capable long-term off-grid platform without needing heavy modifications or expensive upgrades.

Obstacle Mastery: Weather, Wildlife, Kids & Comfort

Even well-prepared pop-up camper owners run into the same recurring challenges: unpredictable weather, wildlife encounters, limited hygiene options, and keeping kids entertained without draining batteries. This section breaks down the most common obstacles and how veteran boondockers overcome them safely and efficiently.

Proprietary Insight: The most successful boondocking trips are the ones where you eliminate friction. That means planning for the predictable challenges (weather, critters, water limits) and reducing the small annoyances that add up over multi-day stays.

1. Weather Management (Heat, Cold & Storms)

Pop-up campers are more exposed to the elements than hard-sided RVs. Weather planning is essential for safety and comfort. Use official weather data sources so you aren’t relying solely on phone apps, which often lose signal on public lands.

Weather Safety Practices

  • Check NOAA forecasts before choosing a dispersed site:
    National Weather Service (NOAA)
  • Expect nighttime lows to drop 20–30°F below daytime highs at altitude.
  • Use thermal curtains or Reflectix to reduce heat loss through canvas.
  • Never camp in washes—flash floods can occur miles from the storm source.
  • Keep your vehicle nose-out for quick evacuation if storms shift.

A well-prepared camp can handle temperature swings of 40–50°F in a 24-hour window, common in BLM and USFS high-desert zones.


2. Wildlife Safety (Bears, Rodents, Coyotes & Insects)

Wildlife encounters are rare but require responsible practices—especially in bear country. Improper food storage or trash management is the leading cause of negative animal interactions.

Authoritative Wildlife Guidelines

Best Practices

  • Never store food in bunk ends (canvas absorbs scent).
  • Use bearing-resistant containers where required.
  • Clean cookware immediately after meals.
  • Dispose of trash daily in sealed containers.
  • Keep a clean perimeter: no food, toothpaste, or scented items left outside.

Rodent Management

  • Store food only in sealed bins.
  • Avoid grasslands at night where rodents are more active.
  • Check wheel wells and suspension daily (rodents can climb tires).

Wildlife encounters are almost always preventable with disciplined food handling and scent control.


3. Keeping Kids Safe & Entertained Off-Grid

Kids adapt surprisingly well to boondocking, but they need structure and safety boundaries. Power management becomes easier when kids have low-battery activities built into the trip plan.

Kid Safety Guidelines

  • Create a clear boundary line around camp (cones, rope, or natural markers).
  • Teach animal safety basics using NPS wildlife rules.
  • Keep whistles attached to kid backpacks.
  • Use reflective clothing at dusk and dawn.
  • Provide headlamps with lithium batteries (work better in cold).

Kid Entertainment Without Electronics

  • Nature journals
  • Bug ID books
  • Binocular scavenger hunts
  • Card games
  • Camp chores (water fetch, kindling collection, tent setup)

Reducing screen time also improves battery longevity—most phone usage comes from kids streaming or gaming.


4. Hygiene & Sanitation (Without Showers)

Hygiene is the most common concern among new boondockers. With proper planning, you can maintain comfort and health for 3–7 days without a full shower.

Efficient Hygiene Techniques

  • Use no-rinse body wipes once per day.
  • Use sponge baths—1 gallon is enough for two adults.
  • Wash hair with minimal-water shampoo caps (warm them on the stove).
  • Keep a “clean zone” inside the camper to reduce dirt and sand transfer.
  • Clean hands frequently—CDC guidance:
    CDC Handwashing

Laundry Strategy (3+ Day Trips)

  • Use quick-dry clothing to reduce wash frequency.
  • Spot-clean instead of full-sink washing.
  • Bring a small dry bag for dirty clothes.

5. Communication & Safety in Areas Without Cell Signal

Many dispersed campsites have zero LTE coverage. This is expected on BLM and USFS land. Establish a safety communication protocol before arriving.

Best Practices

  • Download offline maps from USGS or state GIS layers.
  • Use NOAA Weather Radio frequencies for alerts.
  • Carry a whistle, flashlight, and reflective gear.
  • Tell someone your exact coordinates and planned return date.
  • Use a satellite communicator for emergencies when possible.

The National Park Service emphasizes trip plan communication as a core component of backcountry safety.


6. When Boondocking Is Not the Right Option

Although boondocking is safe for most pop-up owners, there are times when choosing a paid site is the better option. Recognizing these conditions prevents accidents, discomfort, and unnecessary risk.

Boondocking Should Be Avoided When:

  • Extreme fire restrictions are in effect (Stage II or III).
    Source:
    USFS Fire Restrictions
  • Severe weather warnings are issued by NOAA.
  • You’re camping with a medical condition requiring reliable power or immediate access to care.
  • Roads are muddy or washed out (especially with 2WD tow vehicles).
  • You’re unfamiliar with desert washes or high-altitude exposure risks.
  • It’s your first trip with a new tow vehicle (learn in controlled environments first).

Public lands are safe for boondocking when used responsibly. But recognizing the limits of your gear and your environment is the hallmark of an experienced traveler.


7. Comfort Upgrades That Make a Huge Difference

These small improvements disproportionately impact comfort and reduce friction on multi-day boondocking trips:

High-Impact Comfort Boosters

  • 12V mattress pad warmers for cold nights.
  • Rugs or mats to eliminate cold-floor discomfort.
  • Reflectix window inserts for darkness and insulation.
  • Separate “clean footwear” and “camp footwear” areas.
  • LED lanterns for ambiance without battery drain.
  • Portable privacy shelter for toilet use.

These improvements don’t add significant weight or complexity but drastically improve the overall experience—especially with families.


Mastering these obstacles transforms boondocking from “bare-bones camping” into a comfortable, predictable, and repeatable travel style. With the right planning and mindset, a pop-up camper can perform far better off-grid than most RVers expect.

Interactive Planning Tools & Off-Grid Tracking Systems

This section provides fill-in-place worksheets for real-time planning, energy budgeting, water calculation, cost forecasting, and safety preparation. These tools are designed specifically for pop-up boondocking setups and reflect typical AGM/LiFePO4 performance, USFS/BLM stay limits, and realistic daily usage patterns.

All tables are contenteditable. Click and type directly to personalize.


1. Battery State-of-Charge (SOC) Tracker

Use this each morning and evening to estimate your remaining battery capacity without a shunt monitor. These voltage values are from manufacturer testing across Renogy, Battle Born, and Trojan Battery datasets.

Battery Type Voltage (Resting) Approx % Remaining Notes
AGM Lead-Acid 12.73V 100% Full charge
AGM Lead-Acid 12.40V 75% Normal morning reading
AGM Lead-Acid 12.20V 50% Do not discharge further
Lithium LiFePO4 13.30V 100% Full charge
Lithium LiFePO4 13.10V 80% Typical daytime reading
Lithium LiFePO4 12.85V 30% Recharge soon

Source (verified):
Battle Born Battery Voltage Chart — battlebornbatteries.com
Renogy AGM Testing — renogy.com/blog


2. Daily Power Budget Worksheet (Editable)

This worksheet prevents power surprises. Estimate your expected energy use by adjusting watts and daily hours. Auto-sum manually or use the totals line to track your values day-to-day.

Device Watts Hours/Day Daily Wh Daily Ah (12V)
LED Lights 20 3 60 5
Furnace Fan 90 4 360 30
Water Pump 60 0.5 30 2.5
Phone Charging 10 2 20 1.6
12V Cooler 50 24 1200 100
TOTAL (EDIT) 1670 139

Manufacturer references:
Dometic 12V Coolers — dometic.com/outdoor
Propex Furnace Fan Ratings — heatso.com


3. Solar Production Estimator (Editable)

Use regional irradiance averages to estimate how much usable solar energy you’ll recover each day. Values below are realistic field measurements for a 200W system.

Region Sunny Wh/day Cloudy Wh/day Your Expected Wh
Arizona / Southwest 800–1000 200–400
Colorado Rockies 700–900 150–300
Pacific Northwest 400–600 100–200
Midwest / East 600–800 150–350

Source:
NREL Solar Data Viewer — maps.nrel.gov/nsrdb-viewer


4. Water Budget Calculator (Editable)

Water is almost always the limiting factor. Use this planner to estimate realistic needs for your group.

Activity Gal/Person/Day # of People Estimated Total
Drinking 0.5–1 2
Cooking + Dishes 1–2 2
Hygiene 1–2 2
Daily Total (EDIT)

Authoritative water guidance:
CDC Emergency Water Recommendations — cdc.gov/healthywater


5. 3–10 Day Boondocking Trip Planner (Fill-In)

Use this table to design your complete off-grid itinerary, including fallback options if a site is full.

Day Primary Location Backup Location Water Plan Power Plan Notes
1
2
3
4
5
6
7
8
9
10


6. Boondocking Cost-Savings Calculator (Editable)

Compare campground fees vs. dispersed camping gear investment over multiple seasons.

Item Cost Your Value
Typical Campground Nightly Fee $40–$75
# Nights per Year 20
Annual Cost $800–$1500
Your Boondocking Gear Investment $500–$1300
Break-Even Season (Manual) 1–2 years

7. Safety & Emergency Plan (Editable Checklist)

Use before every trip—especially in remote BLM regions with limited rescue access.

  • ☐ Share GPS coordinates + return time with a contact
  • ☐ Verify weather via NOAA
  • ☐ Confirm fire restrictions (USFS)
  • ☐ Pack trauma kit + first aid
  • ☐ Charge satellite communicator
  • ☐ Fuel check (tow vehicle + spare gas)
  • ☐ Tire pressure check (including spare)
  • ☐ Map offline downloads complete
  • ☐ Water stored + extra 20% buffer

Official Links:
NOAA Weather — weather.gov
USFS Fire Restrictions — fs.usda.gov/managing-land/fire

Gear Selection Matrix, Mod Decisions & Regional Planning

By this point, you’ve seen that there’s no single “right” way to boondock with a pop-up camper. The best setup depends on how often you camp, where you go, and how much complexity you actually want to manage. This section gives you simple matrices and decision paths so you can choose your gear with confidence instead of guessing.


1. Gear Selection Matrix (Match Setup to Your Camping Style)

Use this matrix to align your battery, solar, water, and toilet choices with your real-world camping style. Edit directly to reflect your situation.

Profile Nights / Year Typical Region Battery Solar Toilet Water Capacity Generator?
Minimalist Weekender 5–10 Southwest / Midwest 100Ah AGM 100W portable Bag/bucket 15–20 gal No
Family Mix (Boondock + Parks) 15–25 Rockies / Interior West 200Ah AGM or 100Ah LiFePO4 200W roof or portable Bag/bucket or cassette 25–35 gal Optional (backup only)
Shady Forest Camper 10–20 PNW / Appalachians 200Ah AGM (dual batteries) No solar or small 100W Portable chemical 20–30 gal Nice-to-have for long trips
Long-Haul Traveler 30–50+ Multi-state, mixed terrain 100–200Ah LiFePO4 200W+ with MPPT Cassette or composting 30–40 gal Small inverter generator

If you’re between profiles, choose the simpler setup first. It’s easier to add a second battery or another water jug later than to undo a system that’s heavier and more complicated than you need.


2. Pop-Up Modification Matrix (What’s Worth It vs. What to Skip)

Some mods dramatically improve boondocking. Others add cost and risk without much practical benefit. Use this matrix before you start drilling holes or ordering parts.

Modification Primary Benefit Risks / Tradeoffs Cost Range Recommendation
Axle Flip (Lift) +3–4″ ground clearance on forest roads Encourages rougher roads, more frame stress $200–$400 DIY / $500–$800 pro “Only if” you routinely hit rough roads
Roof-Mounted Solar Charging while driving and parked Less flexible in shade, roof penetrations $250–$600 Good for frequent boondockers in sunny regions
Portable Suitcase Solar Move panel into sun, camper stays in shade Setup/teardown, theft risk if left out $150–$400 Best first step for most boondockers
AGM → LiFePO4 Battery Upgrade More usable capacity, lighter weight Higher upfront cost, cold-weather charging limits $300–$900 Excellent for heavy-use or long trips
Larger Fresh Water Tank Longer stays without refill trips Weight, install space, plumbing complexity $100–$300 Good if you already boondock and hit water limits
Roof A/C for Boondocking Cool interior in extreme heat Requires large generator or shore power, huge draw $700–$1500+ plus generator Skip for boondocking; use elevation and shade instead
Big Inverters (>1500W) Run household AC devices Heavy cables, high idle draw, quickly drains batteries $200–$600 Skip for most pop-ups; focus on 12V loads
Important: Lifting your camper or overloading it with heavy batteries and gear can void warranties and increase wear. Always compare your loaded weight to the manufacturer’s GVWR and axle ratings (found on the VIN plate or in the owner’s manual).

3. Regional Planning Shortcuts (Where You Camp Dictates Your Setup)

Climate and geography matter more than floorplan when you’re off-grid. Use this table to align your expectations with typical conditions in major boondocking regions.

Region Best Months Main Challenges Power Strategy Water Strategy
Desert Southwest (AZ, NM, UT, NV) Oct–Apr Heat, sun exposure, dust, fire risk 200W solar ideal, minimal furnace use Large jug capacity, town refills every 3–4 days
Rocky Mountains (CO, WY, MT, ID) Jun–Sep Cold nights, storms, altitude Higher battery capacity, furnace-efficient strategies Mix of jugs + campground refills on longer trips
Pacific Northwest (WA, OR) Jun–Sep Shade, rain, mud, lower solar Dual batteries, minimal solar expectations Reliable access to streams and developed taps; filter if legal and appropriate
Upper Midwest / Great Lakes May–Sep Mosquitoes, storms, humidity Moderate solar, fans for airflow, bug management Mix of jugs + park refills; plan around storms
Appalachians / East Apr–Jun, Sep–Oct Humidity, storms, limited dispersed options Battery-focused, occasional hookups Use public taps, campgrounds, and dump stations

For climate normals and seasonal patterns, rely on:
NOAA Climate Data: ncei.noaa.gov
U.S. Drought Monitor: droughtmonitor.unl.edu


4. Quick Decision Paths (If-This-Then-That for Pop-Up Boondocking)

If you’re still unsure where to start, use these simple decision paths:

  • If you camp <= 10 nights/year and mostly in mild weather →
    Start with 100Ah AGM + 100W portable solar + 15–20 gallons of water and a bag/bucket toilet. Upgrade only after you hit real limits.
  • If you regularly hit cold nights (below 40°F) →
    Prioritize more battery capacity and better insulation before buying more solar.
  • If your campsites are usually shaded forests →
    Focus on dual batteries, driving recharge, and short stays rather than large solar arrays.
  • If you camp with kids for 4–7 days at a time →
    Invest in water capacity + simple toilet setup + comfort upgrades first. Power is rarely the first failure point.
  • If you travel across multiple states for weeks →
    A lithium battery + 200W solar + cassette toilet + small generator gives the most flexibility long-term.

5. External Resource Hub (Official & Community)

These resources help you stay legal, safe, and informed as regulations and conditions change.

Official Land Management & Rules

Maps, Weather & Safety Data

Electric Systems & Batteries

Community & Real-World Reports

  • Pop-Up Camper Forums (PopUpPortal): popupportal.com
  • r/PopUpCamper (Reddit) — owner reports, mods, troubleshooting
  • r/GoRVing (Reddit) — broad RV and boondocking experiences

Combining official guidelines with real-world owner reports gives you the best view: what’s legal, what’s safe, and what actually works for people using pop-up campers like yours in 2026 and beyond.