Articles by Chuck Price — Page 16

A 35+ Year RVer’s Guide to Finding Free & Cheap Campsites

A 35+ Year RVer’s Guide to Finding Free & Cheap Campsites

Quick Answer: How We Actually Find Free & Cheap Campsites

Short version: We combine one main app (usually AllStays or Campendium) with Recreation.gov for official reservations, state forest websites for primitive sites, and old-school ranger station phone calls. We also keep our own Google Maps layer of confirmed spots and always go in with at least three backup options, so we never scramble for a site in the dark.

How We Found Campsites Before Apps Existed

If you started RVing before smartphones, you probably remember this routine: a paper atlas, a payphone, and a hopeful turn down a Forest Service road. Back in 1990, our setup was simple—an ’88 Gulfstream Class C, a DeLorme Atlas for every New England state, and a glovebox full of napkins with campsite tips from other RVers.

The DeLorme Atlas & Gazetteer became our go-to tool. Each state book featured back roads, elevation, primitive pull-offs, and small campgrounds that big RV atlases often overlooked. Those maps rarely steered us wrong, but they required one more step: verification.

Paper road atlas and handwritten campsite notes on a table, old-school RV trip planning.

Before heading into a new area, we would call ranger stations—from payphones—to ask about road damage, seasonal gate closures, and whether a 24-foot Class C could realistically turn around. It was slow, but rangers knew which roads washed out last week and which had just been graded.

We also traded location intel at rallies and campgrounds across Vermont, New Hampshire, and Maine. Word-of-mouth had one huge advantage over modern apps: rig-specific information. When another Class C owner told us that a dispersed site worked for them, we knew our clearance and turning radius should be sufficient as well.

What still works from those days? We still call ranger districts before committing to unfamiliar forest roads, we still keep paper atlases in the van, and we still treat local knowledge as more trustworthy than anonymous star ratings.

Our Current System for Northeastern Camping with a Class B

These days, we travel in a 19-foot Hymer Aktiv Class B. The smaller footprint opens up more options in the Northeast, but it also means we need better intel on narrow forest roads, turnarounds, and small pullouts before we commit.

Instead of chasing every new app, we built a simple, repeatable system:

  • One primary app for overviews and reviews (usually AllStays or Campendium).
  • Recreation.gov for official federal campground reservations and availability.
  • State forest and state park websites for primitive and lesser-known campsites.
  • Harvest Hosts for overnight stops between destinations.
  • Ranger station phone calls to confirm any questionable road or dispersed site.

Hymer Aktiv Class B camper parked in a small forest campsite in the Northeast

We designed this around how we actually camp in the Northeast: weekend trips, shoulder-season getaways, and longer loops where we mix developed campgrounds, primitive sites, and the occasional winery or farm stay.

How We Use Harvest Hosts, Recreation.gov, and State Forest Websites

Harvest Hosts has become our favorite paid tool for “in-between” nights. We use it when we are moving between regions and want a low-stress, one-night stop with some character. Wineries, farms, museums, and small attractions usually have easy access for our Class B, and the host communication system is straightforward. After around five stays, the membership has typically paid for itself compared to commercial RV park rates.

Recreation.gov is still the official gateway for most Forest Service and many national park campgrounds. It can feel clunky and competitive in peak season, but if we want a reserved site on public land, this is where we start. We filter by maximum rig length so we don’t waste time looking at pads built for 40-foot rigs, and we have found that checking around 6 a.m. Eastern often reveals fresh cancellations.

State forest websites are where a lot of the real gems hide in the Northeast. Vermont, New Hampshire, Maine, and other states maintain their own small campgrounds and primitive sites that often never show up in national apps. The booking systems can be basic, but one quick call to the state office or local ranger district usually gives us:

  • current road and gate status,
  • realistic advice on access grades and surfacing, and
  • a clear “yes/no” on whether our 21-foot van will fit.

For a typical weekend trip, our workflow looks like this:

  1. Check Recreation.gov for established public campgrounds near our target area.
  2. If nothing fits, check state forest or state park sites for lower-key options.
  3. Use Harvest Hosts to fill any “travel night” gaps between regions.
  4. Call the relevant ranger district before committing to any unfamiliar forest road.
  5. Bring the paper atlas for navigation once we lose cell service.

Camping Apps and Directories the RV Community Recommends

We have not tested every camping app out there, but over the years, we keep hearing the same names from other RVers at campgrounds, rallies, and on the road. We treat these as starting points, not guaranteed truths.

Official Federal and State Resources

Smartphone and laptop showing camping maps and apps with campsite pins.

Crowdsourced Camping Directories

  • Campendium — Strong for reviews, photos, and cell coverage reports.
  • FreeCampsites.net — Focused on free sites; quality varies a lot by region.
  • iOverlander — Popular with overlanders and international travelers.
  • Boondocking.org — User-submitted dispersed spots with GPS pins.

Membership and Subscription Programs

On-the-Road Planning Apps

Planning and Reference Guides

How Boondockers Actually Use Maps to Find Free Campsites

One of the most common questions we see in boondocking groups is, “Has anyone created a map of boondocking locations?” In a recent Boondocker’s Bible Facebook thread, RVers like Sherri Gore, John Nokes, Jeret Burnett, and others shared how they actually track free spots: not with a single master map, but with a mix of apps, personal Google Maps, and public land overlays.

Diagram showing boondocking maps as a mix of crowdsourced apps, community projects, personal Google Maps pins, and public land layers

There Is No Single “Master Map” of Boondocking

Despite what we all wish existed, there is no 100% complete map of every boondocking site in North America. Instead, information is spread across crowdsourced apps (iOverlander, Campendium, FreeCampsites.net), community projects (like the Boondocker’s Bible boondocking map), and the personal maps that individual RVers maintain for themselves and close friends.

Crowdsourced Apps as Map Layers

Apps like Campendium, iOverlander, and FreeCampsites.net act as living map layers built by other travelers. In the Facebook thread, multiple people pointed new boondockers to these tools because they show reviews, basic GPS pins, and photos. We treat these as “suggested areas” rather than precise parking spots and always verify access with satellite imagery and, when possible, a quick call to the managing agency.

Community & Curated Maps

Several RVers mentioned curated maps and groups that collect boondocking locations in one place. Jeret Burnett shared a BLM boondocking map he built, and others pointed to projects like Boondocker’s Bible’s boondocking map or paid map bundles such as Adventure Know How. These are helpful for ideas and trip inspiration, but even their creators admit they are not comprehensive and should still be double-checked on the ground.

Personal Google Maps and “Private Pins”

Some of the most interesting comments in that thread came from people who quietly track their own spots. Sherri Gore talked about dropping pins at her favorite boondocking spurs. John Nokes showed a personal map with more than 200 pins where he and his partner have either stayed or scouted. We do something similar: each time a site works for our Class B, we save a pin with notes on access, noise, cell coverage, and whether we would return.

Government Land Layers and Planning Tools

Others in the conversation pointed to official mapping tools: the U.S. Forest Service interactive map, BLM recreation maps, and even Garmin’s Basecamp software for offline planning. People also mentioned tools like OnX and public land overlays in apps like Campendium. These layers are extremely useful for understanding who manages the land under your tires, but they rarely show exact pullouts—you still have to use reviews, on-the-ground judgment, and sometimes ranger advice.

Why Some RVers Refuse to Share Exact Spots

The thread also surfaced an honest tension: some long-time boondockers do not want their hard-earned locations broadcast to thousands of strangers. They worry about trash, crowding, and losing the quiet they depend on. We respect that. In our own travels, we are more likely to share general areas publicly and reserve precise GPS pins for people we know will treat the place well.

How We Fold All of This Into Our Own Camp-Finding System

In practice, our system looks like this: we start with one main app (often AllStays or Campendium), overlay public land information from USFS or BLM, and then save our own pins in Google Maps or a similar tool when a spot proves itself. The Facebook conversation simply confirmed what we have seen for years—boondocking works best when you combine community information with your own verified map, not when you chase a mythical “perfect” master map.

Interactive Camping Map

Use the interactive map below to discover free and budget-friendly public campsites across the United States and Canada. Click on the markers for more details about each site.

For a larger view, open the camping map in full-screen mode.

What Matters More Than Which App You Choose

After thirty-five years of hunting for campsites, here is the pattern we see over and over: your verification process matters more than the specific app or membership you use.

A huge directory is useless if the listing is out of date or the person who added it never actually stayed there. We focus less on “the best app” and more on how we confirm that a site really works for us before we commit.

Cross-Reference Everything

If a site appears on Campendium with recent reviews, shows up on another app like iOverlander, and we can confirm access through the local ranger district, we treat it as reliable enough to plan around. If only one source mentions a dispersed site, we treat it as “unverified” until we find corroboration.

Filter for Recent Reviews

A five-star review from three years ago does not help much after a wet spring, a big storm season, or a change in management. We pay special attention to reviews from the last 30–60 days, especially for forest roads and dispersed pullouts.

Always Have Backup Options

Even in a nimble Class B, we assume that our first choice might be full, washed out, or gated. We rarely roll in with just one option; instead, we keep two or three realistic backups within a reasonable drive. That alone has saved more evenings than any single app.

Understand Northeastern Seasonal Shifts

In the Northeast, everything changes with the seasons. Mud season, hunting season, flood damage, late snow, and high summer traffic all impact access. Apps are slow to reflect this. Ranger calls and state websites usually have the most current information about seasonal closures and gate locks.

Match Reviews to Your Rig Size

We pay close attention to what reviewers were driving. A rooftop-tent SUV or a tiny teardrop trailer may fit easily in spots that are tight, sloped, or awkward for a 21-foot van. We look specifically for reviews from Class B owners or rigs under about 25 feet when evaluating small forest sites.

Common Questions About Camping Resources

Is there a single map of all boondocking locations?

No. There is no complete, official map of every boondocking site in North America. Instead, information is scattered across crowdsourced apps, community projects, government land maps, and the private Google Maps that individual RVers maintain. The most reliable systems combine several of these sources with your own verified pins.

Do we really need multiple camping apps?

Not a dozen. In practice, one main app like AllStays or Campendium, plus Recreation.gov and your state forest website, will cover most trips. We would rather know three tools well than juggle eight.

How accurate are GPS coordinates from crowdsourced camping apps?

For established campgrounds, coordinates are usually accurate. For dispersed camping, we treat coordinates as a general area, not a precise parking spot. On the ground, we use landmarks from reviews and ranger guidance to find a realistic pullout.

What is the best free way to find campsites?

For no-cost tools, FreeCampsites.net plus official U.S. Forest Service or Bureau of Land Management websites offer a strong starting point. They require more manual verification, but you are not paying membership fees and still get access to many public land options.

Should we trust camping reviews or official information more?

Official sources explain rules, reservations, and which areas are supposed to be open. Recent reviews reveal on-the-ground conditions such as road washouts, noise, or crowding. When the two conflict, calling the managing agency is usually the safest way to confirm what is really happening.

Do small Class B RVs have an advantage when finding campsites?

In many northeastern forests, shorter Class B rigs do have an advantage because they fit into smaller pads and turnarounds that are difficult for long trailers or big motorhomes. That said, narrow or steep forest roads can still be challenging, so it is important to verify access and always have backup options.

Build Your Own Reliable Camp-Finding System

When we started RVing in 1990, the idea of pulling up satellite imagery and live reviews on a phone would have sounded like science fiction. Even now, after decades on the road, we do not chase every new tool. Instead, we lean on a simple system that combines old-school verification with modern convenience.

We still call ranger stations, still carry paper atlases, and still listen carefully to advice from other RVers we meet along the way. We also use Recreation.gov when reservations make sense, Harvest Hosts when we need memorable overnight stops, and a short list of trusted apps when we are exploring a new region.

Simple flowchart showing a step-by-step system for finding and verifying free and cheap campsites

Your version will look different based on where you travel, what you drive, and how much flexibility you want. A full-timer roaming the western deserts in a large fifth wheel has different needs than a weekend warrior in a Class B focused on northeastern forests. The key is to start simple, test your tools, and adjust based on real trips.

If you build a habit of cross-checking sites, watching for recent reviews, and always having at least one backup plan, you will avoid most of the painful “no vacancy, no signal, no options” nights. The technology can help, but your process is what keeps you out of trouble.

Thirty-five years in, the road still teaches us something new every season. We hope that sharing our system helps you skip a few dead ends and find more of the quiet, memorable campsites you bought your RV for in the first place.

Top 10 Accessible Boondocking Spots (No Hiking Required)

Top 10 Accessible Boondocking Spots (No Hiking Required)

Accessible boondocking is a breakout trend for 2026, with search volume increasing by 25% as the baby boomer demographic seeks to continue RVing well into their 70s and 80s (Google Trends, 2024). However, standard “top 10” lists often fail this demographic by recommending “easy” spots that are actually riddled with ruts, soft sand, or steep grades.This guide moves beyond aesthetics to prioritize safety mechanics. We have analyzed locations based on three non-negotiable metrics for mobility-challenged travelers: Ground Firmness (critical for walkers/wheelchairs), Windshield Views (scenery visible from inside the rig), and Medical Proximity (distance to verified hospital care).

The “Safety First” Data Matrix

The firmness, signal, slope, and medical-access figures below are editorial estimates based on published maps and available location information, not instrumented field tests. Surface conditions, cellular service, routes, and medical facilities can change; verify each destination directly before travel.

Location Ground Firmness Slope Grade Medical Access Best Rig Type
1. Alabama Hills, CA 8/10 (Granite) <2% 4 mi (ER) All Classes
2. Magnolia Beach, TX 6/10 (Hard Shell) <1% 14 mi (Hosp) Class A/C/Towable
3. Plomosa Road, AZ 9/10 (Paved/Dirt) <1% 35 mi (Hosp) Big Rigs
4. Badlands Wall, SD 7/10 (Dry Clay) <2% 8 mi (Clinic) Class B/C
5. Lone Rock, UT 5/10 (Upper Lot) <3% 15 mi (Hosp) All (Upper Lot Only)
6. Valley of the Gods, UT 7/10 (Gravel) <2% 45 mi (Hosp) All Classes
7. Goosenecks State Park, UT 9/10 (Gravel Rim) <1% 30 mi (Clinic) All Classes
8. Peg Leg Smith, CA 9/10 (Hard-Pack) <1% 8 mi (Clinic) All Classes
9. Craggy Wash, AZ 8/10 (Gravel) <3% 10 mi (Hosp) Class A/C/Towable
10. The Bend, UT 8/10 (Salt/Gravel) <1% 5 mi (Clinic) All Classes


Ground Firmness Comparison

Top 10 Accessible Boondocking Spots

Alabama Hills National Scenic Area

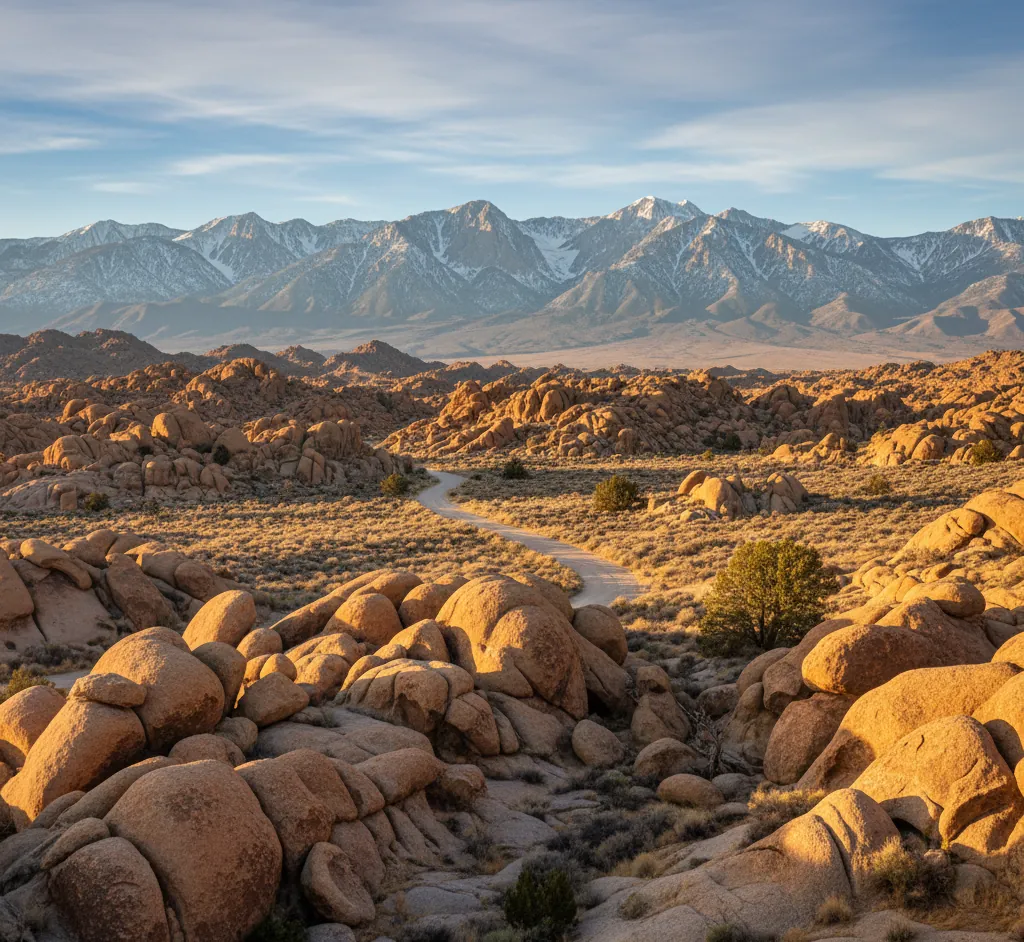
1. Alabama Hills National Scenic Area, California

🏥 4 Miles to ER (Lone Pine)
♿ Firmness: 8/10
📶 Signal: 3/5 (LTE)

The Vibe: This is the crown jewel of accessible boondocking. You camp among rounded granite boulders that look like a movie set (because they were), with the jagged, snow-capped Sierra Nevada mountains towering immediately behind them.

Accessibility Notes: The primary dispersed camping areas off Movie Road are composed of decomposed granite. This surface packs down almost as hard as concrete, making it exceptionally easy to roll a wheelchair or use a walker without sinking. The sites are wide, flat, and clearly defined.

⚠️ Expert Insight: Do not blindly follow GPS down the side trails, which can turn into soft sand washes. Stick to the designated flat pull-outs on Movie Road. Arrive before 3:00 PM on weekdays to secure a spot with western exposure; this ensures you can watch the “Alpenglow” (sunset turning the mountains pink) directly from your windshield without leaving your captain’s chair.

Magnolia Beach, Texas

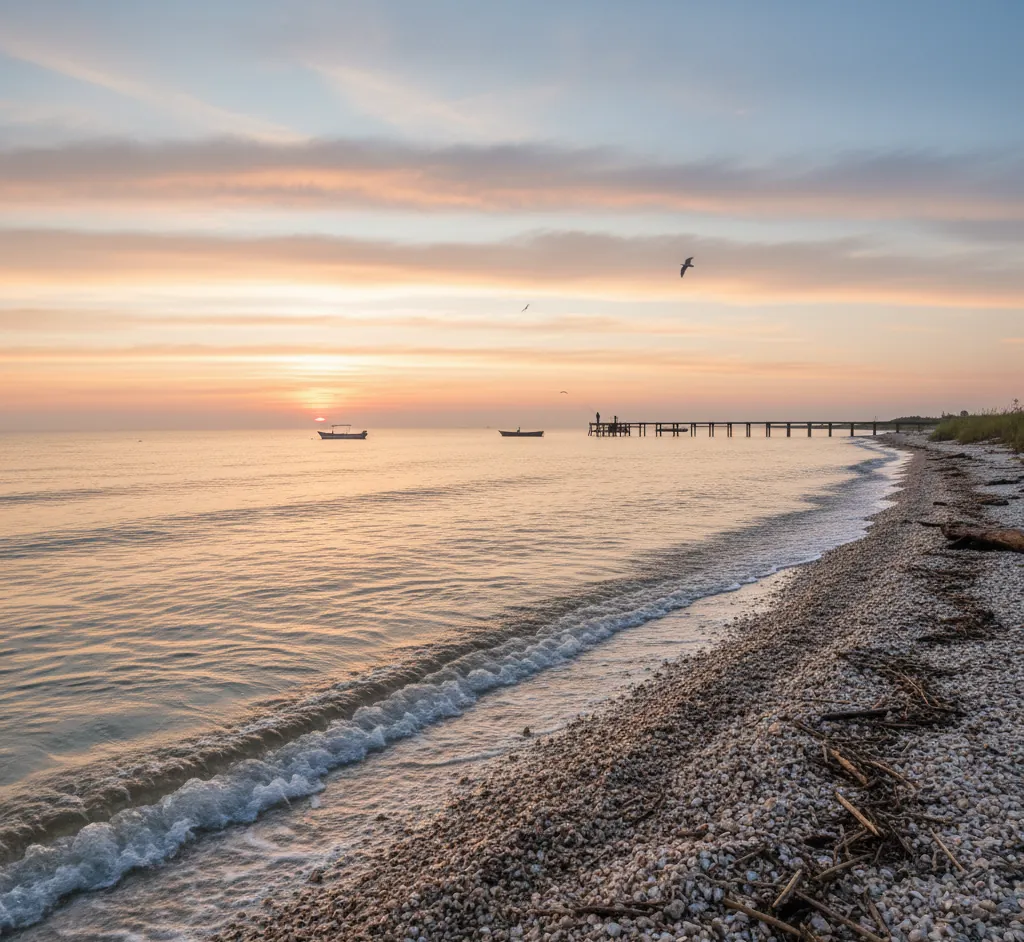
2. Magnolia Beach, Texas

🏥 14 Miles to Hospital (Port Lavaca)
♿ Firmness: 6/10
📶 Signal: 4/5 (LTE/5G)

The Vibe: A rare gem on the Gulf Coast where the “sand” is actually a crushed oyster shell mix that forms a hardpan surface. This allows even heavy Class A diesel pushers to park within 20 feet of the crashing waves safely.

Accessibility Notes: The beach is essentially a 1.5-mile long, flat road. There is zero incline, which is perfect for stability. However, the salt spray is significant, so those with respiratory issues sensitive to humidity should take note.

⚠️ Expert Insight: While the main shelf is hard (Firmness 6/10), the intertidal zone is soft (2/10). Park at least 30 feet back from the water line. If you use a cane or walker, stick to the light-grey crushed shell areas; avoid the darker, wet sand. Pro-tip: Use a heavy duty outdoor mat to create a clean transition space from the shell surface into your RV.

Plomosa Road, Quartzsite, Arizona

3. Plomosa Road, Quartzsite, Arizona

🏥 6 Miles to Urgent Care
♿ Firmness: 9/10
📶 Signal: 5/5 (5G)

The Vibe: The social capital of the snowbird world. While it lacks trees, it offers endless horizons and the best winter weather in the country. It is paved for several miles north of town, with hard-packed “desert pavement” pull-offs.

Accessibility Notes: This receives our highest firmness rating (9/10). The ground is rock-hard desert floor, meaning jacks won’t sink, and mobility scooters can travel for miles without resistance. It is also incredibly level, requiring few to no leveling blocks.

⚠️ Expert Insight: The sheer openness makes this spot windy. If you have mobility issues that affect your balance, orient your RV nose-into the wind (usually North/South) to minimize rocking. The proximity to Quartzsite means you are minutes away from RV mobile mechanics, a huge plus for seniors who may not be able to perform their own repairs.

Badlands Overlook ("The Wall"), South Dakota

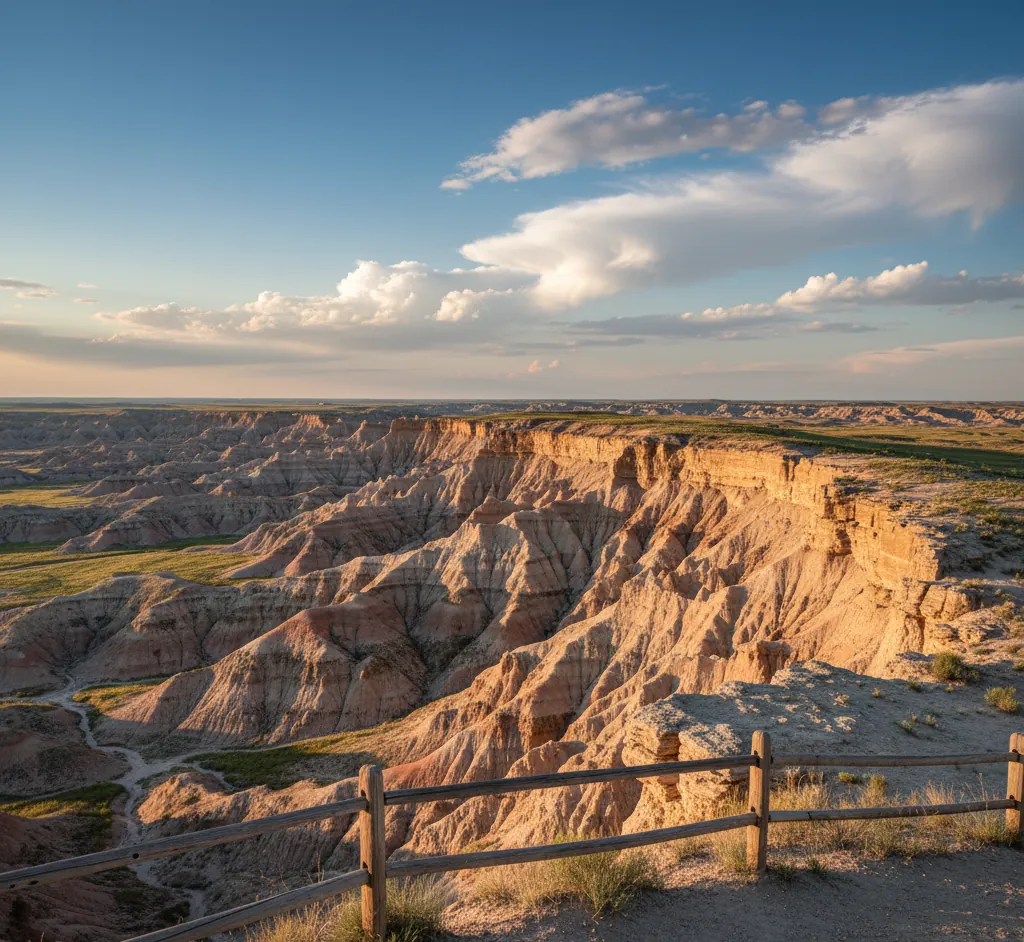
4. Badlands Overlook (“The Wall”), South Dakota

🏥 8 Miles to Clinic
♿ Firmness: 7/10 (Dry Only)
📶 Signal: 3/5 (LTE)

The Vibe: Perched on a grassy rim looking down into the alien spires of Badlands National Park. You get the National Park view for free, without the crowds or the admission fee.

Accessibility Notes: The sites are grassy and flat. The view is visible instantly—pull up parallel to the rim, open your blinds, and you have a world-class vista.

⚠️ Expert Insight: Weather Warning: The soil here is bentonite clay. When dry, it is a solid 7/10. If it rains even a quarter inch, it becomes “gumbo” mud (1/10 firmness) that will trap even a 4WD vehicle. Do not park here if rain is in the 48-hour forecast. If dry, it is one of the most accessible, high-reward views in America.

Lone Rock Beach, Utah

5. Lone Rock Beach, Utah

🏥 15 Miles to Hospital (Page, AZ)
♿ Firmness: 5/10 (Variable)
📶 Signal: 4/5 (LTE)

The Vibe: Camping on the shores of Lake Powell with the massive Lone Rock monolith towering in front of you. It feels like camping on the moon, but with a swimmable lake.

Accessibility Notes: This location has two zones. The shoreline is deep sand (high risk). However, the upper parking areas and paved loop offer hard-packed gravel with elevated views of the water. Accessible bathrooms are available in the parking area.

⚠️ Expert Insight: For an accessible experience, stay in the upper fenced scenic loops. Do not attempt to drive down to the water’s edge unless you have a very capable off-road vehicle and recovery gear. The upper lot offers the “Windshield View” safely and puts you closer to the paved exit for quick medical access in Page, AZ.

Valley of the Gods, Utah

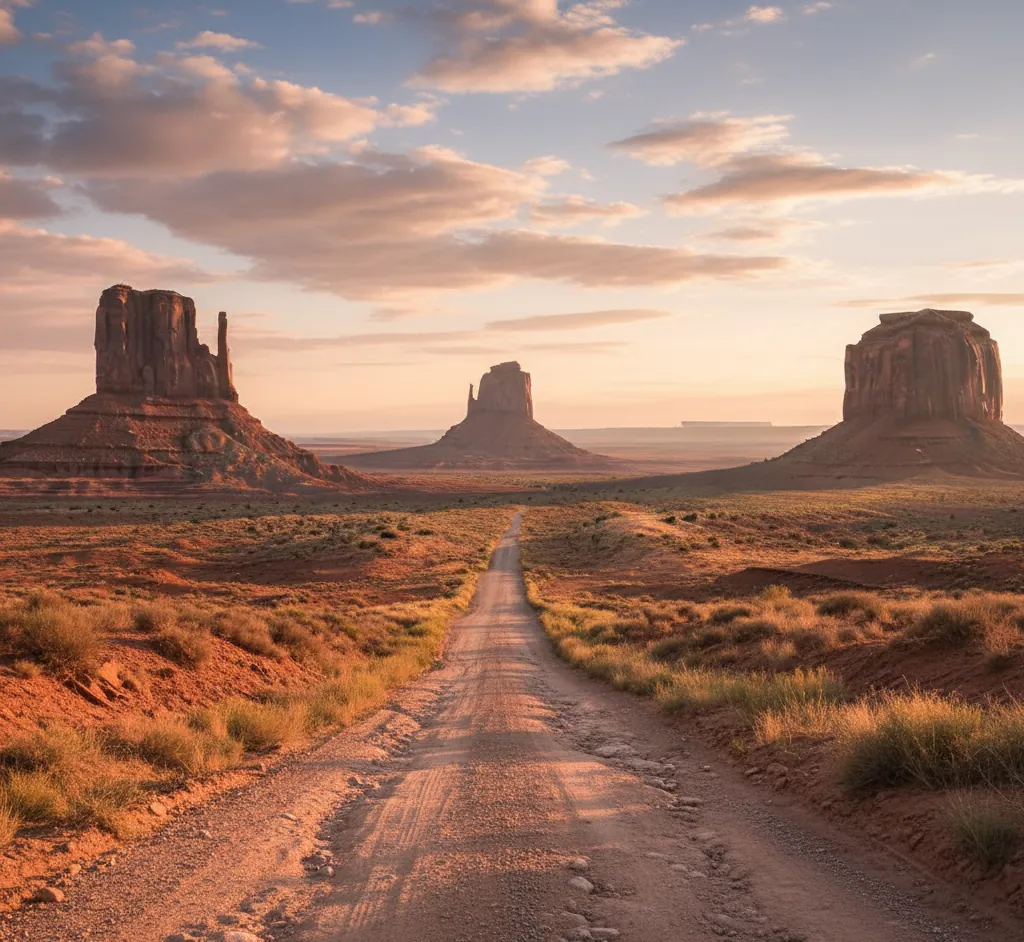
6. Valley of the Gods, Utah

🏥 45 Miles to Hospital (Blanding)
♿ Firmness: 7/10 (Gravel)
📶 Signal: 2/5 (Spotty LTE)

The Vibe: Often called “Monument Valley without the crowds.” The 17-mile loop winds through towering red sandstone monoliths. The scenery is dramatic and prehistoric, offering complete isolation.

Accessibility Notes: The sites themselves are essentially flat gravel pull-outs (7/10 firmness). However, getting to them requires driving the graded gravel loop.

⚠️ Expert Insight: Vibration Warning: While flat, the road is famous for “washboarding” (severe corrugation). This causes intense vibration which can be painful for travelers with chronic back pain or spinal issues. Drive at 5 MPH to mitigate this. Avoid this location entirely during monsoon season (July–August) as washes can flash flood.

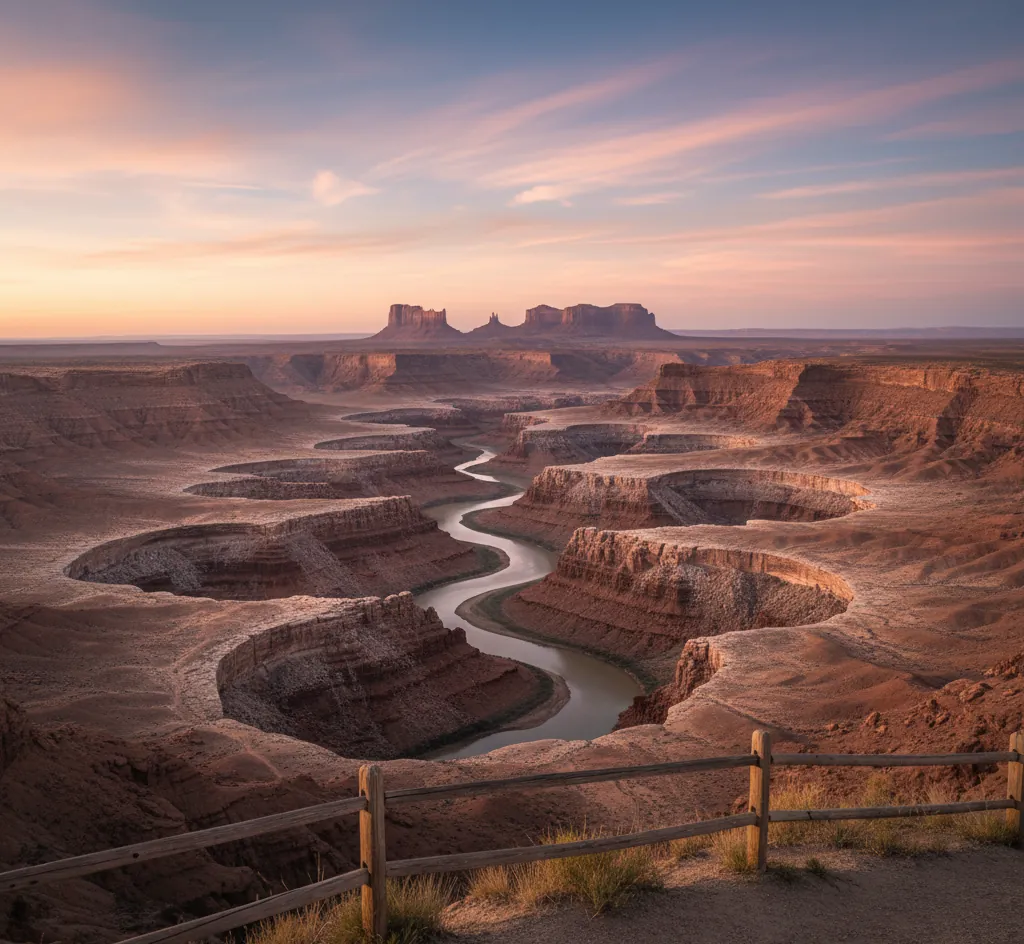
Goosenecks State Park, Utah

7. Goosenecks State Park, Utah

🏥 30 Miles to Clinic (Mexican Hat)
♿ Firmness: 9/10 (Gravel Rim)
📶 Signal: 3/5 (LTE)

The Vibe: You park literally feet from the edge of a 1,000-foot drop, looking down at the San Juan River twisting in “gooseneck” loops. Technically a primitive park (small fee), it functions like boondocking (no hookups) but offers a world-class view.

Accessibility Notes: This receives a rare 9/10 firmness rating. The entire rim parking area is extremely hard-packed gravel/dirt. There is no guardrail at the overlook, and the rim drops roughly 1,000 feet. Wheelchair users and travelers with balance limitations should remain well back from the unfenced edge and use extra caution on uneven ground.

⚠️ Expert Insight: There is zero shade here. For those with heat sensitivity, this is strictly a Spring/Fall location. The wind creates a “wind tunnel” effect up the canyon wall—secure your awning immediately upon parking or you will lose it.

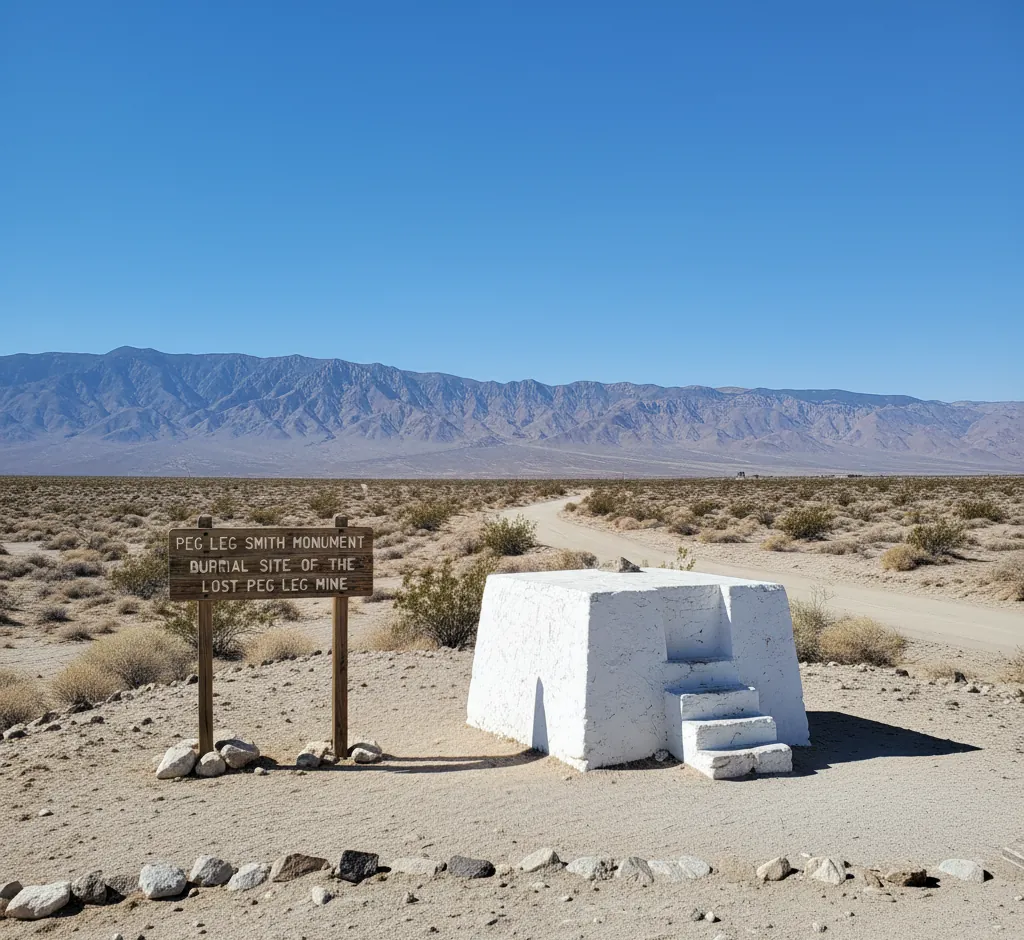
Peg Leg Smith Monument, California

8. Peg Leg Smith Monument, California

🏥 8 Miles to Clinic (Borrego)
♿ Firmness: 9/10 (Hard-Pack)
📶 Signal: 4/5 (LTE)

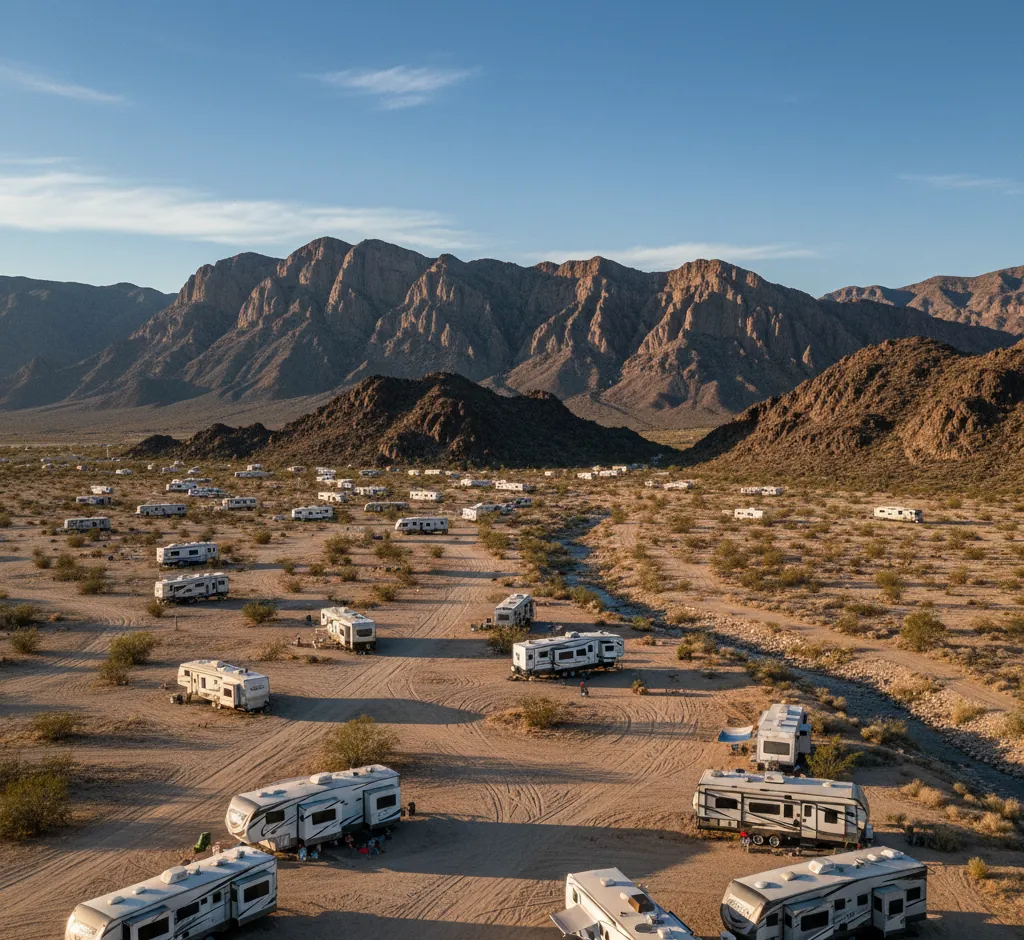
The Vibe: Located near Anza-Borrego Desert State Park, this dispersed area is a haven for solo seniors and snowbirds. It is wide open, safe, and quiet, with views of the Santa Rosa Mountains.

Accessibility Notes: The terrain is classic “desert pavement”—interlocking pebbles that create a surface almost as hard as asphalt. It is one of the easiest places in the country to level an RV.

⚠️ Expert Insight: This spot scores high for Community Safety. Because it is popular with long-term senior boondockers, there is an unofficial “neighborhood watch” vibe. If you have a medical emergency, neighbors are usually close enough to help, unlike deeper desert isolation.

Craggy Wash, Arizona

9. Craggy Wash, Arizona

🏥 10 Miles to Hospital (Lake Havasu)
♿ Firmness: 8/10 (Gravel)
📶 Signal: 5/5 (5G)

The Vibe: A canyon setting just north of Lake Havasu City. It offers protection from the wind and a sense of seclusion while being very close to a Super Walmart and a major regional hospital.

Accessibility Notes: The ground is firm gravel. However, the canyon narrows the further back you go, making turning around difficult for large rigs.

⚠️ Expert Insight: Stay in the first 0.5 miles. The entrance area has the widest, flattest spots suitable for mobility vans and Class As. Beyond the first half-mile, the road gets rockier and uneven, dropping the accessibility rating to a 4/10.

"The Bend" (Bonneville Salt Flats), Utah

10. “The Bend” (Bonneville Salt Flats), Utah

🏥 5 Miles to Clinic (Wendover)
♿ Firmness: 8/10 (Salt/Gravel)
📶 Signal: 5/5 (5G)

The Vibe: Overlooking the surreal, white expanse of the Salt Flats. While camping on the salt crust is often prohibited or wet, the BLM land on the “bench” above (near Leppy Pass) offers a stable vantage point.

Accessibility Notes: Paved road access leads almost directly to the camping spots. The contrast of white salt against blue sky is visible from the windshield, offering one of the most unique views in the West.

⚠️ Expert Insight: Glare Warning: The white salt reflects intense sunlight. Travelers with cataracts or light sensitivity must ensure they have high-quality sunglasses and windshield shades. The glare can be blinding by midday.

Frequently Asked Questions

What is the difference between “Accessible” and “ADA Compliant” in boondocking?
Boondocking on public land is rarely “ADA Compliant” in the legal sense (paved paths, grab bars). In this guide, “Accessible” refers to environmental mechanics: firm ground that supports wheels, level grades that prevent falls, and open space that allows for ramp deployment (RVAccessibilityProject, 2024).
How do I verify cell signal for medical devices?
Never rely on “average” coverage maps. Use apps like CellMapper to check the specific tower locations near these coordinates. For those relying on CPAP or oxygen concentrators, ensure you have a redundant power source (portable power station), as these dispersed sites do not have electric hookups.
Are these spots safe for solo seniors?
Spots like Plomosa Road (Spot #3) and Peg Leg Smith (Spot #8) are high-density areas where you will have neighbors within shouting distance. Valley of the Gods (Spot #6) is much more isolated; we recommend carrying a satellite messenger (like Garmin inReach) if traveling there alone.


DIY vs. Certified RV Inspection

DIY vs. Certified RV Inspection

When to Hire a Pro (and My 35-Year “Expert DIY” Checklist)

By Chuck Price • Boondock or Bust • Updated 2025

Compare DIY and professional inspections
Assess a fair inspection price

Cindy and I were scrolling through a Facebook RV group one night when a post exploded: “Is $800 a fair price for a pre-purchase inspection?” Half the comments said it was highway robbery; the rest swore it was cheap insurance against buying a lemon.After 25 years of crawling across roofs, checking seals, sniffing for propane leaks, and refining a DIY process we trust, I’ve never hired a certified inspector—because I haven’t needed to. Most buyers don’t have that background, and that’s where professional inspectors come in.

Why RV Inspection Prices Vary So Much

RV inspections aren’t cookie-cutter. A 20-foot travel trailer might take a few hours; a 43-foot diesel pusher can swallow a full day. Price is driven by:

  • Rig type & complexity: More slides, appliances, & systems = more hours.
  • Location & travel: Mobile inspectors often charge mileage/time.
  • Inspection scope: “Basic” (life-safety & major systems) vs “premium” (roof-to-chassis, deeper testing).
  • Reporting time: Many certified inspectors spend ~8 hours on-site and up to ~10 hours on a photo-rich report.
Reality check: Those dense PDF reports (often dozens of pages) become your negotiating tool if problems appear.

What You’re Actually Paying For

A solid inspection is a structured evaluation—not just “flip some switches.” Value scales with scope, time, tools, and credentials.

Inspection Type What You Get Typical Range (2025) Best For
DIY (Beginner) Quick visual scan—roof condition, tires, visible leaks Free Screening multiple RVs quickly in a day
DIY (Experienced) Structured checklist across roof, seals, electrical, LP lines, moisture hot-spots Free Owners with mechanical aptitude and ladder confidence
Basic Professional Life-safety and major systems tested; summary report ≈ $700–$900 Late-model travel trailers or simple Class C
Premium Certified Deep-dive: ~8 hrs on-site + robust photo report (fluid analysis optional) ≈ $1,200–$1,800+ Used Class A/B/C, complex rigs, or first-time buyers

Tools matter: moisture meters, borescopes, propane pressure gauges, IR thermometers, and more. You’re also paying for trained eyes that spot soft floors, early delamination, and electrical heat signatures. For a feel of real-world upkeep (and why inspections catch money pits early), read
The Real Costs of Class B RV Maintenance.


DIY vs Certified Inspection: When Experience Saves Money (and When It Doesn’t)

Our DIY process catches a lot—because we’ve done it for decades. If you’re handy and comfortable on a ladder, a structured DIY can spot 70–80% of issues and teach you your rig.

My 25-Year “Expert DIY” Checklist (What I Look For)

  • The Roof (The Deal-Breaker): Hands-and-knees check of every inch of sealant around vents, AC, cap seams; watch for chalking and soft spots.
  • Water Intrusion (The Killer): Open cabinets, look for stains, smell for mildew; push on floors at slide corners and along walls.
  • Systems (The Gut Check): Run everything—fridge on gas and electric, water heater, furnace, AC. Does it just turn on, or does it perform to spec?
  • Electrical & LP: GFCIs trip/recover; test detectors (LP, CO, smoke); look for scorched wires at the converter.
  • Tires & Chassis: Date codes (not just tread), sidewall cracks, uneven wear; suspension bushings and visible frame rust.

High-Tech Tool

Where the Pro Finds What I Might Miss

  • Moisture mapping: My hands feel soft spots; a pro’s meter proves it and shows how far damage spreads.
  • Electrical forensics: I can see if an outlet works; a circuit analyzer flags reverse polarity or bad grounds.
  • Thermal imaging: No, they don’t have X-ray eyes—but a thermal camera can reveal hot converters, overloaded circuits, or hidden leaks.
  • LP manometer tests: A proper pressure/leak-down test beats “smell check” guesses every time.
DIY helpers: Before any trip, use our
Pre-Trip Checklist
and our free planning toolkit,
The Complete RV & Vanlife Planner.

If you’re earlier in the journey (or eyeing used rigs), these buyer-savvy reads help you frame risk and reality:


Why a Premium Inspection Takes 18 Hours (and Why the Report Is the Most Valuable Part)

The 8-Hour On-Site Inspection: Beyond “Kicking the Tires”

Premium inspections follow rigorous standards—think hundreds of checkpoints. It’s not a switch-flip tour: it’s structured testing with tools. Moisture meters (the #1 RV killer is water), thermal imagers (to spot hot electrical runs), borescopes (inside hard-to-see cavities), and manometers (to pressure-test propane) all take time—and produce evidence.

De-Bunking the “10-Hour Report”: It’s Not a Write-Up—It’s Your Battle Plan

“Ten hours to write a report?” The report isn’t typing—it’s data compilation. Expect:

  • Dozens to hundreds of photos: Roof, seals, undercarriage, appliance serials, issue close-ups.
  • Color-coded prioritization: Life-safety (Red), Major repairs (Orange), Maintenance (Yellow).
  • Performance notes & verification: Not just that something turned on—how it performed.
Negotiation power: A 60–100 page PDF turns “firm price” into “let’s talk” when it documents soft roof sections, a failing AC, and an overheating converter—precisely the leverage buyers in our FB thread wanted.

And when you do buy, that same report becomes your maintenance roadmap for the next few years—far more usable than a generic owner’s manual.


An Inspection Isn’t a Pass/Fail Test—It’s a Reality Check

One skeptic said, “If someone spends 8 hours looking at a camper, you’re never going to buy one. They all have problems.” He’s right about one thing: they all have problems. Even brand-new, six-figure motorhomes roll off the lot with issues.

The point of an inspection isn’t to earn a “Pass.” The point is to get a list—and make a smart decision:

  • Ask the seller to fix the red/orange items, or
  • Negotiate the repair amount off the price, or
  • Walk away—saving yourself from a budget-breaking lemon.

How to Decide What’s a Fair Price for Your RV

A fair inspection price depends on your situation:

  1. RV value & age: Older/costlier rigs increase inspection ROI.
  2. Scope: Roof-to-chassis? Fluid analysis on motorized units?
  3. Credentials: Training and liability coverage add real value.
  4. Location: Urban markets and travel distance affect fees.
  5. Risk tolerance: If uncertainty ruins your sleep, buy peace of mind.
Quick math—Is it “fair” for you?
Repair-risk ratio = Estimated hidden repair ($) ÷ Inspection fee ($)
If > 4 → Strong value. If < 2 → Consider DIY first, then reassess.

Want to sanity-check broader budget planning? Start here:
How Much Does Boondocking Really Cost?


FAQ: RV Inspection Pricing & Value

Do certified inspectors guarantee their work?
No. You’re purchasing a detailed report and expert judgment—not a warranty. Quality pros carry liability insurance and will clarify disputed items.
Why do RV inspections sometimes cost more than home inspections?
An RV is a house + vehicle + plumbing + electrical system, all in one. More systems to test = more time.
Should I add a fluid analysis?
For any used motorhome or tow vehicle, yes—it’s one of the best ways to detect internal engine or transmission wear before a breakdown.
How often should I re-inspect my RV?
Every two years or after prolonged storage—so you catch slow-burn issues before they get expensive.

New to upkeep? Start with our hub:
RV Maintenance & Safety.


Bottom Line

A fair inspection price isn’t a number—it’s a ratio between knowledge and risk. If you lack the experience to judge a roof patch from a cosmetic scratch, hire it out. If you’ve got the know-how (and tolerance for risk), DIY can work—and you’ll learn your rig.

Just don’t let a few hundred bucks decide the fate of a $50,000 dream rig.

Next steps:

Article URL: https://boondockorbust.com/rv-inspection-cost-guide/


Wildlife Safety Tips for Boondocking: Staying Safe and Aware in the Great Outdoors

Wildlife Safety Tips for Boondocking: Staying Safe and Aware in the Great Outdoors

The 3-Zone Wildlife Safety System: A Boondocker’s Guide

One of the greatest rewards of RV boondocking is the deep connection to nature—the unfiltered night skies, the silence, and the thrill of seeing wildlife in its natural habitat. But that freedom comes with the responsibility of being a safe, respectful guest. When you leave the managed campground, you leave its buffer zone behind. You are now sharing space with bears, moose, mountain lions, and other wildlife.

For new boondockers, this can be a source of anxiety. For veterans, it’s a skill that needs refreshing. This guide provides a clear, proactive mental model for managing wildlife encounters: The 3-Zone Wildlife Safety System. Instead of a random list of tips, we’ll organize all advice into three distinct contexts: your campsite, the trail, and a direct encounter.

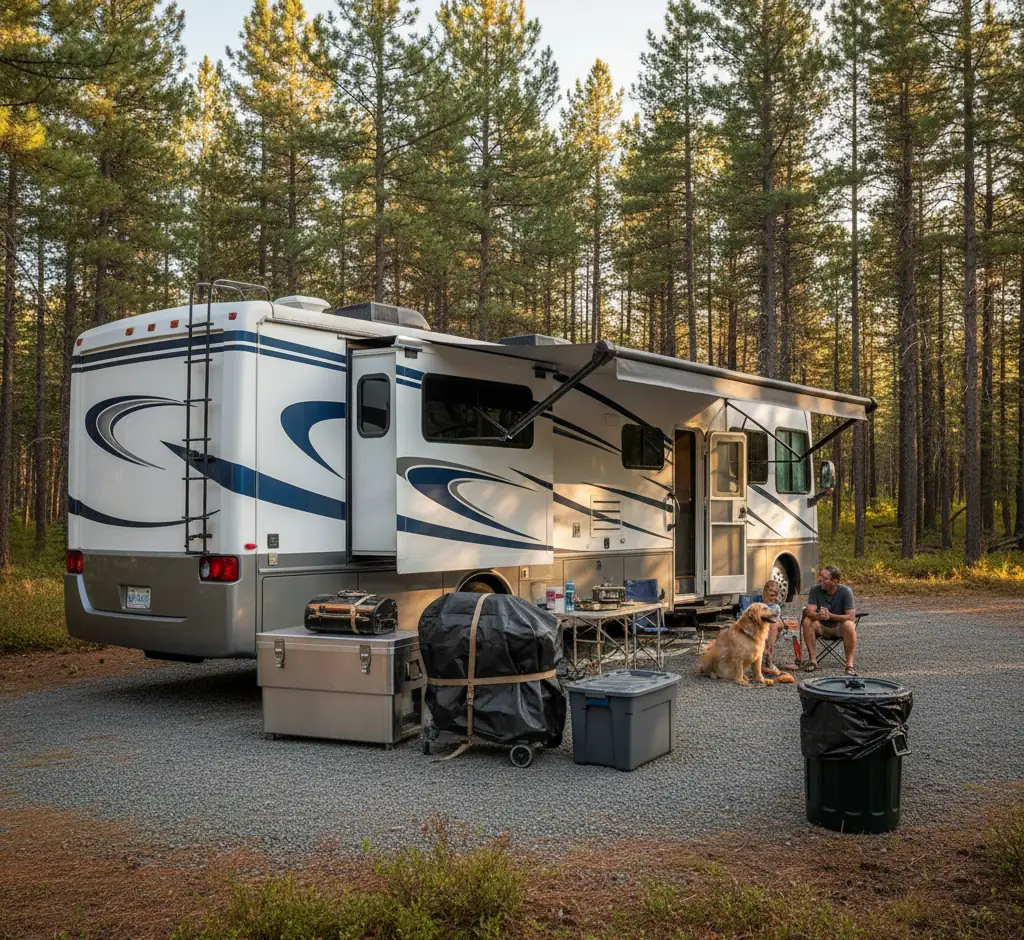
RV campsite with dog and owner

Zone 1: Securing Your RV Campsite (Prevention)

Your RV campsite is your first and most important line of defense against unwanted wildlife encounters. Securing “Zone 1” is about making your site uninteresting and unrewarding for animals, particularly bears, raccoons, and rodents. A “clean camp” is the single most effective way to prevent a negative interaction.

Food Storage: Your Hard-Sided Advantage

Your hard-sided RV is a significant advantage over a tent. Use it. Never store food, coolers, scented toiletries (like toothpaste or soap), or pet food outside or in unlocked compartments. While a hard-sided RV is highly resistant, it’s not 100% “bear-proof” if a bear is determined and rewarded. The goal is to never let it get that far. All food items should be stored inside your main living area when you are sleeping or away from your rig.

Managing Outdoor Kitchens and Grills

Boondocking often involves cooking outdoors. After using a grill or camp stove, burn off all food residue until it turns to white ash. Clean all pots, pans, and utensils immediately after use. Do not dump greasy cooking water on the ground. Instead, wipe items with a paper towel (and pack it out with your trash) or use a “sump” system to collect gray water in a portable tank.

Trash and Wastewater Discipline

Pack it in, pack it out. This is a core principle of Leave No Trace (Leave No Trace Center, 2023). Your trash is a powerful wildlife attractant. Store all trash, even small wrappers, inside your RV, preferably in a sealed, odor-proof bag or container. Never leave a trash bag sitting outside, even for a few minutes. Plan to pack your trash out with you or dispose of it *only* in designated, wildlife-proof dumpsters.

Zone 2: Staying Aware on the Trail (Awareness)

When you leave your RV to hike, bike, or explore, you enter “Zone 2”. Here, the strategy shifts from passive prevention to active awareness. You are now in the animal’s home, and the primary goal is to ensure they know you are coming so you don’t surprise them.

Be Heard: The Value of Noise

Most wildlife wants to avoid you as much as you want to avoid them. A surprised animal is a defensive animal (U.S. Forest Service, 2023). Make noise while you hike. Talk to your companions, sing, or call out “Hey, bear!” every few minutes, especially when rounding blind corners or walking near loud, running water. Bear bells are generally considered ineffective, as their high-pitched jingle doesn’t travel far and is not perceived as a human threat (NPS, 2023).

Carrying and Knowing How to Use Bear Spray

In bear country (which includes black, grizzly, and polar bears), bear spray is a non-negotiable safety tool. It is statistically more effective at stopping an aggressive bear than a firearm (U.S. Fish & Wildlife Service, 2022). Carry the spray in a holster on your hip or chest strap, not in your backpack. Practice removing the safety clip and drawing it. Read the instructions and understand its effective range (typically 25-30 feet) and spray duration. Check the expiration date before you head out.

Identifying Fresh Wildlife Signs

Be an active observer. Look for signs of wildlife activity. Fresh tracks in the mud, partially eaten berries, or large piles of scat are all indicators that an animal is nearby. If you see very fresh signs, consider altering your route. Do not approach or investigate large, partially consumed animal carcasses, as this is a “food cache” that a predator, like a bear or lion, will aggressively defend.

A Critical Note on Pet Safety (Zone 1 & 2)

Managing a pet while boondocking requires extra vigilance. A dog can be both a deterrent and a powerful attractant for wildlife. Mountain lions are known to be attracted to dogs, while a barking dog can provoke a defensive charge from a bear or moose.

Follow these explicit rules:

  • Never leave a pet tied up outside your RV. This makes them a vulnerable, “baited” target.
  • Keep your dog leashed at all times when outside the RV. This applies to both the campsite and the trail.
  • Feed your pet inside the RV. Do not leave pet food bowls outside, as this is a major attractant for raccoons, coyotes, and bears.
  • Be aware of their barking. If your dog starts barking at something you can’t see, take it seriously. Bring them inside and scan the area.

Zone 3: The Encounter—A Calm Response Guide

This is the scenario everyone fears, but it’s the least likely if you’ve properly managed Zones 1 and 2. If you do have a direct encounter, your response must be calm, deliberate, and specific to the animal. Panic is your worst enemy. The primary goal in almost all encounters is to de-escalate the situation and show the animal that you are not a threat (or, in rare cases, that you are too dangerous to attack).

General Rules for All Encounters

Do not run. Running triggers a predator’s chase instinct (NPS, 2023). Do not feed the animal. Keep your children and pets close. Ready your bear spray if you have it.

Wildlife Encounter Quick-Reference Guide

Source: Compiled from guidelines by the National Park Service and U.S. Fish & Wildlife Service[cite: 33, 35].
Animal What to Do (De-escalate) What NOT to Do (Provoke)
Black Bear
  • Stand your ground.
  • Make yourself look large (wave arms).
  • Make loud noises (yell, bang pots).
  • Slowly back away if the bear does not advance.
  • If it attacks (rare), fight back aggressively.
  • Do NOT run.
  • Do NOT climb a tree.
  • Do NOT “play dead.”
  • Do NOT make eye contact.
Grizzly/Brown Bear
  • Stand your ground.
  • Speak in a calm, low voice.
  • Slowly back away.
  • If it charges, use bear spray.
  • If it makes contact (defensive attack), play dead. Lie on your stomach, protect your neck.
  • Do NOT run.
  • Do NOT yell or make loud noises.
  • Do NOT make eye contact.
  • Do NOT fight back (unless the attack persists, then fight).
Mountain Lion / Cougar
  • Make yourself look large; open your jacket.
  • Maintain eye contact.
  • Speak firmly and loudly.
  • Pick up small children.
  • Back away slowly.
  • If it attacks, fight back aggressively.
  • Do NOT run.
  • Do NOT crouch or bend over.
  • Do NOT “play dead.”
  • Do NOT turn your back.
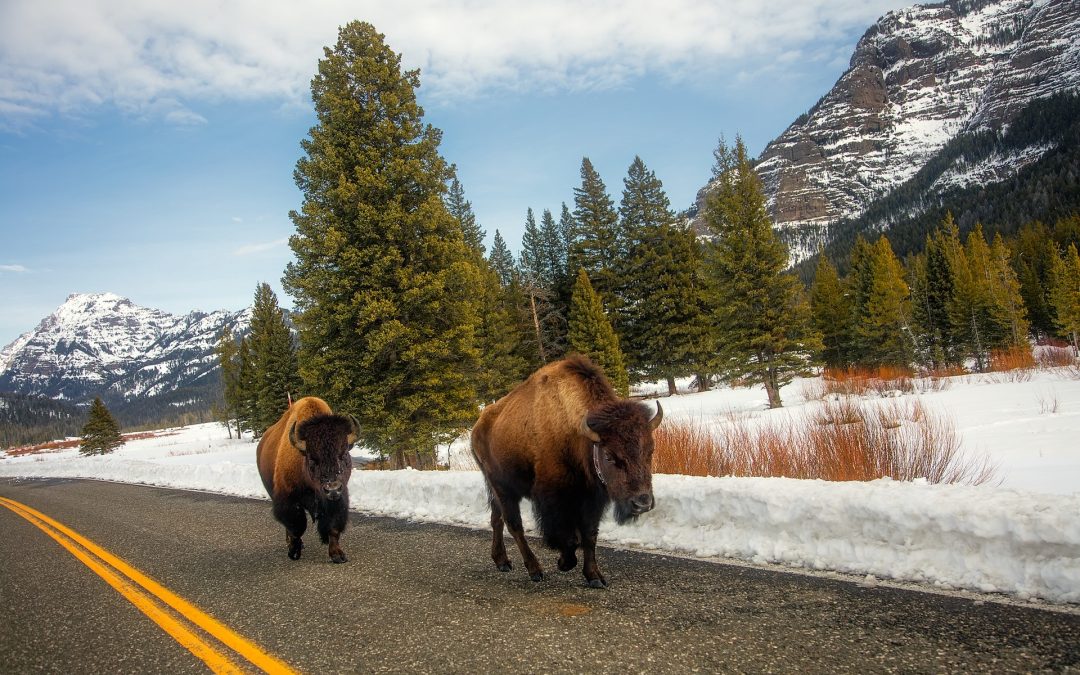
Moose / Elk / Bison
  • These are herbivores but are extremely dangerous and defensive.
  • Give them a lot of space (at least 75 feet / 25 yards).
  • Watch for signs of agitation (pinned ears, pawing ground).
  • Back away slowly.
  • If they charge, get behind a large tree or rock.
  • Do NOT approach for a photo.
  • Do NOT stand your ground.
  • Do NOT get between a mother and her calf.
Venomous Snakes
  • Stop moving immediately.
  • Visually locate the snake.
  • Slowly back away and give it a wide berth.
  • Warn others on the trail.
  • Do NOT try to handle or move the snake.
  • Do NOT try to step over it.
  • Do NOT poke it with a stick.

Frequently Asked Questions

Is my hard-sided RV “bear-proof”?

A hard-sided RV is highly bear-resistant, but no container is 100% “bear-proof” if a bear is sufficiently motivated by a food reward (NPS, 2023). The term “bear-proof” usually refers to containers that have passed formal testing. Your RV is a safe place to store food, but only if you practice clean camping (Zone 1) and don’t give a bear a reason to test its limits.

Do I really need bear spray if I’m not in grizzly country?

Bear spray is highly recommended even in black bear country. While black bears are generally less aggressive than grizzlies, a defensive mother bear or a bear that has been habituated to human food can be dangerous. Bear spray is a proven, effective, non-lethal deterrent that provides peace of mind on the trail (U.S. Fish & Wildlife Service, 2022).

What about snakes and ticks?

For snakes, the best defense is awareness. Wear sturdy, over-the-ankle boots and be mindful of where you step, especially in rocky or brushy areas. For ticks (which carry diseases), use an EPA-registered insect repellent, wear light-colored clothing, and perform a full-body “tick check” on yourself and your pets after every hike (CDC, 2023).

Can I use a firearm for protection?

Firearm laws vary dramatically between national forests, BLM land, and state lands. It is your responsibility to know the law for where you are camping. That said, most wildlife agencies, including the U.S. Fish & Wildlife Service, recommend bear spray as the primary deterrent. It is easier to deploy, more effective at stopping a charge, and does not permanently harm the animal, which avoids a potentially dangerous escalation.

FAQs

Q1. What is boondocking?
A1. Boondocking is a type of camping that involves staying in remote areas without access to amenities such as electricity, water, and sewage hookups. It is also known as dry camping or off-grid camping.

Q2. What are some potential dangers of interacting with wildlife while boondocking?
A2. Some potential dangers of interacting with wildlife while boondocking include bear attacks, snake bites, and tick-borne diseases. It is important to take precautions to ensure your safety and the safety of the animals around you.

Q3. What gear and supplies should I bring to ensure wildlife safety while boondocking?
A3. To ensure wildlife safety while boondocking, it is important to bring essential gear and supplies such as bear spray, a first-aid kit, appropriate clothing, non-perishable and easy-to-prepare food, and anything that can help store food properly and dispose of waste responsibly.

Q4. How can I avoid wildlife encounters while boondocking?
A4. Strategies for avoiding wildlife encounters while boondocking include understanding and respecting animal habitats and territory, making noise to alert animals to your presence, sticking to established trails, carrying bear spray, and not approaching wild animals.

Q5. What should I do if I encounter wildlife while boondocking?
A5. If you encounter wildlife while boondocking, it is important to respond safely and appropriately. For example, if you come across a bear, it’s important to back away slowly and avoid making direct eye contact. In case of a snake bite, seek medical attention immediately. It is also essential to know what to do in case of an emergency situation, such as how to perform CPR or call for help.

Conclusion

In conclusion, boondocking with wildlife can be an incredibly fulfilling experience, but it also requires a great deal of responsibility and preparation. Understanding the wildlife, preparing for boondocking with wildlife, using techniques for avoiding wildlife encounters, and knowing how to respond to wildlife encounters are essential to staying safe while boondocking. By following these guidelines, you can have a safe and enjoyable boondocking experience while respecting and protecting

Resources

  1. National Park Service – Wildlife Safety: This comprehensive resource from the National Park Service provides essential tips and guidelines for staying safe around wildlife in national parks and other natural areas. (https://www.nps.gov/subjects/wildlife-safety/index.htm)
  2. Centers for Disease Control and Prevention – Avoiding Ticks: The CDC offers valuable information on ticks, tick-borne diseases, and how to prevent tick bites while enjoying outdoor activities, including boondocking. (https://www.cdc.gov/ticks/avoid/index.html)
  3. REI Co-op – Bear Safety in the Backcountry: REI’s expert advice on bear safety includes essential information on how to avoid bear encounters, properly store food, and use bear spray effectively while camping or boondocking in bear country. (https://www.rei.com/learn/expert-advice/bear-safety.html)
  4. Leave No Trace Center for Outdoor Ethics – Wildlife Encounters: This resource from the Leave No Trace Center for Outdoor Ethics provides guidelines on how to minimize the impact on wildlife and their habitats while enjoying outdoor activities, such as boondocking, hiking, and camping. (https://lnt.org/why/7-principles/wildlife/)
  5. North American Nature – Wildlife Safety Tips for Campers: North American Nature offers a comprehensive guide on wildlife safety tips for campers, covering various wildlife species and how to handle encounters responsibly and safely. (https://northamericannature.com/wildlife-safety-tips-for-campers/)

Featured Image by David Mark from Pixabay

Delicious and Easy RV Camping Recipes

Delicious and Easy RV Camping Recipes

This guide provides easy RV camping recipes designed for small kitchens, focusing on one-pot wonders, make-ahead meals, and smart tips to simplify cooking on the road.

Effortless RV Cooking Guide

RV cooking can be enjoyable with the right recipes and strategies, allowing for delicious, home-cooked meals without extensive kitchen time. This guide emphasizes recipes that minimize water usage, maximize small spaces, and keep the RV cool.

The RV Kitchen Challenge & Recipe Design

RV kitchens present unique challenges:

  • Limited counter space
  • Small refrigerators
  • Need to conserve water and power (RV Share, n.d.)

Recipes are specifically designed to address these hurdles with simple techniques, minimal ingredients, and efficient cooking methods.

One-Pot Wonders: Minimal Water, Maximum Flavor

One-pot meals are ideal for RV cooking, reducing cleanup and water usage by preparing an entire meal in a single pot or pan

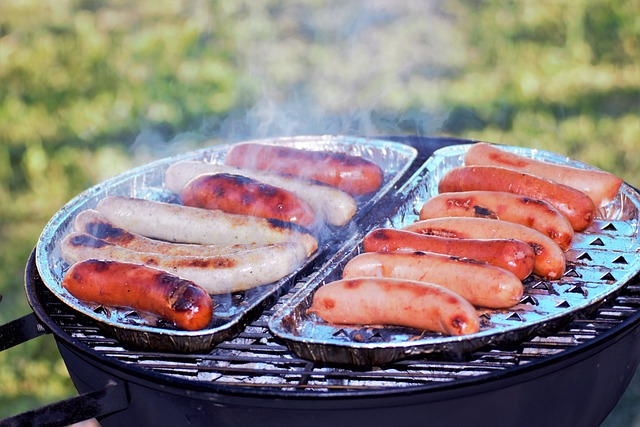
picnic lunch
Image by András from Pixabay

Quick & Hearty Breakfast Ideas

  • Hearty oatmeal with chopped apples, cinnamon, and nuts.
  • Savory breakfast skillet with potatoes, sausage, and eggs.
  • Dutch baby pancake baked in a cast iron skillet over a campfire (check campground rules).

Easy & Satisfying Lunch Solutions

  • Pasta dishes: macaroni and cheese, ramen, simple tomato pasta.
  • One-pot lentil soup (protein and fiber, minimal water).

Crowd-Pleasing & Simple Dinner Meals

  • Jambalaya, chili, beef stew.
  • Vegetarian curry with coconut milk, vegetables, and chickpeas.

Cleanup Hacks for One-Pot Meals

  • Soak the pot immediately after serving.
  • Use a silicone spatula to scrape residue.
  • Boil water with dish soap to remove stubborn stains.

Make-Ahead & Assembly-Only Meals: Conquering Limited Prep Space

These meals minimize active cooking time and cleanup in small RV kitchens.

Grab-and-Go Mornings

  • Overnight oats
  • Breakfast burritos
  • Yogurt parfaits
  • Mini quiches (baked ahead and reheated)

Effortless Mid-Day Fuel

  • Sandwich wraps with pre-cooked deli meats and veggies.
  • Salads with pre-cut ingredients.
  • Charcuterie board (cheese, crackers, fruit).
  • Pre-portioning ingredients into containers for quicker assembly.

Prep-at-Home Favorites (Snacks)

  • Trail mix
  • Energy balls
  • Veggie sticks with hummus
  • Homemade granola bars
  • Muffins

Smart Storage Solutions for Prepped Ingredients

  • Airtight containers
  • Reusable bags
  • Vacuum sealers (to maximize fridge space and prevent spoilage)
  • Clear labeling with dates to ensure first-in, first-out usage.

Pantry Powerhouses: Maximizing a Small Fridge

A well-stocked pantry is crucial for RV cooking with limited fridge space, focusing on shelf-stable ingredients.

Hearty Meals from Shelf-Stable Ingredients

  • Canned beans, rice, pasta, dried vegetables.
  • Chili, pasta e fagioli, rice and beans (customizable with spices/sauces).
  • Canned tuna or chicken for protein.

Creative Uses for Canned Goods & Dry Staples

  • Canned tomatoes: salsa, pasta sauce.
  • Canned corn: soups, salads.
  • Dry lentils: hearty lentil soup, flavorful lentil loaf.

Fridge-Friendly Produce & Smart Shopping Tips

  • Produce that stores well: carrots, celery, onions, potatoes.
  • Buy smaller quantities of perishable items to avoid waste.
  • Visit local farmers’ markets for fresh, seasonal produce.
  • Properly store fruits and vegetables to extend shelf life.

Outdoor Cooking: Keeping Your Rig Cool & Kitchen Clean

Outdoor cooking keeps heat out of the RV, expands cooking space, and enhances the camping experience.

Grill & Fire Pit Favorites

  • Grilled burgers, hot dogs, skewers.
  • Foil packet meals (easy cleanup).
  • Campfire quesadillas (tortillas, cheese, fillings).

Blackstone & Portable Cooktop Creations

  • Blackstone griddle or portable cooktop for pancakes, stir-fries, pizzas.
  • Ideal for cooking breakfast for a crowd or quick dinners.

Safety First: Outdoor Cooking Essentials

  • Keep a fire extinguisher nearby.
  • Never leave a grill or fire pit unattended (RV Fire Safety Guide).
  • Check campground rules regarding open flames.
  • Dispose of ashes properly.
  • Use heat-resistant gloves and utensils.

Essential RV Kitchen Tools & Gadgets (The Right Ones)

Equipping an RV kitchen requires tools that maximize space and efficiency, with multi-purpose items being key.

Multi-Purpose Must-Haves

  • Chef’s knife
  • Cutting board that fits over the sink
  • Nesting bowls
  • Multi-cooker (pressure cooker, slow cooker, rice cooker functions).

Space-Saving Storage Solutions

  • Collapsible colanders
  • Stackable containers
  • Magnetic spice racks
  • Over-the-door organizers
  • Hanging baskets.

Meal Planning for RV Adventures: Your Stress-Free Guide

Effective meal planning involves planning meals in advance, creating a shopping list, and prepping ingredients before travel to save time, money, and reduce frustration.

Conclusion: Enjoying Delicious Meals on Every Journey

With the right recipes, tools, and strategies, RV cooking can be a fun and rewarding experience. Embracing one-pot meals, make-ahead dishes, and outdoor cooking allows for delicious meals on every journey.

FAQs

Q1: What is RV camping?
A1: RV camping is a type of travel where people use recreational vehicles (RVs) to explore different destinations.

Q2: What are the benefits of RV camping?
A2: The benefits of RV camping include the freedom to travel at your own pace, cost-effectiveness, and the ability to bring your home with you on wheels.

Q3: What are some easy breakfast recipes for RV camping?
A3: Some easy breakfast recipes for RV camping include breakfast burritos, overnight oats, yogurt parfaits, and veggie frittatas.

Q4: What are some easy snack recipes for RV camping?
A4: Some easy snack recipes for RV camping include trail mix, homemade granola bars, popcorn, and apple slices with peanut butter.

Q5: What are some tips for RV camping cooking?
A5: Some tips for RV camping cooking include packing the right equipment, planning and preparing meals ahead of time, making the most of local ingredients, and storing and handling food safely.

Conclusion

In conclusion, cooking on the road can be a fun and easy experience with the right recipes and equipment. We hope that these delicious and easy RV camping recipes have inspired you to try new recipes and enjoy your RV camping adventures to the fullest.

Resources

  1. The Camping Cookbook: Delicious and Mostly Healthy Recipes the Whole Family Will Love by Sarah R. Shauger – https://www.amazon.com/Camping-Cookbook-Delicious-Recipes-Family/dp/1983360742
  2. Camping Recipes: Foil Packet Cooking by Bonnie Scott – https://www.amazon.com/Camping-Recipes-Foil-Packet-Cooking/dp/1484861345
  3. RV Travel Blog by RVshare – https://rvshare.com/blog/
  4. KOA Kampgrounds Camping Recipes – https://koa.com/camping-recipes/
  5. Fresh Off the Grid: Camping Food & Recipes – https://www.freshoffthegrid.com/camping-food-ideas/

Featured Image by Joshua Van Hierden from Pixabay