Articles by Chuck Price — Page 9

Best RV Rental Companies 2026: Real Costs Compared

Best RV Rental Companies 2026: Real Costs Compared


Choosing the Right RV Rental: A 2026 Guide to Real Costs and Reliability

Three RV classes comparison showing Class B campervan at $2,925 total cost, mid-size Class C motorhome at $3,700, and large Class A luxury motorhome at $5,115 for seven-day 1,500-mile rental in February 2026

By Chuck Price, Founder of Boondock or Bust | Last updated: May 23, 2026 | 10 min read

About the author: Chuck Price has been RV camping for 35+ years and travels in a 2018 Hymer Aktiv Class B van. He founded Boondock or Bust to provide evidence-based RV research and has been featured on CBC Radio’s “Cost of Living” podcast for expertise in RV travel economics.

Bottom line: Total RV rental cost runs 20-60% higher than advertised nightly rates once you add mileage, generator use, insurance, and cleaning fees. For a 7-day trip covering 1,500 miles, expect $2,900-$5,100 depending on vehicle class and camping choices.

Quick Reference: Decision Criteria

  • Top Filter: Budget capacity eliminates 70% of options (calculate all-in cost first)
  • Second Filter: Group size eliminates 40% (count actual sleeping spots, not marketing claims)
  • Path Split: First-timers → fleet companies (Cruise America) | Budget hunters → peer-to-peer with vetting (RVshare, Outdoorsy)
  • Deal-Breaker: Liability under $1M, deductible over $3,000, hosts with under 10 reviews and ratings below 4.5
  • Transparency Test: If provider won’t give itemized quote within 24 hours, eliminate them

Who This Guide Is For

Best fit if you:

  • Need to compare fleet companies vs peer-to-peer platforms with real cost examples
  • Want measurable criteria to eliminate bad options fast (not just feature lists)
  • Need verification checklist to avoid hidden fees and policy surprises
  • Have 7-14 days for trip planning (requires quote requests and vetting)

Not ideal if:

  • You need to book within 48 hours (insufficient vetting time)
  • You only want luxury RV recommendations (this covers all segments)
  • You’re looking for specific route planning (this focuses on provider selection)

Why RV Rental Pricing Is Deliberately Confusing

RV rental marketing emphasizes nightly rates ($75-$350) while major cost drivers stay buried in fine print. The U.S. RV rental market reached approximately $942.6M in 2025 according to IBISWorld, growing as travelers embrace outdoor road trips. But advertised rates represent only 35-50% of final cost.

The four major cost drivers that turn “$150/night” into “$3,700 total” (as of February 2026):

  1. Mileage charges ($0.35-$0.50/mile at most companies): 1,500-mile trip = $525-$750 added cost
  2. Generator fees ($3-$4/hour): 40 hours over one week = $120-$160 if camping without hookups
  3. Insurance/protection plans ($35-$60/night): $245-$420 for 7 days, often mandatory
  4. Cleaning and prep kits ($75-$250 flat fee): One-time charge at pickup or return

Traditional fleet companies (like Cruise America) offer standardization and predictable support at 20-30% higher base cost. Peer-to-peer platforms (like Outdoorsy, RVshare) offer variety and competitive pricing with more variance between individual listings.

This guide uses verified fee examples from company websites (checked February 2026) to help you calculate realistic budgets, identify deal-breakers upfront, and verify terms before booking.

We compare fleet vs peer-to-peer trade-offs, outline deal-breaker thresholds with measurable criteria, provide red flags and green flags for vetting providers, and give you a pre-trip verification checklist. For a broader look at what RV travel costs beyond rentals, see our boondocking cost breakdown.

The Financial Reality: What RV Rentals Actually Cost

Rule of thumb: Total trip cost typically runs 20-60% above the advertised nightly rate once you add mileage, generator, insurance, and cleaning. The exact uplift varies with route length, pickup location, and season.

Mileage charges commonly run $0.35-$0.50/mile as of February 2026. Cruise America currently charges $0.38/mile (verified February 2026). Generator use typically costs $3-$4/hour at fleet companies. Peer-to-peer listings set their own policies.

All-In Cost Breakdown: 7-Day Example (1,500 Miles)

Methodology: This example uses published fee ranges from Cruise America’s website (verified February 2026) and transparent assumptions. Your actual quote will vary based on dates, location, and route.

Assumptions: 1,500 miles total, fuel at $3.50/gallon, fuel economy of 10 mpg for Class B/C and 8 mpg for Class A, 6 campground nights with full hookups.

Cost Category Class B Campervan Class C Motorhome Class A Luxury
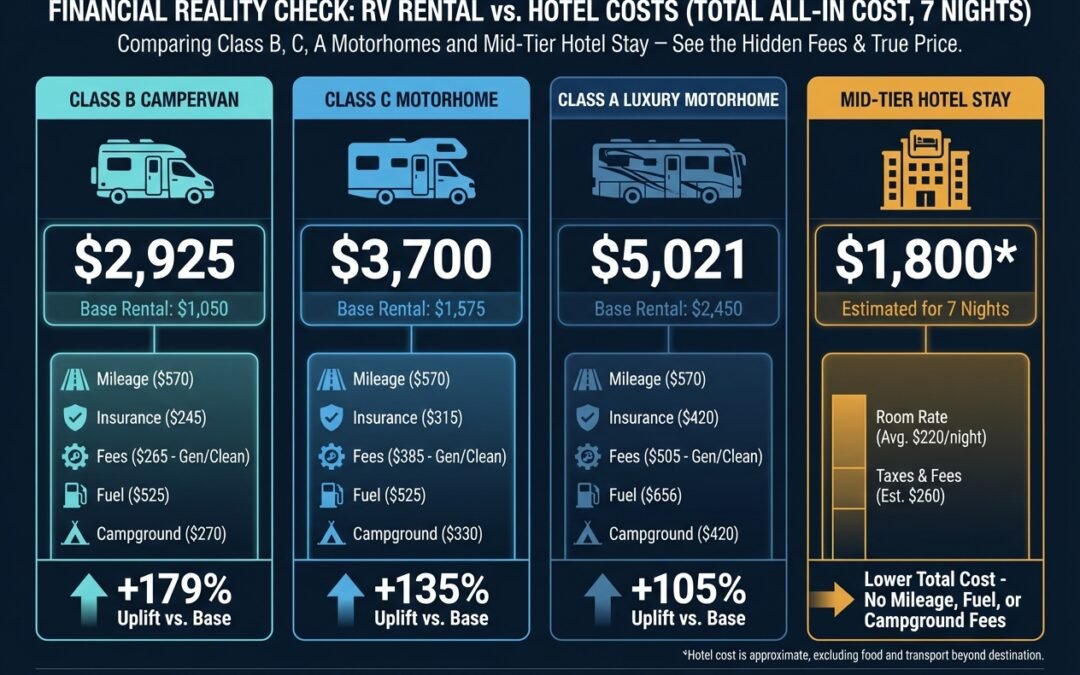
Base Rental (7 nights) $1,050 $1,575 $2,450
Mileage (1,500 miles @ $0.38/mi) $570 $570 $570
Insurance/Protection (typical range) $245 $315 $420
Generator/Amenity Fees (example) $140 $210 $280
Cleaning/Prep Fees (typical) $125 $175 $225
Subtotal: RV Costs $2,130 $2,845 $3,945
Fuel Costs (estimated) $525 $525 $656
Campground Fees (6 nights avg $45-$70) $270 $330 $420
TOTAL ALL-IN COST $2,925 $3,700 $5,021
Uplift vs base rate +179% +135% +105%

Important: This example represents a moderate-to-high uplift scenario. Actual costs vary based on: included miles in your rental (some include 100-150 miles/day), generator usage (zero if using hookup campsites), and seasonal pricing. Fee examples reference Cruise America’s published rates as of February 2026 (generator $3.50/hour, mileage $0.38/mile). Fuel calculation: Class B/C at 10 mpg = 150 gallons × $3.50 = $525; Class A at 8 mpg = 187.5 gallons × $3.50 = $656. Peer-to-peer listings set their own policies. Always request itemized quote for your specific dates and route.

The Hotel Alternative: When Hotels Cost Less

For short trips with couples, hotels often cost 30-40% less than RVs. A 7-night mid-tier hotel stay averages $1,750-$3,500 ($250-$500/night for comparable comfort).

RVs make more financial sense for:

  • Groups of 4+: Hotel costs scale linearly with occupancy; RV costs plateau
  • Trips over 10 days: Per-day cost advantage compounds over time
  • Destinations without hotel supply: National parks, remote areas where free campsite apps help you find dispersed camping spots
  • Flexibility value: Dispersed camping on BLM land, ability to cook meals, no checkout times

Bar chart comparing seven-day trip costs with Class B RV at $2,925, Class C RV at $3,700, Class A RV at $5,021 versus mid-tier hotels ranging from $1,750 to $2,800 for couples based on February 2026 rates

The value proposition includes access and experience, not just nightly accommodation savings. For couples on 3-5 day urban trips, hotels typically deliver better value.

How to Choose the Right RV Rental: Decision Framework

The key to choosing well is eliminating bad options fast. Apply criteria in order of elimination power, not alphabetically or by popularity.

Criteria Hierarchy: Ranked by Filtering Power

These factors are ordered by how many options they eliminate. Apply in sequence to narrow choices efficiently.

  1. Budget Capacity (eliminates ~70% of options)
    • What it measures: Your total trip cost tolerance, not just nightly rate
    • How to verify: Calculate all-in cost using the table above for your specific route, dates, and vehicle class
    • Why it’s first: Immediately rules out vehicle classes and premium listings outside your range
    • Threshold: Eliminate options where total cost exceeds your maximum by more than 10%
  2. Group Size Requirements (eliminates ~40% of remaining options)
    • What it measures: Number of travelers plus sleeping arrangements needed
    • How to verify: Count actual sleeping spots in floor plan diagrams (not marketing capacity claims)
    • Why it’s second: Determines vehicle class before other factors matter
    • Threshold: Eliminate if vehicle sleeps fewer people than your party size
  3. Support and Predictability Needs (eliminates ~50% of remaining options)
    • What it measures: Your risk tolerance for owner variance vs corporate consistency
    • How to verify: Assess your RV experience level and comfort with troubleshooting on the road
    • Why it’s third: Splits decision between traditional fleet vs peer-to-peer platforms
    • Threshold: First-timers and high-anxiety travelers should eliminate peer-to-peer; experienced and budget-conscious should eliminate fleet
  4. Location Coverage (eliminates ~30% of remaining options)
    • What it measures: Pickup and return locations available for your route
    • How to verify: Check company location maps against your departure city
    • Why it’s fourth: Geographic availability constraint
    • Threshold: Eliminate if nearest pickup is more than 2 hours travel from your starting location
  5. Vehicle Amenities (refinement factor, not elimination)
    • What it measures: Luxury features vs basic functionality
    • How to verify: Review floor plans, appliances, vehicle age, and interior condition
    • Why it’s last: Preference optimization after hard constraints are satisfied

RV rental decision flowchart showing budget capacity filter at 70 percent elimination, group size at 40 percent, support needs splitting fleet versus peer-to-peer, location at 30 percent, and amenities as final refinement in 2026

Fleet Companies vs Peer-to-Peer: The Trade-offs

Market context: The U.S. RV rental market reached approximately $942.6M in 2025, up from $833.4M in 2024 according to IBISWorld. Precise market share splits between fleet and peer-to-peer aren’t publicly standardized, so avoid unverified share claims.

Traditional Fleet Companies: Standardization vs Premium Pricing

Fleet operators like Cruise America offer standardized vehicles, corporate roadside support, in-person orientation, and broad pickup networks. Cruise America operates 130+ locations nationwide (verified February 2026).

Advantages:

  • Predictable processes and vehicle condition
  • Corporate roadside support with 24/7 access
  • In-person orientation and walkthrough
  • Vehicle substitution if mechanical problems arise
  • Standardized insurance and liability coverage

Trade-offs:

  • Base costs typically 20-30% higher than peer-to-peer (based on our cost table comparisons above)
  • Utilitarian interiors (basic functionality, not luxury)
  • Seasonal price spikes during summer and holidays
  • Limited vehicle variety (standard floor plans only)

Best fit for: First-time renters, high-anxiety travelers, those who value predictability over customization, anyone uncomfortable with owner-dependent support.

Peer-to-Peer Platforms: Variety vs Variance

Marketplaces like Outdoorsy and RVshare provide inventory variety, geographic coverage, and competitive base rates. As of early 2026, combined peer-to-peer inventory across major platforms exceeds 250,000 active listings in North America.

Advantages:

  • Base rates typically 20-40% lower than fleet companies
  • Luxury vehicles and specialized rigs unavailable from fleets
  • Broader geographic coverage (including remote areas)
  • Flexible policies (some hosts include miles, waive cleaning fees)

Trade-offs:

  • Quality varies significantly by owner and listing
  • Cancellations and damage disputes involve owner, platform, and insurer
  • Vehicle condition and maintenance depend on owner diligence
  • Policies and add-ons differ by listing (requires careful reading)
  • Orientation typically via video or owner meeting (not standardized)

Best fit for: Budget-conscious travelers willing to vet carefully, luxury seekers wanting high-end interiors, those needing specialized vehicles (off-road capable, toy haulers), experienced RVers comfortable with variance.

Insurance and Liability: What to Verify

Coverage Factor Traditional Fleet Peer-to-Peer Platform
Liability Coverage Typically included; limits vary by company Up to ~$1M on major platforms (plan-dependent)
Comprehensive/Collision Fleet policies vary by company Up to ~$300k typical (plan-dependent)
Deductible Range $500-$2,500 typical $500-$3,000 typical (higher in 2026)
Dispute Process Direct with company Owner + platform + insurer coordination
Personal Property Often limited or excluded Often limited or excluded
Mechanical Breakdowns Fleet roadside/support programs Varies by host and plan; verify upfront
Vehicle Substitution Often available if problems arise Depends on owner and platform policy

Critical: Coverage limits, deductibles, and remedies differ by company, listing, jurisdiction, and plan tier. Always review actual policy documents, not marketing summaries. Call your personal auto insurer to confirm what they cover or exclude for RV rentals.

Deal-Breakers: Thresholds That Eliminate Options Immediately

These are absolute disqualifiers with specific, measurable thresholds based on our cost analysis and 35+ years of RV rental experience. If an option fails any of these tests, eliminate it immediately. Adjust thresholds based on your own risk tolerance and trip specifics.

1. Budget Capacity Mismatch

Threshold: Total trip cost exceeds your maximum spend by more than 10%

Why it eliminates: Financial stress ruins the experience; unexpected overages create anxiety mid-trip

Verification test: Use the cost breakdown table above with your actual route miles and camping nights. Add 15% buffer for unforeseen expenses (toll roads, extra generator use, campground upgrades).

2. No Local Pickup Location

Threshold: Nearest pickup point is more than 2 hours travel from your starting location

Why it eliminates: Adds transportation costs, time, and complexity to trip start and end; may require overnight hotel before/after rental

Verification test: Check company location map against your ZIP code or departure city. Factor in airport transfer time if flying.

3. Sleeping Capacity Mismatch

Threshold: Vehicle sleeps fewer people than your party size (count actual sleeping spots, not marketing claims)

Why it eliminates: Comfort and safety issue; sleeping arrangements can’t be improvised safely

Verification test: Review floor plan diagrams and count: beds, convertible dinettes, overhead bunks, and fold-out sofas. Verify weight capacity if using overhead bunks for adults.

4. Insurance and Deductible Gap

Threshold: Liability coverage less than $1M aggregate OR comprehensive/collision coverage less than RV stated value OR deductible exceeding $3,000

Why it eliminates: Financial exposure exceeds acceptable risk for most travelers; 2026 peer-to-peer deductibles have increased industry-wide

Verification test: Read actual policy documents (not summaries). Request written confirmation of coverage limits and deductible amounts. Call your personal auto insurer to verify what they cover.

5. Insufficient Host Reputation (Peer-to-Peer Only)

Threshold: Fewer than 10 reviews OR average rating below 4.5 stars OR no response to inquiry within 24 hours

Why it eliminates: Insufficient track record creates unacceptable quality variance; slow response predicts poor support during trip

Verification test: Check platform reviews, send inquiry message testing response time and detail level. Read negative reviews specifically for patterns (hidden fees, condition issues, support problems).

Deal-Breaker Application Example

Scenario: You’re a family of 4 with $4,500 total budget planning a 7-day trip covering 2,000 miles.

Apply filters in sequence:

  1. Calculate all-in cost for Class C: $1,575 base + $760 mileage (2,000 × $0.38) + $315 insurance + $210 generator + $175 cleaning + $525 fuel + $330 camping = $3,890 total. Within budget threshold ($4,500 + 10% = $4,950 max). ✓ Continue
  2. Check sleeping capacity: Class C sleeps 6. Party size is 4. ✓ Continue
  3. Verify pickup location: Cruise America location 45 minutes from home. ✓ Continue
  4. Check insurance: $1M liability included, deductible $1,500. ✓ Continue
  5. Proceed to red/green flag screening.

Company Analysis: What to Verify Before Booking

Peer-to-Peer Platform Leaders

Outdoorsy

Large marketplace covering North America and international locations. Protection pages cite up to ~$1M liability and up to ~$300k comprehensive/collision (plan-dependent; verify your specific coverage tier before booking). Quality varies significantly by listing.

BBB rating: A+ as of February 2026 (ratings can change; verify current status at bbb.org before booking)

Best for: Travelers seeking variety and geographic coverage, those wanting mid-to-high-end inventory

Verify before booking: Host reviews (15+ minimum with 4.8+ rating), included miles, generator policy, cancellation terms, breakdown procedures

RVshare

High-volume peer-to-peer platform. Protection pages describe up to ~$1M liability and up to ~$300k comprehensive/collision (plan-dependent; verify your specific tier). Customer experience depends heavily on individual host and listing quality.

Best for: Budget-conscious travelers willing to vet hosts thoroughly, those seeking competitive pricing

Verify before booking: Host response time (under 24 hours), itemized fee breakdown, mileage policy, insurance deductible, roadside assistance specifics

Traditional Fleet Example

Cruise America

Founded in 1972 with 130+ locations nationwide. Public pages show generator use at $3.50/hour and mileage charges at $0.38/mile (rates verified February 2026; confirm current pricing in your quote).

Strengths: Predictability, in-person orientation, corporate roadside support, ability to swap vehicles if problems arise

Trade-offs: Higher base pricing (20-30% above peer-to-peer based on our cost comparisons), utilitarian interiors, seasonal price swings

Best for: First-time renters, travelers who value predictable processes over customization

Verify before booking: Total cost with mileage and generator estimates for your route, insurance deductible, cancellation policy, pickup/return hours and location

Hidden Fees: What to Surface in Your Quote

Fee Category Typical Range Where to Find It Impact Level
Mileage Overage $0.35-$0.50/mile Rental agreement/quote High
Generator Use $3-$4/hour FAQ/fine print Medium
Cleaning/Prep & Kits $75-$250 Checkout/quote Low-Medium
Cancellation Penalties 0%-100% of rental Policy page/contract Medium-High
Dump Fee (if not emptied) $50-$100 Return inspection Low
Late Return Fee $25-$100/hour Fine print/return policy Low (if avoided)

Need to empty your tanks before returning the RV? Our dump station finder shows locations along your route.

The Transparency Test

Before booking, request itemized quote showing: nightly rate, included miles and overage rate, generator rate, kit/cleaning fees, insurance cost and deductible, taxes, and cancellation terms. If provider won’t deliver within 24 hours, eliminate them. Refusal to disclose upfront indicates hidden fees at checkout.

Red Flags and Green Flags: Quality Verification

Use these observable, verifiable criteria to screen companies and hosts. Red flags eliminate options; green flags confirm quality probability.

RV rental quality checklist with red flags including under 10 reviews, hidden mileage, high deductibles over $2,500, strict cancellations, exterior-only photos contrasted with green flags including A-plus BBB, 25-plus reviews, itemized quotes, roadside assistance, and orientation

Red Flags: Warning Signs to Eliminate Options

  1. Host/Company: Under 10 reviews OR rating below 4.5 stars
    • Verification method: Check BBB (bbb.org), Google reviews, platform reviews (RVshare, Outdoorsy)
    • Why it matters: Insufficient sample size or poor track record indicates higher risk of problems
  2. Quote: Mileage policy unlisted OR generator rate buried in fine print
    • Verification method: Request itemized breakdown; if they won’t disclose upfront, eliminate them
    • Why it matters: Hidden fees indicate lack of transparency; checkout surprises are likely
  3. Insurance: Deductible above $2,500 (warning) or above $3,000 (eliminate) OR liability coverage below $1M
    • Verification method: Read actual policy documents (not marketing summaries)
    • Why it matters: Deductibles above $2,500 warrant extra scrutiny. Above $3,000 is an elimination threshold per the deal-breaker criteria above.
  4. Contract: Non-refundable cancellation with zero flexibility window
    • Verification method: Read cancellation section in rental agreement before payment
    • Why it matters: No grace period for weather, emergencies, or mechanical issues creates unacceptable risk
  5. Photos: Only exterior shots OR heavily filtered images without interior views
    • Verification method: Demand interior photos or video walkthrough before booking
    • Why it matters: If host refuses interior documentation, likely hiding condition issues

Green Flags: Quality Indicators

Based on patterns across our research, strong quality signals include:

  1. Company: A+ BBB rating held consistently for 2+ years
    • Verification method: Check bbb.org and review complaint resolution patterns over time
    • Correlation: Indicates consistent dispute resolution and customer service
  2. Host: 25+ reviews averaging 4.8+ with detailed host responses
    • Verification method: Read negative reviews specifically and host responses to gauge communication style
    • Correlation: High-volume hosts with consistent positive feedback and engaged communication
  3. Quote: Itemized breakdown provided within 24 hours of request
    • Verification method: All fees disclosed upfront without prompting
    • Correlation: Transparent pricing reduces likelihood of checkout surprises
  4. Insurance: Protection plan includes roadside assistance PLUS towing PLUS vehicle substitution remedy
    • Verification method: Confirm remedies in policy documents (not just coverage limits)
    • Correlation: Comprehensive support infrastructure means smoother breakdown handling
  5. Orientation: In-person walkaround offered (fleet) OR detailed video provided with systems demonstration (peer-to-peer)
    • Verification method: Confirmation of pre-departure training or video access
    • Correlation: Proper orientation reduces likelihood of damage claims and user error

These are screening preferences based on our experience, not universal industry guarantees. Adjust thresholds to fit your comfort level.

Common Mistakes That Increase Costs or Risk

Mistake 1: Assuming Personal Auto Insurance Covers RV Rentals

Many personal auto policies exclude motorhomes entirely or limit coverage to specific scenarios. Don’t assume coverage.

How to avoid: Call your auto insurer before booking. Ask specifically: “Does my policy cover liability and physical damage for a rented motorhome? What are the limits and exclusions?” Get written confirmation.

Mistake 2: Underestimating Route Miles

RV-safe routing (avoiding low bridges, weight-restricted roads) plus unplanned side trips adds 25-30% to straight-line distance calculations. This directly affects mileage charges.

How to avoid: Use RV-specific GPS or apps like those in our free RV GPS app guide to plan realistic routes. Add 25% buffer to Google Maps distance for mileage charge calculations.

Mistake 3: Ignoring Generator Costs When Camping Without Hookups

Air conditioning requires generator when camping without electrical hookups. Metered fees add up quickly: 56 hours over 7 nights = $196 at $3.50/hour.

How to avoid: Compare generator costs vs campground hookup fees. Full hookups eliminate generator costs but add nightly site fees ($35-$70/night). Choose based on total cost trade-offs.

Mistake 4: Booking Peer-to-Peer Based Only on Price or Photos

Low price or attractive photos without checking reviews, response time, and itemized policies creates avoidable problems. For more on rental fraud patterns, see our guide to common RV rental scams.

How to avoid: Spend 15 minutes vetting each potential host using green flags checklist. Check reviews, send inquiry testing response time, verify all fees in writing before booking.

Pre-Trip Verification Checklist

Complete before final payment:

  • Get itemized quote in writing (all fees listed: nightly, mileage, generator, protection, cleaning)
  • Confirm coverage limits and deductible amounts in actual policy documents
  • Plan realistic miles using RV-safe routing with 25% buffer
  • Save 24/7 roadside contact numbers in phone before departure
  • Verify cancellation terms and refund windows
  • Confirm breakdown procedures and vehicle substitution policy

RV Rental Questions Before You Book

What’s the real all-in cost of renting an RV for a week?

For a 7-day trip with 1,500 miles, expect $2,900-$5,100 total depending on vehicle class. Base rates ($150-$350/night) represent only 35-50% of final cost. Major add-ons: mileage ($570 at $0.38/mile), insurance ($245-$420), generator fees ($140-$280), and cleaning ($125-$225). Compare to mid-tier hotels at $1,750-$3,500 for same dates.

Should I choose fleet companies like Cruise America or peer-to-peer platforms like RVshare?

Choose fleet companies if you need predictability, corporate support, and standardized vehicles at 20-30% higher cost (based on our cost table comparisons). Choose peer-to-peer if you accept owner variance for 20-40% savings, want luxury options, or need specialized vehicles. First-time renters benefit from fleet orientation and swap options.

What are absolute deal-breakers when choosing an RV rental?

Based on our cost analysis and 35+ years of RV rental experience, we recommend eliminating options with: total cost exceeding budget by more than 10%, no pickup within 2 hours, insufficient sleeping capacity, liability coverage under $1M, deductibles over $3,000, or hosts with under 10 reviews and ratings below 4.5 stars. These screening thresholds reduce exposure to the most common rental problems. Adjust based on your risk tolerance and trip specifics.

How do I avoid hidden fees in RV rentals?

Request itemized quote showing: nightly rate, included miles and overage rate (typically $0.35-$0.50/mile), generator rate ($3-$4/hour), cleaning fees ($75-$250), insurance cost and deductible, taxes, and cancellation terms. If provider won’t disclose within 24 hours, eliminate them.

Are RV rentals cheaper than hotels for families?

For groups of 4+ on trips over 7 days, RVs can cost less per person than hotels when including accommodation and meals. For couples on 3-5 day trips, hotels typically cost 30-40% less. Value proposition includes flexibility and remote access, not just nightly savings.

What happens if the RV breaks down during my trip?

Fleet companies manage repairs through corporate roadside programs and may substitute vehicles. Peer-to-peer involves owner, platform, and insurer coordination. Before booking, verify: 24/7 contact numbers, vehicle substitution policy, towing coverage, and repair authorization process.

What red flags eliminate RV rental options immediately?

Warning signs include: under 10 reviews or ratings below 4.5, no itemized pricing within 24 hours, mileage buried in fine print, insurance deductibles above $2,500 (a warning threshold; above $3,000 is an elimination trigger), zero-flexibility cancellation, or listings showing only exterior photos. Any of these warrants closer scrutiny or elimination.

What green flags indicate quality RV rental providers?

Based on patterns across our research, strong quality signals include: A+ BBB rating held 2+ years, 25+ reviews averaging 4.8+, itemized quotes within 24 hours, insurance including roadside plus towing plus vehicle substitution, and detailed orientation (in-person for fleets, video for peer-to-peer). These are screening preferences, not guarantees.

Which RV rental option is best for first-timers?

First-time renters benefit from fleet companies like Cruise America offering: predictable processes, standardized vehicles, in-person orientation, corporate roadside support, and vehicle swap capability. Fleet base rates typically run 20-30% higher than peer-to-peer based on our cost comparisons, but the added support access offsets the premium for inexperienced renters.

Can I trust peer-to-peer RV rentals like Outdoorsy and RVshare?

Yes, with verification. Select hosts with 15+ reviews, 4.8+ ratings, and sub-24-hour response times. Confirm in writing: included miles, generator policy, cleaning fees, insurance deductible, cancellation terms, and breakdown procedures before booking.

Use-Case Recommendations by Situation

Match your primary needs to the recommended option, then verify quality using red/green flags.

Your Situation Primary Needs Recommended Option Why This Works
First-Time Renters Predictability, orientation, hand-holding Traditional fleets (Cruise America) Corporate support, standardized process, vehicle swaps if problems, in-person orientation
Budget-Conscious Travelers Lowest all-in cost Peer-to-peer with heavy vetting 20-40% lower base rates if you screen carefully using green flags
Luxury Experience Seekers High-end amenities, modern interiors Peer-to-peer top-tier listings Fleets offer utilitarian interiors only; peer-to-peer has luxury options unavailable elsewhere
Large Groups (4+) Space plus cost-per-person optimization Class C or Class A from either channel Hotel costs scale linearly with occupancy; RV costs plateau, making large vehicles economical for 4+ people
Short Urban Trips (Couples) Convenience plus flexibility Class B campervans Easier parking, lower fuel costs, hotel-competitive pricing for short trips

Making the Right Choice for Your Trip

Choose the right provider by applying criteria in order of elimination power. Budget capacity and group size eliminate most options immediately. Support needs determine fleet vs peer-to-peer path. Screen remaining options using red/green flags to verify quality.

Budget with all-in numbers (not just nightly headlines), confirm all policies in writing, and verify insurance remedies before payment. The time invested in proper vetting prevents trip-ruining surprises and financial stress.

Ready to Book Your RV Rental?

Use this one-page checklist to surface every fee and avoid common pitfalls before you book.

Download Free RV Trip Planning Checklist (PDF)

Disclaimer: Prices, fees, insurance terms, and roadside support policies differ by company, listing, location, and dates. Examples here are illustrative (verified February 2026 from company websites and public pages). Always rely on your written quote and rental agreement for specifics. Market size data from IBISWorld (2025), fee examples from Cruise America public pages, insurance coverage from RVshare and Outdoorsy protection plan pages (February 2026).

References

  1. IBISWorld. (2025). RV & Camper Van Rental in the US — Market Size. https://www.ibisworld.com/united-states/market-size/rv-camper-van-rental/5841/
  2. Cruise America. (2026). RV Rental FAQs. https://www.cruiseamerica.com/rv-rentals/renters-resources/rv-rental-faqs
  3. Cruise America. (2026). How Much to Rent an RV? https://www.cruiseamerica.com/rv-rentals/renters-resources/how-much-to-rent-an-rv
  4. Outdoorsy. (2026). Protection Packages. https://support.outdoorsy.com/hc/en-us/articles/37646881475355-Protection-Packages
  5. RVshare. (2026). Protection Plan. https://rvshare.com/insurance
  6. RVshare Owner Toolkit. (2026). Insurance and How It Works. https://owner-toolkit.rvshare.com/insurance-and-how-it-works/
  7. BBB. (Verified February 2026). Outdoorsy, Inc. Profile. https://www.bbb.org/us/tx/austin/profile/camper-rental/outdoorsy-inc-0825-1000146342
  8. Cruise America. (2026). Locations. https://www.cruiseamerica.com/rv-rental-locations
Walmart Overnight RV Parking Policy by State — Your 2026 Survival Guide

Walmart Overnight RV Parking Policy by State — Your 2026 Survival Guide


Walmart Overnight RV Parking Rules by State

Quick Answer: Walmart’s corporate policy permits overnight RV parking, but approval depends on individual store managers, local ordinances, and parking availability. Of roughly 4,600 U.S. stores, the Walmart Locator community database lists over 1,000 as prohibiting overnight stays. That figure reflects only stores reported by users and is likely an undercount. Separate estimates from RV travel publications put the no-park figure closer to 40% of all locations. Reasons include local laws, lease restrictions, and past abuse. Always call the specific store before arrival. Corporate does not maintain a public list of which stores allow it.

This page is about Walmart-specific overnight RV parking rules. For broader free parking alternatives, use our separate free RV parking locations guide.

Walmart overnight RV parking is one of the most searched and most misunderstood topics in the RV world. The confusion exists because there is no single answer. Corporate says yes. Your local city council might say no. The store manager on Tuesday might say yes while the one on Thursday says no.

This guide breaks down what Walmart corporate actually controls, what overrides their policy, and how to verify any store before you commit to a 300-mile detour. It also includes a state-by-state reference table and backup options for when a store turns you away.

One thing before we go further: Walmart overnight parking is a courtesy, not a right. The RVers who treat it like a free campground are the reason stores keep posting “No Overnight Parking” signs. If you want this option to survive, treat every Walmart lot like a one-night rest stop and nothing more.

What Walmart Corporate Does and Does Not Decide

Walmart’s corporate policy permits overnight RV parking but delegates approval to individual store managers. The company does not override local laws or lease restrictions.

The corporate FAQ page puts it this way: Walmart values RV travelers, considers them among its best customers, and permits RV parking on store lots as it is able. Permission is extended by individual store managers based on parking space availability and local laws. The company asks travelers to contact store management before parking.

That statement has not changed in years. What has changed is the ground-level reality.

What corporate decides:

  • The general policy permitting stores to allow overnight RV parking
  • The absence of electrical hookups or RV-specific accommodations at any store
  • The delegation of authority to individual store managers

What corporate does not decide:

  • Whether any specific store actually allows overnight parking on any given night
  • Local zoning ordinances that prohibit overnight parking in commercial lots
  • Lease agreements where Walmart does not own the property or parking lot
  • Security concerns driven by incidents at a specific location
Correction: Many RV sites claim “only Walmart Supercenters allow overnight parking.” This is false. Regular Walmart stores can and do allow overnight parking. The decision is manager-level, not format-level. Conversely, some Supercenters prohibit it. The store format tells you nothing about the overnight policy.

The Sam Walton origin story is real. The founder was an RVer who encouraged stores to welcome travelers. That philosophy still appears in corporate communications. But corporate cannot override a city ordinance, and they cannot force a manager who has dealt with dumped sewage or month-long squatters to keep welcoming RVs.

This distinction matters because it means no app, no database, and no website can give you a guaranteed answer. Community-reported tools like the Walmart Locator interactive map and the AllStays app provide useful starting points. But the only reliable verification is a direct call to the store, on the day you plan to arrive.

How to Verify a Store Before Arrival

Calling ahead is the single most important step in Walmart overnight parking. It eliminates the 2 a.m. security knock, the wasted fuel, and the scramble to find a backup at midnight in an unfamiliar town.

The verification process:

Step 1: Screen with an app first. Use the AllStays Camp & RV app or the free Walmart Locator website (walmartlocator.com) to check the reported overnight parking status. These tools are community-maintained, so they are not always current. Treat them as a starting filter, not a final answer. If a store is flagged as “no overnight parking,” it is almost certainly accurate because signs and enforcement are hard to miss. If it is flagged as “yes,” it may have changed since the last report because positive status can shift without visible signage updates.

Step 2: Call the store directly. Ask to speak with a manager. Do not rely on the answer from whoever picks up the phone at the service desk. Front-line associates may not know the current policy or may give you a default “no” to avoid making a decision. A simple script:

“Hi, I’m traveling through in my RV and wondering if your store allows overnight parking for one night. I’ll be arriving around [time], parking away from the entrance, and shopping inside before I settle in. Is that something your store permits?”

Step 3: Ask about placement. If the manager says yes, ask where they prefer you to park. Some stores have a preferred area. Follow their instructions exactly.

Step 4: Confirm local law compliance. If the manager says “we allow it but the city doesn’t,” that is your answer. The city wins. If the manager seems unsure about local ordinances, do not assume it is fine.

Step 5: Have a backup. Always identify one alternative within 30 minutes of your planned Walmart stop. Truck stops, Cracker Barrel restaurants, and rest areas are the most common fallbacks. We cover these in the alternatives section below. For travelers trying to keep overall camping costs low, free overnight stops like Walmart are one piece of a larger strategy.

Do not skip the call. Policies change week to week. A store that welcomed RVs last month may have posted “No Overnight Parking” signs after a bad incident. A store listed as “no” in an app may have a new manager who is RV-friendly. The call takes 3 minutes. The alternative is a surprise at midnight.

State and Local Restrictions That Override Store Permission

Even when a store manager says yes, state or local laws can make overnight parking illegal depending on the jurisdiction. Enforcement and penalties vary by municipality. This is the part most RV guides skip, and it is the part that gets people ticketed.

There are three categories of restrictions that override a store manager’s permission:

1. Municipal anti-camping and overnight parking ordinances. Many cities, particularly in California, Florida, and the Pacific Northwest, have enacted ordinances that prohibit overnight parking in commercial lots. Some specifically target vehicles over a certain length. Others ban sleeping in vehicles anywhere within city limits. These ordinances apply regardless of whether the property owner consents. Kingman, Arizona, for example, enacted a local ordinance restricting overnight parking in retail lots, with reported fines up to $250. Verify current ordinance details with the City of Kingman before relying on this figure.

2. Lease and property ownership restrictions. Not every Walmart owns its building or its parking lot. In shopping centers and strip malls, Walmart is a tenant. The landlord or property management company may prohibit overnight parking in the shared lot. The store manager may not even have the authority to override this, even if they personally would allow it. This is especially common in urban and suburban locations where Walmart shares a lot with other retailers.

3. Zoning and land use regulations. Commercial zoning in many jurisdictions includes provisions about vehicle storage, overnight occupancy, or “camping” on commercial property. Even where there is no specific anti-RV ordinance, general zoning rules can be applied to prohibit overnight stays.

Bottom line: A store manager’s “yes” is necessary but not always sufficient. Local law always wins. If you receive a ticket or a police visit, “the manager said it was OK” will not get you out of a municipal ordinance violation.

The pattern across most of the country follows a predictable line: urban and tourist-heavy areas tend to be more restrictive. Rural and small-town Walmarts are more likely to allow overnight parking without local government interference. Stores near major highways in less populated areas are often the most reliable option.

For RVers planning extended trips on public lands, Walmart overnights work best as one-night transit stops between boondocking destinations, not as a primary camping strategy.

To restate the core framework: Walmart corporate permits overnight RV parking. Store managers approve or deny based on local conditions. Municipal ordinances, lease restrictions, and zoning laws can override both corporate policy and manager permission. The only reliable verification method is a direct phone call to the specific store on the day of arrival. No app or database replaces that call.

Walmart Overnight RV Parking: State-by-State Reference

The table below reflects the general pattern for each state based on community reports, municipal ordinance research, and RVer experiences. It is not a guarantee for any specific store. Every entry in the “Call Ahead Required” column says Yes because that is always true regardless of state.

State-by-state reference table showing Walmart overnight RV parking status across the United States

This table does not replace calling the store. It helps you set realistic expectations before you start dialing.

State Common Status Local Restrictions Common Call Ahead Notes
Alabama Generally allowed Low Yes Rural stores tend to be welcoming. Gulf Coast tourist areas more restrictive.
Alaska Generally allowed Low Yes Limited stores. Anchorage and Fairbanks locations typically allow it.
Arizona Mixed Moderate Yes Kingman enacted anti-overnight ordinance ($250 fines). Quartzsite-area stores RV-friendly in winter. Phoenix metro restrictive.
Arkansas Generally allowed Low Yes Walmart HQ state. Rural stores are typically the most welcoming in the country.
California Mostly restricted High Yes Most urban and coastal cities prohibit overnight lot parking by ordinance. Inland rural stores offer the best odds. New state-level restrictions trending.
Colorado Mixed Moderate Yes Front Range cities restrictive. Mountain towns and eastern plains more flexible.
Connecticut Mostly restricted High Yes Dense population and local ordinances make overnight parking uncommon.
Delaware Mixed Moderate Yes Limited stores. Beach-area locations generally restricted.
Florida Mostly restricted High Yes Local ordinances ban overnight lot parking in most coastal and tourist areas. Interior and Panhandle stores offer better odds. High snowbird traffic increases enforcement.
Georgia Generally allowed Low to Moderate Yes Metro Atlanta restrictive. Rural and south Georgia stores generally allow it.
Hawaii Restricted High Yes Hawaii law (HRS §291C-112) prohibits using a vehicle for habitation on public roads, highways, and public property between 6 p.m. and 6 a.m. County ordinances add further restrictions. Very few Walmart locations. Not viable for RV overnighting.
Idaho Generally allowed Low Yes Rural and permissive. Boise metro slightly more restrictive.
Illinois Mixed Moderate Yes Chicagoland area heavily restricted. Downstate and rural stores more accommodating.
Indiana Generally allowed Low Yes Mostly RV-friendly outside Indianapolis metro.
Iowa Generally allowed Low Yes Rural state with welcoming stores. Des Moines metro stores check local rules.
Kansas Generally allowed Low Yes Primarily rural. Kansas City metro may have restrictions.
Kentucky Generally allowed Low Yes Louisville metro somewhat restrictive. Rest of state generally welcoming.
Louisiana Generally allowed Low to Moderate Yes New Orleans area restricted. Rural and I-10/I-20 corridor stores generally allow it.
Maine Mixed Moderate Yes Tourist coastal towns often restricted. Inland stores more accommodating.
Maryland Mostly restricted High Yes Dense suburbs and local ordinances make overnight parking difficult across most of the state.
Massachusetts Mostly restricted High Yes Tight zoning throughout the state. Very few stores allow it.
Michigan Generally allowed Low to Moderate Yes Upper Peninsula and rural stores welcoming. Metro Detroit and Ann Arbor more restrictive.
Minnesota Generally allowed Low Yes Twin Cities metro somewhat restrictive. Greater Minnesota generally welcoming.
Mississippi Generally allowed Low Yes Rural and welcoming statewide. Gulf Coast stores check local rules.
Missouri Mixed Moderate Yes Kansas City Walmarts reported as no-overnight. Rural stores generally accommodating. Branson tourist area variable.
Montana Generally allowed Low Yes Permissive state with plenty of BLM and NF alternatives nearby.
Nebraska Generally allowed Low Yes I-80 corridor stores useful for cross-country travelers.
Nevada Mixed Moderate Yes Las Vegas metro restricted. Casino parking is a better option in resort areas. Rural Nevada stores generally allow it.
New Hampshire Mixed Moderate Yes Tourist season in White Mountains area can trigger restrictions.
New Jersey Mostly restricted High Yes Dense population and restrictive local ordinances statewide. Few options.
New Mexico Generally allowed Low Yes RV-friendly state with abundant BLM and NF alternatives. Store lots useful for resupply stops.
New York Mostly restricted High Yes Downstate almost entirely restricted. Upstate and Adirondack-region stores somewhat more flexible. Thruway rest areas allow 24-hour parking.
North Carolina Mixed Moderate Yes Reports of increasing “no overnight” signs, especially along the coast and in Charlotte metro. Mountain and rural stores still accommodating.
North Dakota Generally allowed Low Yes Rural and generally welcoming.
Ohio Mixed Moderate Yes Centerville, OH reported heavy police enforcement of new no-overnight policy (2025). Rural stores more accommodating.
Oklahoma Generally allowed Low Yes I-40 and I-44 corridor stores are common transit stops for RVers.
Oregon Mixed Moderate to High Yes Portland metro and coast heavily restricted. Eastern Oregon and I-5 rural towns more flexible.
Pennsylvania Mixed Moderate Yes Philly suburbs and Pittsburgh metro restrictive. Central PA and rural stores more accommodating. Turnpike service plazas allow 24-hour parking.
Rhode Island Mostly restricted High Yes Very few stores and dense zoning. Not a reliable option.
South Carolina Generally allowed Low to Moderate Yes Myrtle Beach and Charleston tourist areas more restrictive. Interior stores welcoming.
South Dakota Generally allowed Low Yes Sturgis-area stores may restrict during rally season. Otherwise welcoming.
Tennessee Generally allowed Low to Moderate Yes Nashville and Gatlinburg tourist areas more restrictive. I-40 and I-24 corridor stores useful for transit.
Texas Mixed Moderate Yes Urban areas (Houston, Dallas, Austin, San Antonio) increasingly restrictive. West Texas, Panhandle, and rural stores generally allow it. High concentration of anti-overnight ordinances in metro areas.
Utah Mixed Moderate Yes Salt Lake and Provo metro restrictive. Southern Utah gateway towns to national parks variable. BLM land is a better option in this state.
Vermont Mixed Moderate Yes Williston reported community of long-term lot residents (2025), which may trigger future restrictions. Few stores overall.
Virginia Mixed Moderate Yes Northern Virginia (DC suburbs) restricted. Shenandoah Valley and southwest Virginia more accommodating.
Washington Mixed Moderate to High Yes Seattle metro and western Washington heavily restricted. Eastern Washington and I-90 corridor stores more flexible.
West Virginia Generally allowed Low Yes Rural and welcoming. Good transit option on I-64 and I-77.
Wisconsin Generally allowed Low Yes Milwaukee metro somewhat restrictive. Dells tourist area variable during peak season. Rest of state welcoming.
Wyoming Generally allowed Low Yes Permissive state. BLM and NF land nearby makes Walmart less necessary here.
How to read this table: “Generally allowed” means most stores in the state permit overnight RV parking, based on community reports, but individual stores may still say no. “Mixed” is a qualitative label meaning community reports are split, with urban/rural location being the primary dividing line. It does not mean an exact 50/50 split. “Mostly restricted” means local ordinances prohibit it at the majority of locations. No status is a guarantee. Always call the specific store.

This table does not cover every local ordinance. It does not capture lease restrictions at individual locations. It does not reflect policy changes that happen after publication. Verify current status with the store directly.

Alternative Chains When Walmart Says No

Getting a “no” from Walmart is not the end of your night. Several other chains and public facilities can fill the gap. The same rules apply everywhere: call ahead, stay one night, keep a low profile, and spend money where you park.

Cracker Barrel

Cracker Barrel has approximately 657 locations across 43 states (as of early 2026) and a long history of welcoming RVers. Many locations have designated RV-sized parking spaces. The policy is store-by-store, just like Walmart, and community reports indicate that Cracker Barrel’s corporate-level overnight policy has not changed. However, RVers are reporting an increasing number of individual locations declining overnight stays. The decision is based on local ordinances, lot size, and layout.

The etiquette is the same: call the restaurant directly, ask the manager, eat a meal there, and leave by morning. Cracker Barrel lots tend to be quieter than Walmart lots after closing and many are located right off highway exits.

Limitation: Cracker Barrel is not present in Alaska, Hawaii, California, Oregon, Washington, Vermont, or several other western states. Coverage is strongest in the Southeast, Midwest, and along major interstate corridors.

Cabela’s and Bass Pro Shops

Since the 2017 merger, both chains have generally been reported by RV travelers as allowing overnight parking. Their lots are large, often quieter than Walmart, and some have designated RV spaces. Neither chain publishes an official chainwide overnight policy. Call ahead to confirm. Alaska Bass Pro has been reported as not allowing overnight parking.

Truck Stops

Pilot Flying J, Love’s, and TravelCenters of America (TA/Petro) all have locations that accommodate RVs. Some locations have designated RV parking areas, though availability varies widely by chain and location. As of early 2026, overnight fees at locations that charge range from roughly $15 to $35 per night. Verify current pricing with the specific stop. Most mixed-use parking is free but comes with unwritten etiquette about space usage. Professional truck drivers completing federally mandated rest periods take priority. Stay out of marked commercial driver zones.

For a detailed breakdown of truck stop parking etiquette, safety assessment, and chain-by-chain policy analysis, see our complete guide to overnight RV parking at truck stops.

Rest Areas

Interstate rest areas are managed by state Departments of Transportation, not private companies. Rules vary by state, from unlimited overnight stays to 2-hour limits that effectively prohibit sleeping. Our rest area overnight parking guide by state provides a full state-by-state table with time limits and DOT source links.

General rules for rest areas: stay inside your vehicle, keep slides in, do not set up camp, park in standard vehicle spaces (not commercial truck areas), and follow all posted time limits.

Casino Parking

Many casinos allow free overnight RV parking as a way to attract customers. Check with security on arrival. Some casinos use license plate tracking and expect you to visit the casino floor. Tribal casinos in the Southwest and Midwest are often the most accommodating.

The backup strategy that works: Before you commit to a Walmart overnight, identify one alternative within 30 minutes in each direction. Use the AllStays app or iOverlander to find nearby options. Having a Plan B eliminates the midnight scramble that leads to risky parking decisions.

Walmart Overnight Parking Etiquette That Keeps the Privilege Alive

The number of Walmarts allowing overnight RV parking has dropped over the past decade. A 2020 CNN report, citing data from OvernightRVParking.com, estimated the figure at roughly 58% of locations still permitting stays, down from an estimated 78% in 2010. The Walmart Locator community database lists over 1,000 no-park stores. The current figure may be lower. The decline is driven by three things: local ordinances, liability concerns, and RVer behavior.

You cannot control the first two. You can control the third.

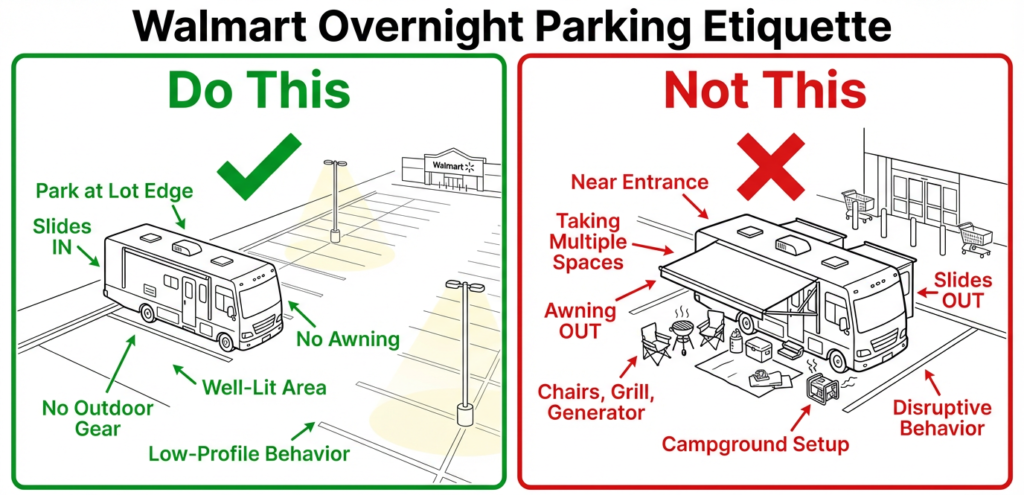
Side-by-side comparison showing correct low-profile RV parking versus campground setup behavior in a Walmart lot

One night only. Arrive in the evening. Leave by mid-morning. If you need a second night due to an emergency, get fresh permission from the manager.

Park far from the entrance. Use the outer edges of the lot. Stay away from loading docks, fire lanes, and customer traffic flow.

No campground behavior. Keep slides in unless absolutely necessary for access (and if you must extend one, park against a curb where it extends over grass, not into traffic). No awnings. No outdoor chairs, rugs, or grills. No generator use unless you have explicit permission and even then, not after 10 p.m. Do not unhitch your trailer.

Shop inside. Spending $30-50 on groceries or supplies gives the store manager a business reason to keep allowing overnight parking. This is the single most effective way to protect the privilege.

Leave no trace. Take everything you brought. If it did not come from the store or the parking lot, it leaves with you. Never dump gray water, black water, or trash in the parking lot. This is the fastest way to get RV parking banned at a location permanently.

Be invisible. The ideal Walmart overnight is one where nobody notices you were there. If security, other customers, or the morning shift manager would never know an RV stayed overnight, you did it right.

Frequently Asked Questions

Does Walmart corporate allow overnight RV parking?
Yes. Walmart’s corporate FAQ states that the company values RV travelers, permits parking on store lots as able, and delegates approval to individual store managers based on parking availability and local laws.

Do all Walmart stores allow overnight RV parking?
No. Of roughly 4,600 U.S. stores, the Walmart Locator community database lists over 1,000 as prohibiting overnight parking, and the actual no-park count is likely higher. Local ordinances, lease restrictions, manager discretion, and past abuse all affect individual store policies.

How do I find out if a specific Walmart allows overnight parking?
Use the AllStays app or the Walmart Locator website (walmartlocator.com) to check community-reported status, then call the store directly and ask to speak with a manager. The phone call is the only reliable confirmation.

Can I stay more than one night at Walmart?
The expectation is one night only. Extended stays are the primary reason stores revoke overnight parking privileges. If you need more than one night, use a campground, truck stop, or dispersed camping area.

What if the manager says yes but there is a “No Overnight Parking” sign?
The sign may reflect a local ordinance rather than the store’s preference. Clarify with the manager whether the restriction is store policy or city law. If it is a city ordinance, the sign governs regardless of the manager’s willingness.

Is Walmart overnight parking safe?
Most Walmart stores do not provide dedicated overnight security patrols for parking lots. Park in well-lit areas, lock your doors, secure external gear, and trust your instincts. If a lot feels unsafe, leave. A truck stop with overnight activity is often safer than an empty parking lot.

Do I need to buy something if I park overnight?
It is not required, but it is the smartest thing you can do. Spending money at the store gives management a business incentive to keep allowing overnight parking. Budget $30-50 for groceries or supplies.

Last verified: March 2026. Walmart overnight parking policies change frequently at the individual store level. Always call the specific store before arrival. This guide reflects community-reported data and published corporate policy. It does not constitute legal advice regarding local ordinances.

How to Work Remotely While Boondocking

How to Work Remotely While Boondocking

Last updated: May 2026  |  Equipment pricing verified May 2026 — confirm current rates before purchase

By Chuck Price — 35+ years of RV travel, 118 documented boondocking locations across 38 states in a 2018 Hymer Aktiv Class B, featured on CBC Radio’s “Cost of Living”.

Quick Answer

Running a reliable 8-hour remote workday from BLM land or National Forest requires three things: a 300W+ solar array with adequate lithium storage, a layered connectivity stack (satellite primary, cellular backup), and a daily schedule aligned to peak solar hours (roughly 10 a.m.–2 p.m.). Initial equipment cost runs $2,000–$3,000. Monthly connectivity depends on your selected Starlink tier and cellular backup; the worked example below uses September 2026 Starlink prices. Camping cost on eligible dispersed sites: $0–$200. Setups in the $2,500 range can offset several months of full-hookup campground fees, though actual payback depends on your camping mix, recurring service costs, and gear choices.

Affiliate disclosure: This page contains referral links to gear we run in our own rig. We earn a small commission at no cost to you. All recommendations are based on personal use across 118 boondocking locations.

Cindy and I have been taking extended RV trips for more than 35 years. When we started working remotely from the road, the standard boondocking advice failed us quickly. Most guides were written for weekend campers who needed enough power for lights and a water pump — not someone running two laptops, a monitor, and video calls from 9 to 5.

We’ve refined the setup over the past several years, utilizing 118 boondocking locations across 38 states in our 2018 Hymer Aktiv Class B. This guide covers the actual numbers, the actual gear, and the actual mistakes — so you don’t repeat ours.

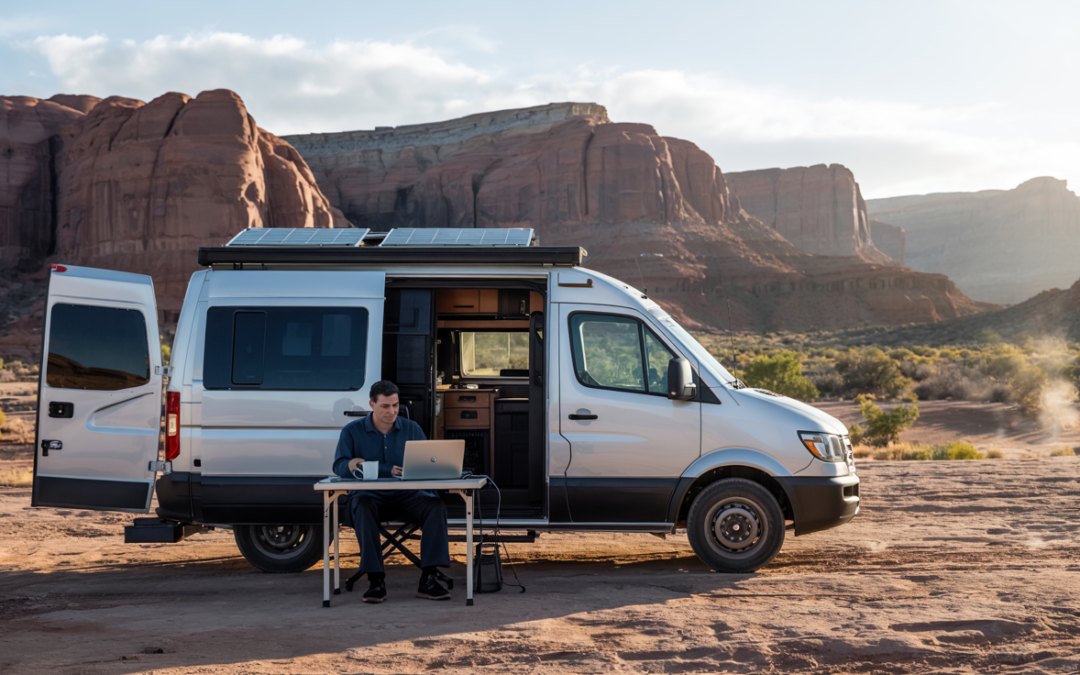
Remote Work in the Desert

Remote Work vs. Workcamping: What the Numbers Actually Show

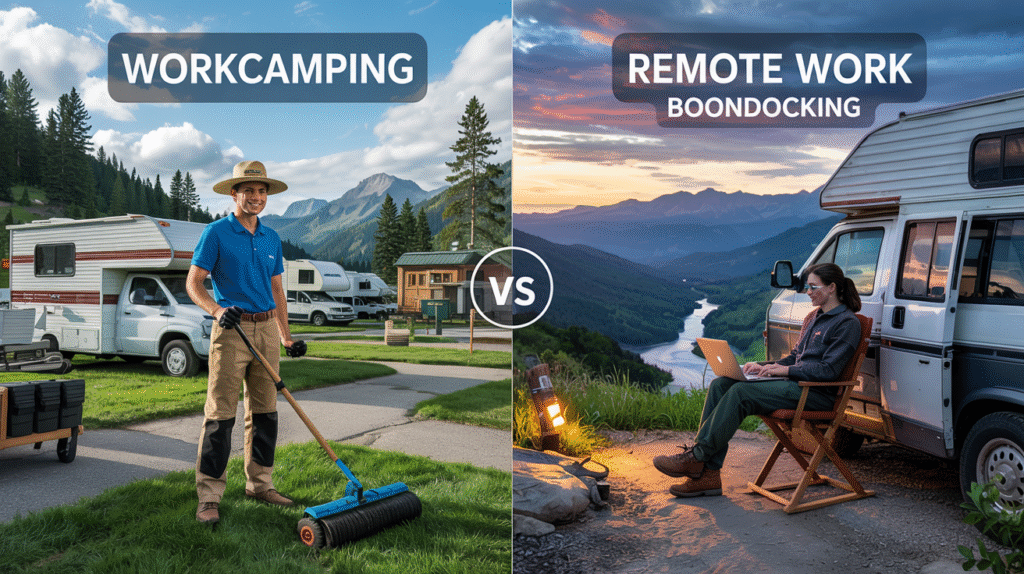
Workcampers typically receive a campsite valued at $500–$900/month in exchange for 20–25 hours of weekly labor — roughly 80–100 hours per month — producing an effective rate of about $6–$11/hour without benefits. Remote workers boondocking on eligible dispersed public land can maintain their full professional salary while paying $0–$200/month in camping costs, depending on location and any applicable permit fees. This comparison applies to US-based remote workers; workcamping compensation and campsite values vary by operator, region, and season. Sources: Workamper.com compensation analysis; campsite cost range from LatestCost RV campsite data (2025–2026).

I met Jim and Sarah at a campground outside Tucson. They were putting in 20 hours a week cleaning facilities and mowing grounds in exchange for a free site. When I mentioned we were boondocking 30 minutes away on BLM land at no cost while keeping our regular jobs, it genuinely surprised them. They hadn’t known that was a legal option on eligible public land.

Here’s the math side by side. I’m using a $700/month midpoint campsite value — well within the $500–$1,200 range for standard full-hookup parks in 2025–2026 — and the average labor commitment of 22.5 hours per week (90 hours/month):

Effective hourly rate calculation: $700/month ÷ 90 hours/month = $7.78/hr. At the low end ($500/month ÷ 80 hrs) = $6.25/hr. At the high end ($900/month ÷ 100 hrs) = $9.00/hr. Stated range: $6–$9/hr.

Factor Traditional Workcamping Remote Work + Boondocking
Effective hourly compensation ~$6–$9/hr equivalent, no benefits Your professional salary
Monthly camping cost $0 (offset by labor) $0–$200 on eligible dispersed sites
Weekly hours committed to camp 20–25 hrs 0 hrs
Location freedom Fixed to participating campground Eligible dispersed sites where local rules allow
Career progression Paused Continues
Upfront equipment investment Minimal $2,000–$3,000 (offset potential varies)
Schedule control Fixed by campground Self-determined

Hourly equivalent calculated using $700/month midpoint campsite value at 22.5 hrs/week average (90 hrs/month). Full campsite cost range for US full-hookup RV parks: $300–$1,200/month in 2025–2026, with premium resorts higher. Source: LatestCost; HookHub campground cost data; Workamper.com.

The workcamping model isn’t wrong for everyone. If you want community, structure, and a built-in social environment, it delivers those. The financial comparison is the starkest difference — and see our full boondocking cost breakdown for a more detailed look at the numbers across trip types.

On public land access: many BLM areas use a framework of up to 14 consecutive days in one location before requiring a move, but exact stay limits and distance requirements vary by field office and district. The 25-mile move requirement is commonly referenced but is not universal. Rules for National Forest dispersed camping are similar in concept but vary by forest, ranger district, and local orders. Always verify current rules for the specific area you plan to use at blm.gov or the relevant ranger district before your trip. For a full breakdown of what the rules actually say, see our BLM camping rules guide.

Power Management: Sizing Your System for an 8-Hour Workday

A 300W solar array with a properly sized lithium battery bank can sustain a dual-laptop 8-hour remote workday in most US locations from roughly April through October. In northern latitudes or winter months, plan for 40–50% reduced solar output and size up accordingly. This guidance applies to RV-mounted fixed panels under typical open-sky conditions; shading, roof angle, and geography all affect real output. Use the free NREL PVWatts calculator to model your specific location and month. For a deeper dive into solar system design, see our complete RV solar power guide.

The hardest lesson I learned cost me a client call. We were in Coconino National Forest outside Sedona and by noon my laptop battery warning was flashing and the inverter was beeping. I finished the workday from the front seat of the tow vehicle with the engine running. That afternoon I built a spreadsheet and started tracking every watt we consumed. Five years of that data shaped this section.

What a Remote Workday Actually Consumes

Before sizing a system, you need measured numbers, not estimates. After five years of daily tracking in our Hymer Aktiv, here is what our typical 8-hour workday draws:

Device Draw (Watts) Hours/Day Daily Wh Notes
2x laptops 75W total 8 600 Wh Varies by model — measure yours
Portable monitor 25W 8 200 Wh USB-C powered preferred
Wi-Fi router/hotspot 15W 8 120 Wh Starlink dish draws more on startup
Phone charging 8W avg 5 40 Wh
LED lighting (2 lights total) 10W total 4 40 Wh 5W per light, 2 lights = 10W total
Coffee maker 900W 5 min 75 Wh Run during peak solar hours
Daily total ~1,075 Wh Based on our measured data, 2020–2025

Data from Chuck Price’s personal power consumption logs across 118 boondocking locations, 2020–2025, Boondock or Bust. Your draw will vary by equipment — measure with a kill-a-watt or battery monitor before sizing your system. Lighting row shows 10W total for 2 lights (5W each) over 4 hours = 40 Wh.

Battery Options: What We’ve Actually Used

Lead-acid: Lower upfront cost. Heavy, require maintenance, and usable to only about 50% depth of discharge without shortening lifespan. Under daily deep-cycle use, rarely last more than two seasons. More expensive in practice.

AGM: Sealed, no maintenance, slightly better cycle life than flooded lead-acid. Still limited to roughly 50% usable depth of discharge. Heavier than lithium per usable Wh. Adequate for occasional use.

Lithium (LiFePO4): We upgraded in 2020. Usable depth of discharge is 80–90% — roughly double the usable capacity of lead-acid at equivalent stated amp-hours. Lighter, faster-charging, no voltage sag under load. For daily professional use over a 5+ year horizon, lithium is the practical choice. Source: NREL — Why Lithium-Ion Batteries Are Taking Over.

Our Actual Power Setup (Field-Tested Since 2020)

Power System — 2018 Hymer Aktiv Class B

  • Solar: 3 × 100W panels (300W total) — roof mounted
  • Battery bank: 2 × 300Ah LiFePO4 at 12V nominal = 600Ah total / 7,200Wh nominal capacity
  • Usable capacity at 80% DoD: ~5,760Wh (600Ah × 12V × 0.80)
  • Inverter: 2,000W pure sine wave
  • Battery monitor: Victron BMV-712 Smart — real-time amp-hour and watt tracking

Daily generation (average): 300W × 5 peak sun hours × ~80% system efficiency = approximately 1,200 Wh under average conditions. Actual output depends on latitude, season, and obstruction. Southwestern US locations typically see 5.5–7 peak sun hours; northern or winter conditions produce significantly less. Model your location at NREL PVWatts.

Real-world monitor data (Victron BMV-712 history): Average discharge of 379Ah per cycle; deepest single discharge recorded at 716Ah. At our measured daily draw of ~1,075Wh, our 5,760Wh usable bank provides roughly 5 full workdays of storage before recharge — a comfortable buffer for multi-day overcast stretches.

Why 300W instead of 200W: In Oregon one November, a week of overcast cut our output by more than half. 200W left us managing carefully. The additional 100W adds roughly $150 in panel cost and meaningfully reduces that scenario across most conditions.

Power Conservation: Stretching Every Watt

The battery monitor is the purchase I didn’t know I needed. The Victron BMV-712 shows real-time watts in from solar and watts out to devices. Before installing it, I was guessing. After, I could see exactly which device was drawing the most and when to shift loads.

  • Screen brightness at 50–60% cuts laptop draw by 10–15W without meaningfully affecting productivity
  • Schedule high-draw tasks — video calls, large file uploads, the coffee maker — between 10 a.m. and 2 p.m. when solar input is highest
  • Kill phantom loads: inverter left on, propane detector, and multiple USB chargers with nothing plugged in combined to roughly 20–25W of constant draw in our rig. These numbers are setup-specific; yours may differ. A battery disconnect switch on non-essential circuits eliminates this when you’re away from the rig
  • Lower screen resolution and disable background app refresh during sustained work blocks — measurable reduction on older hardware

Winter sizing note: In northern Arizona one December, our 300W array produced under 130W at midday due to low sun angle and shorter days. Plan for 40–50% reduced output from October through February north of roughly 35° latitude. Size your system against your worst expected working month, not your best summer conditions. Source: DOE — Solar Performance and Efficiency.

300W solar array and 600Ah lithium battery bank in a 2018 Hymer Aktiv Class B motorhome with Victron BMV-712 battery monitor
Our power setup: 300W solar, 2×300Ah LiFePO4 (600Ah total), Victron BMV-712 monitor. Photo: Boondock or Bust.


Connectivity: The Three-Layer Stack That Actually Works

No single connection source is sufficient for professional remote work in dispersed camping areas. Starlink performs well in many locations with no cellular signal, but weather, obstructions, and occasional outages make a cellular backup non-negotiable for client-facing work. Check real-world coverage reports at CoverageCritic before committing to a location — carrier maps regularly overstate rural coverage per FCC coverage data. For a deeper look at connectivity options, see our RV internet 2026 guide.

I’ve logged connectivity performance across 118 locations — carrier, signal strength, Starlink availability, obstructions, and speed test results. The consistent finding in the locations we’ve visited: signal strength varies more by terrain and amplification than by which carrier you’re on. We tried three separate carrier plans before settling on one plan with a quality booster. In many of the remote areas we tested, switching carriers didn’t materially improve service when terrain and tower distance were the real constraints. Your results may differ based on your region and the carriers available there.

Here is what remote work actually demands from a connection that casual internet use does not:

  • 2–3 Mbps upload minimum for video conferencing — not download. Most people check download speed and ignore upload. Upload is what breaks calls. Source: Zoom bandwidth requirements
  • Reliability during defined work hours — not just average uptime across the day
  • Low latency for real-time tools, shared docs, and voice
  • Sufficient data — in our usage, a 40-hour work week typically runs about 20–60GB depending on how many hours of video calls we have; light-video weeks are closer to 20GB, heavy-video weeks approach 60GB

Our Field-Tested Connectivity Stack

Connectivity Stack — 2018 Hymer Aktiv (logged across 118 locations)

Primary: Starlink Roam

  • Hardware: kit prices depend on the model and current offer. Check current Starlink kit prices and referral eligibility
  • Monthly service: US Roam 100GB $55, Roam 300GB $80, or Roam Unlimited $175, checked September 29, 2026. Verify current plan prices
  • Can work at many BLM and National Forest dispersed campsites where camping is allowed, the site has a clear sky view, and local rules do not restrict your setup. Canyon walls, dense tree canopy, and terrain features that block the northern sky are the main obstacles. The Starlink app includes an obstruction checker — use it before committing to a site
  • In our testing in open terrain, we often saw roughly 50–200 Mbps download, 10–20 Mbps upload, and 25–60ms latency. Performance varies significantly by congestion, weather, obstruction, and location
  • This changed the locations available to us. Sites that were previously unusable for work became workable

Choose Starlink only if your sites have open sky, your battery budget covers the dish, and the selected plan permits your intended use. Roam has business-use restrictions; review Starlink’s plan terms before relying on it for work. For routes with dependable cellular coverage, a hotspot may be enough.

For eligible new customers who order directly through the referral link, Starlink offers one month of service credit on the second bill. You pay the first month and must remain subscribed for at least two months. Existing or returning customers, retail purchases, and transferred kits are not eligible. Confirm the offer before ordering. Starlink referral terms, checked September 29, 2026.

Referral disclosure: Boondock or Bust may receive a reward if you make an eligible purchase through our link. We are independent publishers, not Starlink representatives.

Backup: Cellular + Signal Booster

  • WeBoost Drive Reach RV — $499 as of May 2026 (verify current pricing at weboost.com). Before use, verify current carrier and FCC setup/registration requirements for your booster
  • Visible unlimited plan — $40/month as of May 2026 (verify current pricing at visible.com)
  • In our case, this three-layer setup has prevented missed deadlines across 118 locations so far — including three Starlink outages from weather and one damaged cable

Emergency: Public Wi-Fi Locator

  • WiFi Map Pro — crowdsourced public Wi-Fi. Used once: drove about 28 miles to a library to upload a large project file when both primary and backup failed during a severe weather event
  • Garmin inReach Mini 2 — satellite communicator for safety emergencies, not for work connectivity

Monthly connectivity cost:

  • Recurring service example: $95–$215/month (Starlink $55–$175 + an assumed $40 cellular backup). Check current cellular pricing; taxes and optional charges are extra.
  • Historical equipment-cost example: about $23/month over four years ($599 Starlink + $499 WeBoost = $1,098 ÷ 48 months). These are the example’s equipment costs, not current purchase quotes.
  • Illustrative monthly equivalent: about $118–$238 for the service and historical hardware inputs above. This excludes the RV power system, taxes, accessories, and other costs.

Pre-Trip Connectivity Testing

Test your full connectivity stack locally before any trip where a failure has professional consequences. Run speed tests on both primary and backup connections during your normal work hours — not just at midnight when congestion is low. A bad test at home is an easy fix. A bad test 40 miles from the nearest town on a client call day is not.

CoverageCritic provides useful crowdsourced signal data, but treat missing data as a lack of information, not confirmation of coverage. In very remote areas, reports may be sparse. When no data exists for a specific site, call the nearest BLM field office or ranger district — they often know which carriers work in their area.

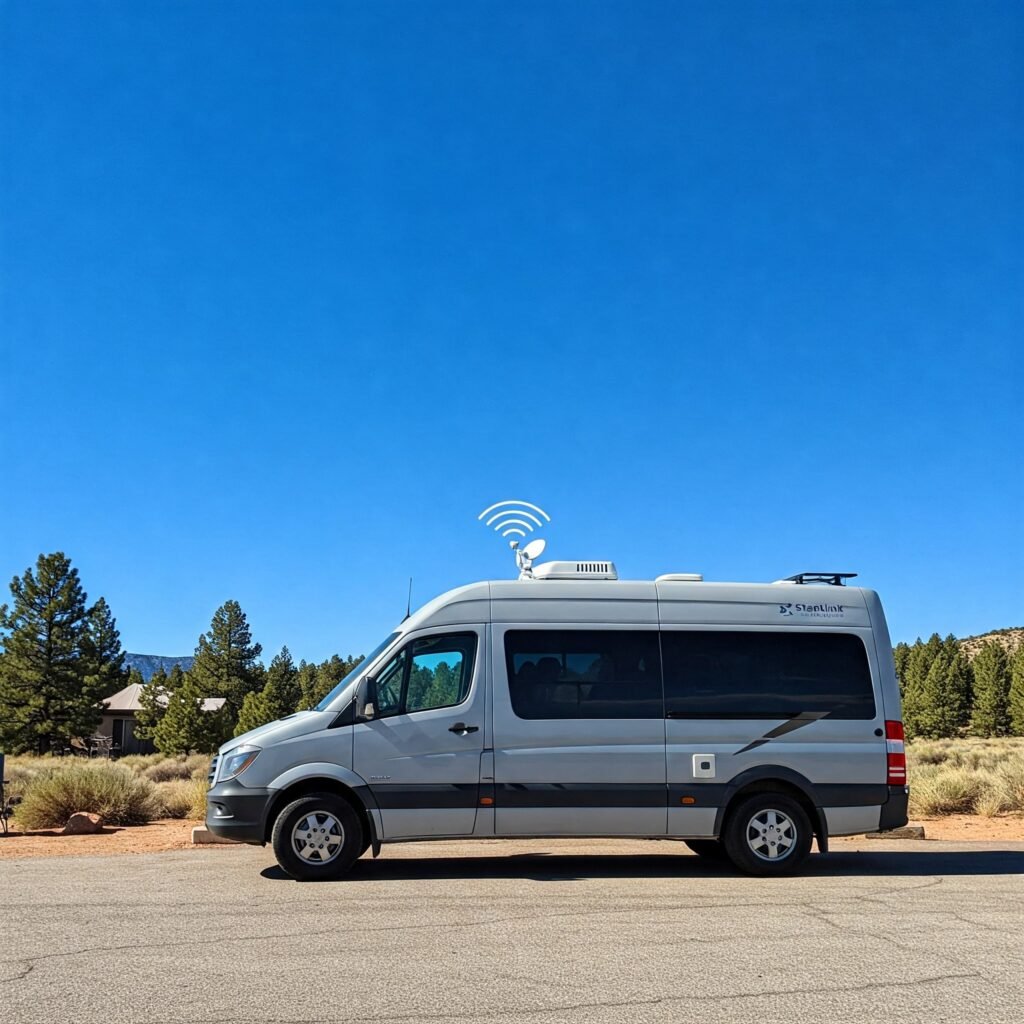
Starlink dish deployed from a Class B motorhome roof at a dispersed BLM campsite with clear sky view
Starlink Roam in use at a dispersed site: effective where sky view is clear, but a cellular backup is still non-negotiable for professional work. Photo: Boondock or Bust.

Daily Schedule: Aligning Your Workday to Solar Production

Solar panels begin generating meaningful output as the sun rises and reach peak production when irradiance approaches 800–1,000 W/m², typically between 9 a.m. and 2 p.m. depending on season and latitude. Scheduling your highest-power tasks inside this window — video calls, large uploads, compute-heavy work — maximizes solar input against load and preserves battery reserve for afternoon work. The table below shows our typical day; adjust the window 30–60 minutes earlier in summer and later in winter. Source: peak sun hours explained (SolarReviews); production modeling via NREL PVWatts.

Time Block Solar Status What We Do Why
7:00–9:00 a.m. Low / rising Email, planning, light writing Low bandwidth; battery recovering from overnight phantom loads
9:00 a.m.–2:00 p.m. Peak generation Video calls, large uploads, high-draw tasks, coffee maker Solar input at or near load — running on sun, not battery
12:00–1:00 p.m. Peak continues Lunch, walk; battery charging toward full Build afternoon reserve; break improves afternoon focus
2:00–5:00 p.m. Declining Focused writing, reading, lower-draw tasks Drawing from battery reserve built at midday
5:00–7:00 p.m. Minimal Monitor battery level; wrap up; disconnect non-essentials Battery management; align end of work with sunset

Peak generation window shown as 9 a.m.–2 p.m. — this is our typical observed window; it shifts with latitude and season. Source: SolarReviews peak sun hours. Use NREL PVWatts to model your specific location.

The advantage of this structure is flexibility. On days when weather cuts solar production, you’re not scrambling — you’ve been banking reserve at midday all week. With 5,760Wh of usable storage and a ~1,075Wh daily draw, we have roughly five workdays of buffer before the bank runs dry without any solar input. That covers most multi-day overcast stretches we’ve encountered.

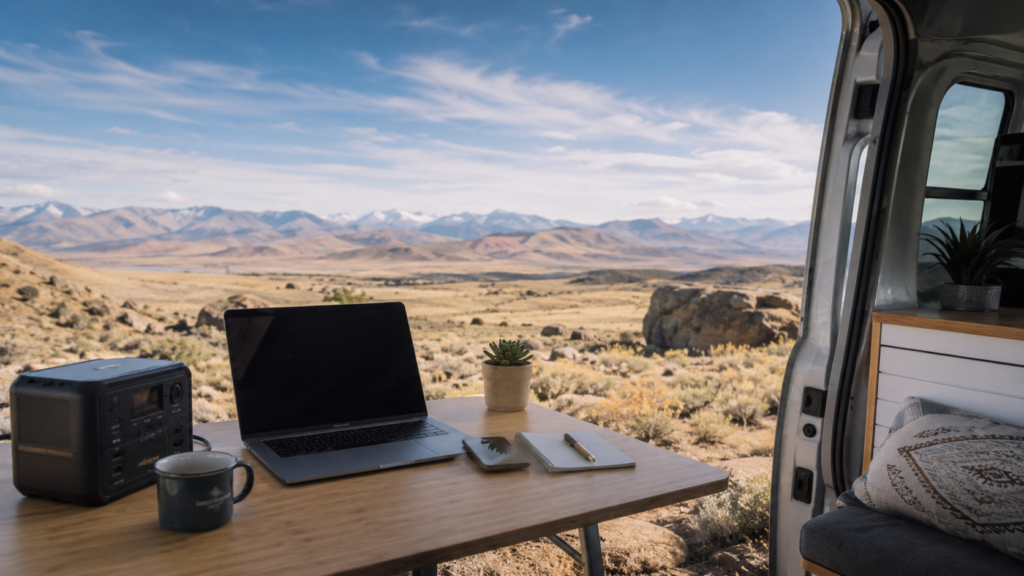
Remote worker at laptop inside a Class B motorhome during peak solar hours at a dispersed BLM campsite
Cindy working during the 9 a.m.–2 p.m. peak solar window. Scheduling high-draw tasks in this block keeps the battery reserve intact for afternoon work. Photo: Boondock or Bust.

Workspace Setup: Making a Small Space Actually Work

A dedicated, ergonomically correct workspace in a Class B or C motorhome is achievable without major renovation, but it requires intentional design. The main risk is back and neck strain from makeshift surfaces — dinette tables set at the wrong height, working from a bed, or standard chairs not adjusted for RV use. These risks apply regardless of vehicle size. OSHA’s ergonomic principles are a useful reference for setting up a mobile workspace, even though formal employer obligations and enforcement apply differently than in a traditional office setting. Source: OSHA ergonomics guidance.

When we started, I worked wherever I found a flat surface. After three weeks of lower back pain I took it seriously. In the Hymer Aktiv we modified the rear lounge to create a semi-permanent desk space. The single biggest improvement was a wall-mounted articulating monitor arm that swings away when unused and takes no floor space.

Our Workspace Setup

  • Monitor arm: Wall-mounted articulating arm — folds flat when not in use, brings monitor to eye level when working. Single biggest ergonomic improvement we’ve made
  • Laptop stand: Roost V3 — packs flat, raises screen to eye level, enforces correct neck angle
  • Keyboard and mouse: Full-size wireless. Typing on a laptop keyboard with a monitor at the wrong height causes wrist and shoulder strain within weeks
  • USB fans: Instead of running A/C (900W+), USB-powered fans handle most warm weather. Position the workspace away from direct afternoon sun; orient with workspace windows north-facing where site layout and safety allow

Work-Life Separation When Your Office is 10 Feet From Your Bed

This turned out to be harder than the technical setup. When your desk and bedroom are the same room, work expands to fill all available time if you let it. APA reporting on remote work stress highlights elevated burnout and boundary-management challenges for many remote workers — it’s a structural problem, not a discipline problem. Source: APA — Remote Work and Stress (2021).

Our solution: a physical work lamp that is only on during work hours. When it goes off at 5 p.m., that’s the end of the workday — no exceptions. A visual cue tied to a physical object removes the decision. We’ve used this approach for four years and it works better than any app-based reminder we’ve tried.

  • Shutdown ritual: Close all work tabs, write tomorrow’s top three tasks, move the laptop to a specific location you don’t touch after hours. The physical movement creates a boundary the monitor arm alone doesn’t provide
Compact ergonomic workstation with laptop on a stand, external monitor, and wireless keyboard in a tight space
A functional workspace in a small footprint: Raised laptop, external display, and wireless peripherals. Photo: Unsplash.

Common Pitfalls and How to Avoid Them

The most common failure modes in remote boondocking setups are undersized power systems, unverified connectivity, and poor site selection — all avoidable with pre-trip testing. These errors are more frequent among people who size their system against best-case conditions rather than worst-case ones. Test your full setup — power, internet, workspace — before the first trip where a failure has professional consequences. Verify access, permit requirements, and stay limits for your specific area before departure; rules vary by district and change. Sources: BLM dispersed camping; USDA Forest Service dispersed camping.

Power Pitfalls

Undersizing for winter: Our first winter boondocking in northern Arizona, 300W of solar produced under 130W at midday. The shorter days and low sun angle cut output by more than half. Size your system against your worst expected working month, not your best summer trip. Plan for 40–50% reduced output from October through February north of roughly 35° latitude. Use the NREL PVWatts calculator to model monthly output for your specific location. Source: DOE — Solar Performance and Efficiency.

Phantom loads: We came back from a 3-day hiking trip to find the battery bank well below where we expected. The culprits in our rig: an inverter left on, a propane detector, and multiple USB chargers with nothing plugged in. Combined, these drew roughly 20–25W continuously in our specific setup — your numbers will depend on your equipment. The fix: a battery disconnect switch on non-essential circuits, and a battery monitor to identify what’s drawing when you think nothing is running.

Connectivity Pitfalls

Trusting carrier coverage maps: FCC mapping data shows coverage is frequently overstated in rural areas. Coverage maps indicate where a tower exists; they don’t show whether you’ll get usable signal inside a canyon or under tree canopy. Verify with crowdsourced reports at CoverageCritic before committing to a location for a workweek, and treat sparse or absent data as unknown rather than confirmed coverage.

Running multiple carriers without a booster: In some remote areas, carriers may rely on overlapping or shared infrastructure, so switching carriers doesn’t always improve signal. In the locations we’ve visited, one carrier with a quality booster worked better than multiple plans without amplification. Test your specific area before drawing any conclusions — regional infrastructure varies significantly.

Site Selection Pitfalls

Ignoring tree canopy for Starlink: Dense forest canopy blocks Starlink’s sky view. Use the Starlink app’s obstruction checker at your prospective location before committing. Open desert, high mesa, and alpine meadow sites generally work well. Old-growth forest and canyon floors often don’t. This is the real constraint in most cases — not geographic coverage.

Site orientation: Where site layout and safety allow, orient your rig for the best practical solar exposure — often roughly south-facing in the northern hemisphere, though the best angle depends on roof layout, shading, and the specific site. Park on level ground for comfort and more reliable system operation overall. Orient the vehicle so you could leave quickly if needed.

Three Misconceptions We Hear Constantly

“You need to be a tech expert”

I was an English major. I learned solar sizing, battery chemistry basics, and signal amplification over a few months of reading and hands-on trial and error. The core concepts aren’t complicated — watts times hours equals watt-hours. A battery monitor gives you real-time feedback. Most RV solar installers will spec and install a complete system to your requirements if you’d rather not DIY. The learning curve is real but manageable for anyone comfortable operating their RV’s existing systems.

“Boondocking only works where there’s already cell service”

This was true before Starlink. For us, Starlink has made some no-cell-service locations workable when the site had a clear view of the sky. Sky obstruction — not map coverage — is now typically the binding constraint. That said, Starlink isn’t universal: it doesn’t work under heavy canopy, in deep canyons, or in any spot without a clear northern sky view. Check the best apps for finding dispersed sites to identify locations with the right sky exposure before committing.

“The upfront cost is too high”

At $2,000–$3,000 for the power and connectivity stack, that’s real money. For travelers who would otherwise pay regularly for full-hookup parks ($500–$1,200/month in most US markets), the equipment cost can offset several months of campground fees — though actual payback depends on your camping mix, how often you use hookup sites versus dispersed, and your ongoing service costs. Our only regret is not building the full system sooner. If upfront cost is the barrier, start with the Starlink hardware and a minimum 200Ah lithium bank and add solar capacity in a second phase.

Comparison graphic showing workcamping versus remote work boondocking lifestyle and financial differences
The financial comparison tells most of the story, but the lifestyle difference is equally significant. Photo: Boondock or Bust.

Frequently Asked Questions

How much solar power do I need to work remotely while boondocking?

Based on our five years of measurement data, a dual-laptop 8-hour workday draws roughly 1,000–1,100 Wh. A 300W solar array with a properly sized lithium battery bank handles this load in most US locations from April through October, generating approximately 1,000–1,500 Wh daily depending on location, season, and sky conditions. In winter or northern latitudes, plan for 40–50% reduced output. Model your specific location and month using the free NREL PVWatts calculator. For system design details, see our complete RV solar power guide.

Can you use Starlink on BLM land for remote work?

It is often possible, but not guaranteed at every location. Starlink Roam is designed for mobile use and can work at many eligible dispersed campsites where camping is allowed and the site has a clear, unobstructed sky view. Whether it works in practice depends on terrain, canopy cover, and any local rules affecting your stay or equipment setup. Verify the rules for the specific BLM field office or National Forest ranger district before relying on the site for professional work. Use the Starlink app’s obstruction checker before committing. See our BLM camping rules guide for current access information.

What is the best cellular backup for Starlink while boondocking?

In the locations we’ve visited, one carrier plan plus a quality signal booster worked better than juggling multiple plans without amplification. Signal strength in remote areas varies more by terrain and amplification than by carrier in many cases, though this isn’t universal — your region and the carriers available there will affect what works. We run Visible unlimited ($40/month as of May 2026 — verify current pricing) paired with a WeBoost Drive Reach RV. Before deploying any booster, verify current carrier and FCC setup/registration requirements. Check crowdsourced reports at CoverageCritic before committing to a location.

How long do lithium batteries last for a remote work day while boondocking?

Our battery bank is 2×300Ah at 12V nominal, giving 600Ah total / 7,200Wh nominal capacity. At 80% depth of discharge, usable capacity is approximately 5,760Wh (600Ah × 12V × 0.80). At our measured daily draw of approximately 1,075Wh, that provides roughly 5 full workdays of storage before recharge — a comfortable buffer for multi-day overcast stretches. A smaller 200Ah 12V bank (common entry-level spec) provides about 1,920Wh usable at 80% DoD, or roughly 1.8 workdays of storage at our draw rate. Cold weather below 32°F reduces LiFePO4 capacity; do not charge LiFePO4 cells below freezing without a battery management system rated for cold-weather charging.

Is it legal to work remotely from BLM land?

In many BLM and National Forest dispersed camping areas, remote work from your campsite may be allowed when camping itself is permitted and no local rule, permit condition, or land-use restriction prohibits your activity. Rules vary by field office, ranger district, and site-specific orders. Many BLM areas use a framework of up to 14 consecutive days in one location before requiring a move, but exact stay limits and movement requirements can vary by office and area. National Forest dispersed camping rules are often similar in concept but vary by forest and ranger district. We are not lawyers and this is not legal advice. Verify the current rules for the specific area you plan to use at blm.gov or with the relevant ranger district before relying on it for professional work. See our full BLM camping rules guide for current guidance.

Your Next Steps

Get the free setup checklist

The 1-page Remote Work Boondocking Setup Sheet — power budget template, connectivity stack checklist, and our site-scouting criteria from 118 locations. Free for subscribers.

Get the Free Checklist →

  1. Calculate your actual daily power draw — plug a kill-a-watt meter into each device for a full workday. Your numbers will differ from ours. Then use NREL PVWatts to size solar generation against your load for your target region and worst expected month
  2. Test your connectivity stack before you need it — run upload speed tests on both primary and backup during your normal work hours. Upload matters more than download for video calls
  3. Run a 3-day test trip somewhere close to home — full work schedule, real deadlines, actual solar production. Fix what breaks before you’re 200 miles from a parts store
  4. Identify your first real boondocking location — use the best free campsite apps to find eligible dispersed areas, then verify current access, stay limits, and permit requirements with the relevant field office or ranger district before departure

Questions? Drop them in the comments below — Chuck or Cindy will respond.

Safe travels and good signal.
— Chuck & Cindy

Transparency: This article contains affiliate links to gear we run in our own rig. We earn a small commission on purchases at no additional cost to you. Starlink plan pricing was checked September 29, 2026. The equipment amortization and cellular figures above are explicitly labeled example inputs, not current quotes. All prices are subject to change — verify current pricing at each manufacturer’s site before purchase. Recommendations based on personal use across 118 boondocking locations, 2020–2025.

About the Author

Chuck Price has been RVing with his wife Cindy for 35+ years and has documented 118 boondocking locations across 38 states in a 2018 Hymer Aktiv Class B. He has tracked off-grid power consumption data across five years of remote work from BLM land, National Forests, and dispersed public land. Chuck was featured on CBC Radio’s “Cost of Living” podcast discussing the economics of extended RV travel. He publishes field-tested boondocking guidance at Boondock or Bust.

References

  1. American Psychological Association. (2021). Remote work, technology, and stress.
  2. Bureau of Land Management. (2024). Dispersed camping on BLM land. Accessed May 2026. Note: stay limits and distance requirements vary by field office; verify with the specific district managing your area.
  3. Federal Communications Commission. (2024). Mobile coverage maps.
  4. FlexJobs. (2024). Remote work salary and statistics.
  5. Gloomba / HookHub / LatestCost. (2025–2026). Average RV campsite price and cost data. Range: $300–$1,200/month for standard full-hookup parks; $1,500+ for premium resorts.
  6. National Renewable Energy Laboratory. (2024). PVWatts solar production calculator.
  7. National Renewable Energy Laboratory. (2024). Solar resource maps and data.
  8. National Renewable Energy Laboratory. (2022). Why lithium-ion batteries are taking over.
  9. Price, C. (2020–2025). Off-grid power consumption data from 118 boondocking locations, 2018 Hymer Aktiv Class B (2×300Ah/12V LiFePO4, 300W solar, Victron BMV-712). Field records. Boondock or Bust. boondockorbust.com.
  10. SolarReviews. (2024). Peak sun hours explained.
  11. U.S. Department of Energy. (2024). Solar performance and efficiency.
  12. USDA Forest Service. (2024). Dispersed camping guidelines. Accessed May 2026. Rules vary by forest and ranger district; verify with the specific district managing your area.
  13. Victron Energy. (2024). BMV-712 Smart battery monitor.
  14. Workamper News. (2023). Doing the math on workcamping compensation.
  15. Zoom Video Communications. (2024). Zoom bandwidth requirements.

<!– ============================================================
END OF CHUNK 3 — FULL ARTICLE COMPLETE v2

How to Find and Manage Fresh Potable Water

How to Find and Manage Fresh Potable Water

RV Boondocking Water Management: Fresh and Potable Water

How to store, find, filter, and conserve fresh water while camping off-grid.

Last Updated: | Reading Time: ~22 min | Author: Chuck Price, Boondock or Bust

Quick Answer: How much fresh water do you need for boondocking?

Two adults can use a 90-gallon RV fresh water tank for about 9 days with normal habits, 18 to 20 days with basic conservation, and about 30 days with strict water discipline, backup jugs, and careful reuse of non-potable rinse water for non-drinking tasks. Your real number depends on tank size, weather, shower habits, cooking style, pets, and how often you can refill with potable water.

The Shurflo 4008 pump died on day three. Not a slow leak, not a warning drip, just a high-pitched whine and silence. We were camped deep on Willow Springs Trail north of Moab, about forty minutes of washboard from town, with more than a week left in the trip.

Most RVers would have packed up. We stayed because our fresh water plan did not depend on one electric pump, one hose, or one nearby refill point. We had emergency jugs, a hand pump, measured daily usage, water-saving habits, and a clear rule: potable water is for drinking, cooking, hygiene, and safe system fills first.

This guide is focused on fresh water and potable water management only. It covers how to estimate water use, stretch a tank, choose refill sources, filter questionable water, store backup containers, protect the RV system, and avoid running dry while boondocking on public land or remote private land.

Field-use note: Potable water access, posted permissions, seasonal closures, hours, and fill costs change. Verify the source directly before you build a route around it, especially in desert towns, winter conditions, or high-demand snowbird areas.

How the RV fresh water system works off-grid

The rule: Your boondocking water runway starts with fresh tank capacity, but it is controlled by daily use. Why it matters: A large tank disappears quickly when showers, dish washing, and open faucets are unmanaged. Boundary: These numbers apply to self-contained RV camping without hookups, not campground use with unlimited spigots. Example: A 90-gallon tank can last 9 days or about 30 days depending on habits.

An RV fresh water system has four practical parts: the fresh tank, the pump, the plumbing lines, and the faucets or fixtures where water is used. When you are connected to a campground spigot, pressure comes from the outside source. When you are boondocking, pressure usually comes from your 12-volt pump pulling water from your onboard tank.

That shift changes everything. Every faucet run, every dish rinse, every shower, every hand wash, and every pot of coffee comes from a finite supply you carried in. A 40-gallon Class B tank and a 100-gallon Class A tank feel very different, but both fail the same way when daily habits do not match the amount of water available.

Most factory tank gauges are too vague for serious boondocking. A display that moves in thirds gives you very little warning. A better monitor, such as a SeeLevel II tank monitoring system, gives percentage-based readings and makes it easier to connect habits with actual consumption.

The first upgrade is not always hardware. The first upgrade is measurement. Fill your tank, write down the starting percentage, camp normally for 24 hours, and check the reading again at the same time the next day. Do that for three days. Your own number beats every generic RV water estimate online.

Fresh water priority order

Protect drinking water first, cooking water second, hygiene water third, and convenience water last. When supplies tighten, drop convenience tasks before you reduce drinking water. That means fewer dish-heavy meals, fewer long rinses, and no unnecessary faucet running.

Fresh water consumption benchmarks from real boondocking

The baseline: Two adults using basic conservation usually need about 4 to 5 gallons of fresh water per day. Why it matters: Published estimates often reflect RV park habits, not remote camping. Boundary: Hot weather, pets, children, medical needs, and dish-heavy cooking increase the number. Example: A 40-gallon tank gives roughly 8 days at 5 gallons per day.

Our fresh water use falls into three practical tiers. Standard use runs about 9 to 10 gallons per day for two people. Basic conservation drops that to about 4 to 5 gallons per day. Strict conservation can bring net fresh water demand close to 2.5 to 3 gallons per day when you capture clean warm-up water, use spray bottles, skip faucet waste, and keep stored potable water separate from utility water.

Daily fresh water use for two adults, based on boondocking field logs
Activity Strict Use Notes
Drinking and cooking 1.5 gal/day Assumes moderate weather and simple meals.
Navy showers and hygiene 1.5 gal/day Based on short showers and faucets off between uses.
Dish washing 0.5 gal/day Uses basin washing and spray bottle rinsing.
Hands, teeth, small rinses 0.3 gal/day Assumes taps are turned off between actions.
Dog water, 40 to 80 lbs 0.2 gal/day Increase this in heat, wind, or long hiking days.
Strict fresh water baseline 4.0 gal/day This is the practical planning number before weather adjustments.

Heat changes the math. Above 90°F, add at least 25% for drinking, cooling towels, pet water, and extra hand rinses. Above 95°F, plan higher. Wind and low humidity also increase water needs because you dehydrate faster while feeling less sweaty.

Cold weather creates different problems. You may drink less, but you also risk frozen hoses, stiff fittings, and delayed fills. In shoulder season, we still top off whenever a safe potable source is convenient because weather can make the next refill harder than planned.

15 fresh water conservation techniques ranked by impact

The ranking: The largest savings come from showers, dishes, and faucet behavior. Why it matters: Small daily leaks in habits beat big tanks over time. Boundary: Savings below assume two adults in a self-contained RV with moderate weather. Example: Switching from running-water dishes to basin washing can save several gallons per day.

1. Navy showers (Save: 4 to 14 gallons per shower)

Turn water on long enough to wet down. Turn it off. Soap everything. Turn it back on only long enough to rinse. A short navy shower can use under one gallon when you are disciplined. A casual RV shower can burn through many times that.

2. Basin dish washing (Save: 3 to 5 gallons per day)

Fill a small collapsible basin with hot soapy water. Wash all dishes there. Use a spray bottle for the final rinse. Running water over each plate feels normal at home, but it is one of the fastest ways to drain an RV fresh tank off-grid.

3. Capture cold water while waiting for hot water (Save: 0.5 to 1 gallon per day)

Put a clean container under the faucet or showerhead while the line warms up. Use that captured clean water for dishes, hand washing, dog bowls, or first-pass cleaning. This is the easiest reuse habit because the water never touches a dirty surface. Water is the limit. See where to shower when boondocking for seven options compared.

4. Turn off taps between actions (Save: 1 to 2 gallons per day)

Do not let water run while soaping hands, brushing teeth, shaving, rinsing cookware, or waiting for someone else. Watch yourself for one full day. Most people waste more water from short unconscious faucet runs than from one obvious mistake.

5. Use spray bottles for rinsing (Save: 2 to 3 gallons per day)

Keep labeled spray bottles for dishes, counters, and hands. A spray bottle gives ounce-level control. A faucet gives you gallons unless you pay close attention.

6. Drink from a dedicated jug (Save: 0.5 to 1 gallon per day)

Fill a drinking jug in the morning and pour from it all day. This prevents the habit of running the faucet until water feels cold. It also shows whether you are drinking enough in heat.

7. Plan simple meals (Save: 1 to 2 gallons per meal)

One-pot meals, foil packet meals, and meals with fewer pans reduce wash water. Cast iron, silicone spatulas, and quick wipe-downs help more than elaborate camp cooking when water is tight.

8. Scrape before washing (Save: 0.5 gallons per day)

Use a silicone spatula or paper towel to remove food residue before dishes hit the basin. Cleaner basin water lasts longer and requires less rinse water.

9. Use wipes between shower days (Save: 0.5 to 0.75 gallons per day)

Body wipes are not a permanent shower replacement, but they work for face, hands, feet, and quick cleanup between shower days. Pack out used wipes and never leave them at camp.

10. Install low-flow faucet aerators (Save: 1 to 2 gallons per day)

A low-flow aerator reduces water volume while keeping enough pressure for hand washing and dish rinsing. This is cheap, simple, and easy to reverse if you dislike the feel.

11. Use a hand pump as a backup faucet (Save: behavior change)

When you manually pump water from a jug, you use less because effort replaces habit. A hand pump also keeps your camp functional if the electric pump fails.

12. Heat water once for multiple jobs (Save: 0.3 to 0.5 gallons per day)

Heat water for coffee, then use the remaining hot water for dish prep or wipe-downs. Repeatedly running a tap while waiting for hot water wastes more than most people expect.

13. Pre-clean greasy cookware (Save: 0.5 to 1 gallon per meal)

Grease forces more hot water use. Wipe pans before adding water. For messy meals, paper plates may be the practical choice when the next refill is far away.

14. Do laundry in town (Save: 20 to 30 gallons per avoided load)

In-rig laundry can overwhelm a fresh water plan. Stretch clothing with spot cleaning and schedule laundromat stops when you are already refilling water, buying groceries, or getting fuel.

15. Refill before you think you need to (Save: the trip)

Top off on every town run. The difference between 60% and 100% does not matter when the spigot is in front of you. It matters later when wind, road closures, crowds, or broken pumps change the plan.

Navy shower and basin dish washing setup inside an RV galley

Fresh water storage and containment setup

The setup: Carry onboard tank water plus separate potable backup jugs. Why it matters: A pump failure or bad refill source should not end the trip immediately. Boundary: Use food-grade containers only, and label any non-drinking container clearly. Example: Two 7-gallon Aqua-Tainers add 14 gallons of manually accessible reserve water.

Your onboard tank is the main supply, but it should not be the only supply. We carry two 7-gallon Aqua-Tainer jugs as reserve potable water. They are stored separately and are not used for daily convenience. Their job is to keep the trip safe when the main system fails or the next refill takes longer than expected.

Use food-grade containers for drinking water. Do not repurpose chemical, fuel, cleaner, or mystery jugs. Water stored in bad containers can pick up taste, odor, or residue. For camping, the container is part of the water system, not just a storage box.

Label containers by use. We use separate labels for potable drinking water, utility rinse water, and captured clean warm-up water. Labeling sounds fussy until you are tired, dusty, and reaching for a jug in the dark. Clear labels prevent mistakes.

Recommended fresh water containment kit for boondocking
Item Purpose Why it matters
Two 7-gallon food-grade jugs Backup potable water Adds 14 gallons outside the onboard system.
Manual hand pump Access water without RV pump Keeps drinking and cooking water available during pump failure.
White potable water hose Safe system fill Avoids taste and contamination issues from non-potable hoses.
Hose filter Sediment and taste reduction Useful at parks, fairgrounds, town fills, and older spigots.
TDS test strips or meter Water quality screening Helps identify mineral-heavy sources before filling the tank.

Aqua-Tainer emergency water jugs with hand pump stored in an RV

Filtration and potable water safety checks

The rule: Treat unknown water as untrusted until it passes your checks. Why it matters: Clear water can still carry sediment, taste problems, bacteria, or high mineral content. Boundary: A basic inline RV filter improves taste and sediment, but it is not a full purification system. Example: Natural water should be filtered and disinfected before drinking.

Potable does not always mean pleasant. Some municipal sources are safe but mineral-heavy. Some campground spigots taste like rubber hose. Some rural fills produce sediment after a long dry period. Filtering at the hose reduces risk and improves taste, but you still need judgment.

We use a layered approach. First, inspect the spigot and surrounding area. Second, run the water briefly before connecting the hose. Third, use a drinking-water-safe hose and inline filter. Fourth, test questionable sources with a TDS meter or strips. Fifth, avoid filling the whole tank from a source that smells, looks, or tests wrong.

Natural water sources require more caution. Desert rivers, springs, and seeps can carry pathogens, agricultural runoff, dead animal contamination, or heavy minerals. A Sawyer Mini filter can remove many biological contaminants when used correctly, but natural water should still be treated as a backup source, not a casual tank fill.

Potable water check before filling

  • Use only a safe drinking water hose.
  • Confirm the spigot is intended for drinking water.
  • Run the water briefly before attaching your hose.
  • Smell and visually inspect the water before filling.
  • Use a filter when the source is older, rural, or questionable.
  • Stop the fill if water changes color, odor, or pressure suddenly.

What to do when your water pump fails

The protocol: Switch from the onboard pump to manual water access immediately. Why it matters: A dead pump does not mean you are out of water. Boundary: This plan works only if you already carry separate potable jugs and a hand pump. Example: Our Moab pump failure became a parts delay, not a trip-ending emergency.

Day three on Willow Springs Trail, the RV pump stopped. We still had water in the tank, but the faucet could not access it. That is the difference between having water and being able to use water. Your emergency plan needs to solve access, not just capacity.

Step 1: Protect drinking water. Switch to your sealed potable reserve jugs. Do not use those jugs for cleaning, gear rinsing, or convenience tasks until you know how long the repair will take.

Step 2: Install the hand pump. A basic hand pump on a 7-gallon jug gives you usable water for coffee, cooking, teeth brushing, and basin washing. It is slower than the RV pump, which is exactly why it saves water.

Step 3: Cut usage hard. Delay showers, use wipes, cook simple meals, and use spray bottles for rinses. When a pump fails, your goal is not comfort. Your goal is staying safe and buying time.

Step 4: Identify the part before you leave home. Write down your pump model, fuse size, hose fitting size, and access panel location. A common pump such as the Shurflo 4008 is easier to replace quickly than an obscure model you cannot identify from camp.

Test the backup before it matters

Once a month, turn off the RV pump and operate from your backup jug for one normal meal cycle. You will quickly learn whether your pump fits, whether the jug is accessible, and whether your backup plan is realistic.

Where to find potable water while boondocking

The rule: Public land usually provides land access, not drinking water. Why it matters: New boondockers often assume public land includes public facilities. Boundary: Potable water availability changes by town, season, freeze risk, maintenance, and local rules. Example: Quartzsite and Moab both have water options, but timing and season affect reliability.

The safest potable water sources are usually municipal fills, RV parks that allow paid fills, campgrounds with posted drinking water, visitor centers with public spigots, truck stops with RV lanes, and grocery stores or fuel stations that clearly allow RV water fills. Always confirm the spigot is meant for drinking water before connecting your hose.

Common potable water fill options for boondockers, verify current access before relying on any source
Source Type Typical Cost Reliability Notes
Municipal water fill Free to low cost Often reliable, but hours and access rules can change.
RV park paid fill Often $5 to $15 Usually simple if the office allows outside fills.
Campground potable spigot Free with stay or day access Confirm day-use access before planning around it.
Truck stop or travel center Varies Look for RV lanes and clearly marked drinking water.
Grocery or fuel station spigot Usually permission-based Ask first and buy something when appropriate.

Quartzsite, Arizona has historically been one of the easier winter water towns for RVers, but lines can form during peak snowbird season. Moab, Utah has more limited fill options near popular dispersed camping areas, and outdoor spigots may be seasonal because of freezing. The lesson is simple: do not wait until you are low to research water.

Cross-check water sources before you drive. Apps such as iOverlander, Campendium, and AllStays Camp & RV can help, but user reports get stale. Use recent comments, official town pages, campground websites, and phone calls when the refill is mission-critical.

Water planning is one part of planning extended public land stays. For broader camp setup, permit, and stay-limit guidance, see our guide to LTVA camping and extended public land stays.

Boondocking fresh water calculator

How to use this table: Find your fresh tank size and read across by conservation level. Why it matters: Days off-grid are easier to plan when tank size and daily gallons are visible. Boundary: This table assumes two adults in moderate weather. Example: A 60-gallon tank can support about 12 days at basic conservation.

Estimated fresh water runway by tank size and conservation level, two adults, moderate temperatures
Fresh Tank Size Standard Use
10 gal/day
Basic Conservation
5 gal/day
Strict Conservation
3 gal/day
30 gallons 3 days 6 days 10 days
40 gallons 4 days 8 days 13 days
50 gallons 5 days 10 days 16 days
60 gallons 6 days 12 days 20 days
75 gallons 7 days 15 days 25 days
90 gallons 9 days 18 days 30 days
100 gallons 10 days 20 days 33 days
120 gallons 12 days 24 days 40 days

Quick adjustment guide

  • Add one dog: subtract about 10% from your result.
  • Hot weather above 90°F: subtract about 25% from your result.
  • Cold weather below 40°F: add about 10% only if freezing does not limit refills.
  • Three adults: divide by 3 instead of 2.
  • Dish-heavy cooking: subtract 10% to 20% unless you use basin washing.

Hydration for hikes and off-RV excursions

The baseline: Desert hiking can require 1 to 1.5 liters of water per hour in moderate temperatures, and more in high heat. Why it matters: Low humidity hides sweat loss. Boundary: Kids, dogs, heat, altitude, and exposed routes increase demand. Example: A four-hour hot hike can require far more water than a casual campground walk.

Boondocking water planning does not stop at the RV door. A day hike can use more drinking water than an entire low-activity camp day. We plan hiking water separately so the RV tank estimate does not quietly collapse after one hot trail day.

Our normal hiking setup is a 3-liter CamelBak reservoir plus two 1-liter backup bottles. For moderate hikes, that gives 5 liters of carry capacity. One liter stays untouched as the “get home” reserve unless conditions turn serious.

Pre-hydration matters. Drink before you leave camp. Starting thirsty means you are already behind, and it is hard to catch up in dry heat. On long or hot hikes, add electrolytes after the first hour. Headache, cramps, nausea, confusion, or chills in heat are not normal trail discomfort. Stop, cool down, and reassess.

Dogs need their own water budget. A dog cannot tell you it is getting behind. Panting, slowing down, seeking shade, or refusing to continue are warning signs. Carry a collapsible bowl and do not count on natural sources along the route.

Frequently asked questions

How long can I boondock with a 40-gallon fresh tank?

A 40-gallon fresh tank supports about 4 days for two adults with standard water use, about 8 days with basic conservation, and about 13 days with strict conservation. Adjust down for hot weather, pets, extra people, dish-heavy meals, and long hikes.

How much drinking water should I carry separately?

Carry at least several days of potable drinking water outside the main tank. For two adults, two 7-gallon food-grade jugs provide 14 gallons of manually accessible reserve. That reserve matters if the pump fails, the next refill is closed, or the tank water tastes wrong.

Can I drink water from a campground or public spigot?

Only drink from a spigot that is clearly intended for potable water. Use a drinking-water-safe hose, run the spigot briefly before filling, and filter questionable sources. If the water smells, looks cloudy, or comes from an unmarked source, do not fill your tank without additional verification.

What is the easiest way to save RV water while boondocking?

The easiest high-impact changes are navy showers, basin dish washing, turning off taps between actions, and using spray bottles for rinsing. These changes require little gear and directly reduce the biggest daily water drains.

What should I do if my RV water pump stops working?

Switch to stored potable jugs and a manual hand pump. Protect drinking water first, pause showers, cook simple meals, and use basin washing. Know your pump model before the trip so you can find parts faster if a replacement is needed.

Should I fill my fresh tank every time I go to town?

Yes, if the source is safe and access is easy. A partial tank feels fine until weather, crowds, closures, or mechanical problems change the plan. Top off when the opportunity is convenient, especially before returning to remote public land.

How do I keep stored RV water from tasting bad?

Use food-grade containers, keep them clean, store them away from heat when possible, and avoid old hoses. Flush questionable water, use an inline filter, and do not store drinking water in containers previously used for fuel, cleaners, or unknown liquids.

Fresh water is what extends the trip

Boondocking water management is not about suffering through a trip. It is about knowing the math. A 90-gallon fresh tank can last 9 days with normal habits or about 30 days with strict conservation, smart storage, and a refill plan that does not depend on luck.

Start with measurement. Track your daily water use for three days. Switch to navy showers and basin dish washing. Carry separate potable reserve jugs. Test your hand pump before you need it. Top off whenever a safe refill is easy.

The Moab pump failure could have ended our trip on day three. Instead, it became a delay because the fresh water plan had backups. That is the goal: keep drinking, cooking, hygiene, and safe system fills protected even when one part of the system fails.

Want field-tested boondocking systems like this?

Practical RV camping advice from real trips, real constraints, and real mistakes.

Explore More Boondocking Guides

Need to Empty Your Waste Tanks?

If your holding tanks are full, read our quick guide to finding RV dump stations.

{
“@context”: “https://schema.org”,
“@graph”: [
{
“@type”: “Article”,
“@id”: “https://boondockorbust.com/resources/rv-boondocking-water-management/#article”,
“headline”: “RV Boondocking Water Management: Fresh and Potable Water”,
“description”: “A practical guide to finding, storing, filtering, and conserving RV fresh water while boondocking, with consumption benchmarks, storage planning, refill strategy, and backup water access.”,
“datePublished”: “2025-10-08”,
“dateModified”: “2026-05-20”,
“author”: {
“@type”: “Person”,
“@id”: “https://boondockorbust.com/#chuck-price”,
“name”: “Chuck Price”,
“affiliation”: {
“@type”: “Organization”,
“@id”: “https://boondockorbust.com/#organization”,
“name”: “Boondock or Bust”,
“url”: “https://boondockorbust.com/”
}
},
“publisher”: {
“@type”: “Organization”,
“@id”: “https://boondockorbust.com/#organization”,
“name”: “Boondock or Bust”,
“url”: “https://boondockorbust.com/”
},
“mainEntityOfPage”: {
“@type”: “WebPage”,
“@id”: “https://boondockorbust.com/resources/rv-boondocking-water-management/”
},
“about”: [
{ “@type”: “Thing”, “name”: “RV fresh water management” },
{ “@type”: “Thing”, “name”: “Potable water storage” },
{ “@type”: “Thing”, “name”: “Boondocking” },
{ “@type”: “Thing”, “name”: “Water conservation” },
{ “@type”: “Thing”, “name”: “RV filtration” }
],
“mentions”: [
{ “@type”: “Thing”, “name”: “Shurflo 4008 water pump” },
{ “@type”: “Thing”, “name”: “SeeLevel II tank monitoring system” },
{ “@type”: “Thing”, “name”: “Sawyer Mini filter” },
{ “@type”: “Place”, “name”: “Quartzsite, Arizona” },
{ “@type”: “Place”, “name”: “Moab, Utah” },
{ “@type”: “Place”, “name”: “Willow Springs Trail” }
]
},
{
“@type”: “FAQPage”,
“@id”: “https://boondockorbust.com/resources/rv-boondocking-water-management/#faq”,
“mainEntity”: [
{
“@type”: “Question”,
“name”: “How long can I boondock with a 40-gallon fresh tank?”,
“acceptedAnswer”: {
“@type”: “Answer”,
“text”: “A 40-gallon fresh tank supports about 4 days for two adults with standard water use, about 8 days with basic conservation, and about 13 days with strict conservation. Adjust down for hot weather, pets, extra people, dish-heavy meals, and long hikes.”
}
},
{
“@type”: “Question”,
“name”: “How much drinking water should I carry separately?”,
“acceptedAnswer”: {
“@type”: “Answer”,
“text”: “Carry at least several days of potable drinking water outside the main tank. For two adults, two 7-gallon food-grade jugs provide 14 gallons of manually accessible reserve. That reserve matters if the pump fails, the next refill is closed, or the tank water tastes wrong.”
}
},
{
“@type”: “Question”,
“name”: “Can I drink water from a campground or public spigot?”,
“acceptedAnswer”: {
“@type”: “Answer”,
“text”: “Only drink from a spigot that is clearly intended for potable water. Use a drinking-water-safe hose, run the spigot briefly before filling, and filter questionable sources. If the water smells, looks cloudy, or comes from an unmarked source, do not fill your tank without additional verification.”
}
},
{
“@type”: “Question”,
“name”: “What is the easiest way to save RV water while boondocking?”,
“acceptedAnswer”: {
“@type”: “Answer”,
“text”: “The easiest high-impact changes are navy showers, basin dish washing, turning off taps between actions, and using spray bottles for rinsing. These changes require little gear and directly reduce the biggest daily water drains.”
}
},
{
“@type”: “Question”,
“name”: “What should I do if my RV water pump stops working?”,
“acceptedAnswer”: {
“@type”: “Answer”,
“text”: “Switch to stored potable jugs and a manual hand pump. Protect drinking water first, pause showers, cook simple meals, and use basin washing. Know your pump model before the trip so you can find parts faster if a replacement is needed.”
}
},
{
“@type”: “Question”,
“name”: “Should I fill my fresh tank every time I go to town?”,
“acceptedAnswer”: {
“@type”: “Answer”,
“text”: “Yes, if the source is safe and access is easy. A partial tank feels fine until weather, crowds, closures, or mechanical problems change the plan. Top off when the opportunity is convenient, especially before returning to remote public land.”
}
},
{
“@type”: “Question”,
“name”: “How do I keep stored RV water from tasting bad?”,
“acceptedAnswer”: {
“@type”: “Answer”,
“text”: “Use food-grade containers, keep them clean, store them away from heat when possible, and avoid old hoses. Flush questionable water, use an inline filter, and do not store drinking water in containers previously used for fuel, cleaners, or unknown liquids.”
}
}
]
}
]
}

RV Dump Stations: Finder Apps, Fees and Free Options

RV Dump Stations: Finder Apps, Fees and Free Options

Find black tank and gray tank disposal facilities, compare finder apps, check fees, and verify local disposal rules before you detour.

By Chuck Price

Last updated: September 29, 2026. Links and title updated. Fee table checked September 29, 2026. Other fee and discount details last checked May 20, 2026.

RV dump station finder app used to locate nearby waste disposal stops

Chuck Price has 35+ years of RV camping and road-trip experience. Boondock or Bust focuses on practical RV planning, boondocking logistics, campground alternatives, and road-tested travel systems.

Quick Reference

  • Must-know: RV dump stations are the proper place to empty black tanks and gray tanks.
  • Trip killers: Closed facilities, unclear fees, tight access lanes, and out-of-date app listings cause the biggest detours.
  • Best for: RVers searching for dump stations near a route, campground, truck stop, public facility, or boondocking area.
  • Confirm before you go: Hours, fee, payment method, RV length access, and current operating status.

Use this guide to find RV dump stations for black and gray tank disposal only. It covers finder apps, truck stop options, public dump facilities, processing fees, timing, gear, and local disposal-rule checks. For broader off-grid trip planning, pair it with our boondocking tips guide. Read our Allstays Camp & RV review before you pay for the app.

Verify before you detour: Waste facilities, processing fees, access rules, and operating status change. Confirm current details with the facility, app listing, campground office, public works department, or land management agency before you drive out of your way.

What Counts as an RV Dump Station?

An RV dump station is a designated waste disposal point built to receive sewage and gray tank wastewater from recreational vehicles. This page covers RV waste-disposal planning in the United States, not state-by-state legal advice, household plumbing, campground hookups, or solid trash disposal. Dump stations are commonly found at campgrounds, truck stops, RV service centers, some public facilities, and selected public recreation areas.

Black tanks hold toilet waste. Gray tanks hold sink and shower wastewater. Both need proper disposal because campground drains, roadside ditches, storm drains, and open ground are not RV dump stations. Leave No Trace disposal guidance directs travelers to dispose of waste properly and follow local rules. For non-tank trash, use our separate guide to trash disposal rules while boondocking.

Waste-only scope: This guide is intentionally restricted to RV waste tank disposal, dump station access, app selection, fees, and disposal rules. It does not teach onboard supply setup, tank sanitizing, or household-use hose planning.

Best Ways to Find RV Dump Stations Near You

The fastest way to find a nearby dump station is to check a dedicated RV dump app first, then confirm the facility directly. App databases vary by region, and crowd-sourced listings can become stale. The safest workflow is app search, listing review, phone or website confirmation, then navigation.

Phone map showing nearby RV dump station options and route filters

Availability, prices, and app features can change. Confirm current details before using any listing.
Finder Best Use Case What to Confirm
RV Dump Stations app Dedicated dump station lookup with offline map access. Recent user notes, fee, hours, and whether the station is still operating.
The Dyrt PRO Route planning when you also need campground or overnight parking options. The Dyrt help center says dump pins are a PRO feature. Current subscription terms, route filters, and user-reported facility status.
Pilot and Flying J app Interstate routes where truck stop RV services are convenient. Pilot RV Services lists RV dump stations among its RV amenities. Dump station amenity, Good Sam discount eligibility, and access hours.
Love’s app or RV Stops page Highway stops with dedicated RV service layouts at selected locations. Love’s RV Stops promotes RV dump access at participating RV stops. Whether that location has an RV dump, current fee, and lane access.
iOverlander Crowd-sourced options, municipal sites, and remote-route backup planning. Comment recency, local restrictions, and whether the listing is still public.
Google Maps Last-minute backup when dedicated RV apps miss a nearby business. Call the facility. Map results often mix RV parking, service centers, and true dump sites.

How Much Do RV Dump Stations Cost?

RV dump station fees range from no-charge access to paid facility use, depending on ownership, location, membership status, and whether you are an overnight guest. Published fees are less reliable than direct confirmation because private campgrounds, truck stops, municipal facilities, and park systems update rates at different times. The Dyrt help center notes that dump station costs and availability can vary by season, campground status, and whether you are a paid guest.

Use these as planning ranges only. Confirm the exact fee before arrival.
Location Type Common Fee Pattern Best Verification Step
Campgrounds and RV parks Often included for registered guests. Non-guest access may be restricted or paid. Call the office and ask whether non-guests may use the dump station.
Truck stops Usually paid unless a discount or loyalty program applies. Check the chain app, then confirm at the location desk.
National or state park campgrounds May be included for campers and paid for visitors where public access is allowed. Check the specific park page before arrival.
Municipal facilities May be free, resident-only, donation-based, or paid by card or cash box. Call public works or the wastewater treatment office.
RV dealers and service centers Sometimes offered to customers. Walk-in access varies. Call before detouring and confirm your RV can fit.

Fee example: Some National Park Service dump stations publish location-specific prices and seasonal access rules. Confirm the exact park page before arrival because access and fees are site-specific. Use the National Park Service park finder to verify the specific location.

What Do RV Dump Stations Charge? Listed Fees in the Northeast and Mid-Atlantic

The table below shows fees as directories list them. We did not pay these fees ourselves, and directory entries can be out of date. Where a non-guest price is listed, it runs from $10 to $50. The three truck stop listings show $10, and the campground, forest and military listings limit free use to guests or campers. Call ahead to confirm the fee, payment method and hours.

RV dump station fees as listed in directories, checked September 29, 2026. Sources are linked in each row.
Location State Listed fee Access note Source
TA Travel Center, Willington CT $10 Pay the cashier inside and get the key. Campendium reviews, 2022 to 2023
Pilot Flying J, Cranbury NJ $10 Listed 24/7. Confirm the dump station is working. findrvdump
Love’s Travel Stop, Turnersville NJ $10 Listed 24/7. Confirm the dump station is working. findrvdump
M&L Boston Fuel & Wash, Woburn MA $50 Appointment required. Office hours Monday to Friday, weekends by appointment. RVshare directory
Myles Standish State Forest, Carver MA Free for guests, $20 for non-campers Water is listed as available. RVshare directory
Peters Pond RV Resort, Sandwich MA Free for registered guests, fee for others (amount not listed) Hours change by season. Call the resort office. RVshare directory
Fort Eustis Recreation Area, Newport News VA $10 dump-only, free if camping Military ID required. RVshare directory

Where Free RV Dump Stations Are Most Likely

Free RV dump stations exist, but they are inconsistent and often poorly advertised. The best free-disposal searches start with public rest areas, municipal wastewater sites, campground guest amenities, and public recreation facilities. Always verify access because free sites can become resident-only, seasonal, temporarily closed, or removed from public use.

  • Highway rest areas: Some state rest areas list RV dump amenities. Check the state transportation department site or rest area guide before relying on one. See our rest area rules by state.
  • Municipal wastewater facilities: Smaller towns sometimes allow RV waste disposal at public works sites, but rules are local.
  • Campgrounds: Dump station use is often available to registered guests. Non-guest access is location-specific.
  • Public recreation areas: Some park campgrounds include sewage disposal facilities with camping reservations or a separate fee.

Truck Stop Dump Stations: Pilot, Flying J, Love’s, and TA

Truck stop dump stations are useful because they sit close to major routes, but not every location has RV waste disposal. Pilot RV Services lists RV dump stations as an RV amenity, and Good Sam lists $2.50 off dumping fees for linked Pilot and Flying J rewards accounts. Love’s RV Stops promotes RV dump access at participating sites, but location-level confirmation still matters.

For lot rules at these stops, read our truck stop overnight parking rules.

Use this three-step check before you drive in:

  1. Open the chain app or location page and confirm the dump station amenity.
  2. Call the store if the app listing is old, vague, or missing fee details.
  3. Confirm lane access, hours, and payment method before entering with a larger RV.

RV dump station pad with sewer inlet and pull-through access lane

Red flags: The listing says RV parking but not RV dump station. User reviews mention closure, broken equipment, locked access, or cash-only payment. The app shows the facility but gives no recent operating-status signal.

How to Dump Black and Gray Tanks Without Making a Mess

RV tank dumping works best when the process is simple, controlled, and done in the right order. Dump the black tank first so the gray tank can help rinse the sewer hose afterward. This is a common RV waste-handling practice, but always follow your rig manual and the posted rules at the dump station.

RV dump station checklist with gloves sewer hose fittings and tank supplies

  1. Park close enough for the sewer hose to reach without pulling tight.
  2. Put on disposable gloves before handling caps, valves, or fittings.
  3. Connect the sewer hose securely to the RV outlet and dump station inlet.
  4. Open the black tank valve first and let it drain fully.
  5. Close the black tank valve, then open the gray tank valve.
  6. Close all valves, disconnect carefully, rinse approved parts only where allowed, and store sewer gear separately.
  7. Check the site for spills, loose caps, or dropped gear before you leave.

Gear to carry: Sewer hose, clear elbow, sewer hose support, disposable gloves, bayonet adapters, sewer cap wrench if needed, disinfecting wipes, tank treatment, and a sealed bin for sewer-only equipment.

When to Plan Dump Stops

Plan dump stops before your tanks are full. A conservative route plan gives you one confirmed disposal option before your next overnight stop and one backup option along the same corridor. This matters most when you are boondocking, crossing rural areas, or traveling during shoulder seasons when some facilities close.

  • Use tank sensors as a warning, not a guarantee: Sensors can read incorrectly when waste buildup sticks to the tank wall.
  • Build disposal into travel days: Dumping on the way into or out of a destination avoids dedicated detours.
  • Keep a backup facility: Save a second location in case the first site is locked, broken, or too tight for your RV.
  • Do not wait for an emergency: Full tanks can create odor, backup, and route-planning stress.

Which Dump Station Finder Fits Your Route?

The right finder depends on how you travel. Weekend campground users need office confirmation and guest rules. Highway travelers need chain apps. Boondockers need offline maps, public facility options, and a backup plan because signal, staffing, and seasonal access can fail at the same time.

Travel Pattern Best Starting Point Backup Move
Weekend campground trip Ask the campground whether dumping is included for guests. Find a nearby RV park or service center before checkout day.
Interstate travel day Check Pilot, Flying J, Love’s, or TA locations along the route. Search dedicated RV dump apps before leaving the highway corridor.
Boondocking route Pre-save dump stations before you lose cell signal. Call municipal public works offices near your exit route.
Seasonal migration Plan dump stops every few travel days along major corridors. Use campground guest dumps when route facilities are unavailable.

RV Dump Station FAQ

How do I find RV dump stations near me right now?

Open a dedicated RV dump app first, then confirm the listing with the facility. Search by your current location, filter for dump stations, read recent comments, and check fee notes. For urgent searches, use a chain app or Google Maps as a backup, then call before detouring.

How much does it cost to dump RV tanks?

RV tank dumping may be free, included with a campground stay, discounted through a membership, or charged as a separate service. The exact price depends on location ownership and current policy. Confirm the fee, payment method, and operating hours before you arrive.

Can I dump RV tanks for free?

Yes, but free dump stations are inconsistent. Start with campground guest amenities, selected public rest areas, municipal facilities, and public recreation sites. Confirm access before arrival because free sites can be seasonal, resident-only, temporarily closed, or available only to registered campers.

Do Love’s, Pilot, and Flying J have RV dump stations?

Some Love’s, Pilot, and Flying J locations have RV dump stations, but the amenity is location-specific. Use the chain app or location page to confirm the dump station, then verify fees and access hours. Do not assume every truck stop on a route has waste disposal.

Should I dump black or gray tanks first?

Dump the black tank first, then dump the gray tank. The gray tank flow helps rinse the sewer hose after toilet waste drains. Follow your RV manual, keep the hose secured at both ends, wear gloves, and obey the posted instructions at the dump station.

Can I dump gray tank wastewater on the ground?

Do not dump gray tank wastewater on the ground unless a land manager explicitly allows it, and many places do not. Leave No Trace grey water guidance says local regulations and campground staff instructions should guide disposal. Use a designated dump station and verify local rules before camping off-grid.

Can I use a campground dump station without staying there?

Sometimes. Campgrounds often include dump station use for registered guests, but non-guest access depends on the owner, staffing, local rules, and site layout. Call before arrival, ask about the fee, and confirm whether your RV can enter and exit safely.

Before You Leave the Dump Station

A good dump stop ends with a clean site and a confirmed next disposal option. Check that all valves are closed, caps are secure, sewer gear is stored separately, and the dump area is clear of spills or dropped supplies. Then save the next verified location before heading back off-grid.

Need to Fill Your Fresh Water Tanks?

If you are looking for potable water, read our complete guide to RV boondocking water management. For free and cheap options, read our guide to free or cheap water and dump stations.