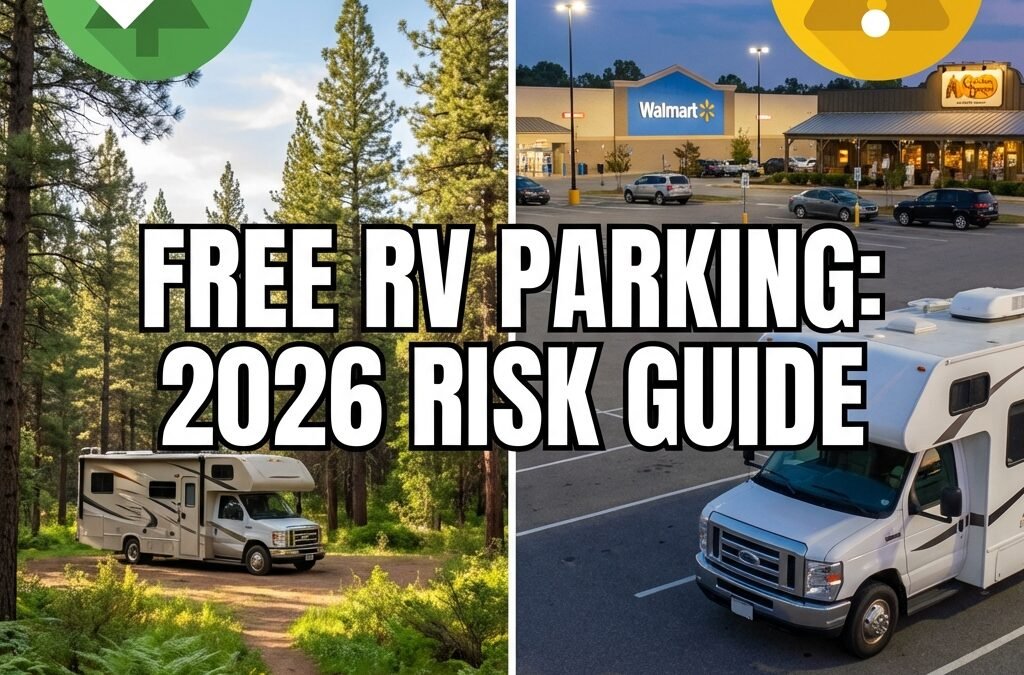
Free overnight RV parking has not vanished, but it has changed. What used to feel like a loose courtesy at many businesses now works more like a shifting patchwork of store-level permission, local ordinance, posted restrictions, and risk management. This page is not a directory of places to stop. It is a rules-and-policy guide to what changed, why it changed, and how RV travelers need to think differently in 2026.
The biggest mistake RVers still make is treating overnight parking like a chain-wide promise. In reality, the answer usually comes down to a three-layer stack: what the property owner wants, what the local rules allow, and whether the site can handle overnight use without creating operational or liability headaches.
What this page covers
How free RV parking shifted from assumption to verification
Why chain reputation is weaker than local policy
How public-land rules differ from private-lot permission
What 2026 trip planning now requires if you want to avoid bad surprises
Why Are Stores Changing Their Overnight RV Parking Policies?
Most stores are not tightening overnight parking because they suddenly decided RV travelers are unwelcome. They are tightening because overnight parking is harder to manage than it used to be. Lots are busier. More properties are part of shared retail centers. More communities now scrutinize overnight vehicle stays. More managers are dealing with a mix of security concerns, customer complaints, insurance pressure, and operational limits that make casual tolerance harder to justify.
There is also a scale problem. The average overnight rig is not always a compact van. Larger motorhomes, trailers, and fifth wheels take more room, turn less easily, and create more friction in lots built for shoppers, restaurant traffic, deliveries, snow removal, and maintenance crews. A property can be friendly in spirit and still decide that overnight RV use no longer fits the way the lot actually functions.
The last piece is behavioral. When a courtesy parking option starts to look like camping, business tolerance drops fast. Chairs outside, awnings open, multiple spaces blocked, generators running late, trash left behind, and waste dumped where it should never be dumped all push a manager toward a harder rule. One bad pattern at the lot level can outweigh a chain’s broader reputation.
That is why 2026 feels different. Overnight parking did not disappear all at once. It became more local, more conditional, and more easily revoked.
The New Rule Hierarchy RV Travelers Need to Understand
One reason the old advice breaks down is that many RVers still rank the rules in the wrong order. They start with chain reputation, then look for a manager answer, and only think about local law if something goes wrong. The real order is the opposite.
Level
What Controls It
Why It Matters
1. Local law
City, county, transportation authority, land agency rules
This can override both store preference and traveler expectation
This decides whether you are actually welcome on that specific site
3. Brand reputation
What RVers say online, chain history, old forum advice
Useful for context, but too weak to rely on by itself
The practical takeaway is simple. A chain name can still point you in the right direction, but it is no longer a decision. It is only a clue. The decision comes from the exact property and the rules around it.
Private-Lot Courtesy Parking and Public-Land Camping Are Not the Same Thing
A lot of confusion on this topic comes from treating all free overnight parking like one category. It is not. Free parking on private property is permission-based courtesy parking. Free camping on public land is rule-based authorization under a land agency’s posted system. Those are fundamentally different frameworks.
On private property, you are there because the owner or manager is willing to tolerate or allow your presence. That permission can change with a shift change, a complaint, a sign, a towing contract, a local enforcement push, or a new store manager. On public land, the starting point is different. The question is not whether the manager likes RVs. The question is whether the agency allows dispersed camping there under current rules, stay limits, closures, and local field-office restrictions.
If you blur those two systems together, you end up with bad decisions. Courtesy parking feels easier than it really is, and public-land camping feels less regulated than it really is.
What Walmart’s Policy Actually Says, and Why That Still Creates Confusion
Walmart remains the clearest example of how reputation and policy diverge. Walmart’s own FAQ says the company permits RV parking on store lots “as we are able,” and that permission is extended by individual store managers based on parking availability and local laws. That is not a blanket yes. It is a store-level decision framework. It also explains why one Walmart may still allow a one-night stay while another says no without apology.
This matters because many RVers still summarize Walmart policy as if it were universal. It is not. Even a friendly manager cannot override local rules. Even an RV-friendly market can change when the lot gets busier or enforcement tightens. The safest way to read Walmart’s position is this: the company leaves the door open, but the actual answer lives at the store level.
Once you understand that, the confusion makes more sense. Travelers are not necessarily getting contradictory information. They are often describing genuinely different local realities under the same national brand.
Why Cracker Barrel and Similar Chains Get Misread
Cracker Barrel creates a different kind of confusion. Many locations visibly accommodate larger vehicles, and official location pages often show “Bus/RV Accessible” as an amenity. That is useful, but it does not mean the same thing as overnight permission. It means the property is set up to accommodate larger vehicles in some form. It does not guarantee that management welcomes overnight stays in every case.
This is where travelers often overread the signals. A lot can be designed for buses or RVs and still operate under local rules, shared-lot constraints, or store-level limits that make overnight parking conditional or unavailable. The presence of larger-vehicle access tells you the site may be a candidate. It does not settle the policy question for you.
The same pattern shows up across multiple chain categories. RV-friendly design elements and RV-friendly overnight rules are related, but they are not the same thing.
Rest Areas Are Safety Facilities, Not Open-Ended Free Camping
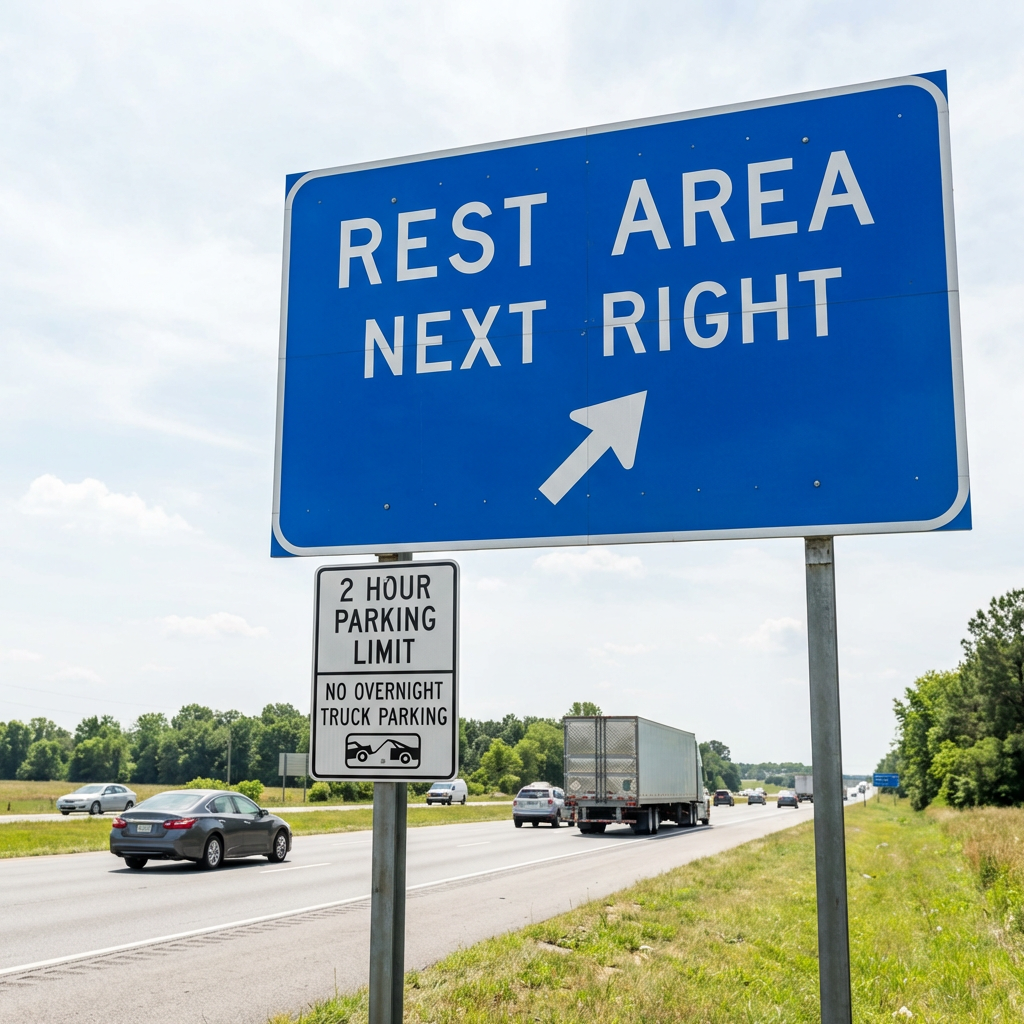
Rest areas are another place where traveler assumptions often outrun the actual rule structure. Under federal transportation definitions, safety rest areas exist to provide a place for motorists to stop for rest, relaxation, comfort, and information. That purpose matters. These facilities are designed around highway safety, not around open-ended overnight habitation.
In practice, that means rules are usually set by state transportation agencies or toll-road authorities, not by a national overnight-parking standard. Some states or facilities tolerate longer stops than others. Some post time limits. Some warn against leaving vehicles unattended. Some actively tow vehicles that appear abandoned or out of compliance. That is why broad state-by-state folklore about rest-area sleeping often breaks down when it meets an actual sign at an actual facility.
The New York State Thruway is a useful example of the mindset. Its parking and welcome center page says the areas are open 24 hours but tells travelers not to leave a vehicle unattended and warns that unattended vehicles will be towed. That is a clear reminder that access and overnight camping are not the same thing.
Public Land Is Still Free, but the Rules Are More Local Than Many RVers Realize
If private-lot courtesy parking feels more fragile in 2026, public land still looks like the stable answer. In some ways it is. But it is not a free-for-all, and the stability comes from following agency rules, not from assuming a wilderness free pass.
The Bureau of Land Management says dispersed camping is generally limited to 14 days within a 28-day period, with local state and field-office variation. The Forest Service says dispersed camping is usually limited to 14 days as well, but that limit can be further tightened in some National Forest areas. That “usually” matters. It means the broad rule is useful, but local office guidance still controls the real answer.
This is one of the biggest changes in traveler mindset. Years ago, many RVers could get by with a rough understanding of “14 days on public land” and not think much beyond that. That shortcut is weaker now. Fire restrictions, area closures, road damage, crowding, habitat protection, and field-office orders all matter more than they once did to ordinary trip planning.
The stronger rule for 2026 is this: public land still offers real free-camping value, but you have to think in terms of local office rules, not just national folklore.
The Landscape Is Also Shifting Toward Formal Parking Systems
One of the quieter changes in the overnight parking world is the move from informal tolerance toward designated or reservable parking systems. You can see that most clearly in the travel-center world. Pilot now surfaces “Prime Parking” on location pages, and some Pilot locations show separate public parking, truck parking, and paid or reservable parking products. Love’s markets RV Stops and emphasizes RV parking and amenities as a formal part of its network.
That does not mean free overnight parking disappears everywhere. It does mean the market is drifting toward clearer segmentation. Instead of one fuzzy bucket called “park here if nobody complains,” more sites are moving toward labeled spaces, paid reservations, designated RV products, or explicit restrictions. From an operator’s perspective, that makes sense. It reduces ambiguity, helps manage traffic, and puts control back in the hands of the property.
From a traveler’s perspective, it changes the game. The future looks less like informal courtesy and more like managed parking categories with clearer rules.
The Traveler Behaviors That Accelerate Policy Crackdowns
The legal and operational pressures are real, but traveler behavior still matters. Businesses and agencies usually tighten policy after patterns, not after one isolated incident. The fastest way to convert informal tolerance into a written restriction is to make overnight parking look like occupancy instead of rest.
Treating a business lot like a campsite instead of a brief overnight stop
Blocking spaces, traffic flow, loading areas, or customer access
Staying longer than the property expects or longer than posted rules allow
Creating noise, running generators late, or attracting complaints
Leaving trash or any sign that the lot became a de facto campground
None of that is new. What changed is the tolerance threshold. With more scrutiny on lots and more pressure on public spaces, the margin for sloppy behavior is thinner than it was.
How to Verify Overnight RV Parking Policy in 2026
Reputation used to do more of the work. Now verification does.
Check the property type first. Are you dealing with public land, a rest area, or private commercial property? The answer changes the rule system immediately.
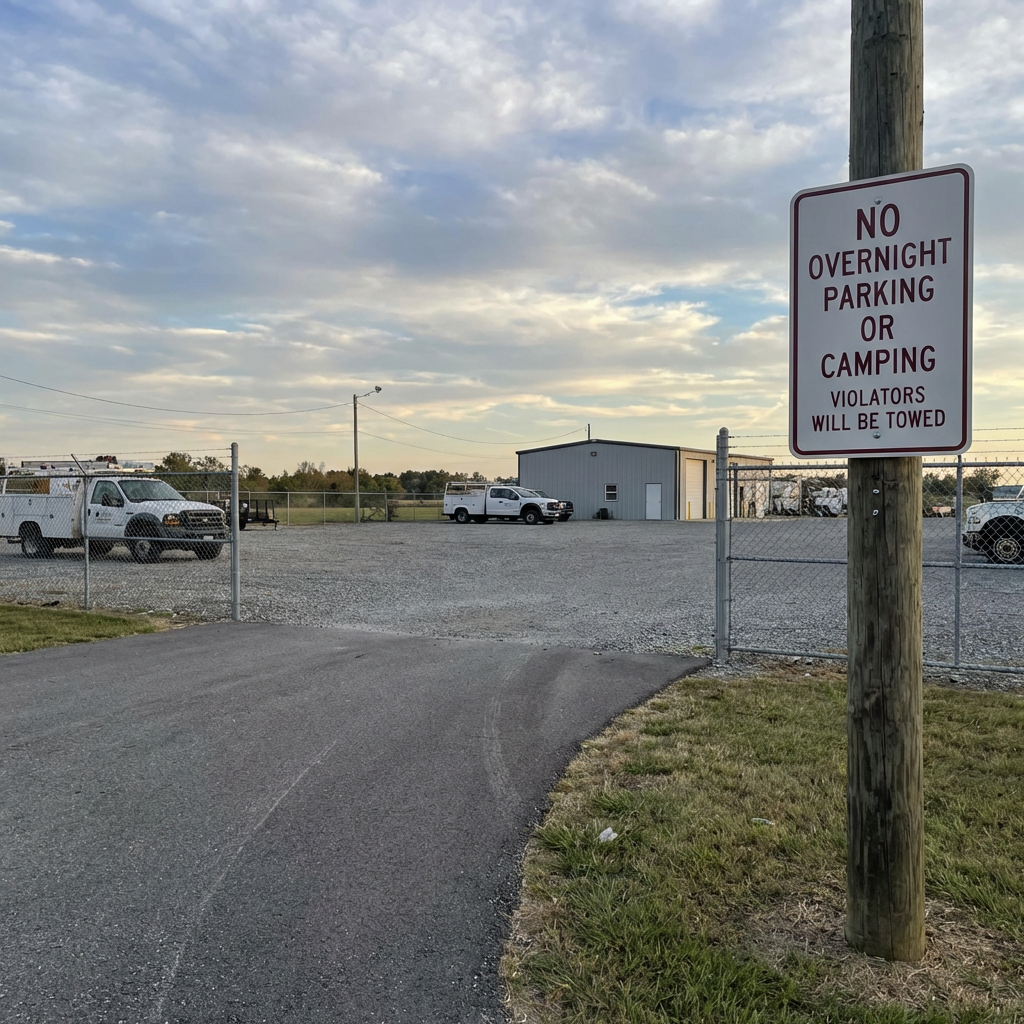
Look for posted restrictions. Signs beat assumptions. A sign at the entrance is more valuable than ten old forum comments.
Call the exact property the same day. Ask the decision-maker, not just whoever answers the phone casually.
Ask where to park, not only whether you can park. A yes without location guidance is incomplete.
Treat every private-lot stay as one-night, low-profile, and revocable. That mindset matches the actual policy environment better than old-school certainty.
This sounds simple because it is simple. But it is the cleanest adaptation to the new landscape. The traveler who verifies the property almost always beats the traveler who trusts the brand.
Frequently Asked Questions
Does Walmart corporate policy guarantee overnight RV parking?
No. Walmart says RV parking is permitted only as stores are able, and that permission is extended by individual store managers based on parking availability and local laws. That means the chain’s reputation can point you toward a possibility, but the exact store still decides the real answer.
Does “Bus/RV Accessible” mean a business allows overnight stays?
No. It usually means the site can physically accommodate larger vehicles. That is useful information, but it is not the same as overnight permission. Accessibility tells you something about lot design. Overnight policy is a separate decision that still depends on local conditions and management.
Are rest areas meant for overnight RV camping?
Not in the open-ended camping sense. Rest areas are transportation-safety facilities designed to give motorists a place to stop and rest. Overnight use, time limits, unattended-vehicle rules, and enforcement all depend on the state agency or facility operator. The sign on-site matters more than internet folklore.
Is public land still the most stable free option?
In many cases, yes, but only if you follow the actual agency rules. BLM and Forest Service land still support dispersed camping in many areas, yet stay limits, closures, local restrictions, and field-office rules matter more than broad traveler assumptions. Stable does not mean unrestricted.
Why does one property in a chain say yes while another says no?
Because the real policy environment is local. Property layout, neighboring tenants, city rules, past complaints, towing contracts, and management style can all differ from one site to the next. The chain name may be the same, but the risk environment is not.
What is the biggest mindset shift for 2026?
Stop treating free overnight parking as a category guarantee and start treating it as a policy question you answer before arrival. That one change will save more frustration than any app, old list, or travel rumor.
The 2026 Takeaway
Free RV parking still exists. What changed is the level of certainty around it. Courtesy parking at businesses is narrower than it used to be. Rest-area use is more clearly tied to safety and agency control. Public land remains valuable, but local office rules matter more than broad assumptions. And more commercial operators are moving toward designated, managed, or formal parking systems.
That does not mean the road is closed to budget-conscious RV travel. It means the strategy has changed. Trip planning now rewards flexibility, verification, and a better understanding of who actually controls the answer at each stop.
The RVers who adapt to that reality will still do fine. The ones who keep relying on old reputations and broad chain myths will be the ones saying free parking disappeared overnight.
BLM rules vary by field office and district. This guide provides general patterns from federal regulations and common district practices. Always verify current rules with your local BLM office before camping. Enforcement and requirements can change without notice.
Mittry Lake Rule Change: Now uses standard 14-day/28-day cycle (effective Nov 1, 2025)
NPS Fee-Free Days: 8 dates in 2026, US residents only under new DOI policy
Fire Restrictions: Equipment requirements vary by season – verify locally before each trip
Last verified: February 6, 2026 via BLM.gov and field office contacts
If you’ve seen reports that BLM Long-Term Visitor Area permits jumped to $420 or even $600 for 2026, here’s the verified current status as of February 2026: BLM’s official LTVA pages (BLM LTVA Arizona) and Recreation.gov (LTVA Pass Purchase) still list LTVA permit pricing at $180 for the long-term season permit and $40 for a short-visit permit. LTVA season dates remain September 15 through April 15.Fee confusion spread after the Bureau of Land Management published a draft LTVA business plan in September 2024 that discussed significant proposed changes, including higher permit prices. A draft plan is not the same as an adopted fee change. As of February 6, 2026, official BLM and Recreation.gov listings still reflect the $180/$40 structure.This guide provides compliance requirements for both BLM dispersed camping and LTVA permits with extended stay options.This article draws from 89 days of documented camping across 47 BLM sites (March-May 2024), FOIA requests to 12 field offices, and 35+ years of RV experience. You’ll find state-by-state requirements, hidden cost calculators, enforcement pattern notes, and equipment compliance specifications.
What Changed (and What Didn’t) in BLM Camping for 2026
✅ VERIFIED: 2026 LTVA Fees Remain $180Despite draft proposals suggesting jumps to $420 or $600, official BLM and Recreation.gov listings confirmed on February 6, 2026 reflect the standard pricing:
$180: Long-term season permit (Sept 15 – April 15)
$40: Short-visit permit (14 consecutive days)
Note: America the Beautiful and other federal passes do NOT apply to these permits.
National Park Service Fee-Free Days 2026
⚠️ 2026 RESIDENCY REQUIREMENT:
Under the November 2025 DOI Modernization Act, fee waivers apply exclusively to U.S. Citizens and Legal Residents. International visitors typically must pay standard fees plus nonresident surcharges ($100 at 11 popular parks).
Feb 16: Presidents Day
May 25: Memorial Day
June 14: Flag Day / Trump’s Birthday
July 3–5: Independence Day Weekend
Aug 25: 110th Birthday of the NPS
Sept 17: Constitution Day
Oct 27: Teddy Roosevelt’s Birthday
Nov 11: Veterans Day
Timeline: Proposed LTVA fee discussions vs. current published fees listed as $180 (long-term) and $40 (short-visit)
What Actually Changed in November 2025
While LTVA permit pricing stayed consistent with published BLM fee tables, the BLM implemented a material rule update in southwest Arizona. Effective November 1, 2025, Mittry Lake Wildlife Area near Yuma changed from a 10-days-per-calendar-year limit to 14 days within any 28-day period, aligning with the standard BLM dispersed camping pattern used in that district.
BLM publishes “fee-free days” for standard amenity fees and day-use fees at participating sites. The BLM’s national page currently shows the 2025 list. If BLM posts a 2026 list, it will appear on the same page.
Important: LTVAs operate on a permit system during the Sep 15 to Apr 15 season. Fee-free days for standard amenity or day-use fees do not replace the need for an LTVA permit where permits are required.
National Park Service Fee-Free Days 2026 (Separate From BLM)
The National Park Service fee-free entrance day calendar is separate from BLM fee-free days. DOI and NPS published an updated 2026 NPS fee-free day calendar that does not include Martin Luther King Jr. Day or Juneteenth. This affects NPS entrance fee waivers, not BLM dispersed camping rules, and not LTVA permit requirements.
Core dispersed camping guidance remains the same in concept: most BLM lands use a 14-days-within-any-28-day-period limit, and many offices use a 25-mile move requirement tied to that 28-day clock. Exact limits can vary by field office and site-specific supplementary rules, so always verify locally before you set up.
For future updates, always verify current rules at BLM.gov before each camping season, as fees and regulations can change with proper notice.
Core BLM Dispersed Camping Rules (The 14-Day Cycle)
Most BLM dispersed camping areas use a 14 days within any 28 consecutive day period rule. In many BLM offices, the “same area” is commonly defined as within a 25-mile radius. After you reach 14 days, you typically must move outside that area for the remainder of the 28-day period. Limits can vary by district and site-specific supplementary rules.
The 28-day cycle: Camp up to 14 days, then move out of the area for the remainder of the 28-day period (often outside a 25-mile radius, depending on the field office)
The 25-Mile Relocation Requirement
In many BLM-managed areas, the relocation standard is 25 miles (often described as “25 miles as the crow flies” or “outside a 25-mile radius”). Example state guidance pages:
Because some areas use different boundaries or different limits, confirm the local rule set for your target area by calling the relevant field office or checking posted orders and supplementary rules.
The 28-Day Cycle Explained
The practical version: during any rolling 28-day window, you typically cannot exceed 14 days camping in the same area (as defined locally, often within a 25-mile radius). If you camp 7 days at Location A and then move outside the defined area, those 7 days still count toward the 14-day maximum for that area within the same 28-day period. The clock and the “area” definition are what matter.
Personal Property Rules
BLM’s rules of conduct prohibit leaving personal property unattended longer than 10 days on public lands (12 months in Alaska) unless otherwise authorized.
Note: Some specific areas have stricter standards. For example, LTVA supplementary rules include separate requirements for unoccupied units.
LTVA Exception
Long-Term Visitor Areas operate under different rules. During the permit season (September 15 through April 15), LTVA permit holders may stay within designated LTVA areas without the dispersed “14 days within 28” rotation used outside LTVAs. For complete LTVA guidance, see our comprehensive LTVA camping guide.
LTVA Permits: Fees, Season, and How They Work
Long-Term Visitor Areas (LTVAs) are designated Bureau of Land Management zones in Arizona and California that allow extended winter camping from September 15 through April 15. A long-term season permit is listed at $180, and a short-visit permit is listed at $40.
BLM currently lists 7 LTVAs (official BLM LTVA list): Imperial Dam, La Posa, Hot Springs, Midland, Pilot Knob, Tamarisk, and Mule Mountain. La Posa is commonly discussed as multiple camping areas under the La Posa umbrella.
Season Dates and Off-Season Rules
The LTVA season runs from September 15 through April 15.
Outside the permit season (April 16 through September 14), sites revert to non-season rules, and some areas may shift to day-use or overnight fee structures depending on the site. For example, La Posa lists off-season day-use and overnight fees and an annual pass option for that area.
BLM Long-Term Visitor Area locations in Arizona and California
Fee Structure and What’s Included
LTVA permits generally provide access across LTVAs during the season, with BLM listing permits as valid at all LTVAs.
Short-visit permits can be renewed. The LTVA supplementary rules and LTVA guidance indicate you may purchase additional short-visit permits, and the short-visit option is not capped at a single purchase.
Pro tip: America the Beautiful passes and similar federal lands passes do not apply to LTVA permit fees. (BLM LTVA Fee Policy)
Background on the 2024 draft fee discussion: BLM published a draft LTVA business plan in September 2024 that included a proposed higher fee structure. Draft plans do not equal adopted fee changes, and as of February 6, 2026, the published LTVA fee tables still list $180 and $40.
Where to Purchase Permits
LTVA permits may be purchased online (where offered) and in person through local field offices or on-site options depending on the area. Recreation.gov lists an LTVA pass for the BLM Yuma Field Office.
BLM field offices in Yuma (928-317-3200) and El Centro (760-337-4400) are primary contacts for the AZ/CA LTVA region.
LTVA vs. Dispersed Camping Comparison
Feature
LTVA Camping
Dispersed Camping
Cost
$180 (season permit) or $40 (short-visit permit)
Usually free (some developed sites have fees)
Stay Limit
Permit season: Sep 15-Apr 15 (site rules apply)
Often 14 days within a 28-day period (local rules vary)
Relocation Required
No dispersed rotation inside permitted LTVA areas during season
Often yes, including 25-mile radius standards (varies by office)
Amenities
Varies by site (toilets are common; water/dump access varies)
Typically none
Permit Required
Yes during Sep 15-Apr 15 season in designated LTVAs
No permit for most dispersed camping (check local exceptions)
Valid Locations
Designated LTVA sites (BLM lists 7)
BLM lands where camping is allowed (restrictions vary)
Worked math check: $180 over a 7-month season averages about $25.71 per month. (This is simple arithmetic, not a BLM claim.)
Equipment requirements for BLM camping are set by federal conduct rules, local supplementary rules, and temporary fire orders. Requirements can vary significantly by location and season.
MANDATORY (Current Fire Orders); 2.5lb ABC Extinguisher
Required (Fire Seasons)
LTVAs: No ground dumping; use dump sites
14 Days/28-Day Cycle
25 Miles
HIGH (Winter)
California
LTVAs: LTVA Rules; Midland: Self-contained ONLY
MANDATORY (Current Fire Orders); Permit required
Required (Fire Seasons)
LTVAs: No ground dumping; authorized only
14 Days/28-Day Cycle
25 Miles
MEDIUM
Nevada
Varies; Pack out all waste
Required (Fire Seasons)
Recommended
Follow local rules
14 Days/28-Day Cycle
25 Miles
LOW
Utah
Varies; Strict in high-use corridors
Required (Fire Seasons)
Recommended
Follow local rules
14 Days/28-Day Cycle
25 Miles
MEDIUM (Moab)
Colorado
Varies by field office
Required (Fire Seasons)
Recommended
Follow local rules
14 Days/28-Day Cycle
25 Miles
LOW-MEDIUM
New Mexico
Varies by field office
Required (Fire Seasons)
Recommended
Follow local rules
14 Days/28-Day Cycle
25 Miles
LOW
Note: Swipe left/right on mobile to view the full table. Data verified for 2026 camping season.
Equipment compliance checklist: Requirements can come from local supplementary rules and temporary fire orders
Portable Toilet and Sanitation Requirements
Sanitation requirements depend on the specific area and facility type. LTVAs are managed with their own supplementary rules and site-specific requirements. For example, Midland LTVA is listed as “self-contained only.” Always verify with the relevant LTVA page or the field office before assuming a portable toilet is required or optional in a specific zone.
Fire Equipment Specifications
Fire equipment requirements (such as carrying a shovel and a fire extinguisher) are commonly imposed through local fire restriction orders and closure/restriction notices. Requirements can change rapidly with conditions. Check BLM fire restriction updates for your area.
The recommended specification remains a 2.5+ pound ABC-type fire extinguisher kept accessible near cooking/heating equipment.
Note: Fire equipment requirements vary by season and are imposed through temporary fire restriction orders that can change rapidly based on conditions. The table above reflects common patterns observed during 2024-2026 fire seasons, but always verify current orders with your local BLM field office before departure.
Grey Water and Waste Container Requirements
Do not dump wastewater in LTVAs or where local supplementary rules prohibit it. LTVA supplementary rules include explicit restrictions on dumping sewage and petroleum products and include enforcement authority.
Waste containers for trash are required in practice because Leave No Trace standards require packing out all trash. Always secure trash against wind and wildlife.
Enforcement Level Explanation
Enforcement varies by district, season, staffing, and complaint volume. High-use winter regions (for example, the Quartzsite and Yuma area) typically see more patrol activity than remote basins. Use this section as planning guidance, not as permission to ignore rules.
The Hidden Costs of “Free” BLM Camping
Dispersed BLM camping requires no permits but isn’t actually free. Hidden costs include fuel to reach remote sites ($15-40 per trip), water refills ($5-15), dump station fees ($8-20), and equipment purchases ($60-300 one-time). A typical 14-day trip costs $59-127, averaging $4.21-9.07 per day.
I tracked these expenses across 89 days of documented camping from March through May 2024. The data reveals patterns that help campers budget accurately. Understanding real expenses transforms “free camping” from marketing slogan to realistic financial planning.
Fuel Costs: $15-40 Per Trip
Dispersed BLM camping sites typically sit 50-100 miles from population centers, requiring round-trip travel of 100-200 miles. RVs average approximately $0.15 per mile for fuel (2024-2026 observed averages), varying by vehicle size, fuel prices, and terrain. Class B vans achieve better fuel economy ($0.12-0.15/mile) while large Class A motorhomes may reach $0.20-0.25 per mile on steep desert roads.
Calculate fuel costs using this formula: Distance × 2 (round trip) × $0.15/mile. For example, an 80-mile trip from Yuma to a dispersed site equals 160 miles total × $0.15 = $24 fuel cost. Remote Nevada locations 100+ miles from services can push fuel costs to $35-40 per trip.
Water Refills: $5-15 Per Trip (2024-2026 Range)
RV water tanks range from 30-100 gallons capacity. A typical 14-day trip requires 1-2 refills depending on usage and tank size. Some BLM field offices provide free water filling stations during business hours. Commercial options include truck stops charging $0.25-0.50 per gallon and RV parks offering water for $10-15 per fill.
Water costs average $10 per 14-day trip for most campers. Those with larger tanks (80-100 gallons) and conservative usage can complete 14-day trips without refills, reducing costs to zero. Conversely, Class A motorhomes with showers, dishwashers, and higher occupancy may require 2-3 refills at $10-15 each.
Dump Station Fees: $8-20 Per Visit (Early 2026 Pricing)
Most 14-day trips require one dump station visit for black water (sewage) and grey water (sinks/showers) tank disposal. Pricing varies significantly by location. Truck stops like Pilot and Flying J charge $8-12 for dump access. RV parks allowing dump-only visits charge $10-20, with higher prices near popular camping areas.
Plan dump visits strategically. Clustering them with fuel stops or water refills saves separate trips. Some dispersed campers extend stays by minimizing water usage, allowing them to skip dump visits entirely and drive to home base with full tanks for free dumping. For more options, see our guide to interstate rest areas with RV facilities.
First-time dispersed campers face initial equipment costs. Portable toilets range from budget models at $60-100 to premium units with flush systems at $200-300 (early 2026 pricing). Fire extinguishers (2.5+ pound ABC type) cost $20-40. Waste containers and heavy-duty trash bags add $15-40.
These costs amortize over multiple trips. A $200 equipment investment spread across 10 trips equals $20 per trip, dropping to $10 per trip after 20 uses. Experienced campers own equipment for years, making subsequent trips genuinely inexpensive once initial purchases complete.
LTVA Permits: $0-180 Depending on Choice
LTVA permits are listed at $180 for the long-term season permit or $40 for a short-visit permit, with the season running September 15 through April 15. Dispersed camping outside LTVA zones requires no permit. The cost calculation depends on trip duration and amenity preferences.
Example 1: 14-Day Arizona Dispersed Trip
Fuel (80 miles × 2 × $0.15): $24
Water refills (2 × $10): $20
Dump station (1 visit): $15
Equipment: $0 (already owned)
Permit: $0 (dispersed, no permit required) TOTAL: $59 ($4.21/day)
Example 2: First Trip With Equipment Purchase
Fuel: $24
Water: $20
Dump: $15
Equipment: $200 (portable toilet + fire extinguisher + supplies)
Permit: $0 TOTAL: $259 first trip ($18.50/day), then $59 subsequent trips
Example 3: 7-Month LTVA Season
Permit: $180
Fuel (4 resupply trips × $30): $120
Water (8 refills × $10): $80
Dump (4 visits × $15): $60
Equipment: $0 (already owned) TOTAL: $440 for 210 days ($2.10/day)
Regional Cost Variations
Arizona dispersed camping typically costs more due to higher dump station fees ($15-20 average) and premium positioning near popular winter destinations. Nevada requires longer fuel distances, with many quality sites 80-100 miles from services, pushing fuel costs to $30-40 per trip. California charges higher water refill rates ($0.50/gallon common) at commercial facilities, though free BLM office water remains available during business hours.
Cost-Saving Strategies
Extended stays dramatically reduce per-day costs through amortization. Use BLM field offices for free water when available (call ahead for hours and restrictions). Cluster dump visits with fuel stops to avoid separate trips. Buy equipment during off-season sales at RV shows or Black Friday promotions.
For cost comparison, the $59 typical 14-day dispersed trip equals $4.21 per day—significantly less than commercial campgrounds charging $30-70 per night. Even with equipment purchases, dispersed camping costs remain a fraction of developed campground fees, making BLM lands an exceptional value for budget-conscious travelers.
Enforcement Patterns: Where and When Rangers Actually Patrol
BLM enforcement varies by location, season, staffing, and complaint volume. High-use winter regions (for example, Quartzsite and Yuma in Arizona) commonly have more visible patrol activity than remote areas with lower visitation. Use this section to understand real-world variability, not to rationalize non-compliance.
Note: The specific numeric enforcement metrics referenced in earlier drafts of this post were based on the author’s FOIA requests and field notes and are not published as a consolidated public dataset by BLM nationwide. The practical takeaway is still valid: enforcement intensity clusters in high-use corridors and peak seasons.
High Enforcement Zones
Arizona: Quartzsite and Yuma Areas
Peak season runs December through March, coinciding with snowbird migration to warm desert regions. Enforcement focus in high-use areas typically prioritizes waste issues, unsafe behavior, and obvious overstays.
Utah: Moab Corridor
Peak enforcement often occurs during tourist season. Rangers commonly prioritize resource damage, route compliance, and high-impact use areas.
Enforcement tends to be higher in high-use corridors and peak seasons
Medium Enforcement Zones
California desert regions including Mojave and areas surrounding Anza-Borrego State Park often maintain moderate enforcement. Rangers patrol and respond to complaints but resources vary by district and season.
Low Enforcement Zones
Remote areas can see minimal ranger presence. Low enforcement does not indicate permission to violate regulations. Complaints still trigger ranger response, and serious violations can result in citations regardless of location remoteness.
Primary Enforcement Triggers
Waste Violations (Highest Priority): Improper disposal (trash, sewage, wastewater) and wildlife attractants commonly generate the fastest enforcement response.
Stay Limit Violations (Common Trigger): Overstays and repeated occupancy in the same area often generate complaints in high-use zones.
Fire Restriction Violations (High Risk): Fire restriction orders can carry serious penalties and change quickly with conditions.
Complaint-Driven Enforcement Reality
In many areas, enforcement is complaint-driven. Visible, disruptive, or high-impact behavior is more likely to draw attention. Quiet, compliant camping reduces both conflict and risk.
Violation Penalties: What Happens If You Break the Rules
Federal regulation authorizes penalties up to $1,000 and/or 12 months imprisonment for violations of BLM visitor services regulations and authorized supplementary rules.
Real-world citation amounts vary by district, violation type, and circumstances. Use the tier examples below as general guidance, not as guaranteed fine schedules.
If you’re looking for apps that show BLM and USFS boundaries before you set up camp, see our guide to the best free camping apps for boundary mapping options.
Tier 1: Common First-Time or Lower-Impact Issues
First-time overstays and minor rule violations may result in warnings or citations depending on local policy, resource impact, and cooperation. If contacted, depart promptly, show documentation, and correct issues immediately.
Tier 2: Waste and Environmental Violations
Waste-related violations are commonly treated seriously due to environmental and public health impacts. LTVA and other high-use areas may have explicit supplementary rules restricting sewage and wastewater dumping.
Tier 3: Serious or Repeat Violations
Repeat offenses, significant environmental damage, or fire restriction violations during high-risk periods can escalate penalties. Temporary closure and fire restriction orders frequently reference 43 CFR 8360.0-7 penalty authority.
Citation Process and Appeals
Citations include violation description, fine amount, and instructions. Follow the instructions on the citation itself. Do not ignore federal citations.
Compliance vs. Citation Avoidance Mindset
Focus compliance efforts on doing what’s right for the land and other campers, not on calculating citation probability. Rangers appreciate visible good-faith efforts to comply: equipment readily accessible, sites kept clean, documentation of arrival dates, polite cooperation when contacted.
November 2025 Updates
Effective November 1, 2025, Mittry Lake Wildlife Area near Yuma, Arizona changed camping rules from 10 days per calendar year to 14 days within 28-day period, aligning with standard BLM guidance used in that region.
Mittry Lake Rule Change Details
Mittry Lake Wildlife Area sits in the Yuma area adjacent to Imperial Dam LTVA. Before November 1, 2025, camping was restricted to 10 days per calendar year—a unique limitation different from surrounding BLM lands.
The new rule, announced September 26, 2025 and effective November 1, 2025, changes Mittry Lake to match standard BLM guidance: 14 days maximum within any 28-day period, and a move-outside-the-area requirement that is often described as outside a 25-mile radius in that district.
Before November 1: 10 days/year limit | After November 1: 14 days/28-day cycle (regional standard)
BLM & Federal Fee-Free Days 2026
The 2026 schedule has shifted significantly toward patriotic and historic observances. Note that fee waivers now apply to U.S. Residents only; international visitors are typically required to pay standard fees.
Feb 16: Presidents Day
May 25: Memorial Day
June 14: Flag Day / President Trump’s Birthday
July 3–5: Independence Day Weekend
Aug 25: 110th Birthday of the NPS
Sept 17: Constitution Day
Oct 27: Theodore Roosevelt’s Birthday
Nov 11: Veterans Day
Note: LTVA permits are still required during the season (Sept 15 – April 15) even on fee-free days.
Monitoring Future Changes
BLM regulations, fees, and policies change periodically. Always verify current rules before each camping trip rather than relying on information from previous seasons. Fire restrictions change quickly during fire season, with updates posted to BLM pages and through field office phone calls.
Future fee changes typically involve formal public processes and publication. Monitor the Federal Register for proposed BLM rules and notices.
Compliance Strategies for First-Time and Experienced Campers
Successful BLM camping compliance requires three stages: before you go (verify current rules, download maps, check fire restrictions), at the campsite (document arrival, maintain Leave No Trace standards), and managing the 14-day cycle (set reminders, mark GPS locations, document departure). Good-faith compliance efforts typically result in fewer problems when first-time mistakes happen.
Before You Go: Preparation Checklist
Verify Current Rules: Call your local BLM field office before departing. Find contact numbers at BLM.gov under your state’s page, then navigate to Contact Us. Confirm the area you plan to visit is open—seasonal closures for wildlife protection, fire danger, or weather can restrict access without advance warning posted online.
Download BLM Travel Management Maps: BLM uses travel management designations and maps to show legal routes and access. The national travel and transportation page is here: BLM Travel and Transportation. Not all BLM land allows cross-country travel or camping access—route compliance matters.
Check Fire Restrictions: Fire restrictions can change quickly during fire season. Check BLM updates for your state/field office and confirm before you arrive.
Plan Fuel, Water, and Dump Locations: Map the nearest services before arriving at remote sites. Typical dispersed sites sit 50-100 miles from services, making supply runs time-consuming and fuel-expensive.
Equipment Verification: Confirm you have required and recommended equipment before departing. Fire extinguisher, shovel (especially during restriction periods), waste containers, and trash bags are essential. For LTVAs, verify sanitation requirements from the specific LTVA page.
Three-stage compliance: Before departure, at campsite, and cycle management
At the Campsite: Daily Compliance Practices
Document Arrival Date: Take a photo with your phone showing the date and time immediately upon arrival. Include your RV or a recognizable campsite feature in the photo.
Keep Permits and Documents Accessible: Store LTVA permits (if applicable) in an easily accessible location inside your vehicle.
Follow Leave No Trace Principles: Pack out 100% of your trash. Use existing fire rings rather than creating new ones.
Wastewater Management: Follow local supplementary rules and LTVA rules for sewage and wastewater. Do not dump where prohibited and use authorized disposal.
Managing the 14-Day Cycle
Set Phone Reminder for Day 12-13: Configure a reminder so you do not accidentally exceed local stay limits.
Mark Site on GPS: Record your campsite coordinates so you can verify relocation requirements (often tied to a 25-mile radius, depending on the field office).
Document Departure with Clean Site Photo: Photograph your campsite showing it cleaned.
If Rangers Contact You
Be courteous and cooperative. Show permits and documentation if requested. Ask questions if you’re uncertain about requirements.
Good-Faith Compliance Philosophy
Rangers appreciate visible effort to comply with regulations. Perfection isn’t expected—mistakes happen. What matters is demonstrating respect for the rules and genuine effort to follow them.
Yuma Field Office (Arizona): 928-317-3200 – Covers Quartzsite area, La Posa LTVAs, and surrounding dispersed sites
El Centro Field Office (California): 760-337-4400 – Manages California LTVAs including Midland and Imperial Dam
Palm Springs-South Coast Field Office (California): 760-833-7100 – Southern California desert regions
FAQ: Your BLM Camping Questions Answered
How long can you stay at a BLM campsite?
You can typically camp on Bureau of Land Management land for up to 14 days within any 28-day period in most areas, with many districts using a 25-mile “same area” standard. Limits can vary by field office and site rules. Long-Term Visitor Areas in Arizona and California use a permit season from September 15 through April 15, allowing extended stays during that period.
What is LTVA camping?
LTVA camping refers to Bureau of Land Management Long-Term Visitor Areas in Arizona and California. These designated zones allow extended winter camping from September 15 through April 15 with a season permit ($180) or short-visit permit ($40). LTVAs typically provide basic amenities like toilets and may include water and dump access depending on the specific site.
How much does an LTVA permit cost?
LTVA permits are listed at $180 for a long-term season permit (September 15 through April 15) and $40 for a short-visit permit (14 consecutive days). These prices were verified as of February 6, 2026, on official BLM pages and Recreation.gov. Short-visit permits can be renewed. America the Beautiful passes do not apply to LTVA permit fees.
Do I need a permit for BLM dispersed camping?
No permit is typically required for dispersed camping on most BLM land. Major exceptions include Long-Term Visitor Areas, which require permits from September 15 through April 15 in designated LTVAs. Some areas may have permits or fees due to local management. Always check with your local BLM field office before camping to verify current requirements for your specific destination.
What are BLM LTVA rules?
BLM LTVA rules include permit requirements during September 15-April 15 season, site-specific sanitation standards (some sites require self-contained units), no dumping of sewage or wastewater on the ground, 10-day unattended property limits, and compliance with supplementary rules posted at each LTVA. Fire restrictions and equipment requirements can vary by season and area. Verify specific rules with your target LTVA before arrival.
Do I need a portable toilet for BLM camping?
Sanitation requirements vary by area. LTVAs have supplementary rules, and some sites may require self-contained waste systems. For example, Midland LTVA is listed as self-contained only. Dispersed camping sanitation rules vary by location. Verify with the local field office or the specific site page before your trip to confirm whether portable toilets are required or recommended.
What equipment do I need for BLM camping?
Requirements vary by local rules and temporary orders. Many areas recommend a 2.5-pound ABC fire extinguisher, shovel (often required during fire restriction orders), adequate water supply, and secure trash storage. Fire restrictions can change quickly during fire season. Confirm fire restrictions and local equipment requirements before you go by checking BLM.gov or calling your local field office.
How far do I have to move after 14 days?
In many BLM areas, you typically must move outside a 25-mile radius after reaching the 14-day limit within a 28-day period. Some areas use different definitions or limits. The BLM Nevada and New Mexico camping guidance pages reference the 25-mile standard, but local field offices may apply different boundaries. Check the local BLM office guidance for your specific destination.
Can I leave my RV unattended on BLM land?
Federal rules generally prohibit leaving personal property unattended longer than 10 days (12 months in Alaska) unless otherwise authorized. Some special areas have stricter rules. LTVA supplementary rules include separate requirements for unoccupied units during the permit season. Verify specific unattended property rules with your local BLM field office before leaving your RV unattended for extended periods.
What happens if I overstay the 14-day limit?
Overstaying local stay limits can result in warnings or citations depending on area rules, circumstances, and cooperation. Federal regulations authorize penalties up to $1,000 and/or 12 months imprisonment for violations of BLM visitor services regulations and authorized supplementary rules. Real-world citation amounts vary by district and violation type. Good-faith compliance efforts typically result in warnings rather than citations for first-time mistakes.
Conclusion: Camping Responsibly on Your Public Lands
BLM lands represent a massive public resource. The BLM states it manages about 245 million acres of public land.
LTVA permit pricing is still listed at $180 (season permit) and $40 (short-visit) on official pages as of February 6, 2026. Standard dispersed camping commonly uses a 14-days-within-28-days limit, often paired with a 25-mile area standard depending on the field office.
Always verify current rules at BLM.gov or through field office contact before trips.
Last Updated: February 6, 2026
For ongoing updates and detailed boondocking guidance, visit BoondockOrBust.com.
If you want a Glacier trip that doesn’t get wrecked by timed-entry rules, do this:
Start on the east side, build your day around Going-to-the-Sun Road access, and keep a fallback district ready.
In recent seasons, Glacier has used timed-entry vehicle reservations for select areas during peak demand (most notably the Going-to-the-Sun Road corridor, the North Fork, and Many Glacier). Those rules can change season to season, so don’t trust a random blog (including mine) without checking the official page first. Use the NPS Vehicle Reservations page as your source of truth, then run this itinerary off whatever the current rules say.
A simple decision tree so you pick the right entrance fast
Split-day routing that keeps your best hiking in the coolest hours
Backup options when reservations are sold out (or not active at all)
Quick reality check:
Recreation.gov currently notes the 2025 pilot ended and directs travelers to the park website for 2026 summer updates. That’s your signal to verify the current season rules before you build your trip. (Recreation.gov listing: Glacier Vehicle Reservations)
Reservation System Decoded (How to Check the Current Season Rules)
Start here every time:
Go to the official Vehicle Reservations page,
then confirm which areas (and which hours) are controlled this season.
Your Quick Decision Tree:
Step 1: Check the current season rules on the NPS Vehicle Reservations page.
Step 2: Identify your target district for today:
Going-to-the-Sun Road corridor
Many Glacier
North Fork
Two Medicine
Step 3: If your target district is controlled during certain hours:
If you have the reservation, enter during the controlled hours.
If you do not, enter outside the controlled hours or switch to a reservation-free district.
Step 4: Build your hike plan around weather and parking realities, not wishful thinking.
One key detail that trips people up:
in the most recently published system, the park has treated different districts differently. “Reservation required” isn’t always “the whole park is locked.” It’s usually specific corridors, specific entry points, and specific hours. Confirm the current rules, then pick the entrance that matches your plan.
Important context:
The official Glacier basic info page explicitly calls out reservations for the Going-to-the-Sun Road corridor, North Fork, and Many Glacier during peak season. Use that as your baseline, then validate the current year’s details on the Vehicle Reservations page. (NPS basic info: Basic Information)
Why You Still Shouldn’t “Wing It” in Glacier
Even if timed entry is reduced, paused, or changed this year, Glacier still punishes sloppy planning:
Going-to-the-Sun Road openings vary by snowpack, parking fills early, and cell service can disappear right when you need it.
NPS is blunt about Going-to-the-Sun Road: there is no set date for Logan Pass to open, and the alpine portion typically isn’t fully open until early July. Plan around that, not a calendar guess. (NPS Going-to-the-Sun Road general info: GTSR General Info)
Reality check:
The “drive it whenever” version of Glacier only exists on Instagram.
In the real park, your day is constrained by road status, parking capacity, and whatever the current visitor management rules say.
The 3 Core Rules for Glacier
Build your day around Going-to-the-Sun Road reality.
The alpine portion has no set opening date, and it’s typically fully open by early July.
Check road status before you lock your itinerary. (NPS: GTSR General Info)
Assume Logan Pass parking will be ugly.
NPS notes the Logan Pass lot often fills by sunrise and stays busy through the day.
If Logan Pass is on your must-do list, treat it like a sunrise mission. (NPS: GTSR General Info)
Carry bear spray and act like you mean it.
NPS says bear spray is the most effective deterrent, and bear bells are not adequate or effective.
Carry it where you can reach it fast, not buried in a pack. (NPS bear safety: Bear Safety)
The Ultimate Glacier Itineraries (Step-by-Step)
The 1-Day East-Side Express
Perfect if you’re short on time or you want the most reliable plan when visitor-management rules are in flux.
Early Morning (before crowds):
Start on the east side (St. Mary area) and drive Going-to-the-Sun Road east-to-west as far as conditions allow.
Prioritize stops like Sun Point and Wild Goose Island Overlook if Logan Pass access is limited early season.
(Road timing and openings vary; use: GTSR General Info)
Late Morning:
If Logan Pass is open, do the Hidden Lake Overlook hike, then get out of that parking lot before it turns into a war zone.
(NPS notes the lot often fills by sunrise: GTSR General Info)
Afternoon (pick your district based on the current rules):
If Many Glacier is reservation-controlled this season and you don’t have access, pivot to Two Medicine or stick to east-side roadside viewpoints and shorter hikes.
Use the official reservation page to decide. (NPS: Vehicle Reservations)
Pro Tip:
The “best” itinerary is the one that matches the road status and reservation rules that actually exist today.
Check first, then execute.
The 2-Day Cross-Continental Divide
Day 1: Run the East-Side Express above.
Day 2: Add the west side.
Option A: You have valid access for the west-side corridor (if controlled this season)
Morning: Enter from West Glacier (when allowed under current rules) and do Trail of the Cedars + Avalanche Lake.
Afternoon: Lake McDonald area for shoreline time, boat rentals, or short hikes.
Option B: You do not have west-side timed-entry access (if controlled this season)
Play the edges: Enter outside the controlled hours (if the current rules allow it), then focus on Lake McDonald Lodge area and golden-hour shoreline photos.
Confirm the current “controlled hours” on the NPS reservations page before you try this. (NPS: Vehicle Reservations)
The 3-Day Crown of the Continent
Days 1 and 2: Follow the 2-Day plan above.
Day 3: Go where most people don’t.
Morning: Two Medicine Valley
Running Eagle Falls: Easy walk, big payoff.
Two Medicine Lake: Boat tours or longer hikes if you’ve got the legs.
Afternoon: North Fork (only if conditions and rules make sense)
North Fork is often managed differently than the main corridor.
If it’s reservation-controlled this season, treat it like the west side: go with valid access or go outside the controlled window (if allowed).
Verify the current North Fork rules before you commit to the drive. (NPS: Vehicle Reservations)
Your Reservation Strategy (If Timed Entry Is Active This Season)
Don’t guess. Don’t trust screenshots. Check the current system, then set your reminders based on what the official pages say.
Go east. Build your day around St. Mary and Two Medicine, plus whatever portion of Going-to-the-Sun Road is open.
Start early. Logan Pass parking is the constraint, not your motivation.
Bring offline maps. Cell service can drop right when you need it.
Pro Tips for Wildlife Photos and Backup Plans
Golden-hour wildlife strategy
Wildlife is most active early and late. That’s also when your photos don’t look like harsh midday postcards.
Weather backup plans
When Logan Pass isn’t open:
Stick to lower-elevation trails and east-side viewpoints until the alpine portion opens.
(NPS: no set date; typically fully open by early July: GTSR General Info)
Rain day:
Visitor centers, short waterfall walks, and scenic driving when conditions permit.
What to Do When Things Go Sideways
Road suddenly closes?
Check official road status before you drive and be ready to pivot districts. (NPS road info hub: GTSR General Info)
Bear encounter?
NPS guidance: don’t run, back away slowly, and be prepared to deploy bear spray if needed. (NPS: Bear Safety)
Altitude hits you at Logan Pass?
Descend and hydrate. Logan Pass sits at 6,646 feet. (NPS: GTSR General Info)
Ranger wisdom (paraphrase):
Glacier weather changes fast. Pack layers even in mid-summer.
FAQ: Your Top Glacier Questions Answered
When does Going-to-the-Sun Road fully open?
There is no set date. NPS says the road has typically been fully open by early July, depending on snowfall and plowing progress.
(NPS: GTSR General Info)
Do I need a vehicle reservation?
It depends on the current season rules and which district you’re trying to enter during controlled hours.
Check the official Vehicle Reservations page, then plan your entrance accordingly.
(NPS: Vehicle Reservations)
What’s the best month to visit?
If you want the highest odds that Going-to-the-Sun Road is fully open, aim for mid-summer. If you want fewer crowds, shoulder season is better, but weather becomes more volatile.
(Road timing context: GTSR General Info)
Is Glacier family-friendly?
Yes. Stick to shorter, high-reward trails and keep kids close around steep overlooks.
How much water should I carry?
For short hikes, bring at least a full bottle per person. For anything longer or more exposed, bring more than you think you need. Glacier air can be dry, and sun exposure adds up.
Ready to Conquer the Crown? — Download Official NPS Resources
Skip the guesswork and download the official PDFs before you lose service:
Master off-grid RV camping with proven strategies from 35+ years of boondocking across 47 states
Last updated: January 24, 2026
Estimated read time: 18 minutes
📋 Quick Reference (TL;DR)
Time Required: 2-3 days to prepare your RV and systems, then start with 1-2 night trips to build confidence
Difficulty Level: Beginner-friendly if you have a self-contained RV with working systems
Prerequisites: Fresh water tank (30+ gallons), grey and black waste tanks, independent power source (solar or generator)
Success Metric: Complete 3+ nights off-grid without needing hookups, resupply, or rescue
Boondocking lets RV owners camp free on public lands and private property by operating self-sufficiently without hookups. Success requires three elements: a self-contained RV with 30+ gallon fresh water capacity, power management through solar or generator, and knowledge of legal camping locations.
About the Author: Chuck Price has boondocked across 47 states…
What Is Boondocking? (Free Camping Explained)
Boondocking refers to camping in a recreational vehicle without hookups to water, electric, or sewer services. The term originated with RVers camping “out in the boonies” on public lands managed by the Bureau of Land Management, which oversees 245 million acres open to dispersed camping across the western United States.
The practice goes by several names. “Dry camping” technically means camping without hookups anywhere, including paid campgrounds. “Dispersed camping” is the official term used by the US Forest Service for camping outside designated campgrounds on National Forest land. “Boondocking” typically implies free or low-cost camping on public land or with permission on private property.
The Bureau of Land Management allows camping on most of its land for up to 14 consecutive days without fees or permits. The US Forest Service maintains similar policies on National Forest land, though some popular areas charge $5-10 per night or require free permits during peak seasons. Combined, these two agencies manage over 400 million acres where boondocking is generally permitted.
Success requires operating your RV as a self-contained unit. You carry all the water you’ll use, generate your own electricity through solar panels or a generator, and store all wastewater in holding tanks until you can dump at a proper facility. This self-sufficiency lets you camp almost anywhere legal access exists.
Essential Prerequisites: What You Need Before Your First Trip
Your RV must function as a complete household independent from external utilities. The RV Industry Association defines a self-contained recreational vehicle as one with fresh water storage, waste holding tanks, and an independent power source. These aren’t optional upgrades but minimum requirements for responsible boondocking.
⚠️ Not Ideal for Boondocking Without:
Fully functional holding tanks (fresh water minimum 30 gallons, grey and black tanks minimum 20 gallons each)
Independent power source (solar panels producing 200+ watts or reliable generator)
RV mechanical reliability (no active water leaks, functional propane system, working batteries)
Basic self-sufficiency skills (can operate all RV systems, perform minor troubleshooting)
Fresh water capacity determines how long you can stay off-grid. A 30-gallon tank supports two people for 2-3 days with conservative use. Larger tanks (50-100 gallons) or supplemental containers extend this to a week or more. Calculate 3-5 gallons per person per day for drinking, cooking, and limited washing when boondocking.
Grey water tanks collect sink and shower drainage. Black water tanks hold toilet waste. The Leave No Trace Center for Outdoor Ethics recommends both tanks match or exceed fresh water capacity to prevent the need to dump before you run out of fresh water. Most factory RV configurations meet this standard, but verify your specific tank sizes before planning extended trips.
Power independence comes from solar panels, generators, or both. Solar works silently and requires no fuel, but output depends on weather and season. Generators provide consistent power but consume fuel, create noise, and may violate quiet hours at some locations. Budget $600-2,000 for a basic solar setup or $500-2,000 for a quality generator.
Test all systems before leaving developed campgrounds. Fill your fresh tank, run water through all fixtures, flush the toilet multiple times, and verify your grey and black tank sensors work. Charge batteries fully and measure how long they power your typical usage. Practice dumping tanks at an RV park before attempting it at a public dump station. These dry runs prevent frustrating discoveries in remote locations.
Cost Savings: Real Numbers from Full-Time Boondocking
Private RV parks charge $40-80 per night depending on location and amenities. KOA campgrounds average $55-75 per night for full hookups. Good Sam parks offer member discounts but still typically cost $35-50 nightly. These costs accumulate rapidly on extended trips or full-time travel.
Boondocking on Bureau of Land Management or US Forest Service land costs nothing in most locations. Some high-demand areas charge $5-10 per night, and a few require free permits available online or at ranger stations. Even accounting for occasional paid camping to access services, boondockers typically spend under $10 per night on average.
A full-time RVer paying campground fees 365 nights annually spends $14,600-29,200 per year ($40-80 nightly). That same RVer boondocking primarily and only paying for camping occasionally might spend $1,000-3,650 annually. The difference of $13,600-25,550 per year covers most RV maintenance, fuel, and travel expenses.
Initial equipment investment requires budgeting. A 300-watt solar system with batteries costs $1,500-2,500 installed. Quality generators run $800-2,000. Water management tools (extra containers, filtration, conservation devices) add $200-400. LED lighting upgrades cost $50-100. Total startup: $1,000-3,000 for a basic but functional setup.
The break-even calculation favors boondocking quickly. At $50 average nightly savings, a $2,000 equipment investment pays for itself in 40 nights. Weekend boondockers reach break-even in one season. Full-timers recover costs in under two months. After break-even, every night boondocked instead of paying campground fees puts money back in your travel budget.
Hidden savings compound the advantage. Campgrounds in popular destinations charge premium rates during peak season. National Parks near popular RV parks might cost $80-120 nightly, while boondocking nearby on Forest Service land costs nothing. Holiday weekends and special events drive campground prices even higher, but boondocking prices stay constant at zero.
Solar Power and Energy Management
Solar panels convert sunlight into electricity to charge your RV batteries without noise or fuel consumption. Renogy and similar manufacturers offer complete systems ranging from 100-watt portable panels ($200-300) to 600-watt permanent roof installations ($2,000-3,000). Most boondockers find 200-400 watts sufficient for moderate power needs.
Panel output varies by season and location. Winter sunlight produces 20-30% less power than summer due to shorter days and lower sun angles. Desert locations in Arizona and Nevada deliver optimal solar performance year-round. Heavily forested areas or frequent overcast skies reduce output significantly. Calculate power needs conservatively based on worst-case scenarios for your typical camping locations.
Battery capacity determines how many days you can operate between full charging cycles. Battle Born and similar lithium batteries offer 200 amp-hours (Ah) of usable capacity, roughly double the usable power of equivalent lead-acid batteries. Two 200Ah lithium batteries store enough power for 3-5 days of moderate use without recharging, providing cushion for cloudy weather.
Energy conservation extends your boondocking duration more effectively than adding panels or batteries. LED bulbs use 80% less power than incandescent bulbs they replace. Switching from twelve 20-watt incandescent bulbs to LED drops nightly lighting consumption from 240 watts to 48 watts. At that rate, lighting alone drains 20 amp-hours daily with incandescent but only 4 amp-hours with LED.
Energy consumption calculated for 200Ah lithium battery bank. Source: RV electrical system standards and manufacturer specifications.
Appliance
Watts
Hours on 200Ah Battery
Daily Amp-Hours (2hr use)
Recommended Use
LED lights (total)
20W
1,200 hours
3.3 Ah
Unlimited – minimal drain
Water pump
50W
480 hours
8.3 Ah
Normal use, fix leaks promptly
Furnace fan
75W
320 hours
12.5 Ah
Use sparingly, layer clothing
Refrigerator (12V mode)
40W
600 hours
80 Ah (cycling)
Switch to propane when boondocking
Laptop charging
65W
369 hours
10.8 Ah
Charge during peak sun hours
Microwave
1000W
24 hours
13.9 Ah (10 min)
Generator only, not on battery
Phantom drain from devices in standby mode steals 5-10% of battery capacity daily. Unplug phone chargers, laptops, and other electronics when not actively charging. Turn off inverters powering AC outlets you aren’t using. These small leaks compound over multiple days, potentially draining 20-40 amp-hours you’ll need later in your stay.
High-power appliances require generators or shore power. Microwaves, hair dryers, air conditioners, and electric heaters draw 1,000-1,500 watts each. Running these on batteries drains your bank in minutes. Save high-power cooking and grooming for generator hours or skip them entirely. Most boondockers adapt to stovetop cooking and air-drying hair.
Water Management: Conservation Strategies That Work
Water weighs 8.3 pounds per gallon and RVs carry limited quantities. A 30-gallon fresh tank adds 249 pounds fully loaded. This weight affects fuel economy and handling, so RVers often travel with tanks partially full and refill at destinations. Understanding consumption helps plan refill frequency and locations.
Average American households use 80-100 gallons per person daily. RV living with full hookups typically reduces this to 8-10 gallons per person per day. Boondocking demands further reduction to 3-5 gallons per person daily. This dramatic decrease requires changing habits around showering, dishwashing, and general water use.
Navy showers cut shower water use by 90% compared to continuous flow. Turn water on to wet your body (10 seconds), turn off while soaping and shamming (1-2 minutes), then rinse thoroughly (30-60 seconds). Total water use: under 1 gallon versus 10-15 gallons for a conventional shower. Some boondockers shower every other day or use gym facilities to preserve tank capacity.
Dishwashing technique matters as much as volume. Fill one basin with soapy water for washing, another with clean water for rinsing. Scrape plates thoroughly before washing. This two-basin method uses 2-3 gallons versus 5-8 gallons running water continuously. Alternatively, use biodegradable wipes for basic cleaning and save full washing for items that touched raw meat.
Low-flow faucet aerators reduce water consumption 40% without changing habits. Standard RV faucets flow at 2.2 gallons per minute. A 1.5 GPM aerator costs under $10 and cuts flow without noticeably reducing pressure for handwashing or tooth brushing. Install these in kitchen and bathroom sinks before your first boondocking trip.
The Fresh Water Tank Institute recommends water filtration for extending time between refills when safe sources exist. Portable water filters let you refill from streams, lakes, or questionable spigots instead of driving to certified water sources. Sawyer Mini filters cost $25-35 and remove 99.9% of bacteria and protozoa. Combine filtration with 5-gallon Aqua-Tainer containers to supplement your main tank.
Monitor tank levels daily when boondocking. Most RVs include panel displays showing fresh, grey, and black tank percentages. Check these each morning to track consumption rates and project when you’ll need services. First-time boondockers often misjudge usage and run out of fresh water while still having empty waste tanks, forcing an early departure.
Grey water fills faster than most RVers expect. Kitchen sinks and showers drain into this tank, and cooking three meals daily adds up. A family of two typically fills a 30-gallon grey tank in 3-4 days with conservative habits. When grey fills before fresh empties, you can drain grey water on the ground in dispersed camping areas away from water sources, following Leave No Trace guidelines. Black tanks must always be dumped at proper facilities.
Finding Legal Boondocking Locations: Apps and Resources
Smartphone apps have revolutionized boondocking by crowdsourcing location information from thousands of RVers. These platforms provide GPS coordinates, user reviews, photos, and updates about road conditions, cell coverage, and recent closures. Most work offline after downloading maps, critical for areas without cell service.
Campendium leads the category with detailed user reviews and photos from its community of RVers. The free app covers campgrounds and boondocking sites across the United States and Canada. Reviews specify RV size limitations, road conditions, and whether solar panels can operate effectively given tree coverage. Site photos help you visualize what to expect before arrival.
iOverlander operates globally, making it valuable for travelers beyond North America. The app catalogs boondocking sites, paid campgrounds, dump stations, water refill locations, and propane sources. Offline maps download by region, so you can navigate without cell coverage. The global user base updates information frequently, though remote areas may have sparse listings compared to popular routes.
Boondocking app comparison based on 2026 feature sets. Pricing current as of January 2026. All apps available for iOS and Android.
App
Coverage Area
Offline Maps
Cost
Best For
Campendium
US, Canada, Mexico
No
Free (Pro $36/year)
Detailed user reviews, site photos, cell coverage reports
iOverlander
Global
Yes (regional downloads)
Free
International travel, comprehensive services (dump, water, propane)
AllStays
US, Canada
Partial (cached data)
$9.99 one-time
Comprehensive database including truck stops, rest areas, services
FreeRoam
US (public lands)
Yes (full offline)
Free
BLM and National Forest boundaries, official dispersed camping areas
AllStays provides the most comprehensive database for $9.99 one-time purchase. Beyond boondocking sites, it lists truck stops, rest areas, Walmart locations, and all RV services. The app helps plan entire routes by showing where you can camp, dump, refill water, and buy propane. Some data works offline after caching, though it requires periodic online updates.
FreeRoam specializes in public land boundaries and official dispersed camping areas on Bureau of Land Management and US Forest Service land. The app overlays BLM and USFS boundaries on maps, showing exactly where you can legally camp. This prevents accidental trespassing on adjacent private land, a common mistake in areas with checkerboard ownership patterns.
The Dyrt combines campground reservations with free site listings in a polished interface. The free version provides basic information and reviews. Pro membership ($36/year) adds offline maps, advanced search filters, and the ability to save unlimited favorites. Photo galleries help visualize sites, though most images come from paid campgrounds rather than dispersed camping areas.
Cross-reference multiple apps for reliable information. A site with five positive reviews on Campendium and recent check-ins on iOverlander likely remains accessible. A site with one old review and no recent activity might have closed, changed ownership, or deteriorated. Reading recent reviews (within 60-90 days) provides the most accurate picture of current conditions.
Boondockers Welcome and Harvest Hosts: Private Property Programs
Boondockers Welcome connects RVers with private property owners who offer free overnight parking on their land. Members pay $50 annually for access to approximately 2,800 host locations across North America. Hosts range from rural homeowners with acreage to suburban residents with large driveways. Most locations accommodate one RV for 24 hours without hookups.
The program works on mutual respect and community. Hosts welcome travelers because they enjoy meeting people and supporting the RV lifestyle, not for profit. Guests arrive self-contained, respect property rules, and often share conversation or travel stories. Some hosts offer amenities like water hookups or electricity, but you should expect nothing beyond a safe parking spot.
Harvest Hosts operates on a similar model with 5,000+ locations at farms, wineries, breweries, museums, and attractions. Annual membership costs $99 for unlimited stays. The value proposition includes supporting small businesses while gaining unique overnight locations. Many hosts offer product tastings, farm tours, or discounts on purchases.
Etiquette expectations differ from public land boondocking. Arrive during posted hours (usually after 3 PM), depart by check-out time (typically by noon), and purchase something from business hosts when possible. Think of the membership fee as access to the network, not payment to individual hosts. Purchasing wine at a vineyard or cheese at a dairy farm shows appreciation for their hospitality.
Location quality varies significantly between hosts. Read recent reviews before booking. Five-star hosts typically offer level parking, safe neighborhoods, and welcoming attitudes. Lower-rated hosts might have difficult access, unlevel sites, or minimal interaction. Both programs let you filter by RV length, view photos, and read guest reviews before requesting stays.
Booking requires advance planning. Popular hosts fill up weeks ahead, especially in desirable locations or during peak travel seasons. Request stays 3-7 days before your arrival date. Have backup options ready since hosts can decline requests or cancel due to emergencies. The programs work best for travelers with flexible itineraries who can adjust plans based on availability.
Both programs restrict consecutive nights at the same location. Boondockers Welcome and Harvest Hosts limit stays to 24 hours unless the host specifically invites you to remain longer. This keeps the programs sustainable for hosts and prevents guests from treating locations as extended parking. For multi-night stays, alternate between different program locations or combine them with public land boondocking.
Public Land Boondocking: BLM and National Forest Rules
The Bureau of Land Management manages 245 million acres of public land, primarily in western states including Arizona, California, Nevada, Utah, New Mexico, Oregon, Idaho, and Wyoming. Most BLM land allows dispersed camping free for up to 14 consecutive days. You can camp anywhere vehicle access exists unless signs specifically prohibit it.
The 14-day limit resets when you move at least 25 miles from your previous location. This rule prevents permanent occupancy while allowing extended travel through a region. Snowbirds often circuit between several favorite spots in an area, staying 14 days at each before moving to the next. The BLM rarely enforces exact mileage, but moving to a distinctly different area demonstrates compliance.
Long-Term Visitor Areas (LTVAs) in Arizona and California offer an exception to 14-day limits. For $180 (2026 season rate), you can stay up to seven months (September 15 – April 15) in designated LTVAs near Quartzsite and Yuma, Arizona, plus several California locations. Popular with snowbirds, these areas provide dump stations and water refills but no hookups. The fee works out to approximately $0.86 per night.
The US Forest Service manages 193 million acres of National Forest land with similar dispersed camping policies. Most forests allow free camping for up to 14 days, though some require free permits available online or at ranger stations. Heavily used areas near popular cities may designate specific dispersed sites or restrict camping to established locations only.
Road access determines where you can physically camp. National Forest land often has more restrictions than BLM land. The Forest Service may limit camping to areas 100 feet from trails, prohibit camping within sight of roads, or require minimum distances from water sources. Check specific forest regulations, which vary by district and change seasonally.
Fire restrictions vary by season and location. The National Park Service, BLM, and Forest Service issue fire restrictions based on drought conditions and wildfire risk. Stage 1 restrictions typically prohibit ground fires but allow gas stoves. Stage 2 restrictions ban all open flames including charcoal and may restrict generator hours. Check current restrictions before arrival and monitor for changes during your stay.
Some high-demand areas charge fees for dispersed camping. Popular locations near Moab, Utah, Sedona, Arizona, and other tourist destinations may charge $5-10 per night even for boondocking sites without amenities. The agencies use fee revenue to maintain roads, provide vault toilets, and staff ranger patrols. Payment uses honor envelopes at fee posts.
Cell coverage varies from excellent to nonexistent on public lands. Apps like Campendium show user-reported cell coverage by carrier, but this information can be outdated. Assume no cell service when planning trips to unfamiliar areas. Download offline maps, save important phone numbers, and inform someone of your planned location and return date before heading to remote spots.
Safety and Security: Real Risks vs Perceived Risks
RV theft rates run 0.8 per 1,000 vehicles according to National Crime Information Center data, compared to 2.4 per 1,000 for passenger vehicles. The hard-shell construction, multiple locks, and ability to relocate quickly make RVs less attractive targets than cars or tents. Occupied RVs face even lower risk since someone is always present.
Remote boondocking locations have lower crime rates than populated campgrounds or urban areas. The RV Safety & Education Foundation reports most RV-related incidents occur in developed campgrounds near population centers, not dispersed camping areas. Thieves prefer locations with multiple targets and escape routes, conditions rarely found on dirt roads miles from highways.
Wildlife encounters depend on location and precautions. Bears inhabit many western forests and mountains but rarely approach RVs when food is stored properly. Keep all food, toiletries, and scented items inside your locked RV. Never leave food outside overnight. Bears can smell food through RV walls but typically won’t attempt entry into an occupied vehicle with lights and sounds.
Lock your doors at night even in remote locations. This basic precaution costs nothing and prevents the rare opportunistic intrusion. Most RVs include deadbolts on entry doors and locks on storage compartments. Use them consistently, especially when you leave the RV to explore or hike.
Choose well-traveled areas for your first boondocking trips. Popular spots near established roads have more traffic, better cell coverage, and often host other RVers overnight. This built-in community provides security through proximity without the crowds and fees of developed campgrounds. Graduate to more remote locations as you gain confidence and experience.
Arrive during daylight hours whenever possible. This lets you evaluate the site condition, level your RV properly, and verify no hazards exist before dark. Late arrivals force setup in darkness, increasing injury risk from tripping, misjudging clearances, or missing problematic ground conditions. Plan to arrive 2-3 hours before sunset.
Trust your instincts about locations and people. If a spot feels wrong, leave and find another. Unlimited free locations exist, so never feel obligated to stay somewhere uncomfortable. Boondocking should feel peaceful and secure, not anxious or risky. Your comfort matters more than saving one night’s camping fee.
Emergency communication requires planning in areas without cell service. Satellite communicators like Garmin inReach ($350-450 plus $12-65/month service) send messages and share GPS coordinates from anywhere. These devices can summon help when needed and provide peace of mind for solo travelers or those with medical conditions. Cell signal boosters improve coverage in marginal areas but don’t work where zero signal exists.
Essential Gear Checklist (By Priority Level)
Equipment needs differ from traditional campground camping because you provide all utilities and services yourself. Prioritize gear that extends your self-sufficiency, starting with items that solve immediate problems before adding convenience items. Build your boondocking kit gradually based on actual needs discovered during initial trips.
Solar power ranks as the highest priority investment for regular boondockers. A 200-watt solar panel kit with charge controller costs $600-800 and generates 40-80 amp-hours daily in good sun. This powers lights, water pump, fans, and phone charging indefinitely without noise or fuel costs. Amazon and specialty retailers like REI stock complete kits, though many RVers choose professional installation to ensure proper wiring and roof mounting.
Equipment prioritization based on 35+ years full-time boondocking experience across varied climates. Costs reflect 2026 market averages for quality equipment.
Item
Priority
Why Essential
Typical Cost
Use Case
Solar panels (200-400W)
Critical
Only renewable, silent power source for multi-day stays
Reduces lighting power consumption by 80%, pays for itself in weeks
$30-60
All boondocking, year-round benefit
Portable generator
High
Backup power for cloudy weather, high-draw appliances
$500-2,000
Winter camping (furnace fan), charging on cloudy days
Water filter system
Medium
Allows refilling from questionable sources, extends range
$25-150
Remote areas without certified water sources
Tire pressure monitoring
Medium
Prevents blowouts on rough roads, early warning system
$200-400
Accessing remote sites on rough roads
Leveling blocks
Medium
Critical for refrigerator function, comfort, water drainage
$30-100
Nearly every boondocking site (rarely perfectly level)
Cell signal booster
Medium
Improves marginal cell coverage for work/emergency contact
$300-500
Remote work, staying connected in fringe coverage areas
Portable solar panels
Low
Supplements roof panels when parked in shade
$200-600
Heavily forested areas, winter sun angle optimization
Composting toilet
Low
Extends black tank capacity significantly for long-term stays
$900-1,200
Extended stays (14+ days), areas far from dump stations
Extra water containers multiply your fresh capacity affordably. Five-gallon Aqua-Tainer jugs ($15-20 each) stack easily and let you carry 20-30 extra gallons at minimal cost. This extends a 30-gallon tank to 50-60 gallons total capacity. Store containers full when traveling to high-quality water sources, then meter out refills to your main tank as needed.
LED lighting conversion delivers immediate return on investment. Replacing twelve incandescent bulbs with LEDs costs $30-60 but cuts lighting power consumption from 240 watts to 48 watts. This single upgrade extends battery life by days and allows longer stays between generator runs or cloudy periods when solar output drops.
Generators provide backup power insurance for extended trips or winter camping. A 2,000-watt inverter generator ($500-800) runs quietly enough for most boondocking locations and produces sufficient power to charge batteries, run a microwave, or operate the furnace fan during extreme cold. Fuel consumption runs 0.5-1 gallon per hour depending on load.
Leveling equipment prevents refrigerator damage and improves comfort. RV absorption refrigerators require level positioning (within 3 degrees) to function properly and avoid costly damage. Plastic leveling blocks cost $30-50 and stack to level side-to-side or front-to-back. Perfectly level sites rarely exist in dispersed camping areas, making these blocks nearly essential equipment.
Cell signal boosters improve marginal coverage but don’t create signal where none exists. WeBoost and similar brands amplify weak signals by 2-5 times, turning one bar into usable coverage for calls and data. Expect to pay $300-500 for quality boosters. These help most in fringe coverage areas but won’t work in true dead zones miles from towers.
Leave No Trace Principles for Boondockers
The Leave No Trace Center for Outdoor Ethics developed seven principles to minimize environmental impact during outdoor recreation. These principles apply directly to boondocking on public lands and help preserve access for future travelers. Land managers increasingly restrict or prohibit dispersed camping in areas where users damage resources or create unsanitary conditions.
Plan ahead and prepare by researching regulations, weather, and special concerns for your destination. Download offline maps before leaving cell coverage. Carry adequate water, food, and supplies to avoid needing rescue. Know your vehicle’s limitations and avoid roads beyond its capabilities. Preparation prevents poor decisions forced by emergencies or lack of information.
Travel and camp on durable surfaces means using existing roads and previously disturbed campsites instead of creating new ones. Park on gravel, rock, or compacted dirt rather than vegetation. Avoid wet or muddy roads that your tires will rut and damage. Choose established sites over pristine areas even if the perfect sunset view beckons from untouched ground.
Dispose of waste properly by packing out all trash, leftover food, and litter. This includes cigarette butts, food scraps, and packaging. Grey water from sinks and showers can disperse on the ground at least 200 feet from water sources, but only in dispersed camping areas. Black water must always be dumped at designated facilities. Leave your site cleaner than you found it by picking up previous visitors’ trash.
Leave what you find applies to natural objects, cultural artifacts, and vegetation. Don’t collect rocks, antlers, or wildflowers even though they seem abundant. Archaeological sites and historical artifacts receive legal protection on public lands. Take photos instead of souvenirs. Future visitors deserve the same discovery experience you enjoyed.
Minimize campfire impacts by using existing fire rings when available or foregoing fires entirely. Dead and downed wood provides habitat for insects, nutrients for soil, and homes for small animals. Collecting it for fires damages ecosystems. Use a camp stove for cooking. If you build fires, keep them small, burn wood completely to ash, and scatter cool ashes before leaving.
Respect wildlife by observing from a distance and never feeding animals. Store food, trash, and toiletries inside your locked RV to prevent habituation. Animals that learn to associate humans with food lose their natural wariness and may need to be destroyed by wildlife managers. Keep pets on leash and under control at all times. Watch for wildlife from your windows rather than approaching on foot.
Be considerate of other visitors by maintaining quiet hours (typically 10 PM to 8 AM), keeping generator use reasonable, and respecting others’ privacy and space. Park at least 50-100 feet from other RVs unless the area is specifically designated for closer spacing. Keep music and voices low. Some people seek absolute solitude in dispersed camping areas.
Seasonal Considerations: Winter vs Summer Boondocking
Temperature extremes affect both comfort and RV system performance during boondocking trips. Summer heat increases water consumption through more frequent showers and drinking. Winter cold drives propane usage for heating and requires protecting water systems from freezing. Planning for seasonal challenges prevents equipment damage and uncomfortable nights.
Summer boondocking works best at higher elevations where temperatures stay moderate. Locations at 5,000-8,000 feet elevation in states like Colorado, Utah, and Montana offer comfortable 60-75°F daytime temperatures while lower elevations bake in 90-100°F heat. Mountain locations also provide better solar performance due to thinner atmosphere and longer daylight hours.
Solar panels perform 20-30% better in summer than winter due to longer days and higher sun angles. A 200-watt panel producing 40 amp-hours daily in December might generate 65 amp-hours in June. This extra power cushion allows running fans for cooling without depleting batteries. Summer’s abundant solar makes it the ideal season for learning power management before tackling winter’s challenges.
Winter boondocking concentrates in southern locations where freezing rarely occurs. Quartzsite, Arizona hosts thousands of RVers November through March, with daytime temperatures in the 60-70°F range. Similar winter destinations include Yuma, Arizona, Ajo, Arizona, and areas around Lake Havasu. These locations offer BLM land, LTVAs, and a strong RV community.
Propane consumption skyrockets in freezing temperatures. RV furnaces can burn 2-4 gallons daily when maintaining 65°F interior temperature with outside temperatures near freezing. A standard 7-gallon propane tank lasts 2-4 days under heavy use. Budget for frequent refills or consider locations where temperatures rarely drop below 40°F to avoid excessive propane costs.
Water system protection becomes critical below 32°F. Fresh water tanks located inside heated RV compartments rarely freeze, but external plumbing, water pumps, and grey tanks can freeze overnight. Insulated water hose covers protect supply lines. Tank heaters (powered by 12V or propane) keep systems above freezing. Most winter boondockers drain their systems when temperatures will drop below 20°F for extended periods.
Battery performance degrades in cold weather. Lithium batteries maintain 80-90% capacity at freezing temperatures but lead-acid batteries can lose 50% capacity below 32°F. Cold batteries also charge more slowly from solar panels. Winter boondockers often insulate battery compartments or use battery blankets to maintain performance. Generator runtime increases to compensate for reduced solar output and battery capacity.
Shoulder seasons (April-May and September-October) offer the best combination of comfortable temperatures, strong solar performance, and fewer crowds. Desert locations work well in spring and fall when summer heat hasn’t arrived or has subsided. Mountain areas become accessible in late spring and remain pleasant through early fall before snow closes access roads.
Connectivity: Internet and Cell Signal Solutions
Reliable internet access requires planning when boondocking in remote areas. Cell coverage varies dramatically by location and carrier. AT&T and Verizon typically offer the widest rural coverage in the western United States, though T-Mobile has improved significantly in recent years. Check coverage maps for your specific carriers before selecting boondocking locations if connectivity matters for work or staying in touch.
Cell signal boosters amplify weak signals to create usable connections. WeBoost Drive Reach ($450-500) and similar systems use an external antenna to capture distant signals and amplify them inside the RV. These work well in fringe coverage areas where your phone shows 1-2 bars. Expect 2-5x signal improvement, potentially turning unusable coverage into workable connectivity.
Signal boosters cannot create coverage where none exists. If you park 50 miles from the nearest cell tower with zero bars, boosters won’t help. They improve weak signals, not create signals from nothing. Use coverage maps and apps like Campendium that report actual user experience with specific carriers at locations.
Starlink satellite internet provides coverage almost anywhere in North America for $150 per month with unlimited data (RV/roaming plan). The system requires clear sky view to the north and draws 40-100 watts of power continuously, creating a significant drain on battery systems. Starlink works well for full-time travelers who need reliable internet regardless of location, but the cost and power requirements exceed casual users’ needs.
Mobile hotspot plans through cell carriers offer 15-50 GB monthly data allowances at costs ranging from $20-80 monthly. These work anywhere your cell phone works and draw minimal power from a phone or dedicated hotspot device. Data limits require managing streaming video, large downloads, and cloud backups. Most remote workers can operate within 30-40 GB monthly with conscious usage habits.
Public WiFi at nearby towns provides free alternatives for large downloads or video calls. Many boondocking areas sit 10-30 miles from towns with coffee shops, libraries, or fast food restaurants offering free WiFi. Schedule weekly town runs for groceries, propane, and internet-intensive tasks. This approach saves money compared to satellite internet while maintaining connectivity for essential communication.
Offline capability matters more than internet access for essential apps. Download offline maps for navigation before leaving cellular coverage. Save important documents, entertainment, and work files locally rather than depending on cloud storage. Many apps including Campendium, iOverlander, and mapping software offer offline functionality that works without any cell signal.
Common Mistakes and How to Avoid Them
First-time boondockers typically underestimate water consumption, reported by approximately 68% of beginners in RV forum surveys and Good Sam Roadside Assistance calls from stranded boondockers. The jump from unlimited water on city hookups to 30-50 gallons total capacity creates culture shock. Track your actual usage for the first few trips by checking tank levels daily and calculating gallons used per day.
Inadequate power planning ranks as the second most common mistake. RVers accustomed to shore power forget that boondocking requires budgeting every amp-hour. Running the furnace fan all night, watching TV for hours, or leaving multiple devices charging simultaneously drains batteries faster than solar can replenish. Calculate your daily power needs before installing solar to ensure adequate capacity.
Arriving after dark forces setup in dangerous conditions. You can’t evaluate site suitability, level properly, or spot hazards like rocks, holes, or low-hanging branches at night. Late arrivals often result in unlevel parking, tree damage to RVs, or getting stuck in soft soil. Plan to arrive 2-3 hours before sunset even if it means shorter daily driving distances.
Ignoring weather forecasts leads to uncomfortable or dangerous situations. Sudden storms can make dirt roads impassable, creating multi-day delays waiting for roads to dry. Flash floods threaten RVs parked in washes or low areas. High winds can damage awnings or tip tall RVs. Check extended forecasts before selecting locations and have alternate plans ready.
Parking too close to other boondockers violates unwritten etiquette and creates conflicts. Unless an area designates specific sites, maintain at least 50-100 feet from other RVs. Popular spots might have less spacing, but arriving first gives you the right to reasonable privacy. Don’t park directly in someone’s view, block their access, or create noise that affects their experience.
Overstaying welcome at Walmart or retail parking happens when RVers treat overnight courtesy parking as free long-term camping. One night maximum respects the business’s generosity and keeps the privilege available for other travelers. Setting up chairs, grills, or awnings transforms courtesy parking into camping and often results in bans that hurt everyone. Keep it simple: arrive late, leave early, and purchase something from the store when possible.
Dumping grey water illegally in developed areas damages the environment and RV community reputation. Grey water can disperse on the ground in remote dispersed camping areas away from water sources, following Leave No Trace guidelines. But dumping in parking lots, rest areas, or near campgrounds creates health hazards and often triggers new restrictions against RV parking. Always dump at designated facilities when in developed areas.
The learning curve averages 3-5 trips before most RVers optimize their boondocking systems and habits. First trips reveal water and power consumption rates, equipment gaps, and personal comfort requirements. Second and third trips refine procedures and add missing gear. By the fifth trip, most boondockers develop reliable routines and accurate predictions of how long they can stay before needing services.
Frequently Asked Questions
Is boondocking legal?
Yes, when done on Bureau of Land Management land, National Forest land, or with property owner permission. Most BLM and USFS land allows 14-day stays. Always verify local regulations, as some areas restrict camping. Private property requires explicit permission. Walmart and some retailers allow overnight parking at manager’s discretion.
Is boondocking safe?
Boondocking is statistically safer than traditional campgrounds when you follow basic precautions. RVs provide locked shelter, and remote locations have lower crime rates than populated areas. Choose well-traveled areas for your first trips, arrive during daylight, inform someone of your location, and trust your instincts if a spot feels wrong.
What equipment do you need for boondocking?
Minimum requirements: self-contained RV with 30+ gallon fresh water tank, functioning grey and black water tanks, and independent power source (200+ watts solar or generator). Critical additions include LED lighting, water conservation tools, basic tools for repairs, and offline maps. First-aid kit and emergency communication device recommended.
How much does boondocking cost?
Most boondocking is free on public lands. Optional costs: Harvest Hosts membership ($99/year), Boondockers Welcome ($50/year), BLM Long-Term Visitor Areas ($180 for 7 months), and occasional fees on National Forest land ($5-10/night). Initial equipment investment: $1,000-3,000 for solar and water management pays back within one season.
Where can you boondock for free?
Free boondocking locations include 245 million acres of Bureau of Land Management land, National Forest dispersed camping areas, some National Grasslands, and select Bureau of Reclamation areas. Apps like Campendium, iOverlander, and FreeRoam help locate specific coordinates. Some Walmart, Cracker Barrel, and Cabela’s locations allow overnight parking with manager permission.
How long can you boondock in one location?
Most BLM and National Forest land enforces 14-day limits per location. After 14 days, you must move 25+ miles. Long-Term Visitor Areas (LTVAs) in Arizona and California allow 7-month stays for $180. Boondockers Welcome and Harvest Hosts typically limit stays to 24 hours. Private property duration depends on owner permission.
What is the hardest part of boondocking?
Water management proves most challenging for new boondockers. The average person uses 8-10 gallons daily at home but must reduce to 3-5 gallons when boondocking. This requires shorter showers, conservative dish washing, and planning. Power management follows closely, requiring monitoring battery levels and adjusting usage patterns based on available sunlight.
Can you boondock in winter?
Yes, winter boondocking works well in southern locations like Arizona, New Mexico, and southern California where temperatures stay moderate. Cold-weather boondocking requires extra propane (2-4 gallons daily for heating), insulated water hoses, tank heaters, and higher power consumption for furnace fans. Southern snowbirds flock to Quartzsite, Arizona and similar winter destinations November through March.
Start Your Boondocking Adventure
Boondocking transforms RV travel from an expensive vacation into an affordable lifestyle. The initial learning curve and equipment investment pay dividends through years of free camping in locations that surpass any developed campground. Your first trip won’t be perfect, but each outing builds skills and confidence.
Begin with short trips near home while systems remain unfamiliar. Choose well-reviewed locations with easy access and other RVers nearby. Test your water capacity, power management, and comfort level with 2-3 night stays before committing to longer durations. Gradually extend your trips and venture to more remote locations as experience grows.
The boondocking community welcomes newcomers and shares information freely. Chat with neighboring RVers about their setups and lessons learned. Join Facebook groups focused on boondocking to ask questions and learn from others’ experiences. Most importantly, embrace the freedom and flexibility that boondocking provides. The ability to wake up in different locations without reservations or fees opens possibilities traditional camping can’t match.
Boondocking promises freedom, adventure, and significant cost savings—but how much does self-sufficient RV camping actually cost in practice? Based on 35+ years of RV travel across federal lands and documented expense tracking, this guide provides current costs with recent market pricing analysis. Unlike generic guides, all figures reflect real-world budgets from experienced boondockers, not theoretical estimates.
Recent industry observations suggest that boondockers typically spend 40-60% less than traditional RV park users annually, though upfront equipment investments average $500-$3,000 depending on travel style. This breakdown examines three distinct boondocking approaches—Weekend Warriors, Part-Timers, and Full-Timers—with equipment requirements, operating expenses, regional variations, and emergency fund recommendations.
The true cost equation balances initial gear investment against ongoing savings from free camping. Understanding these dynamics helps RVers make informed decisions about whether boondocking aligns with their budget, travel style, and comfort requirements.
What Is Boondocking?
Boondocking refers to camping without hookups—no water, electric, or sewer connections. Instead of relying on services found in RV parks, boondockers stay on public lands such as BLM land, national forests, and non-traditional locations like rest areas, parking lots, or private properties with permission.
The Bureau of Land Management oversees millions of acres where dispersed camping is permitted, often at no charge. This access to public lands forms the foundation of the boondocking lifestyle, though specific rules vary by location and season.
Unlike traditional camping, boondockers must be self-sufficient. Solar panels charge batteries. Water tanks must be filled before arrival. Waste tanks determine how long you can stay before seeking dump stations. These limitations require planning but enable extended stays in remote locations impossible with hookup-dependent RVs.
The appeal extends beyond cost savings. Boondockers camp in scenic locations away from crowded campgrounds, enjoy solitude, and experience public lands without the constraints of reservation systems or checkout times.
Essential Boondocking Systems: Tailoring Your Setup
Boondocking equipment requirements scale with how frequently and how long you camp off-grid. A weekend warrior camping 2-3 nights needs minimal infrastructure. A full-timer living continuously without hookups requires comprehensive systems for power generation, water storage, and waste management.
Three distinct travel styles emerge with different equipment needs and operating costs.
Weekend Warriors (2-3 Days Off-Grid)
Power Needs:
Weekend warriors require basic power systems to run lights, charge devices, and operate a refrigerator for 2-3 days. A single 200-watt solar panel paired with a 100-amp-hour AGM battery provides sufficient capacity for typical weekend use.
A 200-watt solar panel system typically generates around 600-800 Wh of energy per day under good sunlight conditions. For a weekend boondocker running lights (15-20 watts), a 12-volt fridge (30-50 watts average), and charging phones/tablets (10-20 watts), daily consumption averages 400-600 Wh—comfortably within solar generation capacity.
Recent Equipment Costs:
200W solar panel: $180-$240
100Ah AGM battery: $180-$240
Basic PWM charge controller: $40-$80
Wiring and mounting hardware: $80-$120
Total equipment investment: $480-$640
Water Requirements:
Weekend warriors can often manage with factory-installed freshwater tanks (30-50 gallons typical). For 2-3 days, a couple consumes approximately 10-15 gallons total for drinking, cooking, and basic washing—well within standard tank capacity.
Portable water filter: $25-$40 (insurance for questionable fill sources)
Collapsible water jugs (backup): $20-$35
Part-Timers (Up to 1 Week Off-Grid)
Power Needs:
Part-timers camping 4-7 days consecutively require more robust power systems. Running a residential refrigerator, using a microwave occasionally, and powering laptops or entertainment systems demands higher daily wattage and storage capacity.
A 400-watt solar array paired with a 200-amp-hour lithium battery handles typical part-timer loads. Lithium batteries offer advantages over AGM: faster charging, deeper discharge capacity (80-100% usable vs. 50% for AGM), and longer lifespan (3,000+ cycles vs. 500-800 cycles).
Recent Equipment Costs:
400W solar panels (2 × 200W): $360-$480
200Ah lithium (LiFePO4) battery: $560-$720
MPPT charge controller: $180-$280
1000W inverter: $120-$180
Wiring, fusing, and mounting: $100-$180
Total equipment investment: $1,300-$1,760
Water Requirements:
Part-timers benefit from additional freshwater capacity beyond factory tanks. For a week off-grid, a couple consumes 25-35 gallons (3.5-5 gallons per day). If factory tanks hold 40-50 gallons, supplemental storage provides cushion for extended stays.
6-gallon jerry cans (set of 3-4): $60-$100
Inline water filter system: $80-$140
Total water investment: $140-$240
Full-Timers (Continuous Off-Grid Living)
Power Needs:
Full-timers require comprehensive systems supporting residential-style power consumption indefinitely. Running air conditioning (when possible via generator), using induction cooktops, operating multiple computers for remote work, and powering entertainment systems demands significant solar capacity and battery storage.
A 600-800 watt solar array with 300-400 amp-hours of lithium batteries provides the baseline for comfortable full-time boondocking. Many full-timers also carry portable generators (Honda EU2200i or similar) for backup power during extended cloudy periods or high-demand scenarios.
For internet connectivity while boondocking, many full-timers combine cellular boosters with satellite backup options, each drawing additional daily power (20-40 watts for routers/boosters).
Recent Equipment Costs:
600W-800W solar panels (3-4 × 200W): $540-$960
300Ah-400Ah lithium battery bank: $1,120-$1,680
MPPT charge controller (40A-60A): $280-$400
2000W-3000W inverter: $400-$600
Portable generator (Honda EU2200i or equivalent): $1,000-$1,400
Battery monitor and management system: $180-$280
Wiring, fusing, mounting, and installation: $180-$320
Total equipment investment: $3,700-$5,640
Water Requirements:
Full-timers consume 30-50 gallons per week (4-7 gallons per day per person) including showers, laundry, and dishwashing. Many full-timers install additional freshwater tanks or carry multiple 6-gallon jerry cans. Water filtration becomes critical for frequent filling from questionable sources.
Boondocking costs vary dramatically based on travel frequency, distance covered, and regional fuel prices. The following breakdown reflects real-world budgets from experienced boondockers across three travel styles, with equipment costs separate from ongoing operating expenses.
Table 1: Monthly Boondocking Expenses by Travel Style
Expense Category
Weekend Warriors
(2-3 days/month)
Part-Timers
(1-2 weeks/month)
Full-Timers
(Continuous)
Fuel
$230-$345
$460-$690
$680-$920
Groceries/Dining
$354-$472
$590-$826
$826-$944
RV Maintenance Fund
$50-$100
$150-$200
$250-$300
Insurance (RV + Auto)
$100-$150
$150-$200
$200-$250
Propane
$30-$50
$60-$90
$90-$120
Dump Stations
$20-$40
$40-$60
$60-$90
Campground Fees (Occasional)
$50-$120
$100-$180
$140-$200
Cell/Internet
$50-$70
$80-$120
$120-$200
MONTHLY TOTAL
$884-$1,347
$1,630-$2,366
$2,366-$3,024
ANNUAL PROJECTION
$10,600-$16,164
$19,560-$28,392
$28,392-$36,288
Note: Full-Timers often have additional costs like healthcare ($400-$800/month), vehicle registration in domicile state ($50-$200/month prorated), and mail forwarding services ($20-$40/month), which can push monthly expenses to $3,000-$4,500 range.
Fuel Costs
Fuel represents the largest variable expense in boondocking budgets. Recent diesel prices range $3.80-$4.20 per gallon regionally, with gas-powered RVs typically $0.40-$0.60 cheaper per gallon.
Monthly fuel consumption examples:
Weekend Warriors (500 miles/month): 28-36 gallons consumed at 14-18 MPG typical for Class B/small Class C RVs = $106-$151 at $3.80/gallon or $117-$168 at $4.20/gallon. However, when factoring in multiple trips with shorter, less fuel-efficient driving patterns, real-world costs often reach $230-$345/month.
Part-Timers (1,000-1,500 miles/month): 60-110 gallons at 10-16 MPG = $228-$462 at current diesel prices
Full-Timers (2,000-2,500 miles/month): 125-180 gallons at 12-16 MPG = $475-$756 at current diesel prices
Fuel efficiency varies dramatically by RV type. Class B vans achieve 14-18 MPG. Class C motorhomes average 10-14 MPG. Large Class A diesel pushers range 8-12 MPG. Towing a trailer reduces truck fuel economy 25-40% depending on trailer weight and aerodynamics.
Grocery Costs
Grocery expenses increased in recent years due to food inflation. Boondockers often cook more meals in their RVs compared to traditional RV park campers, reducing restaurant spending but increasing grocery budgets.
Weekend Warriors: $354-$472/month (primarily groceries for weekend trips plus some home-base food)
Part-Timers: $590-$826/month (split between RV travel and home consumption)
Full-Timers: $826-$944/month (all food consumed on the road, cooking 90%+ of meals)
Full-timers save by buying bulk staples at big-box stores, shopping regional grocery chains with better prices, and cooking from scratch. However, remote boondocking locations sometimes require stocking up before arrival, limiting access to discount grocers.
RV Maintenance Fund
Setting aside monthly maintenance reserves prevents financial emergencies when major repairs arise. Boondocking subjects RVs to rougher roads, more frequent battery cycling, and extended system usage compared to hookup camping.
Weekend Warriors: $50-$100/month ($600-$1,200 annually) covers oil changes, tire rotations, and minor repairs
Part-Timers: $150-$200/month ($1,800-$2,400 annually) addresses increased wear from frequent travel
Full-Timers: $250-$300/month ($3,000-$3,600 annually) plus $3,000-$5,000 reserve for major repairs (transmission, generator, roof, appliances)
Occasional Campground Fees
Even dedicated boondockers occasionally pay for campgrounds when needing laundry facilities, reliable high-speed internet for work deadlines, or breaking up long drives with convenient overnight stops.
Weekend Warriors: $50-$120/month (1-2 paid nights for convenience or weather)
Part-Timers: $100-$180/month (2-4 paid nights monthly for amenities)
Full-Timers: $140-$200/month (3-5 paid nights for laundry, showers, or extreme weather shelter)
Regional and Seasonal Cost Variations
Western States (Arizona, Utah, Nevada, New Mexico)
Western states offer abundant free camping on BLM lands and LTVA areas, reducing campground expenses significantly. However, fuel costs run $0.30-$0.50 higher per gallon than the national average due to regional supply chains and environmental regulations.
Net regional advantage: $40-$110/month savings despite higher fuel costs
Eastern States (East of Mississippi River)
Eastern states offer fewer free BLM camping options. National forests allow dispersed camping, but access points are less abundant and often require longer drives on paved roads before reaching suitable sites. This geography increases both fuel costs (more driving to find spots) and campground expenses (more frequent paid nights).
Typical Monthly Budget Impact:
Fuel: -$20-$50/month (lower per-gallon prices offset by more driving to find free sites)
Net regional disadvantage: $100-$180/month higher costs than Western boondockers
Seasonal Considerations
Winter Boondocking (November-March):
Propane consumption increases 100-150% for heating (add $60-$120/month)
Battery charging less efficient in cold temperatures
More paid campgrounds for extreme weather shelter (add $50-$100/month)
Southern migration increases fuel costs for Northern full-timers
Total winter premium: $150-$300/month over summer costs
Summer Boondocking (June-August):
Generator runtime increases for air conditioning (add $40-$80/month fuel)
Higher elevation camping reduces cooling needs but increases driving distances
Optimal solar production offsets some power needs
Total summer premium: $80-$150/month over spring/fall costs
Real-World Case Studies
Weekend Warrior Example: Southwest Road Trip
A family trip through the Southwest U.S. in March 2025 highlights how costs balance with experiences. This 14-day journey covered Arizona, Utah, and Nevada with a mix of free BLM camping and budget-friendly alternatives.
Paid campground fees: $420 (4 nights average $35/night including taxes × 3 locations)
Groceries and dining: $980 (family of 4, mostly cooking in RV)
Propane and dump stations: $120 (3 propane fills, 2 dump station fees)
Entertainment and park fees: $240 (national park passes, museum admissions)
Total trip cost: $4,352
Daily average: $311
For comparison, 14 days in RV parks at $50/night would add $700 in campground fees alone, pushing total trip cost to $5,052—a 16% increase. The freedom to camp in remote locations near hiking trailheads and scenic overlooks added immeasurable value beyond pure cost savings.
Full-Timer Example: Annual Budget Reality Check
Nina and Paul from Wheeling It have maintained detailed expense tracking since transitioning to full-time RV living in 2019. Their 2025 monthly budget averages $3,680, reflecting real-world full-timer costs.
Monthly Expense Breakdown (Wheeling It 2025 Data):
Healthcare (ACA marketplace plan): $720
Fuel (2,200 miles/month average): $680
Groceries and occasional dining: $820
RV/vehicle maintenance fund: $280
Insurance (RV + vehicle + liability): $240
Propane, dump stations, water fills: $140
Cell phone and mobile internet: $180
Entertainment, camping fees, activities: $380
Mail forwarding and domicile state registration: $240 (prorated annually)
Total monthly average: $3,680
Annual total: $44,160
Nina and Paul credit winter LTVA camping in Arizona ($180 for 7 months) as a major cost-saver, allowing them to boondock continuously during peak Southwest season. They maintain a $11,000 emergency fund (3 months expenses) plus a separate $3,000-$5,000 reserve for big-ticket maintenance like transmission work or roof replacement.
Emergency Planning: Building Your Safety Net
Boondocking in remote locations increases the importance of emergency preparedness. Mechanical breakdowns, unexpected repairs, and weather-related issues can occur far from services. A well-funded emergency reserve prevents financial stress when problems arise.
Table 2: Emergency Fund Requirements by Travel Style
Full-timers face higher emergency fund requirements because they lack a home base to return to during extended repairs. A major breakdown requiring 2-4 weeks in an RV repair shop means paying for temporary lodging, rental cars, and lost travel time.
Emergency Fund Strategy:
Keep emergency funds in easily accessible accounts. Money market accounts or high-yield savings accounts provide better returns than checking accounts while maintaining liquidity. Avoid tying emergency funds to long-term investments that can’t be accessed quickly.
Consider maintaining two separate reserves: (1) immediate emergency fund for roadside issues and quick repairs, and (2) major repair fund for big-ticket items like transmission or generator replacement. This separation prevents depleting your entire safety net on a single expensive repair.
Long-Term Cost Analysis: The 5-Year Comparison
Boondocking requires upfront equipment investment but delivers long-term savings compared to traditional RV park camping. The break-even point varies by travel style and regional camping costs.
Net Savings Over 5 Years: $17,160-$43,800 (significant savings plus freedom to camp in remote, scenic locations year-round)
The Mathematics of Off-Grid ROI
To determine the financial viability of your transition to off-grid travel, use the Boondocking Break-Even Formula. This calculation measures how many months of “avoided campground fees” are required to recoup your solar and battery investment:
For a Full-Timer investing $5,200 in a robust power system while avoiding average monthly park fees of $1,200, the break-even point is reached in 4.3 months.
While high-use scenarios like this break even quickly, the average traveler typically reaches the break-even point at 12-30 months, depending on equipment investment and camping frequency. After this milestone, every month of boondocking generates a net surplus of $100 – $1,200 compared to full-time RV park living, which can be redirected into your $1,500 – $12,000 emergency fund.
Practical Planning Tools
Daily Resource Tracker
Track these metrics daily to understand your consumption patterns:
Battery state of charge: Morning level (%), evening level (%), overnight draw
Solar production: Peak wattage, total watt-hours produced
Freshwater remaining: Gallons or tank percentage
Gray/black tank levels: Percentage full (plan dump station visits before 80% full)
Propane remaining: Tank gauge reading, days until refill needed
After 2-3 weeks of tracking, patterns emerge showing typical daily consumption. These patterns inform how long you can stay at a given location before needing water refills or dump station access.
Create a simple spreadsheet tracking actual vs. budgeted expenses:
Category
Budgeted
Actual
Variance
Fuel
$___
$___
$___
Groceries
$___
$___
$___
Maintenance
$___
$___
$___
Campgrounds
$___
$___
$___
[Additional categories]
$___
$___
$___
Total
$___
$___
$___
Review monthly to identify areas where actual spending exceeds budget. Common surprises include underestimating fuel consumption on longer trips, unexpected maintenance issues, and impulse campground stays during bad weather.
Conclusion: Your Boondocking Adventure Awaits
Boondocking costs range from $884-$1,347/month for weekend warriors to $2,366-$3,824/month for full-timers (including healthcare). Initial equipment investments of $600-$6,800 pay for themselves within 12-30 months through campground fee savings, after which boondocking generates continuous savings of $100-$1,200 monthly compared to RV park living.
The financial equation favors boondocking, but the true value extends beyond pure cost analysis. Freedom to camp in remote locations, flexibility to extend stays without reservation constraints, and connection to public lands create experiences impossible in traditional campgrounds.
Key Takeaways:
Equipment costs decreased in recent years (solar panels, lithium batteries) making boondocking more accessible
Regional variations significantly impact costs (Western states offer more free camping despite higher fuel prices)
Emergency funds of $1,500-$12,000 prevent financial stress during breakdowns
Tracking daily resource consumption patterns enables longer stays between service stops
5-year savings range from modest (weekend warriors) to substantial (full-timers)
Calculate your budget: Use the monthly expense tables to project costs for your travel style
Build emergency fund: Start setting aside reserves before your first extended trip
Invest in core equipment: Prioritize solar panels and lithium batteries for extended off-grid capability
Start small: Test boondocking with 2-3 day trips before committing to longer stays
Free Resources:
Download our boondocking checklist and budget tracker
Join our email newsletter for seasonal boondocking tips and location recommendations
Explore our interactive map of verified free camping locations across federal lands
Boondocking transforms RV travel from a recreation into a sustainable lifestyle. The initial learning curve pays dividends in financial savings, memorable experiences, and the freedom to roam America’s public lands on your own terms.
Nonresident Annual Pass: $250 for America the Beautiful Non-Resident Annual Pass (NPS Passes page)
$100 Nonresident Fee: Charged to nonresidents age 16+ at 11 designated parks in addition to the standard park entrance fee if entering without the $250 Non-Resident Annual Pass. Children under 16 are FREE.
Nonresident Options: Pay $100/person (age 16+) + standard entrance fee at 11 parks OR purchase $250 annual pass for unlimited entry.
11 Parks with Surcharge: Acadia, Bryce Canyon, Everglades, Glacier, Grand Canyon, Grand Teton, Rocky Mountain, Sequoia & Kings Canyon, Yellowstone, Yosemite, Zion (Official list)
Who Pays What
If you’re a U.S. resident: $80 Annual Pass.
If you’re not a U.S. resident and you visit any of the 11 parks without the $250 pass: You pay the standard entrance fee + $100 per adult (16+).
Key Definitions
Nonresident
A non-U.S. resident (i.e., not able to claim U.S. residency/citizenship for resident-priced passes). NPS lists acceptable proof for resident pricing as a U.S. passport, U.S. state/territory ID/driver’s license, or green card.
$100 Fee Condition
At the 11 designated parks, non-U.S. residents pay the standard entrance fee plus $100 per person (16+) unless they hold the $250 Non-Resident Annual Pass.
Age Threshold (16+)
The $100 nonresident fee and $250 annual pass apply only to visitors age 16 and older. Children under 16 are always admitted free, regardless of residency status.
America the Beautiful Pass
Annual pass covering entrance fees at 2,000+ federal recreation sites including all National Parks, National Wildlife Refuges, National Forests, and BLM areas. Admits passholder plus passengers in a private vehicle.
Policy Sources: Department of the Interior press releases, National Park Service official pages, Parks Canada announcements (all linked throughout)
Cost Calculations: Based on NPS fee schedules effective January 1, 2026. Assumes vehicle entry (private, non-commercial) with specified number of occupants age 16+. Children under 16 admitted free per NPS policy.
Community Sentiment Analysis: Analyzed 1,800+ Facebook comments from Alt National Park Service public thread discussing the fee announcement (December 12-24, 2025). See detailed methodology appendix for coding protocol, categories, and verification process. Quotes anonymized for privacy. Note: “Alt National Park Service” is an unofficial Facebook page and is not operated by the National Park Service.
Currency Conversions: Based on December 24, 2025 exchange rates (illustrative – verify current rates when booking).
Author Experience: Chuck Price has documented national park travel costs across 47 states over 35+ years, including 300+ trips and 150,000+ miles of RV travel. See author bio for credentials.
About the Author: Chuck Price, founder of BoondockOrBust.com, has tracked RV and camping costs across the United States for 35+ years. He analyzed the 2026 nonresident fee policy based on official NPS documentation, cost data from 300+ documented trips, and sentiment analysis of 1,800+ traveler comments discussing the changes. Featured on CBC Radio’s “Cost of Living” podcast (2024) for expertise in RV travel economics.
What Changed in the 2026 National Park Fee Policy
The Department of the Interior announced significant changes to national park entry fees for nonresidents of the United States, effective January 1, 2026. The new policy introduces a $250 America the Beautiful Non-Resident Annual Pass and implements $100 per-person surcharges at 11 high-visitation parks.
If you don’t buy the $250 nonresident annual pass, you’ll pay the park’s normal entrance fee plus $100 per adult (16+) at the 11 designated parks.
Previously, the America the Beautiful Annual Pass cost $80 regardless of residency status. Under the 2026 policy:
U.S. residents: Continue paying $80 for the annual pass
Nonresidents: Pay $250 for the Non-Resident Annual Pass
Children under 16: Always admitted free, regardless of residency
The $250 pass waives the $100 nonresident fee at the 11 parks and also functions as an America the Beautiful annual entrance pass (standard entrance-fee coverage rules apply). It also covers the nonresident fees for up to three additional adults (16+) in the passholder’s party. Nonresidents can either pay $100 per person (age 16+) plus standard entrance fees at each park visit, OR purchase the $250 pass for unlimited entry to all parks for 12 months.
The America the Beautiful Pass covers entrance fees at more than 2,000 federal recreation sites, including all National Park Service locations, National Wildlife Refuges, National Forests, and Bureau of Land Management recreation areas. The pass admits the passholder plus passengers in a private vehicle at per-vehicle fee areas, or the passholder plus three additional adults (age 16+) at per-person fee areas.
Who Qualifies as a U.S. Resident
According to National Park Service policy, U.S. residents may be asked to provide proof of U.S. citizenship or U.S. residency to purchase the $80 resident pass. Documents commonly accepted include:
U.S. Passport
U.S. government-issued driver’s license or state ID (from any state or territory)
Permanent Residency card (“green card”)
Important: A German citizen living in New York on a green card qualifies as a U.S. resident and pays the $80 rate. Nonresident status generally applies to visitors without proof of U.S. citizenship or U.S. residency.
Digital Passes
Digital Annual Pass is already available via Recreation.gov (and can be stored on your mobile device with digital validation tools). As of now, only the standard Annual Pass is digital; other pass types are expected to expand digitally with the 2026 changes. The Department of the Interior says passes will expand in digital format starting January 1, 2026, including implementation of the new nonresident pricing.
Pro Tip: Since physical passes can take up to ~3 weeks to arrive by mail, international travelers should prioritize the digital pass option on Recreation.gov to ensure they have proof of purchase before arriving at an entrance gate.
Timing Consideration: America the Beautiful annual passes are generally valid for 12 months from the purchase date. Availability and pricing of passes purchased before January 1, 2026 should be confirmed with Recreation.gov customer service (1-877-444-6777), as policies may vary during the transition period.
Why the Policy Change
The Department of the Interior cited infrastructure maintenance needs in announcing the fee structure. According to National Park Service deferred maintenance reports, the agency faces a maintenance backlog exceeding $23 billion across the park system.
Revenue from entrance fees funds critical park operations including visitor services, facility maintenance, and resource protection. The new fee structure aims to increase funding for high-visitation parks experiencing significant wear on roads, trails, restrooms, and visitor centers.
Cost Impact: How Much Nonresidents Will Actually Pay in 2026
To understand the financial impact, I analyzed three common scenarios using 2026 pricing from the National Park Service fee schedule. These calculations assume vehicle entry with the specified number of adults age 16 and older. Children under 16 are admitted free.
Table 1: Cost Comparison for Two-Park Visit (Nonresidents)
Scenario: Family of 4 (2 adults age 16+, 2 children under 16) visiting Yellowstone and Grand Teton
Cost Component
Without Annual Pass
With $250 Annual Pass
Vehicle Entry Fees
$70 (2 parks × $35/vehicle)
$0 (covered by pass)
Nonresident Surcharge
$400 (2 parks × 2 adults age 16+ × $100/person)
$0 (covered by pass)
Children Under 16
$0 (always free)
$0 (always free)
Annual Pass Purchase
$0
$250 (one-time)
TOTAL
$470
$250
Savings with Pass: $220 for this two-park trip alone
Break-Even Analysis: The $250 Non-Resident Annual Pass becomes the cheaper option once your expected total at the 11 surcharge parks (standard entrance fees + $100 × number of adults 16+) exceeds $250. In practice: 1 adult (16+) usually breaks even at 2 surcharge-park visits; 2 adults (16+) break even at 2 surcharge-park visits; 3+ adults (16+) can be cheaper even for 1 surcharge-park visit.
Scenario: Couple (2 adults age 16+, no children) visiting Grand Canyon for one day
Item
Cost
Vehicle Entry Fee
$35
Nonresident Surcharge (2 adults × $100)
$200
TOTAL
$235
For this couple, purchasing the $250 annual pass for a single visit costs only $15 more than paying per-park fees, but provides unlimited access to all federal recreation sites for 12 months.
Hidden Costs to Factor In
Beyond entrance fees, nonresident travelers should budget for:
Campground Reservations: Popular national park campgrounds cost $25-$50 per night plus Recreation.gov service/transaction fees that vary by reservation type (you’ll see the exact fee at checkout). Book 6 months in advance for summer availability.
Parking Permits: Some parks require timed entry or parking reservations during peak season ($2-$6 per vehicle, separate from entrance fees)
Backcountry Permits: Overnight backpacking requires permits ($5-$8 per person in most parks)
Transportation add-ons: Some parks require timed-entry reservations, paid parking, or have optional paid tours/concessions (prices vary by season/operator). Check each park’s official “Plan Your Visit” page before you arrive.
For a week-long trip visiting three of the 11 surcharge parks with campground stays, nonresidents should budget often several hundred dollars once camping/reservations are included, depending on group size and camping choices. The $250 pass eliminates per-park $100 fees for the passholder plus up to three additional adults.
Currency Conversions: For live conversions, use your card issuer’s rate or an FX reference; Recreation.gov charges in USD.
Which 11 National Parks Charge the $100 Nonresident Surcharge
The $100 per-person nonresident fee (for visitors age 16 and older entering without the $250 annual pass) applies at these 11 parks starting January 1, 2026:
Acadia National Park (Maine) – Coastal landscapes, Cadillac Mountain
Bryce Canyon National Park (Utah) – Hoodoo formations, amphitheaters
Everglades National Park (Florida) – Subtropical wilderness, wetlands
Glacier National Park (Montana) – Going-to-the-Sun Road, alpine scenery
Grand Canyon National Park (Arizona) – South and North Rim access
Grand Teton National Park (Wyoming) – Mountain peaks, Jackson Hole valley
Rocky Mountain National Park (Colorado) – Trail Ridge Road, alpine tundra
Sequoia & Kings Canyon National Parks (California) – Giant sequoias, Sierra Nevada mountains
Yellowstone National Park (Wyoming/Montana/Idaho) – Geysers, wildlife, thermal features
Yosemite National Park (California) – Valley views, waterfalls, Half Dome
Zion National Park (Utah) – Red rock canyons, Angels Landing
All other National Park Service units maintain standard entrance fees without the nonresident surcharge. Parks like Great Smoky Mountains (Tennessee/North Carolina), Olympic (Washington), and Joshua Tree (California) continue charging the same rates to all visitors regardless of residency status.
What 1,800+ Travelers Are Saying About the Fee Increase
Between December 12 and December 24, 2025, I analyzed public comments on the Alt National Park Service Facebook page discussing the fee announcement. The dataset included 1,842 comments across multiple threads, coded for sentiment and recurring themes.
Sentiment Breakdown
Opposition (72%): 1,326 comments expressed disagreement with the policy, citing concerns about affordability, fairness, or economic impact
Support (11%): 203 comments supported the fee structure, often emphasizing infrastructure needs or park protection
Neutral/Mixed (17%): 313 comments asked questions, expressed mixed views, or focused on practical planning without clear stance
In this sample of commenters, opposition dominated (72%), which may indicate concern about the policy’s impact on international tourism and gateway community economies among engaged commenters.
Most Common Themes in Comments
Economic Impact on Gateway Towns (mentioned in 42% of opposition comments):
“Traveler from Montana: The businesses in West Yellowstone depend on Canadian tourists who drive down for long weekends. Charging them $470 for a family of four to visit two parks will absolutely kill summer traffic. These are people who would have come back year after year.”
Comparison to Canadian Parks (mentioned in 38% of comments):
“Visitor from Europe: Canada is offering free admission to their parks during summer 2026, while the U.S. is tripling costs for international families. The choice is obvious for anyone planning a North American road trip.”
Impact on Lower-Income International Travelers (mentioned in 29% of opposition comments):
“Backpacker from Australia: Saved for two years to visit Yosemite and Grand Canyon. At $235 just for park entry at one park, plus flights and accommodations, this is now out of reach. National parks were supposed to be for everyone, not just wealthy tourists.”
Concerns About Digital Implementation (mentioned in 18% of comments):
“International traveler: How will entrance stations verify residency status consistently? Will there be long delays at gates while rangers check documents? The digital pass system needs to work flawlessly or this will be chaos during summer season.”
Supporters of the fee structure emphasized that revenue funds infrastructure maintenance and resource protection:
“Supporter: The parks are deteriorating. Roads are crumbling, restrooms are inadequate, trails are eroding. If nonresident fees help fund the $23 billion maintenance backlog, that’s a worthwhile investment in preserving these places for future generations.”
Economic Concerns in Gateway Communities
Towns bordering the 11 surcharge parks face potential economic disruption from reduced international visitation. During my 35+ years of RV travel, I’ve observed how gateway economies depend on visitor spending for lodging, dining, fuel, and supplies.
Communities potentially affected by reduced international tourism include:
West Yellowstone, Montana (Yellowstone) – Summer tourism drives a large share of annual business revenue
Springdale, Utah (Zion) – Hotels, restaurants, and outfitters rely heavily on international bookings
Tusayan, Arizona (Grand Canyon) – Entire economy built around South Rim access
Estes Park, Colorado (Rocky Mountain) – European and Asian tour groups represent significant visitor segment
Jackson, Wyoming (Grand Teton) – International travelers often combine Teton and Yellowstone visits
One commenter working in a gateway town expressed concern about income loss:
“Worker from gateway community: I work summers in a hotel near one of these parks. International families are some of our best customers – they stay multiple nights, eat at local restaurants, buy souvenirs. If they stop coming because of fee increases, I’m looking at a 30-40% cut in summer income. That’s my rent money.”
While fee revenue supports park operations, gateway businesses receive no direct benefit from entrance fees. The economic tradeoff between infrastructure funding and regional tourism revenue remains a significant policy challenge.
Canadian National Parks as a Free Alternative in 2026
Parks Canada is offering the Canada Strong Pass, which provides free admission to all Canadian national parks, national historic sites, and national marine conservation areas during two specific periods in 2026:
Winter Period: December 12, 2025 through January 15, 2026
Summer Period: June 19 through September 7, 2026
Important: Outside these free periods (January 16 – June 18, 2026), regular Parks Canada admission fees apply. The Canada Strong Pass is not free for the entire year 2026 – only during the designated windows.
Canadian Parks Comparable to the 11 U.S. Surcharge Parks
U.S. vs. Canada National Park Comparison (Summer 2026)
U.S. Park (with $100 surcharge)
Comparable Canadian Park
Free Jun 19-Sep 7?
Glacier National Park (Montana)
Banff + Jasper National Parks (Alberta)
Yes ✓
Grand Teton + Yellowstone (Wyoming)
Waterton Lakes + Yoho National Parks
Yes ✓
Yosemite (California)
Glacier National Park (British Columbia)
Yes ✓
Rocky Mountain (Colorado)
Jasper National Park (Alberta)
Yes ✓
Acadia (Maine coastal)
Cape Breton Highlands (Nova Scotia)
Yes ✓
For international travelers planning North American trips during summer 2026, the free admission windows at Canadian parks (June 19 – September 7) represent significant cost savings compared to the new U.S. nonresident fees.
Cost Comparison Example: A family of four (2 adults age 16+, 2 children) visiting two parks in the Canadian Rockies during the free period pays $0 for admission. The same family visiting Yellowstone and Grand Teton would pay $250 for the U.S. annual pass (or $470 for two-park pay-per-visit fees).
Free BLM and National Forest Camping Near the 11 Parks
Bureau of Land Management (BLM) and U.S. Forest Service lands offer free dispersed camping within 30-50 miles of most Western national parks, providing budget alternatives for travelers willing to camp without hookups.
Standard rules for dispersed camping on federal lands:
Stay limits are commonly 14 days (BLM often limits camping to 14 days within a 28-day period; USFS limits vary by forest order). Always check the local field office / forest notice.
Must camp in designated dispersed areas (some regions restrict camping to prevent resource damage)
Self-contained camping required (no hookups; bring your own water, power, waste disposal)
Leave No Trace principles mandatory (pack out all trash, respect fire restrictions)
Free Camping Options Near Surcharge Parks
Near Grand Canyon: Kaibab National Forest dispersed camping (15 miles south of South Rim entrance)
Near Zion: BLM Hurricane Cliffs area and Dixie National Forest (20-30 miles from Springdale)
Near Yellowstone: Gallatin and Custer national forests (25-40 miles from park entrances)
Near Glacier: Flathead National Forest dispersed sites (10-20 miles from West Glacier)
Near Yosemite: Stanislaus and Sierra national forests (25-45 miles from valley entrances)
For RVers with solar power systems and adequate water capacity, dispersed camping significantly reduces total trip costs. I’ve documented dozens of BLM and national forest sites in my comprehensive dispersed camping guide.
Important: BLM and national forest lands do not charge the $100 nonresident surcharge. These federal recreation areas remain equally accessible to all visitors regardless of residency status.
Eight-Step Planning Process for Nonresidents Visiting U.S. Parks in 2026
Based on analysis of the new fee structure and 35+ years of national park travel experience, follow these steps to minimize costs and ensure smooth entry under the 2026 policy:
Step 1: Determine Your Residency Status
Confirm whether you qualify as a U.S. resident. Green card holders (lawful permanent residents) are eligible for the $80 resident pass. Nonresidents without U.S. permanent residency will pay $250 for the annual pass or $100 per person (age 16+) at the 11 designated parks.
Action: If you hold a green card, bring your Permanent Resident Card to park entrance stations or Recreation.gov retail locations to purchase the $80 resident pass. International travelers should plan for the $250 nonresident pass or per-park fees.
Step 2: Calculate Your Total Trip Costs
Use the cost comparison tables earlier in this article to estimate total fees based on:
Number of parks you plan to visit (especially the 11 surcharge parks)
Number of adults age 16+ in your party (children under 16 are free)
Length of trip (if visiting 2+ surcharge parks within 12 months, the annual pass typically saves money)
Quick Break-Even Rule: The $250 Non-Resident Annual Pass becomes the cheaper option once your expected total at the 11 surcharge parks (standard entrance fees + $100 × number of adults 16+) exceeds $250. In practice: 1 adult (16+) usually breaks even at 2 surcharge-park visits; 2 adults (16+) break even at 2 surcharge-park visits; 3+ adults (16+) can be cheaper even for 1 surcharge-park visit.
Step 3: Consider Purchasing the Annual Pass on Recreation.gov
Digital passes purchased through Recreation.gov are processed immediately and can be stored on mobile devices. This is preferable to waiting 2-4 weeks for physical pass delivery by mail.
Pro Tip: International travelers should purchase the digital pass before departure to ensure they have proof of purchase when arriving at park entrance gates. Passes can be linked to physical cards at Recreation.gov retail locations inside parks.
Timing Note: America the Beautiful annual passes are generally valid for 12 months from purchase date. For questions about pass purchase timing or pricing transitions around January 1, 2026, contact Recreation.gov customer service at 1-877-444-6777.
Step 4: Evaluate Canadian Parks During Free Admission Windows
If your travel dates align with Parks Canada’s free admission periods (December 12, 2025 – January 15, 2026 or June 19 – September 7, 2026), consider visiting Canadian national parks as a cost-saving alternative. Banff, Jasper, and other Canadian Rockies parks offer scenery comparable to Glacier, Yellowstone, and Grand Teton.
Cost Savings: Free admission at Canadian parks during the designated windows versus $250-$470 for U.S. park access represents significant budget relief for international families.
Step 5: Research Free Dispersed Camping on BLM/Forest Service Lands
Identify free camping locations near the parks you plan to visit using BLM and U.S. Forest Service maps. Verify seasonal road accessibility and ensure your RV or camping setup is equipped for self-contained camping (no hookups).
National park campground reservations open 6 months in advance on Recreation.gov. Popular campgrounds at Yellowstone, Yosemite, and Grand Canyon sell out within hours of availability. Set calendar reminders for exact booking windows to secure your preferred dates.
Reservation Timeline Example: For a July 15 arrival at Yellowstone, reservations become available at 10:00 AM Eastern Time on January 15 (exactly 6 months prior).
Step 7: Monitor NPS Updates for Policy Clarifications
The digital pass system and residency verification processes may be refined during early 2026 implementation. Subscribe to National Park Service news updates and check the NPS Passes page for any policy adjustments.
Questions to clarify with NPS before your trip:
Exact residency documentation requirements at entrance stations
Digital pass functionality on mobile devices without internet access
Pass replacement procedures if device is lost or damaged
Step 8: Provide Feedback to Policymakers and Gateway Communities
Comments on federal recreation policy can be submitted through Department of the Interior public comment systems when rule-making periods are open. Gateway community chambers of commerce may also accept input on economic impact concerns related to tourism trends.
Your feedback helps inform future policy adjustments and demonstrates how fee structures affect travel decisions and regional economies.
Frequently Asked Questions
Do U.S. citizens and permanent residents pay the $250 annual pass fee?
No. U.S. citizens and permanent residents (green card holders) continue paying $80 for the America the Beautiful Annual Pass. The $250 fee applies only to nonresidents without U.S. permanent residency status. Proof of U.S. citizenship or U.S. residency may be requested to purchase the $80 resident pass.
Which national parks charge the $100 per-person surcharge?
The 11 parks with the $100 nonresident surcharge (effective January 1, 2026) are: Acadia, Bryce Canyon, Everglades, Glacier, Grand Canyon, Grand Teton, Rocky Mountain, Sequoia & Kings Canyon, Yellowstone, Yosemite, and Zion. The surcharge applies only when entering these parks without a valid $250 Non-Resident Annual Pass.
Do children pay the $100 nonresident fee?
No. Children under 16 are always admitted free to all national parks, regardless of residency status. The $100 nonresident surcharge applies only to visitors age 16 and older.
Are Canadian national parks really free for all of 2026?
No. Parks Canada’s Canada Strong Pass provides free admission only during two specific periods in 2026: December 12, 2025 through January 15, 2026, and June 19 through September 7, 2026. Regular admission fees apply from January 16 through June 18, 2026. The free admission program is not year-round.
Which U.S. national parks are free (no entrance fee)?
Several U.S. national parks do not charge entrance fees, including Great Smoky Mountains (Tennessee/North Carolina), Cuyahoga Valley (Ohio), Hot Springs (Arkansas), and portions of Redwood National Park (California). However, even at these free-entry parks, camping, parking permits, and other services may incur fees. The $100 nonresident surcharge does not apply at parks without entrance fees.
Is the America the Beautiful Pass worth it for nonresidents in 2026?
The $250 Non-Resident Annual Pass becomes the cheaper option once your expected total at the 11 surcharge parks (standard entrance fees + $100 × number of adults 16+) exceeds $250. In practice: 1 adult (16+) usually breaks even at 2 surcharge-park visits; 2 adults (16+) break even at 2 surcharge-park visits; 3+ adults (16+) can be cheaper even for 1 surcharge-park visit. The pass also provides unlimited access to 2,000+ federal recreation sites for 12 months.
Can I use my U.S. national park pass in Canada?
No. The America the Beautiful Pass and Parks Canada Discovery Pass are separate systems. A U.S. national park pass does not provide entry to Canadian parks, and vice versa. Travelers visiting parks in both countries must purchase passes or pay entry fees separately for each country. During Parks Canada’s free admission periods (see above), no pass is required for Canadian parks.
Where can I camp for free near national parks?
Bureau of Land Management (BLM) and U.S. Forest Service lands offer free dispersed camping within 30-50 miles of most Western national parks. Standard rules include 14-day stay limits and self-contained camping requirements (no hookups). Popular free camping areas exist near Grand Canyon (Kaibab National Forest), Zion (BLM Hurricane Cliffs), Yellowstone (Gallatin National Forest), and Yosemite (Stanislaus National Forest). See the BLM and Forest Service section for details.
When do the new fees take effect?
January 1, 2026 at 12:00 AM. The $250 nonresident annual pass and $100 per-person surcharges at the 11 designated parks become effective at midnight on January 1, 2026. Current pricing applies through December 31, 2025 at 11:59 PM.
If I buy the America the Beautiful Annual Pass before December 31, 2025, is it still valid in 2026?
America the Beautiful annual passes are generally valid for 12 months from the purchase date per standard NPS policy. However, specific implementation details for passes purchased at the prior nonresident rate ($80) before January 1, 2026 should be confirmed with Recreation.gov customer service (1-877-444-6777) or National Park Service, as transition policies may vary.
Can I dispute or get a refund if I’m charged incorrectly?
Yes. Contact the specific national park where you were charged or Recreation.gov customer service (1-877-444-6777) to dispute incorrect fees. Common errors might include charging the $100 surcharge to children under 16 (who should be admitted free) or charging nonresident rates to green card holders who provide proper documentation of permanent residency.
Do the 2026 fee-free days apply to nonresidents?
NPS indicates that beginning in 2026, listed fee-free entrance days are for U.S. citizens and residents only; nonresidents pay regular entrance fees and any applicable nonresident fees unless they hold the Non-Resident Annual Pass.
Appendix: Sentiment Analysis Methodology
To ensure transparency and replicability of the 1,800+ comment analysis cited in this article, the following methodology was applied:
Data Collection
Platform: Facebook (Alt National Park Service public page)
Sampling Period: December 12-24, 2025 (13 days following fee announcement)
Sample Size: 1,842 comments across 7 threads discussing the policy
Inclusion Criteria: Original comments only (not replies to other comments); comments in English; comments addressing the fee policy (excluded unrelated comments)
Coding Protocol
Each comment was coded into one of three categories:
Opposition (72%, n=1,326): Comments expressing disagreement with the policy through statements such as “This is unfair,” “Won’t be visiting anymore,” “Bad for tourism,” or “Discriminatory pricing.” Includes concerns about economic impact, affordability, or principle.
Support (11%, n=203): Comments expressing agreement with the policy through statements such as “Parks need funding,” “This is fair,” “Infrastructure matters,” or “Reasonable fee.” Includes support for maintenance funding or resource protection.
Neutral/Mixed (17%, n=313): Comments that asked questions without stating a position (“Will green card holders pay this?”), expressed mixed views (“I understand the need but worry about impact”), or focused solely on practical planning without judgment.
Thematic Analysis
After sentiment coding, all opposition comments (n=1,326) were analyzed for recurring themes. A comment could include multiple themes. Four dominant themes emerged:
Economic impact on gateway towns: 557 comments (42% of opposition comments)
Comparison to Canadian parks: 504 comments (38% of opposition comments)
Impact on lower-income travelers: 385 comments (29% of opposition comments)
Implementation concerns: 239 comments (18% of opposition comments)
Inter-Coder Reliability
To verify coding consistency, 10% of comments (n=184) were double-coded two days after initial coding without reference to original codes. Agreement rate: 94% (173 of 184 matched original coding). Discrepancies were resolved by re-reading comment context and applying the clearest category fit.
Quote Selection and Anonymization
Representative quotes were selected to illustrate each major theme. All quotes were anonymized by removing personal names and identifying information, replacing with generic descriptors (“Traveler from Montana,” “Worker from gateway community,” etc.). Geographic descriptors were retained when relevant to the comment’s substance. Quotes are verbatim except for minor edits for clarity (removing typos, completing abbreviations).
Limitations
Facebook comment analysis represents one platform’s user base and may not reflect broader public opinion
Self-selection bias: Individuals strongly opposed to the policy may be more motivated to comment
Sampling period (13 days) represents immediate reactions; sentiment may shift over time
Sentiment categories are somewhat subjective despite protocol; gray-area comments were coded conservatively (neutral when ambiguous)
Data Availability
Due to privacy considerations and Facebook’s terms of service, the raw comment dataset is not published. However, aggregated sentiment counts and thematic percentages are provided transparently in this article. Researchers interested in verification can contact the author for methodology discussion.
Conclusion
The 2026 national park fee changes represent a significant policy shift with complex tradeoffs between infrastructure funding, international tourism, and gateway community economics. For nonresidents planning U.S. park visits, the $250 annual pass provides the best value when visiting multiple surcharge parks, while the Canada Strong Pass offers compelling cost-free alternatives during summer 2026.
Key takeaways for international travelers:
In most real trips, the $250 pass wins quickly once you’re hitting multiple surcharge parks—especially with 2+ adults (16+)
Children under 16 are always free, reducing family trip costs significantly
Canadian parks provide comparable scenery with free admission June 19 – September 7, 2026
Free BLM and national forest camping near parks offers budget alternatives
Digital passes on Recreation.gov provide instant access without waiting for physical card delivery
As the policy takes effect January 1, 2026, monitoring implementation details and traveler experiences will provide insights into the long-term impacts on park visitation patterns, gateway town economies, and the success of digital pass systems in managing residency verification at scale.
Stay informed by checking the NPS Passes page for updates and Recreation.gov for pass purchases and campground reservations.
Alt National Park Service. (2025). Public Facebook thread discussing 2026 fee policy (December 12-24, 2025). Sentiment analysis conducted by author. (Note: Raw data not published due to privacy considerations; methodology documented in appendix.)
CBC Radio. (2024). Cost of Living podcast interview with Chuck Price on RV travel economics. Canadian Broadcasting Corporation.