Stream Anywhere: Complete RV Internet and Entertainment Setup

Stream Anywhere: Complete RV Internet and Entertainment Setup


How to Stream TV in Your RV | Cellular vs Starlink

Stream your favorite shows and movies anywhere your travels take you

Last updated: May 16, 2026 | Reading time: 12 minutes

Quick Decision Framework

  • Top Criteria: Internet reliability trumps everything — cellular with booster or Starlink for consistent streaming
  • Deal-Breaker: No backup connectivity option means total entertainment blackout in remote areas
  • Use Case Match: Full-timers need unlimited data plans; weekend warriors can survive on campground WiFi plus downloads
  • Verification Test: Check carrier coverage maps for your planned routes before committing to a plan

Yes, you can stream shows in your RV just like at home. Cellular data with signal boosters works in most campgrounds. Starlink provides coverage in remote areas. Offline downloads eliminate connectivity dependence entirely.

Chuck Price has traveled to 47 states in RVs over 35 years, currently full-timing in a 2018 Hymer Aktiv Class B van. He built KampTrail, a camping app using the Recreation.gov RIDB API, and tests connectivity solutions across diverse camping environments.

Internet Options for RV Streaming

Reliable internet determines whether you watch or stare at buffering screens. Cellular data covers most populated camping areas. Satellite internet reaches remote locations cellular networks miss. Campground WiFi works for light browsing but rarely handles HD streaming. Your travel style dictates which option delivers the best results.

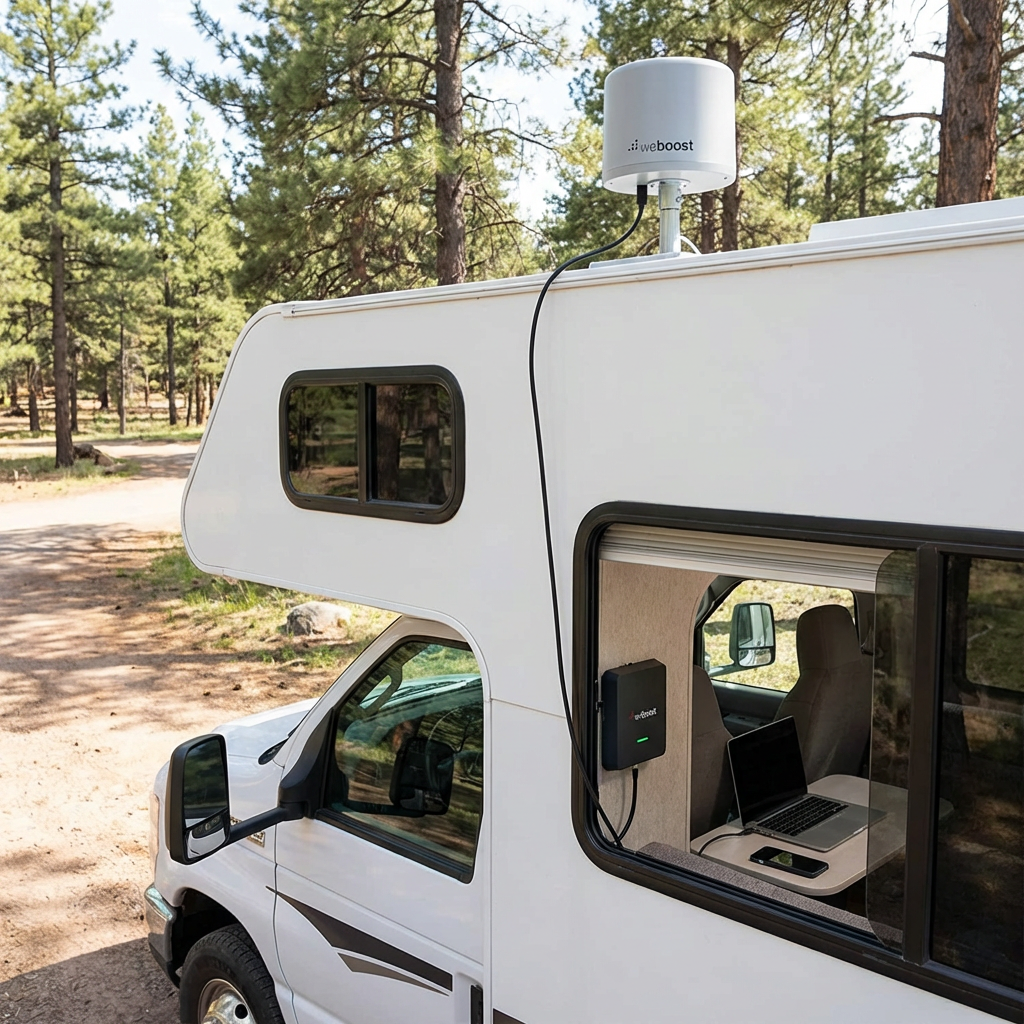
WeBoost cellular booster installation showing roof-mounted antenna and interior amplifier unit for improved RV streaming signal strength

Cellular Data (4G/5G)

Carriers like Verizon, AT&T, and T-Mobile offer plans with high data caps tailored for travelers. Verizon provides the widest rural coverage. T-Mobile offers competitive pricing with 5G expansion in metro areas. AT&T balances coverage and cost for most RV routes.

Advantages

  • High-speed 4G/5G networks support HD streaming
  • Works while driving between destinations
  • No equipment setup at each campsite
  • Covers most campgrounds and RV parks

Limitations

  • Coverage gaps in mountain valleys and remote areas
  • Data throttling after 50-100GB on most plans
  • Weak signals require booster investment
  • Multiple streaming devices consume data quickly

The WeBoost Drive X RV improves signal strength in fringe coverage areas. Installation requires mounting an external antenna on the roof and connecting it to an interior amplifier. RVers report 2-3 bar improvements in weak signal zones, making the difference between buffering and smooth streaming.

Satellite Internet

Starlink RV delivers high-speed internet in locations where cellular networks fail. The dish requires a clear view of the northern sky. Heavy foliage, canyon walls, and severe weather disrupt the signal. Setup takes 10-15 minutes at each new location following these steps:

  • Position the dish with clear northern sky view using the Starlink app’s obstruction viewer
  • Connect the dish cable to the router power supply
  • Plug the power supply into AC power (RV outlet or inverter)
  • Wait 5-10 minutes for the dish to acquire satellite signal and align itself
  • Connect your devices to the Starlink WiFi network shown on the router label

Advantages

  • Works in remote areas with no cell coverage
  • Download speeds of 50-200 Mbps in clear conditions
  • No long-term contracts required
  • Pause service via Standby Mode during months you’re not traveling ($5/mo now; $10/mo after June 18, 2026)

Limitations

  • $249-349 equipment cost plus $55-175 monthly service fee
  • Requires clear sky view — trees block signal
  • Dynamic IP creates issues with some streaming services
  • Power draw of 25-60 watts impacts boondocking

Starlink offers three Roam plans for RVers. Roam 100GB costs $55 monthly and provides 100GB of high-speed data, then unlimited low-speed data for the rest of the billing cycle. Roam 300GB costs $80 monthly and provides 300GB of high-speed data, then unlimited low-speed data — the right fit for remote workers who consistently exceed 100GB but don’t need fully unlimited. Roam Unlimited costs $175 monthly with no data caps. All three plans include in-motion use up to 100 mph. Service can be paused to Standby Mode when not traveling ($5/mo currently; increasing to $10/mo on or after June 18, 2026 per Starlink announcement). Weekend warriors and light users choose the 100GB plan. Moderate remote workers with mixed boondocking may find the 300GB tier hits the sweet spot. Full-timers who stream regularly choose Unlimited. Verify current pricing at starlink.com/service-plans.

Starlink’s dynamic IP assignment causes problems with YouTube TV’s location verification. Some users bypass this with VPN services or static IP solutions. The RV Mobile Internet Resource Center documents workarounds for location-based streaming restrictions.

Campground WiFi

Public WiFi at campgrounds and RV parks offers free or low-cost connectivity. Quality varies dramatically between properties. Premium RV resorts provide dedicated bandwidth. Budget campgrounds share limited connections across 100+ sites.

Advantages

  • Included in campground fees at most locations
  • No data caps or overage charges
  • Works for email and light browsing

Limitations

  • Too slow for HD streaming during peak hours
  • Security risks on open networks
  • Signal strength varies by site location
  • Limited or no bandwidth in budget campgrounds

ExpressVPN protects data on public networks. WiFi range extenders like those from TechnoRV improve weak signals at distant campsites. Campground WiFi works as a backup option but fails as a primary streaming solution for most full-time travelers.

Internet Option Best Use Case Monthly Cost Coverage
Cellular + Booster Frequent movers in developed areas $50-100 Most camping locations
Starlink Roam 100GB Occasional boondocking, cellular backup $55 Remote areas with clear sky view
Starlink Roam 300GB Remote workers, moderate boondocking $80 Remote areas with clear sky view
Starlink Roam Unlimited Full-time boondocking, heavy data use $175 Remote areas with clear sky view
Campground WiFi Weekend campers with low data needs $0-10 Limited to campground location

Starlink pricing current as of May 2026. Verify at starlink.com/service-plans before purchase.

Streaming Devices for RVers

Your streaming device connects entertainment apps to your TV. Smart TVs include built-in apps. Streaming sticks like Roku and Fire TV Stick add app capability to standard TVs. Game consoles stream and game. Phones and tablets work for solo viewing. Device selection depends on your RV’s existing equipment and whether you travel with kids who game.

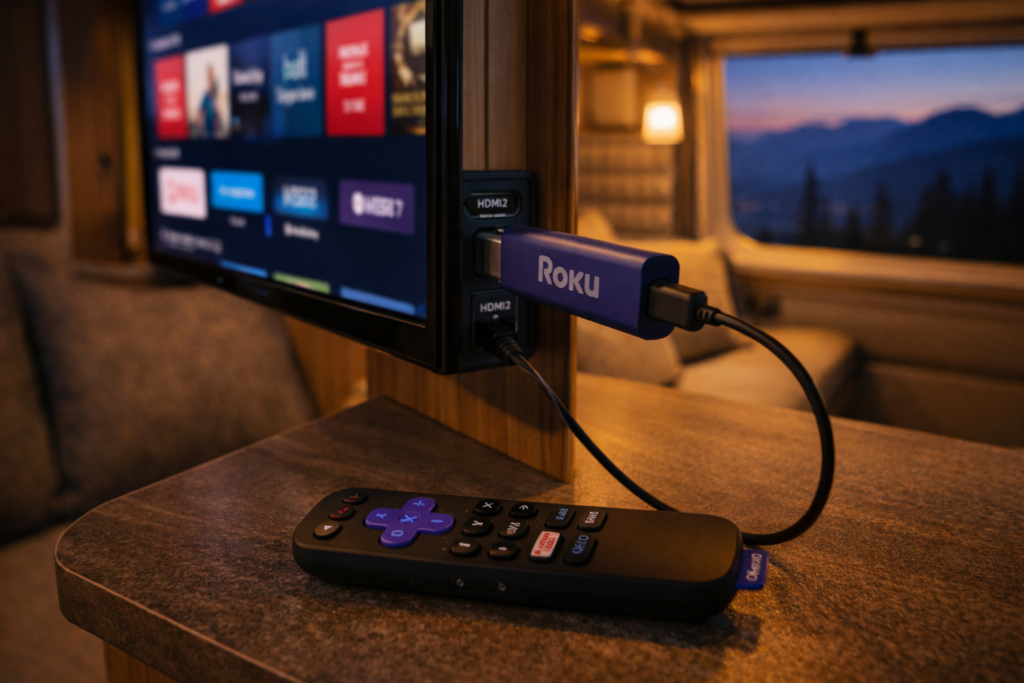
Roku Streaming Stick 4K installed in RV entertainment center showing compact size and simple HDMI connection for mobile streaming

Smart TVs

Modern RVs often include smart TVs with Netflix, Hulu, and Amazon Prime Video pre-installed. Samsung and LG models offer robust app ecosystems. Firmware updates maintain app compatibility. Connection requires only WiFi or hotspot access.

RVers recommend updating firmware regularly to prevent app compatibility issues. Older smart TV models lose support for streaming apps as services update their platforms. Check manufacturer support timelines before relying on built-in apps for long-term travel.

Streaming Sticks and Boxes

Roku devices work reliably with location changes across state lines. The Roku Streaming Stick 4K costs $50 and supports all major streaming services. Amazon Fire TV Stick offers Alexa voice control but requires more frequent location updates for local content.

Both devices connect via HDMI and draw power from USB ports. Setup takes less than 10 minutes. Remote controls include voice search on newer models. Roku receives higher ratings from RV forum users for handling frequent travel and location changes.

Game Consoles

Xbox and PlayStation consoles stream Netflix, Hulu, Amazon Prime Video, and YouTube TV alongside gaming. Storage capacity supports large game downloads. Performance exceeds streaming sticks for graphics-intensive games.

Power consumption of 100-150 watts during gaming creates problems for boondockers relying on battery banks. Bulk and fragility during travel require secure mounting or storage solutions. Game consoles make sense for families who game regularly and camp with full hookups.

Mobile Devices

Phones, tablets, and laptops stream without additional equipment. Netflix and Amazon Prime Video support offline downloads for watching without internet. Screen size limits group viewing unless you connect to a larger display.

Portable docking stations connect tablets and laptops to RV TVs via HDMI. Wireless casting through Chromecast or AirPlay eliminates cable requirements. Mobile devices provide the most flexible streaming option when traveling light or boondocking with limited power.

Top Streaming Services for RVers

Streaming service selection balances live TV access, on-demand content, offline downloads, and location flexibility. YouTube TV and Hulu + Live TV replace cable with live channels. Sling TV offers budget customization. Netflix and Amazon Prime Video provide vast on-demand libraries with download capability. Your travel frequency determines which location restrictions matter.

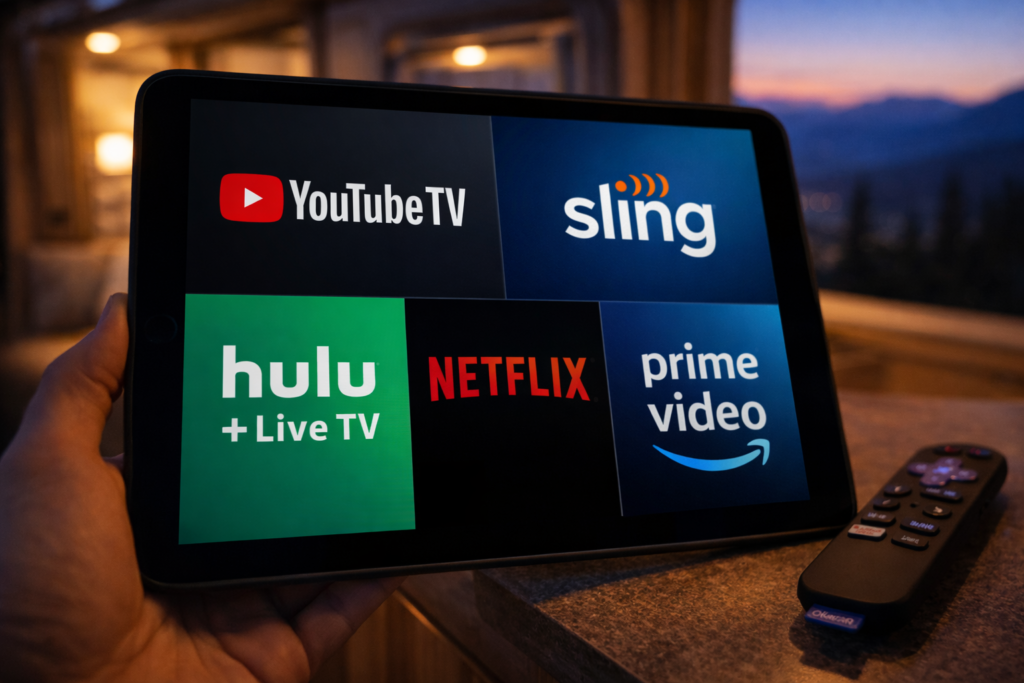
Comparison of top RV streaming services including YouTube TV Sling TV Hulu Live Netflix and Amazon Prime Video on mobile device

YouTube TV

YouTube TV provides 100+ live channels with unlimited DVR storage. The service costs $73 per month with no annual contract. Live sports, news, and network programming attract cord-cutters who miss traditional cable.

Location restrictions limit home address changes to two per year. The service requires login from your home area every three months. Full-time RVers struggle with these limits. Some use VPN services to maintain home location access. Others designate a friend’s address as home and coordinate periodic logins.

Sling TV

Sling TV offers customizable channel packages starting at $40 per month. Orange package includes ESPN for sports fans. Blue package adds more channels and multiple simultaneous streams. Combined Orange + Blue costs $55 monthly.

Location services tie to your billing zip code. You lose local channels when traveling outside your home market. No DVR storage on the base plan. Add-on DVR costs $5 monthly for 50 hours of recordings. Budget-conscious RVers appreciate the flexibility to customize channels and pause service between trips.

Hulu + Live TV

Hulu + Live TV combines 85+ live channels with Hulu’s on-demand library for $77 per month. Disney+ and ESPN+ bundle for $7 more. Unlimited DVR recording included. App requires enabling location services on mobile devices.

Location requirements create friction for frequent movers who change states weekly. The combination of live TV and extensive on-demand content appeals to RVers who camp with reliable internet. Offline download feature works for select on-demand content but not live TV recordings.

Amazon Prime Video

Amazon Prime membership costs $139 annually and includes Prime Video streaming. Library contains thousands of movies, TV shows, and Amazon Originals. No live local channels. Free two-day shipping benefit helps RVers receive packages at campgrounds.

Offline download capability receives high praise from remote campers. Download shows and movies in high quality during strong WiFi connections. Watch later without internet access. No location restrictions or address change limits make Prime Video ideal for full-time travelers.

Netflix

Netflix offers the largest selection of original series and licensed content. Plans range from $7 for ad-supported to $23 for premium 4K streaming. No live TV channels. Mobile plan at $7 restricts viewing to phones and tablets.

Download feature allows offline viewing on all plans. Quality settings let you balance file size against video quality. Netflix imposes no location restrictions beyond country borders. Content library varies between countries but stays consistent across US states. Reliability and offline capability make Netflix the most RV-friendly streaming service.

Service Monthly Cost Live TV Offline Downloads Location Restrictions
YouTube TV $73 Yes Yes (DVR only) 2 address changes/year
Sling TV $40-55 Yes No Tied to billing zip
Hulu + Live TV $77 Yes Partial Location services required
Amazon Prime Video $12 (or $139/year) No Yes None
Netflix $7-23 No Yes None

Boosting Your Signal and Connectivity

Weak signals cause buffering and playback failures. WiFi range extenders amplify distant campground signals. Cellular boosters improve weak carrier signals in fringe areas. Portable hotspots create private networks independent of campground infrastructure. Layering solutions provides redundancy when primary connections fail.

WiFi Range Extenders

WiFi extenders capture weak campground signals and rebroadcast them inside your RV. Devices mount on the roof or exterior wall for better signal reception. Interior routers distribute the connection to your streaming devices.

TechnoRV and similar vendors sell RV-specific WiFi systems. Effective range extends from 150 feet to over 300 feet depending on equipment quality. Public WiFi security risks remain even with range extenders. Use VPN protection on all open networks.

Cellular Signal Boosters

WeBoost Drive X RV and King Extend Pro strengthen cellular signals for streaming and hotspot use. External antenna mounts on the roof. Cable connects to interior amplifier. Your phone or hotspot connects to the amplifier.

Signal improvement ranges from 1-3 bars depending on starting conditions. Boosters cannot create signal where none exists. They amplify existing weak signals to usable levels. Installation requires drilling or using existing cable entry points. One-time cost of $400-700 pays off for travelers who frequently camp in fringe coverage areas.

Portable Hotspots

Portable hotspots from Verizon, AT&T, and T-Mobile create private WiFi networks using cellular data. Devices support 10-15 connected devices simultaneously. Battery life lasts 8-10 hours on most models.

Dedicated hotspots outperform phone tethering for battery life and connection stability. Separate data plans let you switch carriers for better regional coverage. RV forum users recommend keeping backup SIM cards from alternative carriers to avoid dead zones. Redundancy matters when your primary carrier fails in specific geographic regions.

Offline Downloads for Remote Camping

Offline downloads eliminate dependence on internet connectivity. Netflix, Amazon Prime Video, and Hulu allow downloading shows and movies to watch later. Download quality settings balance file size against video quality. Storage space on your device limits total downloaded content. Pre-planning prevents running out of entertainment in remote areas.

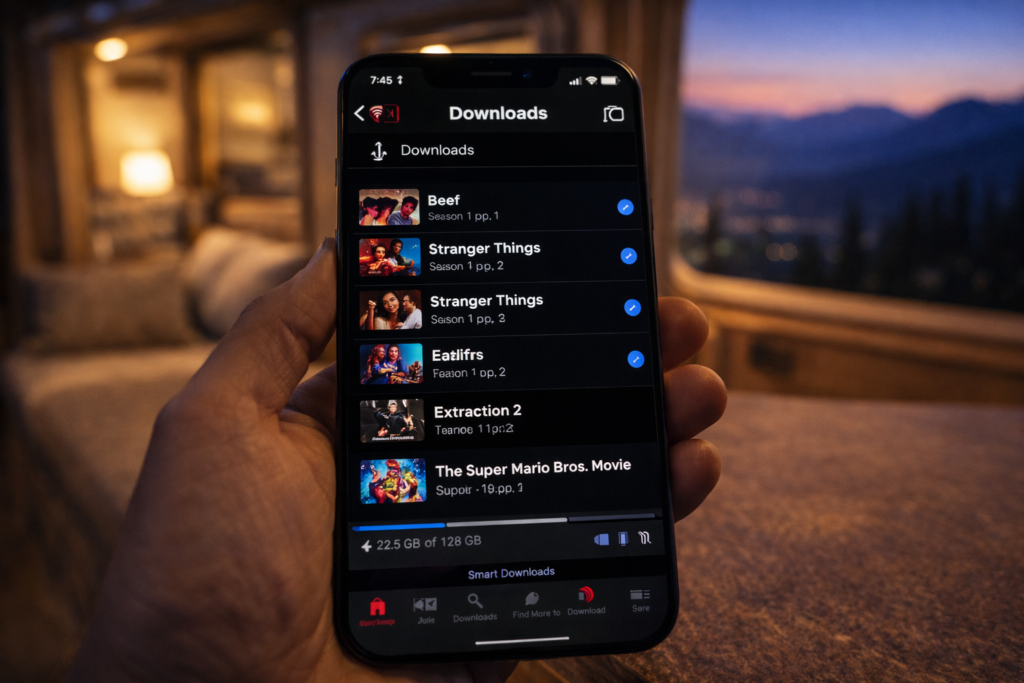
Netflix offline download interface displaying downloaded content library and available storage space for RV streaming without internet

Netflix Downloads

Netflix allows downloads on all subscription tiers. Select the download icon on compatible titles. Quality options include Standard and High. High quality consumes more storage but delivers better viewing on larger RV TV screens.

Download limits vary by title based on licensing agreements. Most shows and movies allow unlimited downloads. Some titles expire after 48 hours of first playback. Check expiration dates before heading to remote locations. Renew downloads during WiFi connections to maintain your offline library.

Amazon Prime Video Downloads

Prime Video supports downloads on the Standard and Premium plans. Mobile app provides the download feature. Download to phone, tablet, or Fire tablet for offline viewing. No download capability on desktop or TV apps.

Storage limits depend on your device capacity. Amazon restricts total downloaded titles to 25 across all devices per account. Quality settings adjust automatically based on available storage. Downloaded content expires after 30 days or 48 hours after starting playback, whichever comes first.

Download Strategy for Extended Trips

Download full seasons of shows during strong WiFi connections before departure. Prioritize high-quality downloads for RV TV viewing. Use standard quality for phone and tablet viewing to conserve storage. Delete watched content immediately to free space for new downloads.

External storage drives expand capacity for laptops. Cloud storage does not help offline viewing. Plan for 1-2GB per hour of HD video. Full season of 10 hour-long episodes requires 10-20GB of storage. Check available space before downloads to avoid incomplete transfers.

Managing Location Restrictions

Streaming services use location tracking to enforce licensing agreements and deliver local content. YouTube TV limits address changes to twice yearly. Hulu + Live TV requires location services enabled. Sling TV ties service to billing zip code. VPN services mask location. Strategic account management minimizes friction for frequent travelers.

VPN Solutions

ExpressVPN and similar services route internet traffic through servers in your chosen location. Monthly cost ranges from $8-13. Connection to a server in your home state maintains access to local channels and bypasses travel restrictions.

Some streaming services detect and block VPN traffic. Success rates vary between VPN providers and streaming platforms. RV forum users report better results with premium VPN services compared to free options. Test VPN compatibility with your streaming services before leaving on extended trips.

Device-Based Workarounds

Apple TV and Shield devices allow disabling location services. This prevents automatic location updates that trigger service disruptions. YouTube TV and Hulu may still require periodic location verification through account settings.

Forum discussions document strategies like having a trusted contact log in from your home location when verification is required. This workaround violates terms of service but reflects common practice among full-time RVers who face address change restrictions.

Service Selection Strategy

Choose services with minimal location restrictions if you travel full-time. Netflix and Amazon Prime Video impose no domestic location limits. Sling TV and YouTube TV create friction with address change caps and verification requirements.

Combine one location-flexible service for primary content with one live TV option for news and sports. Accept that live local channels will change as you travel. Or embrace streaming-only services and skip live TV entirely to eliminate location hassles.

Power Management for Boondocking

Streaming devices consume power that matters when camping off-grid. Smart TVs draw 30-100 watts. Roku and Fire Stick use 3-5 watts. Game consoles consume 100-150 watts during active gaming. Laptops use 30-60 watts. Understanding power draw helps you balance entertainment against battery capacity when boondocking.

Device Efficiency

Streaming sticks deliver the best power efficiency for TV viewing. Roku Streaming Stick uses 3 watts during active streaming. Compare to smart TVs at 50+ watts total power draw. Tablets consume 10-15 watts for solo viewing.

Power saving tips include lowering screen brightness, using sleep timers, and closing background apps. Disable auto-play features that continue streaming after you stop watching. Turn off devices completely rather than leaving them in standby mode.

Battery Capacity Planning

Calculate entertainment power budget within total battery capacity. 100Ah battery bank at 50% depth of discharge provides 600 watt-hours usable power. Streaming for 4 hours on a tablet consumes 60 watt-hours. Smart TV streaming for 4 hours uses 200-400 watt-hours.

Solar panels recharge batteries during daylight hours. 200 watts of solar generates 800-1200 watt-hours on sunny days. Streaming during peak solar hours minimizes battery drain. Cloudy weather or heavy tree cover reduces solar charging and requires prioritizing power consumption.

Generator Backup

Portable generators provide unlimited streaming power at the cost of noise and fuel. Run generators during designated quiet hours at campgrounds. Some boondocking locations prohibit generator use entirely.

Many RVers time streaming entertainment for early evening before quiet hours begin. Generator operation for 2-3 hours charges batteries while running streaming devices. Battery power handles late-night viewing after shutting down the generator.

Frequently Asked Questions

Can you stream Netflix in an RV?

Yes, Netflix streams in RVs through cellular data, satellite internet, or campground WiFi. Download shows before travel for offline viewing in areas without connectivity. All Netflix subscription tiers support downloads to phones, tablets, and computers. No location restrictions apply within the United States.

What is the best internet for RV streaming?

Cellular data with a signal booster offers the best balance of cost, coverage, and reliability for most RVers. Verizon provides the widest rural coverage among carriers. Starlink satellite delivers superior performance in remote areas. Starlink offers three Roam tiers: 100GB at $55/mo, 300GB at $80/mo, and Unlimited at $175/mo. The 300GB tier is the right fit for remote workers who consistently exceed 100GB but don’t need fully unlimited data. Equipment costs $249-349. Cellular plans cost $50-100 monthly. Campground WiFi rarely supports HD streaming during peak hours. Verify current Starlink pricing at starlink.com/service-plans.

Does Starlink work for RV streaming?

Starlink delivers 50-200 Mbps download speeds in clear conditions, supporting multiple HD streams simultaneously. The dish requires an unobstructed view of the northern sky. Trees, canyon walls, and severe weather disrupt service. Setup takes 10-15 minutes at each location. Starlink offers three Roam tiers: 100GB at $55/mo, 300GB at $80/mo, and Unlimited at $175/mo. All active Roam plans include in-motion use up to 100 mph. Service can be paused via Standby Mode when not traveling ($5/mo now; $10/mo after June 18, 2026). Equipment costs $249 for Mini or $349 for standard dish. Verify current pricing at starlink.com/service-plans.

How do you get WiFi in an RV for streaming?

Create WiFi in your RV using cellular hotspots, Starlink satellite, or campground connections extended with range boosters. Cellular hotspots from Verizon, AT&T, or T-Mobile use phone data plans or dedicated devices. Starlink provides independent satellite connectivity. WiFi range extenders capture distant campground signals and rebroadcast them inside your RV.

Can you use Roku in an RV?

Roku devices work in RVs connected to any WiFi network or cellular hotspot. The Roku Streaming Stick 4K connects via HDMI and draws power from TV USB ports. Roku handles frequent location changes better than competitor devices according to RV forum users. Setup takes less than 10 minutes at new locations.

Do streaming services work when traveling?

Most streaming services work during travel with varying location restrictions. Netflix and Amazon Prime Video have no domestic location limits. YouTube TV allows two address changes annually and requires home-area login every three months. Hulu + Live TV requires enabled location services. Sling TV ties service to billing zip code affecting local channel access.

Essential Resources for RV Streaming

Stream Anywhere Your Travels Take You

Reliable streaming in your RV requires matching internet solutions to your travel style. Cellular data with boosters serves frequent movers in developed areas. Starlink reaches remote locations cellular networks miss. Offline downloads provide entertainment insurance when all connections fail.

Combine multiple connectivity options for redundancy. Layer cellular data, offline downloads, and campground WiFi to eliminate total blackouts. Choose streaming services that align with your location flexibility needs. Manage power consumption to balance entertainment against battery capacity during off-grid camping.

Your entertainment setup should match the freedom that drew you to RV life. With the right tools and planning, you can stream anywhere from beach campgrounds to mountain boondocking spots.

References

  1. RV Mobile Internet Resource Center. “Mobile Internet for RVers and Cruisers.” Accessed May 2026. https://www.rvmobileinternet.com/
  2. Starlink. “Roam Service Plans.” Accessed May 2026. https://www.starlink.com/service-plans
  3. WeBoost. “Drive X RV Cell Signal Booster.” Accessed May 2026. https://www.weboost.com/us/products/drive-x-rv
  4. YouTube TV. “Terms of Service.” Accessed May 2026. https://tv.youtube.com/
  5. Escapees RV Club. “RV Internet Discussion Forum.” Accessed May 2026. https://www.escapees.com/
  6. TechnoRV. “RV Internet and Technology Solutions.” Accessed May 2026. https://www.technorv.com/


How to Find Free Dispersed Camping Using BLM and USFS Map Layers

How to Find Free Dispersed Camping Using BLM and USFS Map Layers

Quick Answer

Four free tools provide the public land boundary overlays, MVUM road layers, and offline capability needed to research dispersed camping on BLM and National Forest land: Gaia GPS (free tier), Caltopo (free tier), OsmAnd (free, open-source), and Avenza Maps (free with USFS MVUM downloads). These tools help you verify land ownership and road access — they do not replace confirmation from the local field office that a specific site is currently open and legal. App features and pricing tiers change; verify current terms at each provider’s website before your trip.

Last updated: March 2026. BLM rules, app features, and pricing change — verify current details with the relevant field office and each tool’s official site before your trip.

Most campers searching for free dispersed sites end up in the same trap: Google Maps shows roads but not land ownership. The BLM and Forest Service websites have the right data but poor usability. And every app that promises “free camping” eventually reveals that the features you actually need — public land overlays, offline maps, road classifications — cost money.

This guide covers the tools that legitimately solve the problem at no cost, what each tool does well, and — critically — what each one cannot do so you don’t find out the hard way at the end of a dirt road.

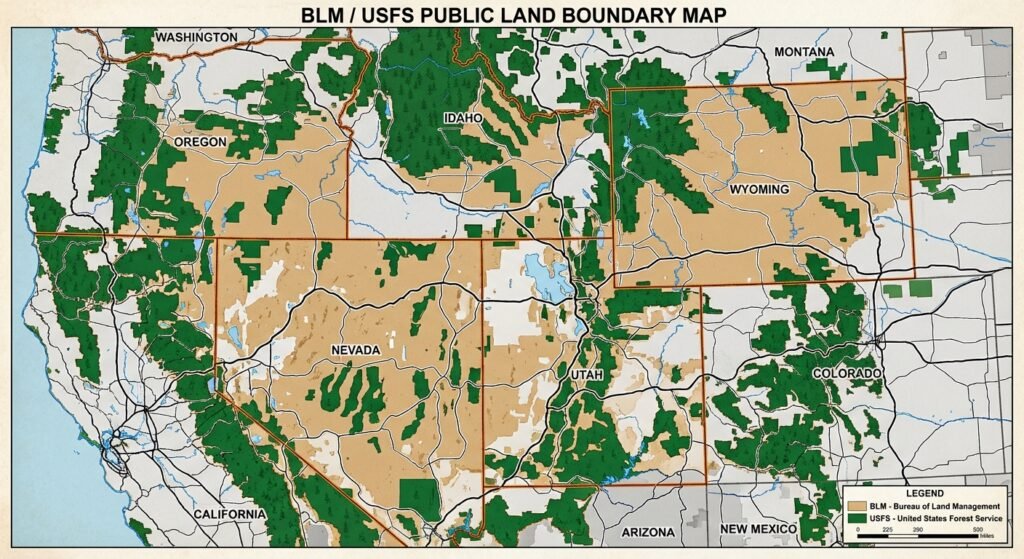
BLM/USFS public land boundary map

Why map layers — not campground listings — are the right tool for dispersed camping

Dispersed camping apps that show user-submitted pins tell you where other people have camped. Map layer tools tell you whether you are on public land where camping may be allowed. For boondocking, that land-ownership confirmation is more useful than any crowd-sourced pin — and it’s the first check that has to pass before anything else matters.

Dispersed camping is camping outside developed sites, typically on BLM or National Forest land. BLM policy allows dispersed camping on most public land unless an area is posted “Closed to Camping.” USFS lands follow similar rules, with individual ranger districts setting local restrictions. Confirming land ownership is a necessary step — it is not sufficient on its own. Closures, seasonal restrictions, and local permit requirements can override the general permission even on verified public land.

The problem is that BLM and USFS land is interspersed with private, state, tribal, and other land categories. Without a public land boundary layer active on your map, every promising pull-off is a guessing game. Map layer tools eliminate most of that guesswork.

Common misconception

Many guides recommend Google Maps as a starting point for dispersed camping research. Google Maps shows satellite imagery and some road names, but it does not display BLM or USFS boundary layers. It has no data on land ownership. Using Google Maps to verify that a site is on public land is not reliable — the land visible in satellite view may be private.

Verified correction: The authoritative public land boundary sources are the BLM Maps portal and the USGS National Map. Gaia GPS, Caltopo, OsmAnd, and Avenza Maps can incorporate these official datasets. Google Maps cannot.

The 14-day dispersed camping limit: what the BLM rules actually say

BLM dispersed camping is generally limited to 14 days within any 28-day period. (BLM.gov, Camping on Public Lands) After reaching the stay limit, you must relocate. The required move-out distance varies by field office — verify the specific distance with the local BLM office before your trip, as it is not uniform nationally.

Three constraints apply that many guides omit:

  • The 14-day limit accumulates across multiple short visits, not only continuous stays.
  • Individual BLM field offices and USFS ranger districts can — and do — set shorter limits, seasonal closures, or different move-out distances. The national default does not override local rules.
  • Some field offices apply stricter annual limits rather than the rolling 28-day window. Check directly with the field office governing your target area before planning any extended stay.

The 14-day rule does not apply to designated Long-Term Visitor Areas (LTVAs), which operate under separate fee and permit structures.

Practical implication for map tool use: You need to know not just that an area is BLM land but which field office governs it. Gaia GPS and Caltopo display BLM boundaries but do not show field office jurisdictions inline. For jurisdiction-specific rules, cross-reference with BLM’s recreation pages or call the field office directly before arrival.

The core workflow: This guide covers four free tools — Gaia GPS, Caltopo, OsmAnd, and Avenza Maps — each capable of incorporating official BLM and USFS geographic data. The right choice depends on three criteria: whether you need offline capability, how comfortable you are building custom layer stacks, and whether your primary goal is land boundary verification or road-level navigation to a site. App features and free-tier access change over time; confirm current capabilities at each provider’s website.

Gaia GPS (free tier): integrated layer stack for pre-trip planning

Gaia GPS’s free tier includes BLM boundary overlays, USFS road layers, and public land classification. These are the core layers for verifying land ownership and road access on a candidate dispersed camping area. Confirm current free-tier feature availability at gaiagps.com, as tier content changes.

The layer stack that works for dispersed site hunting:

  • Gaia Topo: Topographic basemap. Contour lines help identify flat areas suitable for an RV or large tent footprint.
  • Public Land: Color-coded ownership (BLM, USFS, NPS, private, tribal). This layer answers “can I camp here?” — subject to local rules.
  • USFS Roads and Trails (MVUM): Motor Vehicle Use Maps showing which roads are open to which vehicle types. Open roads generally permit dispersed camping along their corridors, subject to district-specific restrictions.
  • USFS 2016: Older but still useful for showing developed recreation sites and designated areas within national forests.

Gaia GPS public land layer screenshot]

What the free tier does not include: Offline map downloads require a Gaia GPS premium subscription. In areas without cell service — which covers most worth-finding dispersed sites — the free tier shows a blank map. Use the free tier for desktop planning; pair it with OsmAnd or Avenza Maps for in-field offline navigation.

Caltopo (free tier): strongest desktop tool for layering multiple data sources

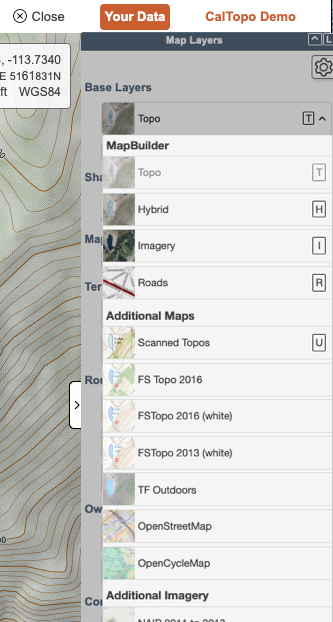
Caltopo’s free tier combines USGS topographic maps, satellite imagery, and public land boundaries in a single view. It is the preferred desktop planning choice when you need to overlay two or more data sources simultaneously to assess land ownership and physical site conditions together. Confirm current free-tier layer availability at caltopo.com.

Key layer combinations for dispersed camping:

  • MapBuilder Topo + Public Lands: Confirms land ownership against a detailed topographic base. The most common starting stack.
  • Satellite + Public Lands: Lets you visually assess terrain, tree cover, access road conditions, and potential camping spots on confirmed public land.
  • MVUM + Topo: Shows Forest Service road accessibility layered over contour data. Identifies which roads are open and whether the terrain alongside them is campable.
  • Cell Coverage: Caltopo’s cell coverage layer allows you to select by individual carrier (AT&T, T-Mobile, Verizon). This is a useful planning advantage for remote work and emergency communication planning.

Caltopo layer stack screenshot

What the free tier does not include: Offline capability is limited for free accounts. Caltopo is primarily a web-based planning tool. For in-field navigation without cell service, pair it with OsmAnd or Avenza Maps. It does not provide turn-by-turn routing.

OsmAnd: fully offline, fully free, higher learning curve

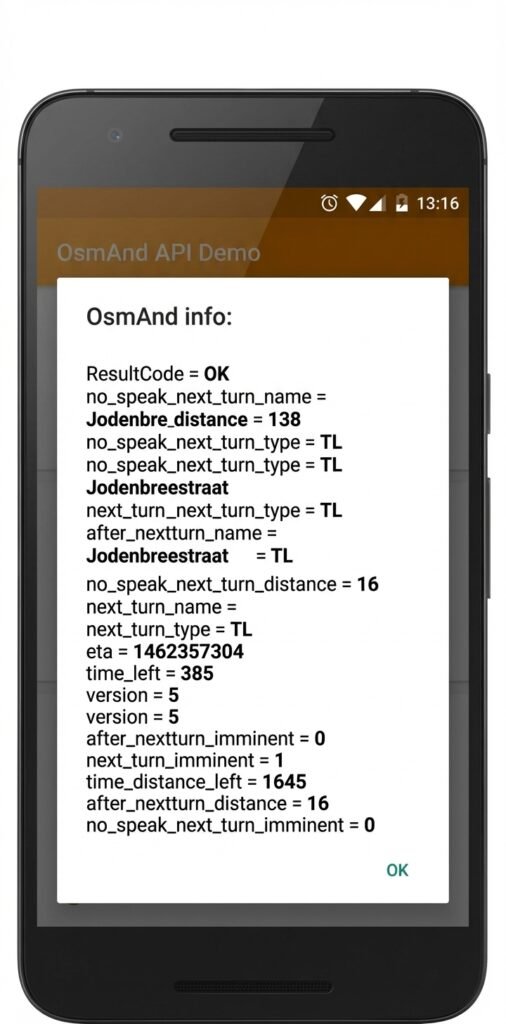
OsmAnd is an open-source mapping application that stores entire map regions on your device — no cell service, no subscription, no data connection required after setup. It is built on OpenStreetMap data and supports custom layer imports, including public land boundary files.

The setup process takes more time than Gaia GPS or Caltopo, but the result is a mapping tool that works identically with or without cell coverage:

  • Download regional map files for any U.S. state directly within the app — no internet required after download.
  • Add custom USFS and BLM boundary layers via the plugin system. The app supports custom map file formats and raster overlay imports; see OsmAnd’s raster map documentation for current import instructions.
  • GPX track recording lets you mark and save candidate sites for future reference.
  • Offline routing works for navigation to a site without active cell service.

OSMAnd Info

What OsmAnd does not include natively: USFS or BLM layer integration requires manual import — the app does not display public land ownership in the default configuration. OpenStreetMap data quality on remote forest roads varies; some roads are missing or mislabeled. Do not rely on OsmAnd road data alone for technical off-road routes without cross-referencing an official MVUM.

Available at osmand.net for Android and iOS.

Avenza Maps: the official MVUM viewer for in-field use

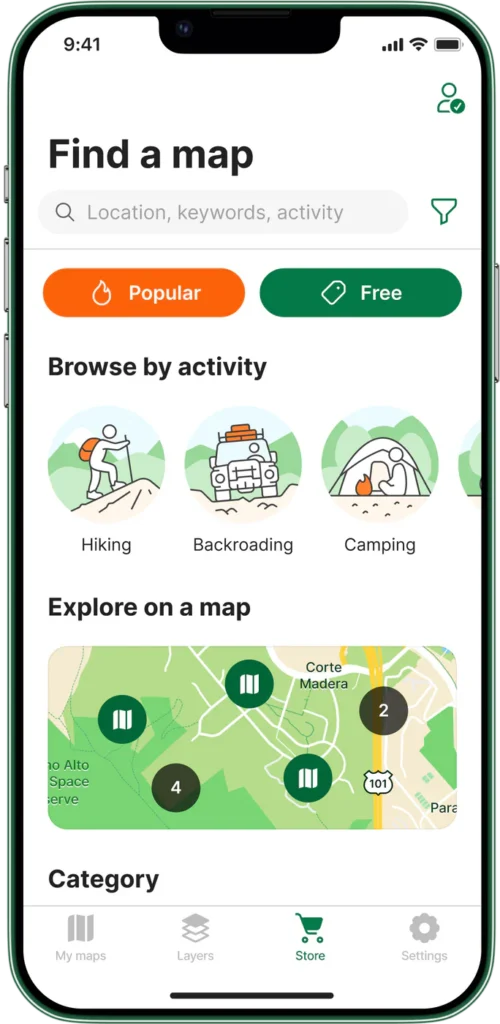
Avenza Maps is the most direct path to official USFS Motor Vehicle Use Maps (MVUMs) on a mobile device. MVUMs are the authoritative USFS documents showing which Forest Service roads are open to motorized vehicles and to which vehicle types. Road-access permission and dispersed camping permission are related but separate: an open road on an MVUM generally allows dispersed camping along its corridor, but district-specific restrictions may still apply. Verify current rules with the ranger district before travel.

The USFS publishes MVUMs as geospatial PDF files. Avenza imports these files and uses your device’s GPS to show your real-time location on the official map — no internet required after download.

Avenza

How to use it:

  1. Identify the National Forest or BLM district you plan to visit.
  2. Download the MVUM for that unit from fs.usda.gov/visit/maps (USFS) or the appropriate BLM field office page. Most MVUMs are free.
  3. Import the PDF into Avenza Maps. The app geo-references it automatically.
  4. Enable GPS tracking in the app. Your position appears on the official map in real time.

What Avenza does not include: It is a map viewer, not a navigation app. It will not route you to a waypoint or provide turn-by-turn directions. It also does not show public land ownership beyond what is printed on the source MVUM. Use it alongside Gaia GPS or Caltopo during pre-trip planning for ownership verification.

Available at avenzamaps.com for Android and iOS.

Side-by-side comparison: which tool handles which job

Feature / Use case Gaia GPS
(free tier)
Caltopo
(free tier)
OsmAnd
(free, open-source)
Avenza Maps
(free)
Public land boundary overlays Yes Yes Add-on required Via MVUM only
USFS MVUM road layers Yes Yes Add-on required Yes (native)
Offline map capability (free) No (paid only) Limited Yes (full regions) Yes (per-map file)
Turn-by-turn navigation No No Yes No
Carrier-specific cell coverage layer No Yes No No
Multiple layers simultaneously Yes Yes (strongest) Yes (with setup) No (single map)
Setup complexity Low Low Medium-High Low-Medium

Feature availability as of March 2026. Free-tier access changes — verify at each provider’s website before your trip.

No single free tool covers the full workflow from desktop planning to in-field navigation. These two combinations work reliably for most RV boondockers:

Option 1 — Caltopo + Avenza Maps: Use Caltopo at home to identify candidate areas using stacked public land, MVUM, and satellite layers. Then download the MVUM for your target National Forest or BLM district and load it into Avenza Maps before you leave cell range. Once on-site, Avenza shows your GPS position on the official MVUM in real time.

Option 2 — Gaia GPS + OsmAnd: Use Gaia GPS (web or app) to plan using its integrated layer system. Download the OsmAnd map for the target region before the trip. OsmAnd handles offline turn-by-turn navigation to a waypoint you’ve marked in Gaia GPS.

What neither combination handles: Both options give you land ownership data and road access information. Neither gives you confirmed site-level conditions — whether the spot is occupied, what road quality looks like after recent weather, or whether a specific pullout can fit your rig. For that, layer in user-submitted databases like FreeCampsites.net or Campendium after you’ve verified the land status independently.

For RV-specific routing to a site you’ve identified, a separate RV GPS tool is required. See our field-tested comparison: best free RV GPS apps for boondockers.

Official government map resources: free and authoritative

The third-party tools above can incorporate data from these primary sources. Using them directly costs nothing and removes the intermediary:

  • BLM Maps portal: Downloadable surface management maps showing BLM, USFS, NPS, and private land for each state. Available as PDF and GIS shapefiles. The authoritative source for land ownership verification.
  • USFS Maps & Apps: Official source for Motor Vehicle Use Maps by ranger district. Free downloads for every National Forest in the contiguous U.S.
  • USGS National Map: High-resolution topographic data and land ownership boundaries. Downloadable for offline use.
  • BLM National Data Viewer (GeoBOB): Interactive web-based viewer for BLM land status, roads, and designated areas. Not mobile-optimized, but reliable for desktop pre-trip research.

Constraint: Government portal maps are authoritative but not designed for field navigation. Download PDFs for offline reference, but use Avenza Maps or OsmAnd for in-field GPS tracking against those files.

For a broader look at legal free camping options — including membership programs, dispersed sites, and app-based spot-finding — see our guide to free campsite apps. For a rundown of where overnight parking remains viable in 2026, see our free RV parking guide.

What map layers cannot tell you — and what fills the gap

Map layer tools answer the ownership question. They do not answer the conditions question. Five things that require a different source — and a phone call or site check before you commit:

  • Current road closures and fire restrictions: MVUMs show roads as they were when the map was published. Seasonal closures, fire restrictions, and washouts are not reflected. Check with the relevant BLM field office or ranger district website before the trip, or call ahead. Fire restrictions change rapidly in dry seasons.
  • Whether a specific site can physically fit your rig: A road marked open on an MVUM may be passable by a pickup but not a Class A. User-submitted databases like Campendium often include rig-size notes from people who’ve been there.
  • Current occupancy: No free map tool shows real-time occupancy at dispersed sites. You will occasionally drive to a confirmed-legal spot and find it taken. Build a short list of two or three candidate sites per trip.
  • Water source status: Springs and streams shown on topo maps may be seasonal or dry. Verify independently before counting on on-site water.
  • Local permit requirements: Certain areas require fire permits or group permits even for dispersed camping. California BLM land requires a free California Campfire Permit for any open fire or gas stove use. Requirements vary by state and district — verify with the local office before your trip.

Frequently asked questions

Is all BLM land open to dispersed camping?

Most BLM land is open to dispersed camping unless an area is posted “Closed to Camping” or subject to specific land use restrictions. (BLM.gov) Some areas are closed for conservation, active restoration, or resource protection. Always check for posted signs and verify current closures with the local field office before committing to a site.

What is an MVUM and why does it matter for boondocking?

A Motor Vehicle Use Map (MVUM) is an official USFS document showing which roads within a National Forest are open to motorized vehicles and for which vehicle types. Dispersed camping is generally permitted along open Forest Service roads, though district-specific restrictions may still apply — road access and camping permission are separate determinations. MVUMs are published per ranger district and available free at fs.usda.gov/visit/maps.

Can I use Google Maps to find dispersed camping?

Google Maps does not display BLM or USFS land ownership boundaries. It shows satellite imagery and some road names, but it cannot confirm whether a specific location is on public land open to camping. It is not a reliable tool for verifying dispersed camping legality. Use Gaia GPS, Caltopo, or the BLM Maps portal for ownership verification.

Do any of these tools work without cell service?

OsmAnd (after downloading regional map files) and Avenza Maps (after downloading MVUM files) both function fully without cell service. Gaia GPS free tier and Caltopo free tier require an internet connection for map tile loading. Pre-download everything before leaving cell range.

What is the BLM 14-day limit and how is it calculated?

BLM dispersed camping is generally limited to 14 days within any 28-day period. The limit applies cumulatively — multiple short visits count toward it. After reaching 14 days, you must relocate; the required move-out distance varies by field office and is not uniform nationally. Individual field offices may impose shorter limits. Verify the specific rules with the local BLM office before your trip. (BLM.gov)

35+ years of field-tested boondocking knowledge, delivered free.

Get our weekly dispatch — real trips, real rigs, real conditions. No RV park ads, no fluff.

Get field-tested tips


Plan Route 66 by RV with the right rig size, parking strategy, and itinerary

Plan Route 66 by RV with the right rig size, parking strategy, and itinerary

Last updated: December 2025

Route 66 RV Planning 2026: Oatman Grade, Stops, Costs

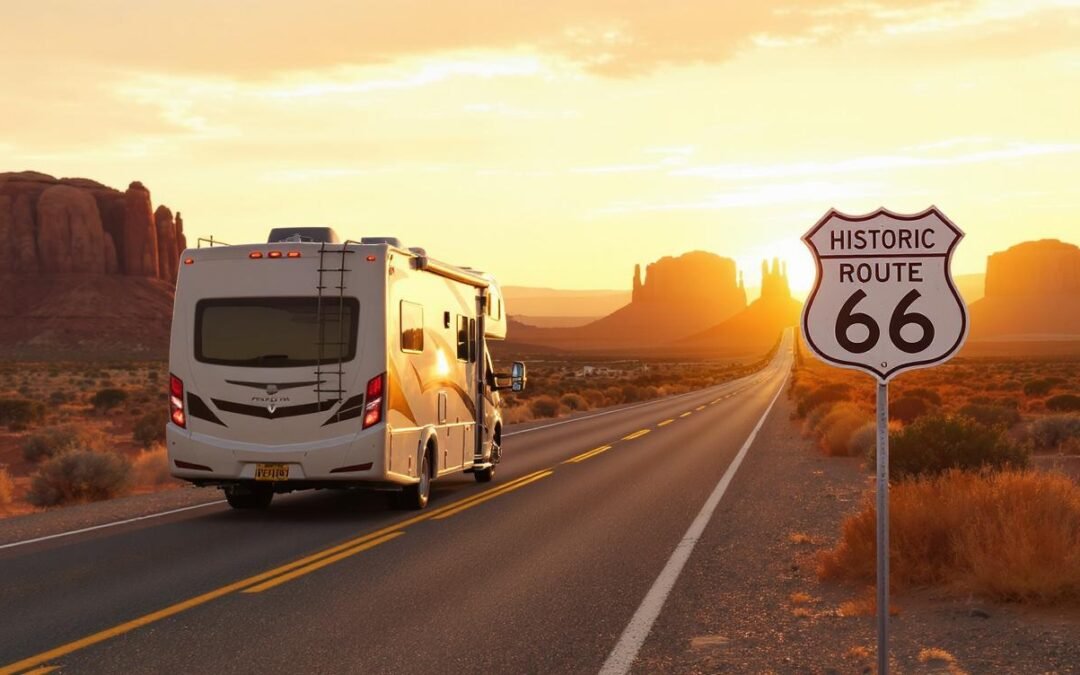
Driving Route 66 by RV is one of those “someday” trips—until it isn’t. When you finally commit, you quickly discover there’s no single truth about RVing the Mother Road. Some say it’s easy. Others warn it’ll shake your axles loose. Some insist big rigs can’t do it; others do it every year.

The reality: Route 66 is absolutely RV-friendly when you understand its constraints.

This guide cuts through the noise using a blend of:

  • On-the-ground reports from real travelers, including a high-signal Facebook thread led by Anthony J. Mignella, who completed Route 66 towing a 30-foot travel trailer.
  • 35+ years of RV travel experience applied to the specific challenges of Route 66.
  • Authoritative sources like the National Park Service, state DOTs, and RV-specific tools.
  • Modern RV strategy for length limits, parking, routing, and reservations.

This isn’t a listicle. It’s a deep, route-by-route RV planning framework for tackling Route 66 in a motorhome, trailer, or camper van.


Quick Answer: Can You Drive Route 66 in an RV?

Yes, Route 66 is RV-friendly with these key facts:

  • ✅ Roughly 80–90% of the drivable Route 66 corridor is suitable for modern RVs.
  • ✅ Class A motorhomes up to about 40 feet can complete the trip with a few smart detours.
  • ⚠️ The Oatman Grade (Sitgreaves Pass) in Arizona is the main problem area for big rigs.
  • 🏙️ Urban parking in Chicago, St. Louis, Santa Fe, and Los Angeles is often harder than the driving itself.
  • 🏕️ Most RVers mix KOAs with small private parks and book only key hubs (like Santa Fe and Malibu) in advance.
  • ⏱️ A comfortable pace is 21–30 days; a rushed trip can be done in 10–14 days.

If you’re worried about where you can legally stop on long driving days, see our store-by-store guide to where to park your RV for free on a road trip.

If you respect length limits, plan for parking, and give yourself time, Route 66 is one of the most rewarding RV trips in North America.


Table of Contents

  1. Why Route 66 Is a Perfect (and Challenging) RV Trip
  2. 2025 Route 66 RV Difficulty Map & Ratings
  3. The 3 Route 66 RV Travel Archetypes
  4. Essential RV Constraints (Length, Height, Parking, Fuel, Water, Terrain)
  5. Real Traveler Insights (Quotes & Commentary)
  6. State-by-State Route 66 RV Guide (Illinois to California)
  7. Verified Campground Stops (State-by-State)
  8. Three Ready-to-Use Route 66 RV Itineraries
  9. Seasonal Timing, Weather & Safety Considerations
  10. What Does It Cost to RV Route 66?
  11. Fuel Gaps, Dump Stations & Alternate Routes
  12. Should You Bring a Toad?
  13. Myth vs Reality: What RVers Get Wrong About Route 66
  14. Route 66 RV FAQ
  15. Authoritative References & Planning Resources

1. Why Route 66 Is a Perfect (and Challenging) RV Trip

Class C RV parked near a neon Route 66 campground sign

Route 66 isn’t a single road—it’s a patchwork of alignments, main streets, and bypasses layered over nearly 100 years. For RVers, that means you’re not just following a line on a map. You’re constantly choosing between:

  • Historic two-lane segments vs faster bypasses
  • Downtown main streets vs truck-friendly arterials
  • Iconic landmarks vs realistic daily mileage

Compared to straight interstate travel, the Mother Road demands:

  • Slower speeds and more frequent turns
  • Awareness of length and grade limits on steep or narrow sections
  • Extra thought for parking in older downtowns
  • Flexible overnight planning for busy periods and small-town parks

That’s exactly why RVers love it. You’re not just driving from A to B—you’re threading a big, modern rig through the remains of an earlier road-trip era.


2. 2025 Route 66 RV Difficulty Map & Ratings

 Stylized US map showing Route 66

We’ve generalized the route into major segments based on lane width, grades, and traveler feedback (including Anthony J. Mignella and others). Use this table as a planning tool, not as a substitute for local conditions or current DOT updates.

Route Segment RV Rating Primary Constraint Best Rig Size
Chicago, IL → St. Louis, MO 🟢 Easy Urban congestion; expensive or limited big-rig parking in Chicago. Any (Class A OK)
St. Louis, MO → Oklahoma City, OK 🟢 Easy Older downtown streets in some towns; generally wide and manageable. Any (Trailers OK)
Oklahoma City, OK → Tucumcari, NM 🟢 Easy Mostly flat plains; wind can be a factor for tall rigs. Any (including big Class A)
Tucumcari, NM → Flagstaff, AZ 🟡 Moderate Elevation: climbs toward 7,000 ft; watch engine and transmission temps. Any (but check brakes & cooling)
Flagstaff, AZ → Kingman, AZ 🟡 Moderate Mountain weather; some steeper grades and curves. Any, with mountain-driving experience
Kingman, AZ → Oatman (Sitgreaves Pass) 🔴 Difficult Steep grades and hairpin turns; minimal shoulders. Under 30′ strongly recommended
Kingman, AZ → Needles, CA (I-40) 🟢 Easy Heat in summer; long grades but wide, modern highway. Any (big rigs OK)
Needles, CA → Barstow → LA → Santa Monica 🟢 Road / 🟡 Traffic High heat near Needles; heavy traffic closer to Los Angeles. Any, with big-city driving comfort

Key Oatman detail: the posted limit is about 40 feet, but the combination of steep grades, tight curves, and lack of shoulders means that in practice, 30 feet or under is the safer choice for that alignment. Most big rigs should avoid it entirely and use the interstate plus a west-side approach.


3. The 3 Route 66 RV Travel Archetypesthree RV silhouettes labeled “Fast-Track 10–14 days,” “Immersion 21–30 days,” and “Collector 4–8 weeks

Before you book a single campground, decide which traveler profile you fit. Your expectations will shape how you experience Route 66.

A) Fast-Track Traveler (10–14 Days)

  • Hits only the major icons (Cadillac Ranch, Chain of Rocks, Oatman, Santa Monica Pier).
  • Prefers KOAs and larger private RV parks with easy in/out.
  • Average daily mileage: 200–350 miles.
  • Best suited for: Class A or big fifth wheels wanting a “check it off the list” version.

B) Immersion Traveler (21–30 Days)

  • Mixes neon, museums, diners, and small-town main streets.
  • Stays multiple nights in Santa Fe, Flagstaff, or Tulsa.
  • Average daily mileage: 100–200 miles with built-in zero-days.
  • Best suited for: Class C or mid-size trailers that want a balance of depth and comfort.

C) Collector (4–8 Weeks)

  • Seeks surviving alignments, abandoned motels, and vintage neon.
  • Stops at lesser-known museums and interpretive centers.
  • Will happily reroute for ghost towns or obscure signage.
  • Best suited for: Smaller Class C or Class B camper van with high parking flexibility.

The rest of this guide works for all three archetypes. The itineraries later on give specific day-by-day structures for each style.


4. Essential RV Constraints on Route 66

RV mirror looking down a narrow two-lane road with Route 66 emblem

4.1 Length & Grade Limits (Especially Near Oatman)

The most important constraint on Route 66 for RVers is the steep, narrow section into Oatman, Arizona, via Sitgreaves Pass. In the Facebook thread that inspired this guide, traveler Anthony J. Mignella noted:

“There is a 40 ft length limit on 66 approaching Oatman from the east.”

Beyond the posted numbers, real-world reports from RVers are consistent: it’s simply not a place for big rigs. Tight switchbacks, steep grades, and limited room for error make the eastern approach a poor choice for anything long or heavy.

The practical takeaway: treat 40 feet as the hard upper limit and 30 feet or under as the realistic safe zone for that grade. If you’re in a large Class A or towing a long trailer, skip the eastern approach entirely.

Safer Oatman strategy for RVs:

  • Run Kingman → Needles via I-40 with your RV.
  • Drop the RV at a park or in Needles/Kingman.
  • Backtrack into Oatman from the west side with a smaller vehicle if you have one.

Always verify current restrictions with the Arizona Department of Transportation:
https://azdot.gov/travel.

4.2 Parking: The Hidden Difficulty

Several travelers mentioned that the real pain point isn’t the highway—it’s parking in cities and small downtowns.

“Parking a problem sometimes, but I bought the RV in part to do this trip… We didn’t see everything but never expected to.” – Anthony J. Mignella

Parking is especially tight in:

  • Chicago (Route 66 starting point)
  • St. Louis
  • Santa Fe and parts of Albuquerque
  • Los Angeles and Santa Monica

Many RVers stage outside the city in KOAs or larger RV parks, then use Uber, Lyft, or a toad to explore. In Chicago, some RVers overnight at the McCormick Place Truck Marshaling Yard (very industrial but central):
official yard info.

If you’re trying to decide whether to lean on store lots vs campgrounds along your route, read our store-by-store guide to free overnight RV parking at Walmart, Home Depot, Cracker Barrel and more.

4.3 Fuel, Water & Dump Access

Route 66 is generally well-serviced, but there are stretches where large, easy-in/out fuel stops and dump stations are farther apart than you might like.

Typical “watch your gauges” stretches include:

  • High desert sections in New Mexico between larger towns.
  • Segments in northern Arizona between Holbrook, Winslow, and Flagstaff.
  • Desert corridors around Needles and Barstow in California.

In practice, that can mean 60–90 miles between truly RV-friendly fuel stops if you’re picky about approach angles and lot size.

Practical approach:

  • Top off fuel before leaving major cities such as Amarillo, Albuquerque, and Kingman.
  • Use apps like Campendium and
    AllStays to locate dump stations and propane.
  • Plan around KOAs and larger private parks for dump/water, even if you mix in small-town parks or Harvest Hosts stays.

If you like to mix in free public-land camping where it’s legal, our step-by-step guide to using Google Maps to find free dispersed camping sites will slot neatly into this planning process.

4.4 Road Conditions & Pavement Reality

One commenter in the thread argued that towing a travel trailer on Route 66 would be catastrophic:

“You would have lost the axles out of it. Be true to your story.”

Multiple travelers pushed back.

“We just got back from a two week trip on the route using the Route 66 app, and we must have missed the parts of the road you speak of.” – Sondra Burlingame

“The roadways of Route 66 are fine for RVs. There are some rough short segments, but it’s not going to be a problem… Motorcycles have it worse.” – Scott McCoy, who tows a 17-foot travel trailer while updating his Route 66 guide.

The consensus from people who have actually done it is clear: you’ll hit some rough patches, but nothing a modern RV can’t handle when driven sanely.


5. Real Traveler Insights (and What They Actually Mean)

Couple at an RV dinette

5.1 Reservations: Day-Of vs Months in Advance

Anthony’s approach was relaxed:

“We booked most places the day we were arriving—only Joliet, Santa Fe and Malibu in advance.”

By contrast, another traveler, Tim Daugherty, shared:

“My wife is a worrier and had me book the entire trip months in advance.”

Both worked. What they really highlight is this:

  • High-demand stops like Santa Fe and Malibu are worth booking in advance.
  • Smaller towns along the route usually have day-of or short-notice availability outside peak holidays.

A practical hybrid strategy:

  • Reserve Chicago/Joliet, Santa Fe, and Malibu early.
  • Keep the rest of your nights flexible so you can adjust mileage, weather, and side trips on the fly.

5.2 Rig Size and “Nimbleness”

Another traveler, Steve Rice, did Route 66 with a 19-foot travel trailer and enjoyed it, but shared future plans:

“We’re going back next summer w/o the trailer, flying to LA and driving east. Looking forward to being a little more nimble.”

The pattern across RV groups is simple:

  • Smaller rigs (Class B, short Class C, under-20′ trailers) get more spontaneous side trips and easier parking.
  • Larger rigs (30–40′) get more comfort and storage but require more planning, especially in cities and historic downtowns.

5.3 Would You Do It Again in an RV?

For some people, Route 66 is a once-in-a-lifetime trip.

“I enjoyed it… but I also don’t plan on doing it a second time.” – Anthony J. Mignella

I see that a lot: RVers are grateful they did it, but a second trip might happen in a car, on a motorcycle, or just in smaller segments.


6. State-by-State Route 66 RV Guide (Illinois to California)

A horizontal collage of Route 66 signs from Illinois, Texas, Arizona, and California

This overview blends real traveler experiences with official guidance from the
National Park Service Route 66 program.

Illinois: Chicago to Springfield

Difficulty: 🟢 Easy

  • Chicago traffic and parking are the only major issues; the roads themselves are fine for RVs.
  • Many RVers overnight in Joliet and visit Chicago as a day trip.
  • The route includes classic downtown stretches, Route 66 signage, and historic stops.

Begin Historic Route 66” sign in downtown Chicago

Missouri: St. Louis to Carthage

Difficulty: 🟡 Moderate

  • Older town centers can have tight street parking and smaller convenience store lots.
  • St. Louis itself is busy; many RVers stay at St. Louis NE / Granite City KOA and drive in.
  • Great stops include Route 66 State Park and Meramec Caverns.

Kansas: Short but Charming

Difficulty: 🟢 Easy

  • Kansas only has about 13 miles of Route 66, but it’s scenic and easy for RVs.
  • Galena and Baxter Springs offer small-town charm and classic road-trip photo ops.

Oklahoma: Miami to Oklahoma City

Difficulty: 🟢 Easy

  • Some of the best-paved and best-marked segments for RVs.
  • Tulsa and Oklahoma City have good services and multiple RV park options.
  • Plenty of roadside attractions and Route 66 museums to break up drive days.

Texas: Shamrock to Amarillo

Difficulty: 🟢 Easy

  • Flat, open, and RV-friendly.
  • Don’t miss Cadillac Ranch and the Route 66 historic district in Amarillo.

New Mexico: Tucumcari to Gallup

Difficulty: 🟡 Moderate

  • Mix of high plains and mountain driving, especially around Santa Fe.
  • Tucumcari offers classic neon motels and RV park options, including KOA.
  • The Santa Fe KOA near Las Vegas, NM, earned praise from Anthony for location and access.

Nighttime neon motel row in Tucumcari with an RV in the distance

If you like to mix in free or low-cost spots between RV parks, bookmark our roundup of the best apps for finding free campsites—the same tools work great across New Mexico and the high plains.

Arizona: Holbrook to Kingman, Oatman & Beyond

Difficulty: 🟡 to 🔴

  • Most of I-40-adjacent segments are fine for any RV.
  • The Meteor Crater RV Park near Winslow is a popular stop; details at
    Meteor Crater Visitor Info.
  • The critical red-zone is the Oatman Grade eastbound via Sitgreaves Pass. Large rigs should avoid this alignment.

Narrow mountain highway near Oatman with warning signs visible

Arizona is also where our Google Maps method for finding dispersed camping starts to shine, especially in areas where public land and national forests intersect the Route 66 corridor.

California: Needles to Santa Monica

Difficulty: 🟢 Easy (Road) / 🟡 Moderate (Traffic & Heat)

  • Road quality is generally fine; summer heat is the main hazard near Needles and Barstow.
  • Malibu Beach RV Park (often called Malibu RV Park or Surf Outpost) offers pricey but spectacular coastal views.
  • Santa Monica can be a zoo for RV parking; many end the “Route 66 journey” just outside the pier and visit it by car or rideshare.

RV perched on a hill with ocean and Pacific Coast Highway visible


7. Verified Campground Stops (State-by-State)

Minimalist map with labeled pins showing each campground Anthony used along Route 66

Traveler Anthony J. Mignella shared his full campground list after towing a 30-foot travel trailer along Route 66 and beyond. We’ve reorganized his stops by state and region to make planning easier.

If you’re evaluating whether a campground membership is worth it for trips like this, our comparison of RV club memberships that actually save money will help you prioritize KOA, Good Sam, Passport America, and others.

📍 Ohio

  • Streetsboro, OH: KOA Streetsboro – convenient first stop outbound from the Northeast.
  • Zanesville, OH: National Road Campground – used on the return leg.

📍 Illinois & Missouri

  • Joliet, IL: Martin’s Camping Ground – practical base for a Chicago day trip without driving the RV into downtown.
  • Springfield, IL: KOA Springfield – positioned near classic Route 66 attractions.
  • Granite City, IL: St. Louis NE / Granite City KOA – big-rig friendly and used twice (outbound and return) as a St. Louis hub.
  • Carthage, MO: Ballards Campground – useful one-night transit stop.

📍 Oklahoma & Texas

  • Tulsa, OK: Mingo RV Park – convenient for a city stop with full hookups.
  • Shamrock, TX: Texas 66 RV Park – right along the Route 66 corridor.

📍 New Mexico

  • Tucumcari, NM: Tucumcari KOA – near the famous neon motel strip.
  • Las Vegas, NM (serving Santa Fe): Santa Fe KOA – Anthony’s multi-night base for exploring Santa Fe; located off I-25 but aligned with the Route 66 corridor.
  • Gallup, NM: USA RV Park – popular full-service stop on many Route 66 itineraries.

📍 Arizona

  • Near Winslow, AZ: Meteor Crater RV Park – convenient for visiting Meteor Crater and exploring the area around Winslow (“standing on a corner” photo ops optional).

📍 California

  • Needles, CA: Desert View RV Resort – used while rerouting around the Oatman length restriction.
  • Twentynine Palms, CA: 29 Palms RV Resort – basecamp for a Joshua Tree National Park side trip.
  • Malibu, CA: Malibu Beach RV Park (Surf Outpost) – Anthony’s most expensive but most scenic stop, overlooking the Pacific.

📍 Nevada, Utah & Colorado (Return Trip)

  • Pahrump, NV: Preferred RV Resort – used as a base for exploring the Death Valley region.
  • Las Vegas, NV: Oasis Las Vegas RV Resort – large, well-appointed resort with easy Uber access to the Strip.
  • Kanab, UT: Grand Plateau RV Park – ideal for visiting Zion and Bryce Canyon on a side trip.
  • Bluff, UT: Cadillac Ranch RV Park – positioned for Monument Valley and Four Corners excursions.
  • Durango, CO: Durango RV Park – springboard for the Durango & Silverton train or local mountain activities.
  • Colorado Springs, CO: Pikes Peak RV Park – tight sites but close to town and local attractions.
  • Salina, KS: Salina Campground – practical overnight stop near I-70.

You don’t need to duplicate Anthony’s exact route, but his list proves that a 30-foot trailer can successfully string together KOAs and independent parks across the entire corridor.


8. Three Ready-to-Use Route 66 RV Itineraries

Simple planner graphic showing a 12-day, 21-day and 30-day strip labeled with key city stops along route 66

8.1 12-Day “Fast Track” Itinerary (Big-Rig Friendly)

This option favors RV-friendly routing and bigger daily mileage, aiming to hit the major highlights without lingering long in each stop.

Day Segment Approx. Miles Notes
1 Chicago → Joliet 45 Start Route 66, overnight in Joliet.
2 Joliet → Springfield, IL 200 Historic stops and Route 66 museums.
3 Springfield → St. Louis / Granite City 100 Visit Chain of Rocks Bridge, stay at KOA.
4 St. Louis → Carthage, MO 280 Scenic Missouri segments, classic diners.
5 Carthage → Tulsa, OK 120 Easy driving, settle into Oklahoma rhythm.
6 Tulsa → Oklahoma City 120 Spend extra time in OKC if desired.
7 OKC → Shamrock, TX 165 Cross into Texas Panhandle.
8 Shamrock → Tucumcari, NM 115 Neon motel row and RV parks.
9 Tucumcari → Santa Fe area (Las Vegas, NM) 185 Stay at Santa Fe KOA, day trip into town.
10 Santa Fe → Gallup, NM 200 Scenic high-desert stretches.
11 Gallup → Kingman, AZ (via I-40) 310 Optional Meteor Crater stop near Winslow.
12 Kingman → LA / Santa Monica (I-40 & freeways) 345 End at Santa Monica Pier, then find RV-appropriate overnight.

Before you pull out of the driveway, pair this itinerary with our printable pre-trip checklist for motorhomes and travel trailers so you’re not chasing last-minute fixes mid-route.

8.2 21-Day “Immersion” Itinerary

Double the time, same route, much deeper experience. You’ll add:

  • Zero-days in Tulsa, Santa Fe, and Flagstaff.
  • Extra time in Oklahoma museums and Arizona national parks or monuments off-route.
  • More downtown walks and local diners instead of always cooking in the rig.

Structure is similar to the 12-day plan but with every 2–3 drive days followed by a lighter or zero day. Most RVers using this style aim for 100–200 miles on drive days and add at least one extra night in the places they like most.

As you slow the pace down, your campsite routine matters more. Our RV campsite setup and cleanup checklist keeps arrivals and departures predictable even when you’re tired.

8.3 30-Day “Collector” Itinerary

This is where you start chasing specific alignments, neon, ghost towns, and interpretive centers documented by the
NPS Route 66 itinerary.

Expect:

  • Multiple nights in key hubs like Springfield, Tulsa, Santa Fe, Flagstaff, and Barstow.
  • High mileage on some days, followed by multiple short days of only 50–90 miles.
  • Intentional detours to sites that aren’t directly on Route 66 but are part of the broader story.

9. Seasonal Timing, Weather & Safety Considerations

RV driving under dramatic storm clouds on open plains

9.1 Best Seasons for RV Travel

Spring (March–May): Often the sweet spot—milder temperatures, lower crowds, and manageable winds.

Summer (June–August): School holidays, more traffic, and serious heat in the desert segments around Needles and Barstow. Air conditioning load, tire temperatures, and coolant all need attention.

Fall (September–October): Cooler nights, pleasant days, and fewer crowds. Great time for photography and hiking detours.

Winter (November–February): Limited services in some small towns. Snow and ice possible in Illinois, Missouri, New Mexico high country, and northern Arizona.

9.2 Wind, Heat, and Storm Risk

  • High winds on the plains and high desert can make travel uncomfortable (or unsafe) for tall Class A rigs.
  • Heat waves in the Mojave region make midday breakdowns more serious—carry extra water and keep your rig well-maintained.
  • Severe storms in shoulder seasons can bring hail and heavy rain in parts of Oklahoma and Texas.

The
NPS Route 66 “Plan Your Visit” page offers maps and park connections you can use to layer in national park stops safely.


10. What Does It Cost to RV Route 66?

Laptop open to a simple trip budget spreadsheet on an RV dinette

Exact costs vary based on your rig, fuel prices, and how often you eat out, but you can build a reasonable ballpark with a few assumptions.

10.1 Simple Cost Framework (Example for a 3-Week Trip)

  • Distance: Roughly 2,400–2,800 miles when you include side trips and repositioning.
  • Fuel: If your RV averages 8–10 mpg and fuel averages $3.50–$4.25 per gallon, you’re looking at roughly $900–$1,500 in fuel for the core trip.
  • Campgrounds: Many RVers pay $35–$70 per night, mixing KOAs with private and municipal parks. Over 21–25 nights, that’s roughly $900–$1,750.
  • Food: Groceries vs restaurants changes this the most. A modest restaurant/grocery mix might add another $600–$1,000 over three weeks.
  • Attractions: Museums, tours, and parks can range from free to $30–$40 per person; budget a few hundred dollars if you like doing “all the things.”

With those assumptions, a typical couple can easily land in a range of roughly $2,500–$4,000+ for a 3-week Route 66 RV trip. You can spend less by boondocking more and cooking in the rig, or more by staying at premium resorts and eating out frequently.


11. Fuel Gaps, Dump Stations & Alternate Routes

Modern RV fueling at a vintage Route 66 service station with restored pumps

11.1 Fuel Planning

Most of Route 66 runs close to I-40 and other major corridors, but fuel prices and availability vary, especially for diesel and larger diesel islands.

A conservative fuel strategy:

  • Refuel when you hit half a tank in New Mexico and Arizona, particularly between Tucumcari, Santa Rosa, Albuquerque, Gallup, and Winslow/Flagstaff.
  • Avoid relying on tiny crossroads stations with a single pump if you have a large diesel rig.
  • Expect higher prices in desert segments around Needles and Barstow; topping off earlier can save money and stress.

If you rely heavily on tech for locating fuel, dump stations, and RV-friendly exits, our in-depth AllStays Camp & RV app guide shows exactly how to filter for big rigs, low bridges, and services along a multi-state route.

11.2 Dump & Water Strategy

  • Plan to use KOAs and bigger private parks for guaranteed dump/water access.
  • Supplement with city parks, travel centers, and occasionally fairgrounds when available.
  • Use filters in Campendium and
    AllStays to map dump stations along your route.

11.3 Alternate Routes (When to Bail Off Historic Alignments)

There’s no prize for forcing a big RV down a narrow, poorly marked historic alignment if you’re uncomfortable. In practice, most savvy RVers:

  • Favor business loops and frontage roads that carry the Route 66 designation but are better maintained.
  • Drop onto I-40 when storms, wind, or traffic make side roads a bad idea.
  • Avoid the Oatman east approach entirely in large rigs and use the I-40 / west-approach combo instead.

12. Should You Bring a Toad?

Class A motorhome towing a Jeep on a quiet highway with distant mesas

Whether to bring a toad (towed car) is one of the biggest Route 66 RV decisions.

When a Toad Helps

  • You’re in a Class A or large Class C and want to explore dense cities like Chicago, St. Louis, Santa Fe, and LA.
  • You prefer to leave the RV in a stable campground for several days and day-trip out.
  • You plan to visit side attractions with limited parking, such as small museums or urban restaurants.

When You Can Skip It

  • You’re traveling in a Class B or compact Class C and are comfortable threading it through older downtowns.
  • Your itinerary leans more toward small towns, viewpoints, and roadside stops with easier parking.
  • You’re happy to rely on rideshare in the largest urban centers instead of towing.

Several travelers mentioned that parking can be annoying but manageable if you accept that you won’t see everything in a single RV pass. A toad simply widens your options.

If your long-term goal includes more national park-heavy trips, see how we handle parking tags, size limits, and access in our Great Smoky Mountains National Park RV guide.


13. Myth vs Reality: What RVers Get Wrong About Route 66

Myth 1: “Route 66 Will Destroy Your RV.”

Reality: While there are rough patches, travelers like Scott McCoy report that modern RVs handle the route just fine. You’ll drive slower, but you’re not sacrificing your axles to the road gods.

Myth 2: “You Can’t Do Route 66 in a Big Rig.”

Reality: Anthony’s 30 ft travel trailer completed the route with only a few workarounds, and plenty of Class A owners report similar experiences. The key is respecting the Oatman grade and tight urban parking.

Myth 3: “You Need Every Night Reserved Months in Advance.”

Reality: Some RVers book nearly everything ahead of time; others do day-of reservations except for a handful of high-demand stops. Both have worked. Seasonal timing and your personal risk tolerance matter more than any universal rule.

Myth 4: “You Have to See Every Alignment to ‘Do It Right.’”

Reality: There is no single “correct” Route 66 experience. For many RVers, safety, comfort, and a handful of favorites beat chasing every historic lane.

If you’re also planning more general boondocking or off-grid trips, your next stops should be our guides to the best apps for finding free campsites and best internet options for RV living in 2025—both written from a real-world, full-trip perspective.

🔑 Key Takeaways

  • Route 66 is roughly 80–90% RV-accessible for modern rigs.
  • The Oatman Grade is the only major alignment most big rigs should avoid.
  • Urban parking requires more planning than road conditions.
  • Book Chicago/Joliet, Santa Fe, and Malibu in advance; keep the rest flexible.
  • 21–30 days is a realistic timeline for an enjoyable trip.

14. Route 66 RV FAQ

Is Route 66 RV-friendly?

Yes. Around 80–90% of the drivable Route 66 corridor is suitable for modern RVs, including large motorhomes. The main exception is the steep, narrow Oatman Grade eastbound into town, which most big rigs should avoid.

If you’re brand new to long-distance RV travel, start by learning how to use Google Maps to find free dispersed camping sites and where you can safely park your RV for free overnight at major chains.

What size RV is best for Route 66?

Anything in the 22–30 ft range is a sweet spot—big enough for comfort, small enough to be nimble in towns and parking lots. Larger rigs can still do the route with more planning and a few detours.

How long does an RV trip on Route 66 take?

Fast-track trips can be done in 10–14 days, but most RVers are happier with 21–30 days. That gives room for weather, repairs, and side trips without feeling rushed.

Do I really need reservations?

You should reserve in high-demand locations like Santa Fe and Malibu, and during peak summer or holiday windows. Outside those hotspots, same-day or short-notice booking often works.

What’s the safest way for a big rig to visit Oatman?

Run I-40 between Kingman and Needles with your RV, then approach Oatman from the west in a toad or smaller vehicle if you want to experience the town and the burros without taking a large rig over Sitgreaves Pass.


15. Authoritative References & Planning Resources

Laptop displaying an NPS Route 66 page next to a paper map and coffee mug on an RV table

The 3-Layer Guide to RV Insurance

The 3-Layer Guide to RV Insurance

Legal Requirements, Essential Protection & Full-Timer Coverage

This guide simplifies RV insurance by breaking it down into three essential layers: legal requirements, essential protection, and specialty add-ons, to help RV owners protect their investment and ensure peace of mind.

What is RV Insurance and Why is it Essential?

RV insurance is a specialized policy designed to protect recreational vehicles from damage, liabilities, and losses. It is crucial due to the significant investment RVs represent and the potential for substantial financial burdens from accidents or unforeseen events. Insurance may also be legally required, depending on the RV type and state laws.

Understanding the Unique Needs of RV Owners

RV owners face unique risks because RVs serve as both transportation and residences. This dual nature requires insurance to cover not only road accidents but also liabilities and damages that can occur while parked or camping, such as guest injuries or damage to personal belongings inside the RV.

The 3-Layer Approach to RV Insurance

The guide proposes a three-layer approach:

  • Layer 1: Legal & Lender Requirements (“Must-Haves”): Focuses on meeting basic legal and financial obligations.
  • Layer 2: Essential Protection (“Should-Haves”): Covers essential protections for accidents, theft, and weather events.
  • Layer 3: Lifestyle Coverage (“Specialty” Add-Ons): Includes specialized coverages for specific RVing lifestyles.

Couple outside RV


The Ultimate Budget Boondocking Guide

The Ultimate Budget Boondocking Guide

Camp Free, Save Big, Explore More

What is Boondocking and Why Go Budget?

Boondocking is camping in an RV on undeveloped land without hookups, while budget boondocking emphasizes doing so affordably. Boondocking, also known as dry camping or dispersed camping, allows RVers to experience nature away from crowded campgrounds (Roadtrippers.com). This guide explores how to embrace budget boondocking, balancing adventure with financial savings.

Understanding the Basics: Your Budget-Friendly Boondocking Foundation

Couple enjoying sunset by camper.

Boondocking is legal on many public lands, but understanding the specific rules and regulations is crucial. The Bureau of Land Management (BLM) and National Forest Service (NFS) often allow dispersed camping, but restrictions may apply (BLM.gov). Always check for stay limits, permit requirements, and fire restrictions before setting up camp. The “Leave No Trace” principles are essential to protecting these free spots for everyone.

Types of Free & Low-Cost RV Camping

There are several types of free and low-cost RV camping, each offering a unique experience. Dispersed camping provides true wilderness freedom, while roadside overnighting (Wallydocking, rest stops) offers convenient, though less scenic, options. Membership programs like Harvest Hosts and Boondockers Welcome provide unique stays on private properties for a yearly fee (Boondockerswelcome.com). Initial Membership Cost: ~$50-100/year USD

Finding Your Free Campsite: Tools and Strategies for Budget Travelers

Essential Apps & Websites for Spotting Free Sites

Several apps and websites can help you discover free campsites. Campendium, iOverlander, and FreeCampsites.net are popular resources for finding boondocking locations. Google Maps satellite view can be invaluable for scouting potential spots, assessing accessibility, and identifying potential hazards.

Local Knowledge: Ranger Stations & Fellow RVers

Ranger stations and fellow RVers are invaluable sources of local knowledge for finding boondocking spots. Rangers can provide information on current conditions, restrictions, and hidden gems in the area. Fellow RVers often share their experiences and recommendations on forums and social media groups.

Choosing the Right Spot: Accessibility, Safety, and Connectivity

Choosing the right boondocking spot involves considering accessibility, safety, and connectivity. Rig size considerations are paramount; ensure your RV can safely navigate the roads and terrain leading to the site. Cell signal and satellite internet access may be important for staying connected and safe.

Preparing Your RV for Off-Grid Living: Smart Gear for Saving Money

Water Wisdom: Conserving Your Most Precious Resource

Conserving water is crucial for extending your boondocking stays. Fresh water capacity and management are key; know how much water your RV holds and plan your usage accordingly. Grey & black tank management is also important, portable waste tanks can provide extra capacity. Cost: ~$100-250 USD. Adopting water-saving habits like navy showers can significantly reduce water consumption. Water filters & purification systems help ensure access to safe drinking water. Cost: ~$20-150 USD

Powering Your Adventure: Budget-Conscious Energy Solutions

Budget-conscious energy solutions are essential for powering your boondocking adventures. Battery systems are the foundation; house batteries store power for later use, and upgrades can increase capacity. Solar power offers a renewable energy source, and even a basic portable panel can make a difference. Generators provide a reliable backup power source, but use them wisely to conserve fuel and minimize noise. LED lighting upgrades are a simple way to reduce energy consumption. Cost: ~$5-50 USD

Solar Power Basics: Getting Started Affordably

Getting started with solar power affordably is easier than you might think. Portable solar panels are a great entry point, offering flexibility and ease of setup. Cost: ~$200-500 USD. Inverters convert DC power from your batteries or solar panels to AC power for running household appliances. Cost: ~$100-400 USD.

Packing Smart: Food, Essentials, and Emergency Preparedness

Packing smart is crucial for a successful and safe boondocking trip. Meal planning and cooking on-board can save money and reduce waste. An Instant Pot or grill can be versatile cooking tools. An emergency kit and roadside assistance plan are essential for dealing with unexpected situations. Basic Kit Cost: ~$50-150 USD

Boondocking Etiquette: Being a Good Steward of Free Spaces

Quiet Hours & Generator Use

Respecting quiet hours and using generators responsibly is essential for maintaining good boondocking etiquette. Be mindful of noise levels, especially during established quiet hours. Limit generator use to necessary times and consider using quieter models.

Waste Disposal: Pack It In, Pack It Out

Proper waste disposal is crucial for preserving the natural beauty of boondocking locations. The “pack it in, pack it out” principle is fundamental; take all trash and waste with you when you leave. Dispose of waste properly at designated facilities.

Respecting Other Campers & Wildlife

Respecting other campers and wildlife ensures a harmonious boondocking experience. Maintain a safe distance from other campsites and avoid disturbing their privacy. Observe wildlife from a distance and never feed them.

Maximizing Your Budget Boondocking Experience: Advanced Tips

Slow Travel: Save on Fuel, Savor the Journey

Slow travel can significantly reduce fuel consumption and enhance your boondocking experience. Driving at slower speeds improves fuel efficiency. Savoring the journey allows you to explore hidden gems and connect with the local environment.

Finding Free or Low-Cost Activities

Many free or low-cost activities can enrich your boondocking adventures. Hiking, biking, and nature photography are excellent ways to explore the outdoors. Visiting local museums, parks, and historical sites can provide cultural experiences without breaking the bank.

Seasonal Considerations: Chasing Good Weather to Save on HVAC

Chasing good weather can reduce your reliance on heating and cooling systems, saving energy and money. Boondocking in milder climates minimizes the need for HVAC. Consider seasonal migrations to optimize your comfort and minimize energy consumption.

Common Boondocking Mistakes to Avoid (and How to Save Money by Avoiding Them)

Underestimating Resource Needs (Water, Power)

Underestimating your resource needs is a common boondocking mistake that can lead to discomfort and unnecessary expenses. Carefully calculate your water and power consumption based on your planned activities and climate. Bring extra supplies and have backup plans in case of unexpected shortages.

Poor Trip Planning (Fuel, Supplies)

Poor trip planning can result in wasted fuel, missed opportunities, and potential safety hazards. Plan your route carefully, taking into account road conditions, fuel stops, and supply availability. Check weather forecasts and be prepared for changing conditions.

Ignoring RV Maintenance

Ignoring RV maintenance can lead to costly repairs and downtime. Regularly inspect your RV’s systems, including tires, brakes, batteries, and plumbing. Address minor issues promptly to prevent them from escalating into major problems.

Conclusion: Your Path to Affordable RV Adventures

Recap of Key Budget Boondocking Principles

Budget boondocking combines the freedom of RV travel with the financial benefits of free camping. By understanding the rules and regulations, conserving resources, and planning carefully, you can enjoy incredible adventures without breaking the bank.

Embrace the Journey, Not the Expense

Embrace the journey and not the expense and discover the joys of affordable RV travel.

FAQs

Q: What are the best free camping spots in the US?
A: National Forests and BLM land are great options for free camping in the US.

Q: What gear do I need for boondocking?
A: Necessary gear for boondocking can include a tent or RV, sleeping bags, cooking equipment, and more. We estimate that the necessary equipment cost will be around 200-300 USD.

Q: Are there any permits or fees required for boondocking?
A: Some areas may require permits or have fees for boondocking. It’s important to research local regulations and restrictions before you go.

Q: How much solar power do I need for boondocking?
A: The amount of solar power you need for boondocking will depend on your energy usage. A 100-watt solar panel is a good starting point for most boondockers.

Q: Can I use a portable generator while boondocking?
A: Yes, you can use a portable generator while boondocking, but it’s important to be aware of noise regulations and fuel usage.

Takeaway

Boondocking on a budget can be a rewarding and cost-effective way to experience the great outdoors. By following the tips and advice in this ultimate guide, you can plan your trip, conserve resources, and dispose of waste in an environmentally-friendly way. We encourage you to try boondocking for yourself, and to share your experiences with other outdoor enthusiasts.

Resources

    • United States Forest Service (USFS) Dispersed Camping Guidelines: The United States Forest Service (USFS) provides guidelines for dispersed camping (https://www.fs.usda.gov/visit/know-before-you-go/dispersed-camping), which is camping outside of designated campgrounds in national forests. The guidelines cover topics such as choosing a campsite, setting up camp, and practicing Leave No Trace principles to minimize impact on the environment.
    • Bureau of Land Management (BLM) Camping Information: This website (https://www.blm.gov/programs/recreation/camping) provides information about camping on public lands managed by the Bureau of Land Management (BLM) in the United States. It includes information on campgrounds, fees, permits, and other regulations to help visitors plan their camping trip.
    • Campendium’s Comprehensive Guide to Free Camping in the US: This comprehensive guide (https://www.campendium.com/free-camping) provides information on free camping options across the United States, including national forests, Bureau of Land Management lands, and other public lands. The guide includes details on amenities, accessibility, and nearby attractions.
    • Solar Power for Boondocking and RV Camping: This website (https://www.parkedinparadise.com/rv-solar/) offers information on using solar power for boondocking and RV camping, including tips on selecting solar panels, installing a solar power system, and maintaining it. It also includes information on battery systems and inverters to help campers stay powered up while off the grid.
    • Waste Disposal Tips and Regulations for Boondocking: This website (https://www.thewanderingrv.com/rv-waste-disposal/) provides guidance on how to properly dispose of waste while boondocking or camping off the grid. It includes information on black water and gray water tanks, composting toilets, and other waste disposal methods. The website also highlights regulations and best practices to help campers minimize their impact on the environment.
The Ultimate Guide to Waterfront RV Parks

The Ultimate Guide to Waterfront RV Parks

Definition and Appeal of Waterfront RV Parks

Waterfront RV parks are curated destinations offering dedicated spots for RVs with direct access to water bodies like oceans or lakes. They provide a blend of freedom, comfort, and immersion in nature, allowing RVers to wake up to beautiful views and enjoy the amenities of their own mobile homes.

Essential Elements of a Quality Waterfront RV Park

  • Full Hookups: Water, sewer, and power are considered non-negotiable.
  • Reliable Wi-Fi: Essential for digital nomads and general connectivity.
  • Clean and Well-Maintained Facilities: A fundamental requirement for any respectable establishment.
  • Location: A prime draw, offering stunning views of sunrises, sunsets, oceans, or lakes.
  • Recreational Access: Immediate proximity to activities like swimming, fishing, kayaking, or beach strolling.
  • Resort-Style Perks: Desired amenities include pools, hot tubs, playgrounds, dog parks, and clubhouses. Some parks offer on-site restaurants.
  • Sense of Community: Opportunities for fellow travelers to connect and share experiences.
  • Pet-Friendliness: Welcoming environments for pets are highly valued.

Grand Canyon National Park Trailer Village
Image Credit: Grand Canyon National Park Trailer Village / flickr

Common Frustrations with Waterfront RV Parks

  • Unreliable Wi-Fi: Spotty internet connectivity is a frequent complaint.
  • Cramped and Uneven Sites: Poorly maintained or tight parking spaces.
  • Neglected Facilities: A lack of upkeep in common areas.
  • Exorbitant Prices: High costs for premium waterfront locations.
  • Erosion of Rustic Charm: Concerns that an overemphasis on luxury is diminishing the traditional RVing appeal.

Historical Evolution of RV Camping

  • Early 1900s: “Auto camps” were rudimentary areas for tent camping beside vehicles, lacking basic amenities. Seaside stops were similarly informal.
  • Post-WWII (1950s-1960s): The rise of the American road trip and more sophisticated RVs led to an explosion in demand for dedicated RV parks. Pioneers like KOA emerged, offering essential amenities.
  • Increasingly Luxurious RVs: As RVs became more advanced, the desire for direct waterfront parking grew, leading to the development of coastal RV parks.

Spotlight on Top Waterfront RV Parks

Texas Gulf Coast

South Padre Island KOA
South Padre Island KOA Image Credit: Larry Pearson / flickr

  • Loyd Park (Grand Prairie): Family-friendly with pools and playgrounds; potential extra parking fees.
  • Dellanera RV Park (Galveston): Offers full hookups, Wi-Fi, and ocean views; sites can be snug for larger rigs.
  • Galveston Island RV Resort: Features fishing, horseshoes, a pool, and an on-site store.
  • South Padre Island KOA: Year-round pool, dog park, workout facilities; some past visitors noted cleanliness issues.

Florida’s Sunny Sanctuaries

Grassy Key RV Park & Resort
Grassy Key RV Park & Resort Image Credit: Grassy Key RV Park & Resort

  • Bahia Honda State Park: Excellent for snorkeling and fishing; requires booking well in advance; maximum RV length of 50 feet.
  • Anastasia State Park (St. Augustine): Ideal for nature lovers (hiking, kayaking, bird watching); communal dump station; 40ft RV length restriction.
  • Henderson Beach State Park: Over a mile of shoreline; pet-friendly; central dump station; accommodates RVs up to 60 feet.
  • Red Coconut RV Park (Fort Myers Beach): Beachfront views, full hookups, social events; popular choice.
  • Grassy Key RV Park & Resort (Marathon): Beach access, pool, free Wi-Fi, boat dock.

Arizona’s Aquatic Adventures (Lakes and Rivers)

Serene lake surrounded by autumn foliage. Patagonia Lake State Park via ALAN SCHMIERER, CC0, via Wikimedia Commons

  • Lake Pleasant RV Park (Peoria): Developed sites, boat rentals for exploring Lake Pleasant.
  • Patagonia Lake State Park: Lakeside camping for fishing and relaxation in picturesque scenery.
  • Dead Horse Ranch State Park (Cottonwood): Features lagoons and Verde River access; popular for hiking and horseback riding.
  • Antelope Point RV Park (Lake Powell): Full hookups, views of Tower Butte, direct access to Lake Powell for watersports.

Controversies and Challenges

  • Environmental Concerns: Erosion, habitat loss, strain on water resources, waste management (plastics), noise, and light pollution.
  • Land-Use Conflicts: Disputes over public access vs. private development, obstruction of scenic views, and NIMBYism from local communities.
  • Overcrowding: Difficulty securing desirable spots due to increased RV popularity, straining infrastructure (water, electricity, sewer).
  • Long-Term Residents: Can alter park dynamics and limit availability for short-term visitors.
  • RV Age Limits: Some parks impose restrictions, raising debates about fairness and sustainability.

The Future of Waterfront RVing

  • Upscale Resorts: Expect more luxury accommodations like cabins and yurts, potentially with robotic concierges.
  • Technology Integration: Seamless app-based check-ins, high-speed Wi-Fi, smart energy management, and EV charging stations.
  • Sustainability: Increased adoption of renewable energy, advanced water conservation, and zero-waste programs.
  • Climate Change Adaptation: Resilient infrastructure (elevated sites, flood-resistant buildings), smart shoreline protection, dune restoration, wetland preservation, and potentially “managed retreat” (relocation inland).
  • Focus on Wellness and Family: Growth in mental wellness trips, multi-generational adventures, and nostalgic road trips.
  • Digital Nomad Support: Dedicated co-working spaces and incentives for longer, work-friendly stays.

Conclusion

Waterfront RV parks have evolved from basic camping spots to sophisticated resorts, offering enriching experiences by America’s waterways. The industry is continuously adapting to new trends, technologies, and challenges, with a perfect spot available for various preferences, from breathtaking views to peaceful retreats.