Last updated: | Author:Chuck Price, 35+ years of RV camping and boondocking, featured on CBC Radio’s Cost of Living.
A first-person breakeven analysis of the America the Beautiful Senior Pass, AARP, Good Sam, Escapees, Passport America, and state park senior programs, with the math shown so you can run it against your own calendar.
Quick answer
Must-know: The America the Beautiful Senior Pass pays for itself in about 7 nights of federal camping. It costs $80 for life.
Biggest ROI killers: Blackout dates, a park network that does not match your route, and forgetting to ask for the rate at check-in.
Best for: Seniors 62 and older who camp on federal land, plus one low-cost membership matched to how you actually travel.
Confirm before you buy: Current pass and membership prices, since they change. Verify at each source before you join or renew.
Why the Math Matters More Than the Marketing
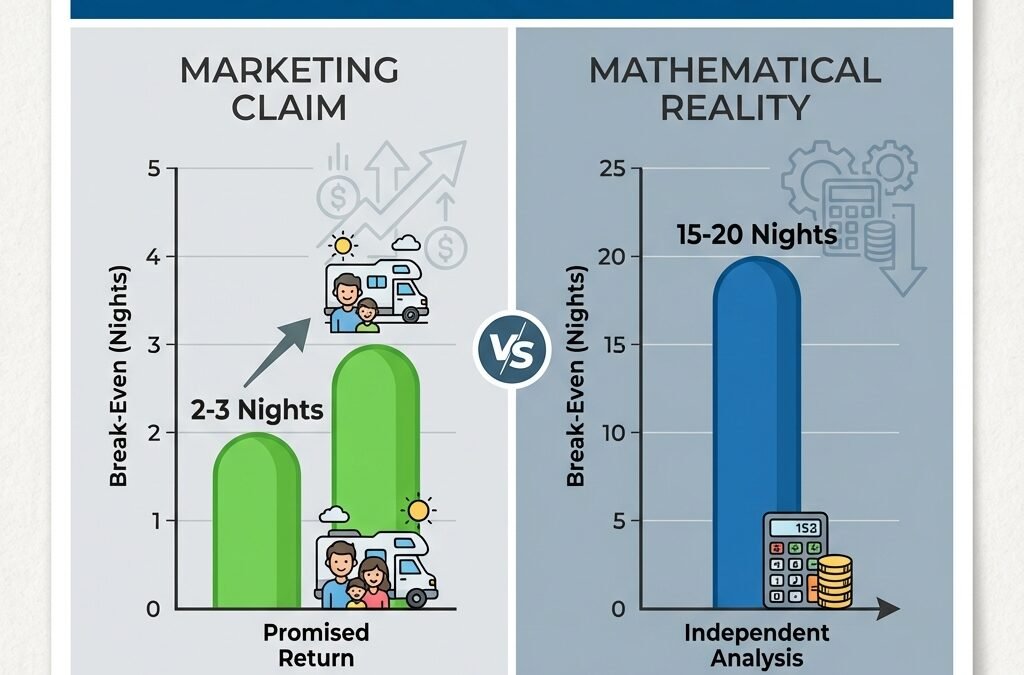
Senior camping discounts are sold on headline percentages, and the headline rarely matches your receipt. The America the Beautiful Senior Pass can take 50% off camping fees at many federal sites. Passport America advertises 50% off at participating parks. AARP promises up to 10% off at thousands of campgrounds. Those numbers look strong on a brochure. They look different once you run them against the parks you actually visit and the blackout dates in the fine print.
I have camped and boondocked for more than 35 years and carried most of these memberships at one point or another. The ones that paid off were not always the ones with the biggest advertised discount. They were the ones whose park network matched where I travel and whose breakeven I could clear in a normal season.
This is not a roundup of everything labeled a senior discount. It is a breakeven breakdown of the programs that move the needle, with the math shown so you can run it against your own numbers.
A note on boondocking. When this guide says boondocking, it means camping without hookups, usually on public land managed by the Bureau of Land Management (BLM) or the U.S. Forest Service. You handle your own power, water, and waste. It is quieter, often free, and flexible once you know the rules. New to it? Start with our boondocking guide.
The America the Beautiful Senior Pass: Breakeven in About 7 Nights
The Senior Pass breaks even in about 7 nights at federal campgrounds. At $80 for a lifetime pass, or $20 a year, it gives free entrance to most federal recreation sites and 50% off camping fees at sites run by six federal agencies. The National Park Service states the Senior Pass “may provide a 50 percent discount on some amenity fees” such as camping. U.S. citizens and residents age 62 and older qualify. The discount does not apply to utility surcharges, cabins, or flat-rate group sites. Prices are current as of September 2026, so verify before buying.
The six agencies that honor the pass for camping discounts:
National Park Service (NPS)
U.S. Forest Service (USFS)
Bureau of Land Management (BLM)
U.S. Army Corps of Engineers (USACE)
Bureau of Reclamation
U.S. Fish and Wildlife Service
The Senior Pass gives 50% off expanded amenity fees at most participating federal sites. Most basic federal sites without hookups run $15 to $30 a night. Using the midpoint, the pass saves roughly $11 a night where it applies, an estimate rather than a guarantee.
Breakeven calculation (illustrative estimate)
Lifetime pass cost: $80
Assumed average savings per night: about $11 (50% off the $22.50 midpoint of a $15 to $30 site fee)
Breakeven: $80 divided by $11.25 equals about 7 nights
Result: at roughly $11 a night, seven or eight qualifying federal nights repays the lifetime pass in full. Your actual breakeven depends on the sites you use and current fees.
Most RVers hit that breakeven in their first season, not over a decade. Every discounted federal night after that is money back for the rest of your camping life.
Common misconception. Many RVers assume the biggest Senior Pass value is free park entrance.
The correction. In real RV use, camping discounts save far more than entrance waivers. A $25 entrance fee waived is a one-time benefit. A 50% cut on a $30 site saves $15 every night you are parked. Run enough nights and the camping discount dwarfs the entrance benefit.
One point that trips people up. The camping discount belongs to the Senior Pass and the Access Pass, not to the free Military or Veterans passes. Recreation.gov notes the standard pass “does not cover expanded amenity fees such as camping”. For the full pass-by-pass breakdown, including the military and veterans rules and Corps of Engineers specifics, see our America the Beautiful pass guide.
What the Senior Pass does not cover
The discount does not apply to:
Utility surcharges for electricity or sewer billed separately from the site fee
Cabins, yurts, or lodge rooms
Group sites billed at a flat rate rather than per night
State park systems, which run their own separate senior programs
The discount covers the single site you occupy. If you caravan with other rigs, each site needs its own qualifying pass holder to get the discount.
Annual pass or lifetime pass
The $20 annual pass is a fair starting point if your volume is uncertain. The switch to lifetime is simple math:
Annual pass for 4 years: $20 times 4 equals $80
Lifetime pass: $80 once
If you plan to camp more than four more seasons, the lifetime pass wins on day one of year five, assuming the annual price holds. Any future price increase moves that crossover sooner. For most RVers over 62, it is an easy call.
Where to buy it
Buy it online at the USGS store with a processing fee, or in person at most national parks and federal recreation sites that charge entrance, with no fee. Within driving distance of a federal site? Buy in person and skip the fee. Keep the pass in your glove box with your registration. It is checked at entry gates, not at checkout.
If you mostly boondock on free BLM land
The Senior Pass math shifts for full-time boondockers who rarely use developed campgrounds. Where it still pays off:
Developed federal sites for dump station access, water fill, and laundry
A few hookup nights to recharge after long off-grid stretches
Popular parks where dispersed options are limited, crowded, or seasonal
Even five or six discounted nights a year keep the lifetime ROI climbing. For how BLM land and dispersed camping work in practice, our BLM camping guide covers the rules.
RV Membership ROI: AARP, Good Sam, Escapees, Passport America, and AAA
No RV membership pays off unless you camp enough participating nights to beat its annual cost. Real savings per night differ from advertised percentages, because acceptance rates, blackout dates, and eligible-site rules cut into what you collect. AARP’s renewal price has moved in recent years, so verify the current rate at aarp.org before you run your number. At a rate near $20 and about $5 in real savings a night, that is roughly 4 nights to break even. Verify the current rate before you rely on that number. Canadian travelers see different park lists and should check our Canadian camping membership guide.
Five programs dominate the senior RV conversation, and each fits a different traveler. The table runs the breakeven math on a common basis. Prices were last verified September 2026. Confirm current rates before joining.
RV membership ROI comparison (verify current pricing before joining)
50% off participating parks (peak-season and weekend limits apply)
$15 to $20 (when accepted)
3 to 4 nights
Flexible travelers who camp midweek and off-peak consistently
*Prices last verified September 2026. Confirm current rates before joining or renewing: AARP, Good Sam, Escapees, Passport America, AAA. Average savings per night reflects illustrative real-world discounts at parks that accept each membership. Actual savings vary. Assumes a typical $40 to $45 nightly rate.
AARP: low cost, broad coverage, low risk
AARP is the first membership I point most senior RVers to. The breakeven is low enough that almost any season clears it, so verify the current rate at aarp.org and divide by your realistic per-night savings. The network covers KOA, thousands of independent parks, and participating chains. Hotel and travel discounts add value if you fly or book hotels on trip legs.
Choose AARP when you camp 10 to 50 nights a year at private or chain parks and want a no-risk start.
Skip it as your only card if you camp entirely on federal or free BLM land, since the discount applies only to participating private and chain parks.
Escapees RV Club: deep discounts for full-timers
Escapees discounts run 15% to 50% off at partner parks, plus member-owned parks with low flat rates. Full-timers who have dropped a fixed address need mail forwarding, and that service alone can cover the membership.
Choose Escapees when you camp more than 60 nights a year, are full-timing or close to it, or need mail forwarding and domicile support.
Skip it as your only card if you camp fewer than 30 nights a year and do not need mail forwarding. The math still works, but the value is thinner.
Good Sam: fuel savings change the math
Good Sam’s camping discount alone, about 10% at affiliated parks, puts breakeven at 8 to 10 nights. That is reasonable, not exceptional. Where it turns into an easy yes is for high-mileage RVers who burn a lot of fuel. A discount of $0.05 to $0.08 a gallon at participating stations adds up. At $0.06 a gallon, 2,000 gallons saves $120, more than triple the membership. At $0.05 a gallon the same mileage saves $100, still twice the fee.
Choose Good Sam when you drive 5,000+ RV miles a year and fuel up at participating chains.
Skip it as your primary card if you move rarely and do not shop at Camping World. The campground-only ROI is middling.
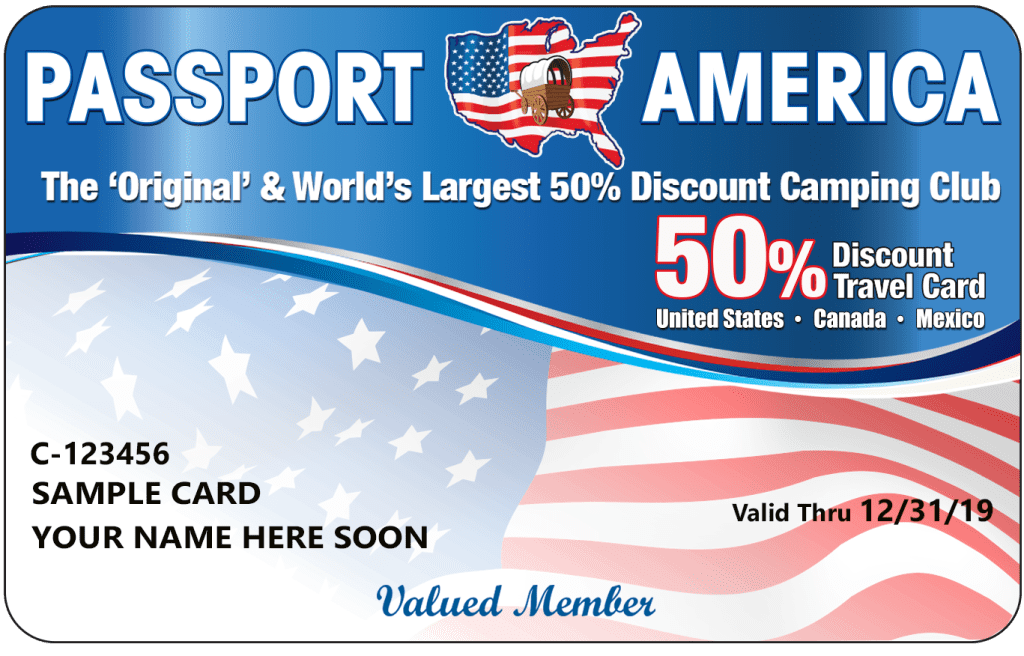
Passport America’s 50% headline gives it the fastest breakeven at 3 to 4 nights. The catch is peak-season blackouts, weekend limits, and a park network that needs route planning. When the pieces line up, midweek and off-peak at participating parks, the savings are real and large.
Choose Passport America when your travel is genuinely flexible and mostly midweek and off-peak.
Skip it as a core card if most of your camping falls on weekends or in July and August, when blackout dates block the discount.
AAA: roadside first, camping second
AAA pricing varies by region, so the $65 figure is a baseline. At that price, the camping discount needs 9 to 13 participating nights just to cover the fee before you count roadside value. The case for AAA is the bundle: roadside coverage, trip planning, hotel and cruise discounts, and the camping discount together. Bought for campground savings alone, it is hard to justify over AARP.
Choose AAA when you have no separate roadside coverage and you use hotel or travel discounts.
Skip it if your RV or insurance already provides roadside coverage and you want campground-only value. AARP delivers comparable camping discounts at a lower cost.
To keep the framework straight as you read on: the Senior Pass is the near-certain win for federal camping, one low-cost membership matched to your route covers private and chain parks, and state programs fill the gap for regional stays. Everything below is a matter of matching each tool to how you actually travel.
State Park Senior Discounts: The Underused Tool
Dozens of state park systems offer senior camping discounts that rival or beat private membership savings. Unlike the federal Senior Pass, state discounts are set by each state, so eligibility, amounts, and residency rules vary widely and change without notice. State discounts do not stack with the America the Beautiful Senior Pass. Always verify current terms at the official state site before booking. As two examples, Florida State Parks offers qualifying resident seniors about 50% off camping at many parks with residency proof, and West Virginia State Parks sets the senior age at 55, lower than most, and typically does not require residency. Both change, so confirm before you book.
State park senior RV discounts, illustrative overview (verify at each state site before booking)
The pattern I see in RV communities is consistent. Snowbirds and regional travelers quietly build their whole calendar around a handful of senior-friendly state systems. Florida and Louisiana get the most attention. Maryland, Georgia, and Washington draw seniors willing to travel in shoulder seasons, April into May and September into October, when availability is better and discounts stack with off-peak rates.
If your travel allows 7 to 14 nights in one park at a stretch, state senior discounts can out-earn most private memberships, especially when the locations are ones you would visit anyway and hiking, paddling, and ranger programs come with the site fee.
For extended stays on BLM land at the other end of the spectrum, our LTVA camping guide covers the federal long-term visitor area programs that run parallel to state senior discounts.
Stacking Discounts: Getting Below $30 a Night
Stacking a senior rate, a membership discount, and a weekday rate can cut a $42 site to under $29. Independent parks allow stacking more often than chains or federal campgrounds. The federal Senior Pass rate is not stackable, since the 50% is the final rate and no extra percentage comes off. The move that works is to ask one clear question rather than negotiating each discount.
How the sequence works
At independent private parks, the common stacking order is:
Senior discount applied to the base nightly rate.
Membership discount (AARP, Good Sam, or Escapees) applied to the new lower rate.
Off-season or weekday special layered on top when the park allows it.
Worked example: senior plus membership plus weekday
Base rate (full hookups): $42 a night
Senior discount (10%): $42 times 0.90 equals $37.80
Good Sam (10% on the lower rate): $37.80 times 0.90 equals $34.02
Weekday rate (15% off Sun to Thu): $34.02 times 0.85 equals $28.92
Result: $42 down to $28.92 a night. Savings of $13.08 a night, or $91.56 over 7 nights.
Combinations that usually do not stack
Passport America plus Good Sam: both are network discounts. Parks pick one program, not both.
AARP plus AAA at one property: most parks honor one or the other, not both at once.
Federal Senior Pass plus extra percentages: the 50% federal rate is final. No further percentage applies.
How to ask without making it awkward
The framing I use is one honest question:
“I’m over 62 and I have a Good Sam card. I’ll be staying midweek for several nights. What’s the lowest rate you can offer?”
Park staff know which levers they can pull. If stacking is possible, they will do it. If not, they will say so. No need to negotiate each discount one by one.
Managers are more flexible midweek and in shoulder seasons, April into May and September into October. In July and on holiday weekends, demand removes any reason to discount. At a half-empty park in November or early spring, the math changes.
Worth asking about separately:
Weekly rates: a flat weekly fee often beats even aggressively stacked daily discounts.
Monthly rates: parks at $700 to $800 a month can undercut daily stacking for longer stays.
For finding the parks where stacking is most likely, our guide to finding free and low-cost camping covers the tools worth building into pre-trip research.
The Self-Audit: Is Your Membership Actually Paying Off
Every RV membership either pays you back each year or it does not. The breakeven is annual cost divided by real savings per night at parks where the discount is accepted. Real means the actual dollars you got back, not the advertised percentage. Brochure percentages overstate savings, because acceptance rates, blackout dates, and eligible-only-on-select-sites clauses cut what you collect.
Breakeven formula
Breakeven nights equals annual membership cost divided by average real savings per night
Step 1: know your actual camping nights
Most people overestimate. Pull your last 12 months of card statements, highlight every campground charge, and count nights from reservations or trip notes. Weekend campers usually land at 20 to 40 nights a year. Serious part-timers hit 50 to 80. Full-timers can clear 200.
Step 2: track real savings, not brochure percentages
Track 10 to 15 stays. Write down the pre-discount rate and the final charge. Subtract. Average those differences. If AARP advertises 10% but one park gives 10%, another 5%, and a third only on weekdays, your real average might be $4 a night, not $4.50 based on 10% of the average rate.
Step 3: run the calculation
AARP example (illustrative, verify current price at aarp.org)
Annual cost: verify current rate
Average real savings: about $4 a night
Breakeven: annual cost divided by $4 equals your personal breakeven nights
At 30 nights a year: 30 times $4 equals $120 saved. Net after the membership: well ahead.
Step 4: count the shadow benefits
Some memberships pay off in ways that never hit a campground receipt:
Good Sam fuel discounts: 2,000 gallons times $0.06 a gallon equals $120 back, triple the membership on fuel alone.
Escapees mail forwarding: price a comparable commercial service and treat the difference as savings.
Roadside assistance: one avoided tow can cover years of fees.
Once a year, run this on every active membership and ask one question: knowing what I know now, would I buy this again today? If the answer is no, cancel it. Habit is expensive. A card that made sense at 60 nights a year does not automatically justify renewal at 25.
Membership Traps: When Best on Paper Fails in Practice
Expensive resort-style RV memberships often fail to deliver when your travel style does not match their network. Blackout dates, a footprint concentrated near cities and coasts, and peak-season limits cut real access below the brochure. The pattern is consistent in RV communities. The problem is not the discount, it is a mismatch between the membership’s designed use and how the buyer actually travels.
Three factors account for most disappointments:
Geography: the network sits in regions you rarely visit, coastal resorts and major metros, while you prefer forests, mountains, or the Southwest.
Timing: blackout dates block the discount in July, August, and holiday weekends, which is when you camp.
Style drift: you bought a resort membership and then shifted toward boondocking and state parks, leaving the network irrelevant.
The fix is simple. Start with how you already like to travel, then add memberships and senior discounts that amplify that pattern. Do not buy a membership hoping it will change your behavior. It usually does not, and the math rarely works when you have to force yourself to use it.
Passport America’s 50% headline with peak-season blackouts is the most common version of this trap for seniors. The discount is real when accepted, but if 60% of your camping falls on peak weekends, your effective rate is far below 50%.
Your Senior RV Discount Action Plan
Six steps cover most of what senior RVers need. The order matters: federal pass first, then a low-cost membership, then niche programs matched to your travel. Some discounts start at 55, while the federal Senior Pass and most state programs start at 62. Confirm age thresholds before assuming you qualify.
Get the America the Beautiful Senior Pass. Buy it in person at a federal site to skip the processing fee. Keep it in the glove box. At $80 for life, it is one of the few one-time RV purchases with near-certain positive ROI. Price is current as of September 2026, so confirm it at store.usgs.gov.
Add AARP. Low cost, wide coverage, fast breakeven. The baseline card for most senior RVers, whether or not you think of yourself as an AARP person.
Check state programs for every state where you will spend a week or more. Look for senior passes, off-season deals, and residency rules that help or hurt eligibility.
Add one or two memberships that match your travel. Escapees for full-timers or near-full-timers. Good Sam if you drive far and fuel at participating chains. Selective Passport America if your schedule is genuinely midweek and off-peak.
Ask for the lowest rate, not just the discount. One clear question, “I’m over 62 and have [membership], what’s the lowest rate for a midweek stay,” gives the park room to stack what it is allowed to.
Run the annual self-audit. Every membership either clears breakeven in a normal year or it does not. Cancel what does not. Do not carry dead weight into the next season.
For travelers who camp often at qualifying sites, stack discounts where allowed, and use both federal and state programs, senior discounts can cut an estimated 30% to 50% off annual paid camping. On an illustrative $4,000 campsite budget, that is roughly $1,200 to $2,000 back, enough to fund a trip or two, bring family along, or add a month to a season. Actual savings vary. Casual RVers with fewer nights will see proportionally smaller savings.
Found a combination that works for your rig and style? Share it in the comments below, since more real data makes this page more useful for the next person running the numbers. For our full set of low-cost camping resources, start at the Boondock or Bust resources hub, or the 35-year RVer’s guide to free and cheap campsites for the databases and apps worth having before you book.
Frequently Asked Questions About Senior RV Camping Discounts
At what age do senior discounts start for RV camping?
Most RV camping discounts begin between ages 55 and 62. Many private parks honor AARP-style 55-plus discounts, while the America the Beautiful Senior Pass and most state park systems use 62 as the cutoff. Always confirm age requirements with each park when you book, since thresholds are not always posted clearly online.
Can I combine senior discounts with memberships like Good Sam or AARP?
Often, yes. Many independent campgrounds will stack a senior discount with one membership discount and sometimes an off-season rate. Corporate chains and federal campgrounds tend to be stricter. The most effective ask is: “I’m over 62 and have a membership. What’s the lowest rate you can do?” That frames it as one question instead of a line-by-line negotiation, and it lets the park tell you what they allow.
Does the America the Beautiful Senior Pass work at state parks?
No. The Senior Pass provides entrance and fee discounts at federal recreation lands, including national parks, national forests, and most Corps of Engineers campgrounds. State parks are run by individual states with entirely separate pass systems and senior rules. A handful of states have their own senior passes that are equally valuable within their system, but those are distinct from the federal pass and are not interchangeable with it.
How much can I realistically save each year with senior RV discounts?
It depends on how often you camp and how consistently you use available discounts. A casual RVer camping 25 to 30 nights a year with one or two memberships can save several hundred dollars annually. A heavier traveler who leans on state park discounts, the Senior Pass, and stacked membership deals can reach four figures in a busy year. The self-audit formula in this guide gives you the exact calculation for your own numbers.
Are senior RV discount memberships worth the cost?
They are worth it when you camp enough nights at participating parks to cross the breakeven point. A low-cost membership like AARP can pay for itself in 3 to 5 nights. Higher-priced memberships need more nights or stronger secondary benefits, such as fuel discounts, mail forwarding, or roadside assistance, to be worthwhile. The honest answer comes from running your own numbers once a year using actual nights and real savings per night, not brochure percentages.
Do I always need to show ID to get senior camping discounts?
Almost always. Expect to show a driver’s license or other photo ID to prove your age, and present the physical pass or membership card when a discount program is involved. Keeping a small folder in the RV with your senior pass, membership cards, and ID copies makes check-in faster and saves digging through the rig at the registration window.
Is the America the Beautiful Senior Pass still $80 for a lifetime pass?
As of September 2026, the lifetime pass is $80 and the annual pass is $20. Prices are set by Congress under the Federal Lands Recreation Enhancement Act, Public Law 108-447 (2004), and are subject to change. Verify current pricing at store.usgs.gov before purchasing. Buying in person at a federal recreation site avoids the processing fee charged for online orders.
Federal Lands Recreation Enhancement Act, Public Law 108-447 (2004). Governs pass program pricing and eligibility. congress.gov
Membership pricing for AARP, Good Sam, Escapees, Passport America, and AAA was last verified September 2026. Costs and terms change. Verify current rates with each organization before joining or renewing. State park data is illustrative, so verify at each state’s official site before booking.
About the author.Chuck Price has more than 35 years of RV camping and boondocking experience across the United States, including extended travel in a 2018 Hymer Aktiv Class B motorhome. He has been featured on CBC Radio’s Cost of Living discussing full-time RV expenses. He runs Boondock or Bust with his partner Cindy Price.
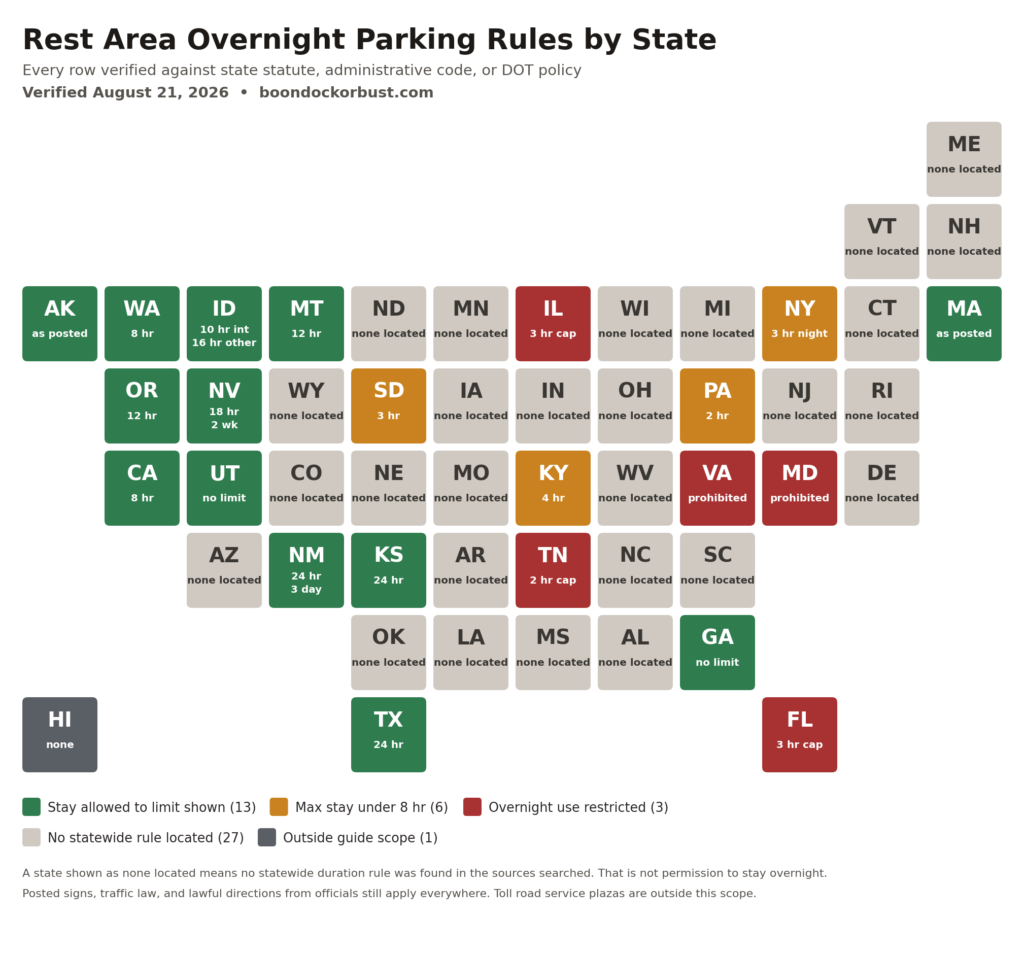
In 27 of 50 states, no statewide rest area parking-duration rule was located in the sources searched. That is a research finding, not permission to stay. Thirteen states publish a statewide rule or agency policy describing stays long enough for a typical sleep period, subject to facility restrictions. Six publish shorter caps. Three restrict overnight use expressly. Verified August 21, 2026.
Chuck Price has traveled by RV for more than 35 years and currently travels in a 2018 Hymer Aktiv Class B. He checked all 50 state rows against state statutes, administrative codes, and transportation department publications on August 21, 2026.
Rest area overnight parking at a glance
Must-Know: In 27 states no statewide duration rule was located. That is not authorization. Posted signs, general traffic law, and lawful directions from officials still apply.
Trip Killers: Nevada caps stays at 18 hours per two-week period. Florida, Illinois, Maryland, and Virginia prohibit overnight parking by administrative rule, and Tennessee prohibits it by department policy.
Best For: Fatigue stops on long interstate drives, not multi-night stays. Texas, Kansas, and New Mexico publish the longest numeric limits at 24 hours. Georgia and Utah publish no limit at all.
Confirm Before You Go: Check the posted sign at the facility and the linked state source in the table below. Rules change between verification dates.
Disclaimer: This guide summarizes statewide sources located as of the verification date, for state-operated highway rest areas. It is not legal advice and it is not permission to stay overnight. A statewide source may not address every facility, and a facility may carry additional posted restrictions, closure orders, agency policies, and other applicable law. Confirm the rules and signs at the specific location before you stop. If an authorized official directs you to leave, comply and resolve any dispute afterward.
How every row on this page was verified
Two research paths were attempted for every state and completed for 45. First the state transportation department’s own rest area publications, then separately the state statute and administrative code. A state is marked “no statewide rule located” only when both completed searches came back empty. A finding that no rule was located is not proof that no applicable rule exists. Five rows completed only one path and are flagged in the table: Maine, New Mexico, North Dakota, Rhode Island, and Vermont. New Mexico’s statutory text is confirmed through a third-party reproduction rather than a state-hosted source. Scope: this covers interstate and state highway rest areas operated by state transportation departments in the United States. Toll road service plazas, private travel centers, and campgrounds set their own rules and are outside this page. Example: Ohio Revised Code 5515.07 mentions rest areas but governs vending machines and closures, so it was rejected rather than cited.
Counted by the authority behind each row, the 50 states divide as follows. Twenty-two cite a statute or administrative code section. Three cite published transportation department policy, which is agency material rather than codified regulation. Twenty-four cite neither, because no rule governing visitor use was located in the sources searched. Hawaii falls outside this guide’s facility scope. Those four groups sum to 50.
Montana is the one row drawing on both kinds of authority. Its camping prohibition is statutory, under MCA 60-6-202, while its 12-hour parking figure comes from a department page.
Where a code section mentioned rest areas but governed something other than visitor use, it was rejected. That test removed twelve states that other guides cite as authority. Arizona Revised Statutes 28-873 governs speed limits. Michigan’s Rule Set 2025-30 TP is proposed and not yet filed. North Carolina’s General Statutes Chapter 136 Article 6D bars stopping on the right-of-way but sets no limit inside a designated parking area. Ohio Revised Code 5515.07 covers vending machines and facility closures. West Virginia Code 17-4-55 covers commercial sponsorship. Arkansas Code 27-74-213 covers maps and advertising. Iowa’s rule covers holiday rest stop sponsors. Louisiana Revised Statutes 48:461.1 is a definitions section. Missouri’s chapter covers publication vending. Wyoming Statutes Title 24 Chapter 10 is the Outdoor Advertising Act. Oklahoma’s most-cited section belongs to the Department of Wildlife Conservation and governs wildlife land, not highways. Minnesota Statutes 160.2721 governs lease terms for rest area operators. None of the twelve sets a stay limit.
Last verified: August 21, 2026. Next scheduled verification: February 2027.
Rest area overnight parking rules by state
No nationwide rule governs rest area overnight parking. For this guide, the author identified either a statute or administrative-code provision, an official transportation-department policy, or no statewide rule in the sources reviewed. Boundary: this table covers state-operated highway rest areas only, and individual facilities may post limits stricter than the statewide rule. For example, Pennsylvania sets a two-hour maximum stay by code, while Texas sets a 24-hour maximum under Transportation Code 545.411.
How to read this table
Maximum statewide stay means a statute or regulation caps how long you may remain. The cap is in the time column. A cap is not an authorization to use a particular facility overnight, and posted restrictions may be stricter.
Maximum statewide occupancy is used for Nevada alone, whose rule caps cumulative occupancy across two weeks rather than a single stay.
Subject to posted limits means the statewide rule makes the posted sign the operative limit rather than stating a number itself.
DOT policy in the status column means the figure comes from an agency publication rather than a statute or regulation.
No statewide maximum stated means the cited authority addresses rest area use without setting a duration.
Where a cap falls under eight hours, the table shows the number rather than a judgment about it. Eight hours is this guide’s editorial threshold for a full night, not a legal definition, and a shorter cap may still allow a fatigued driver to sleep.
Express overnight-parking prohibition means the cited regulation bars overnight parking in terms, which only Maryland and Virginia do. Tennessee is listed separately as a department policy restriction rather than a regulation. Read the Camping column on its own, because a camping ban is a different prohibition reaching different conduct, and a ban on sleeping on the grounds or in a building is different again.
No statewide rule located means no statewide parking-duration rule was found in the state code or the transportation department’s publications searched for this guide. This is a limit of the research, not a legal determination. An unlocated rule may still exist, and facility signage, general traffic law, trespass law, agency closure authority, and lawful directions from officials all continue to apply. Nebraska, New Hampshire, and Wisconsin sit in this group and restrict camping by statute while saying nothing about parking duration.
Outside this guide’s scope is the status shown for Hawaii alone. This guide covers interstate and state highway rest areas, and no comparable facilities were identified in Hawaii. That is a scope exclusion, not a finding that no roadside rules exist there.
An express prohibition and a short maximum stay are different findings, and the difference turns on what the cited text actually reaches. Maryland and Virginia bar overnight parking with no stay limit attached. Virginia’s rule, effective March 11, 2026, bars overnight parking and separately bars sleeping inside rest area buildings. It does not use the phrase sleeping in a vehicle. Tennessee restricts overnight use through department policy rather than a regulation.
Illinois and Florida are classified by their maximum stay rather than as express prohibitions, because their cited text does not bar overnight parking in terms. Illinois prohibits sleeping overnight on the grounds, benches, or in the building of a rest area under 92 Ill. Adm. Code 533.40(l), which does not name vehicles, while 533.20(c) provides that the allowed duration of a rest area stop shall not exceed three hours. Florida’s cited material prohibits camping and sets a three-hour limit. Kentucky, New York, Pennsylvania, and South Dakota likewise publish a maximum stay with no express overnight ban.
Law in the authority column means a statute or administrative code section. DOT policy means an official transportation department publication rather than a codified regulation. This guide does not assess whether a given department policy is independently enforceable, and travelers should comply with posted conditions either way. No rule located means neither was found. In the Camping column, Not addressed means the cited source is silent on camping, not that camping is allowed.
In 27 states no statewide duration rule was located, which is not permission to stay. Verified August 21, 2026.
Every row identifies the source supporting the stated rule, or describes the sources searched when no statewide rule was located. Links marked secondary point to a third-party reproduction rather than an official state-hosted text, because no working official link was found for that row on the verification date.
Rest Area Overnight Parking Rules by State, verified August 21, 2026
State
Statewide status
Time limit
Camping
Authority
Source
Alabama
No statewide duration rule located
No maximum stated
Not addressed
No Alabama statute or ALDOT rule located No rule located
Nevada is the only state in this guide with a cited cumulative-occupancy cap rather than a single-stay limit. Nevada Administrative Code 408.595 states: “Parking, camping or occupancy in a roadside park or safety rest area is limited to 18 hours in any 2-week period.” That cap runs across two weeks, not per visit. Source: NAC 408.595, verified August 21, 2026.
Pennsylvania permits sleeping in a parked vehicle and caps the stay at two hours. Title 67 of the Pennsylvania Code, Chapter 443, lists among prohibited activities: “Camping overnight or setting up a tent, sleeping anywhere but in a legally parked vehicle or remaining anywhere at a roadside rest area for more than 2 hours or as otherwise posted.” Read that carefully. The prohibition is on sleeping anywhere except a legally parked vehicle. Source: 67 Pa. Code Ch. 443, verified August 21, 2026.
Kansas expressly permits one night of camping. Kansas Administrative Regulation 36-32-2 allows it for a single night, inside a 24-hour parking cap. No other state in this guide’s sources carries comparable language, though this guide has not searched every parks and facility rule nationwide.
New Mexico’s 24-hour limit runs across three days. NMSA 1978 Section 67-8-22(A) caps stays at 24 hours in any three-day period, so a full-day stay uses your allowance for the next two days.
Parking is not camping, and the difference decides your citation
A camping ban is not a parking ban, and three states have only the first. Camping statutes reach tents, external setup, and in some states sleeping on the ground, without touching a person asleep inside a vehicle. Boundary: this distinction applies to state highway rest areas. Private campgrounds, service plazas, and designated camping zones operate under separate rules. Example: Montana bans camping by statute under MCA 60-6-202 while its transportation department separately permits 12-hour parking.
Those three are Nebraska, New Hampshire, and Wisconsin. New Hampshire bars pitching a tent or sleeping on the ground in the highway right-of-way, which does not reach a person asleep in a van. Nebraska bars camping except at designated campsites. Wisconsin makes camping unlawful only after a notice to remove. None of the three sets a parking limit.
Two states name vehicle sleeping as permitted conduct, though both cap the stay. South Dakota law states a person temporarily resting in a vehicle is not in violation of the camping ban, defining that as up to three consecutive hours, or ten for a commercial driver. Pennsylvania makes the legally parked vehicle the permitted case, within a two-hour limit. Neither permits sleeping through a night.
Read those camping bans as parking bans and you will skip stops the statute never reached. Read them as permission to set up outside and you risk a citation. The lists below are practical guidance drawn from the rules this guide located, not universal legal definitions. What counts as camping depends on the specific state’s wording, the facility, and the posted sign.
Conduct usually treated as parking
Sleeping inside your vehicle with the doors closed
Running interior lights, heat, or air conditioning
Eating inside the vehicle
Walking a leashed pet in designated areas
Using restrooms, vending, and picnic tables
Conduct more likely to be treated as camping
Extending slide-outs or awnings
Setting up tents, canopies, or tarps
Placing chairs, tables, or mats outside
Cooking outside on a grill or camp stove
Building a fire
Dumping tanks or connecting hoses
Plugging into any outlet at the facility
Where a state defines camping to include external setup, as Idaho does, extending a slide-out or awning can convert legal parking into camping.
Idaho’s transportation department names most of that list explicitly: no camping, no plugging vehicles, generators, or other camping devices into outlets, and no hooking hoses to water faucets. If you need to empty tanks, our guide to finding RV dump stations covers the legal options, none of which are rest areas.
Rest areas compared to other overnight options
Where a state publishes a duration rule, rest area limits are more readily identifiable before you leave. In the 27 states where no statewide duration rule was located, check posted restrictions and confirm use requirements with the facility operator or the relevant agency before relying on the stop. Boundary: the comparison below covers United States options. Costs and availability shift seasonally and by region. Example: a Walmart manager can revoke permission on the spot, while Texas sets a 24-hour maximum under Transportation Code 545.411.
Overnight parking options compared
Option
Cost
Who sets the rule
Typical limit
Amenities
Highway rest areas
Free
State law, agency regulation or policy, facility restrictions, and other applicable law
2 to 24 hours where published
Restrooms, vending, picnic areas
Retail lots
Free with permission
Store manager, revocable
Usually one night
Store access during hours
Truck stops
Free to $20 and up
Private operator
Typically 24 hours
Showers, food, fuel
Membership hosts
Annual fee
Individual host
One night by arrangement
Varies widely by host
Dispersed public land
Free
Federal land agency
Set by the managing district
None
Rest areas are generally intended for traveler safety and short-term rest rather than lodging. If your trip needs consecutive nights, compare the membership programs that fit your rig and route, or read the current BLM dispersed camping rules before relying on public land. Stay limits on dispersed federal land are set by the managing district. Source: BLM camping, accessed August 21, 2026.
What happens if you exceed the limit
Posted signs may impose restrictions stricter than the statewide rule, and they are not the only authority that applies. Statutes, agency regulations, traffic and trespass law, closure orders, and lawful directions from officials remain in force whether or not a sign mentions them. In the 27 states where this guide located no statewide duration rule, that absence tells you nothing about what a specific facility or officer may require. Boundary: commercial drivers are also subject to federal hours-of-service requirements, which interact with state limits. Source: FMCSA Hours of Service.
Three things are worth carrying with you.
Staying inside a vehicle may avoid conduct that some camping restrictions target, and two states name vehicle sleeping as permitted conduct. It does not override an overnight-parking prohibition, a duration cap, a posted restriction, or a broader definition of camping.
A posted facility limit may be enforceable and may be more restrictive than a statewide default, depending on the governing authority and the applicable law. Follow it unless an authorized official says otherwise.
If asked to move, move. Note your arrival time, photograph the signage, and contest later if the sign did not say what you were told it said.
Are rest areas safe to sleep in?
Safety varies by facility, and no statewide answer is meaningful. Rest areas on high-traffic corridors tend to be lit and patrolled, while rural facilities on low-volume routes may have neither. Boundary: this covers state-operated rest areas. Truck stops and private campgrounds use different staffing and security models. Example: Louisiana’s transportation department lists 12-hour nighttime security at several of its facilities, while most states publish nothing about security at all. Source: Louisiana DOTD rest areas, accessed August 21, 2026.
Park within the lighting near the main building rather than at the isolated end of the lot.
What improves the odds
Park within the lighting near the main building
Park alongside other vehicles rather than in an isolated corner
Keep sight lines to the entrance and face the exit
Stay out of the commercial truck lot, where drivers under federal hours-of-service rules need the spaces
Lock up, cover windows, and keep keys within reach
Reasons to leave
Lights out or broken in the parking area
No other vehicles present during normal travel hours
Visible neglect, vandalism, or broken security equipment
Aggressive loitering or panhandling
Your own instinct saying no
The next facility is usually 30 to 60 minutes down the road, and a lit truck stop may be an alternative where one is nearby and open.
Frequently asked questions
How long can you stay at a rest area?
It depends on the state, and in 27 no statewide duration rule was located. Where limits exist they run from two hours in Pennsylvania and Tennessee to 24 hours in Texas, Kansas, and New Mexico. Nevada caps occupancy at 18 hours per two-week period. Verified August 21, 2026. Verify current status before departure.
Is sleeping in your car at a rest area illegal?
It depends on the state and the facility, and the honest answer is rarely a flat yes or no. Two states prohibit overnight parking by administrative rule: Maryland and Virginia. Tennessee restricts overnight use by department policy. Florida and Illinois set short maximum stays and prohibit camping, but their cited text does not bar overnight parking in terms. Thirteen publish a rule or policy describing stays long enough for a typical sleep period, six publish shorter caps, and in 27 no statewide duration rule was located, which is not the same as permission. Check the posted sign and treat the stop as fatigue rest rather than lodging. Verified August 21, 2026.
Which states publish a stay limit long enough for a typical sleep period?
Thirteen states publish a statewide rule or agency policy describing stays long enough for a typical sleep period: Alaska, California, Georgia, Idaho, Kansas, Massachusetts, Montana, Nevada, New Mexico, Oregon, Texas, Utah, and Washington. Caps run from eight hours in California to 24 hours in Texas. Alaska and Massachusetts make the posted sign the operative limit. A cap is not an entitlement to use a specific facility overnight. Verified August 21, 2026. Verify current status before departure.
Can RVs park overnight at rest areas?
RVs are generally subject to the same statewide duration and overnight-use restrictions as other vehicles, but a facility’s signs, space restrictions, and camping rules may add limits. Do not assume a rest area allows an RV overnight merely because no statewide rule prohibits it. Avoid external setups such as awnings, chairs, hoses, or slide-outs where camping restrictions may apply, and use standard vehicle spaces rather than commercial truck parking. Verified August 21, 2026.
What states have the longest rest area time limits?
Georgia’s cited statute and Utah’s cited department material state no numerical maximum in the sources reviewed. Among states publishing a number, Texas and Kansas set 24-hour maximum stays. New Mexico sets a 24-hour maximum within any three-day period. Idaho’s published policy states 16 hours at US and state highway rest areas and 10 hours at interstate rest areas. Montana’s department material states 12 hours, and Oregon sets a 12-hour maximum within any 24-hour period. Verified August 21, 2026. Verify current status before departure.
Can you run your RV generator at a rest area?
Check the posted sign. Idaho explicitly bans plugging vehicles, generators, or other camping devices into facility outlets. For most states this guide did not locate a statewide generator rule, so check posted restrictions and facility guidance. Battery power is the quieter option next to sleeping travelers. Verified August 21, 2026.
Are rest areas safer than Walmart lots?
Neither is universally safer, and both depend on the specific location. Rest areas offer designated parking and lighting at many facilities, but rural sites can be isolated. Retail lots offer a populated area with staff present, but require permission. Assess each stop on arrival.
Can you stay at rest areas during a government shutdown?
Generally yes. Rest areas are funded and operated by state transportation departments rather than federal agencies, so they usually stay open. Our government shutdown camping guide covers what does close. Verify current status before departure.
What to do before your next overnight stop
Find your route states in the table above and note two things: the status and the authority column. A row labelled “Law” identifies a statute or regulation relevant to the stated statewide rule. A state marked “No rule located” means this guide found nothing statewide, so read the posted sign carefully and photograph it when you arrive.
For any state you plan to sleep in, open the linked source and confirm the text still matches what this page reports. Rules change, and this page carries a verification date precisely so you can tell how stale it might be.
If your route crosses Florida, Illinois, Maryland, Tennessee, or Virginia, plan an alternative before you are tired. The Walmart overnight parking guide and the free RV parking guide both cover legal fallbacks in those states.
Found a rule we missed or a citation that no longer resolves? Send it and we will verify and update the row.
References
Complete per-state citations, including the statute or regulation for all 22 states labelled Law, appear in the Authority column of the table above with direct links. The sources below support claims made outside the table.
Federal Motor Carrier Safety Administration. Summary of Hours of Service Regulations. Accessed August 21, 2026. fmcsa.dot.gov
Bureau of Land Management. Camping. Accessed August 21, 2026. blm.gov
Louisiana Department of Transportation and Development. Rest Areas. Accessed August 21, 2026. dotd.la.gov
Montana Code Annotated. 60-6-202, Overnight camping and storage of personal property on state highway right-of-way prohibited. Accessed August 21, 2026. legmt.gov
Ohio Revised Code. Section 5515.07. Accessed August 21, 2026. codes.ohio.gov
Pennsylvania Code, Title 67, Chapter 443. Roadside Rest Areas. Accessed August 21, 2026. pacodeandbulletin.gov
South Dakota Codified Law. 31-7-15 and 31-7-17. Accessed August 21, 2026. sdlegislature.gov
Texas Department of Transportation. Safety Rest Area Map. Accessed August 21, 2026. txdot.gov
Land access, permits, road conditions, and site availability change. Verify all information with the relevant land management agency before your trip.
About the author: Chuck Price has traveled by RV for more than 35 years and now travels in a 2018 Hymer Aktiv Class B. He is affiliated with the Family RVing Association and writes on boondocking, dispersed camping, and free overnight parking at Boondock or Bust.
The Complete State-by-State Guide to Street Legal UTV and Side-by-Side Laws
By Chuck Price, Boondock or Bust | Full-time RVer, 35+ years UTV experience, 47 states traveled
Last updated: February 2, 2026
Read time: 15 minutes | Key stat: Montana and South Dakota require zero speed restrictions for street-legal UTVs
Quick Reference (TL;DR)
Legal status: 20 states allow UTVs on most public roads with proper equipment and registration. Another 25 states allow limited road use. 5 to 9 states severely restrict or prohibit on-road use.
Golden rule: Local ordinances override state permission. County commissioners can ban UTVs even in permissive states. Verify local rules before riding.
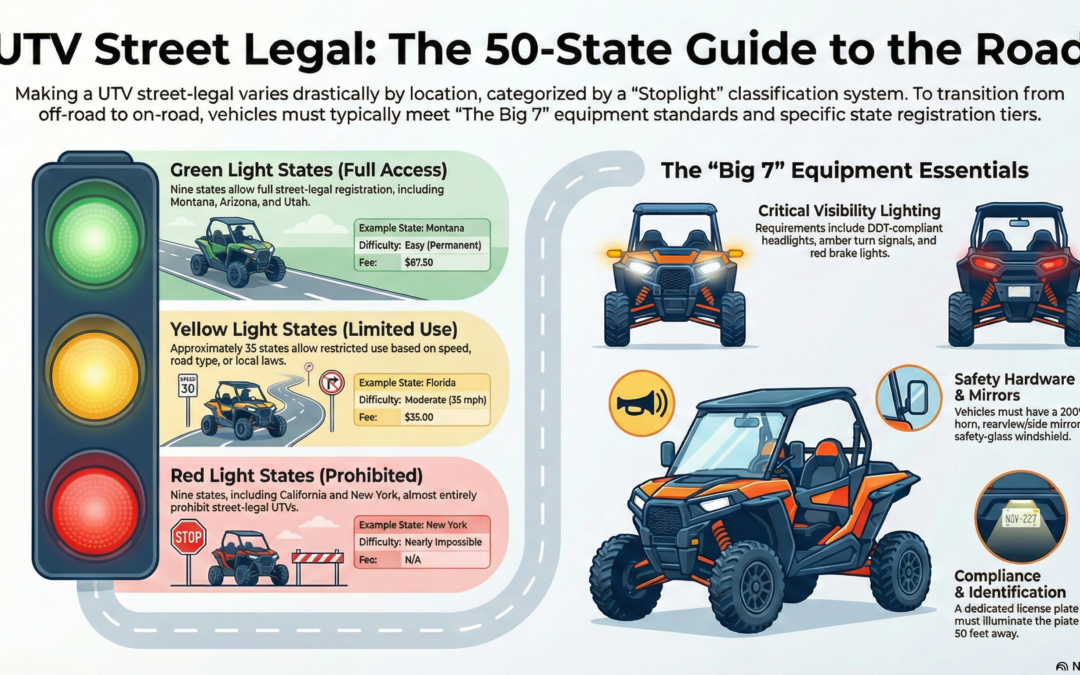
Safety baseline: Most states require seven core components including horn, mirrors, turn signals, brake lights, headlights, license plate light, and windshield.
Budget: $1,130 to $2,730 for basic street-legal conversion. Insurance is usually a separate powersports policy with a street-legal endorsement, not auto coverage.
A Utility Task Vehicle can legally operate on public roads in approximately 20 states with full street-legal registration (per World Population Review), while another 25 states allow limited road use under specific conditions.
Montana and South Dakota offer the most permissive pathways with permanent plates and no speed restrictions, while California and several other states severely restrict or prohibit on-road UTV use.
Success requires understanding three layers of regulation: state registration laws, equipment rules, and local road access rules.
State-by-State UTV Street Legal Status: 2026 Quick Reference
The table below summarizes UTV road legality tiers. Treat it as a starting point. Local ordinances can override state-level permission.
State
Tier
Registration Difficulty
Key Restrictions
Insurance Required
Montana
Green Light
Easy (permanent plates)
None, classified as quadricycle
Yes (motorcycle-level)
South Dakota
Green Light
Easy (permanent plates)
None, full road rights
Yes (motorcycle-level)
Arizona
Green Light
Moderate
Maintained roads only
Yes (liability minimum)
Utah
Green Light
Easy
Some national park access
Yes
Wyoming
Green Light
Easy
County roads, some highways
Yes
Nevada
Green Light
Moderate
State highways allowed
Yes
North Carolina
Yellow Light
Moderate
35 mph roads only
Yes
Texas
Yellow Light
Moderate
County roads, local override
Yes (mandatory)
Florida
Yellow Light
Moderate
35 mph roads, county approval
Yes
Georgia
Yellow Light
Moderate
Local roads, municipal override
Yes
Tennessee
Yellow Light
Moderate
Secondary roads only
Yes
Virginia
Yellow Light
Moderate
Crossing roads only, trail access
Limited
West Virginia
Yellow Light
Difficult
Motorcycle endorsement required
Yes
California
Red Light
Nearly Impossible
Agricultural or emergency use only
N/A (prohibited)
New York
Red Light
Nearly Impossible
Private property only
N/A (prohibited)
All Other States
Yellow Light
Varies
Typically 35 to 45 mph roads
Check state DMV
Data compiled from state DMV regulations and motor vehicle codes, verified January 2026. Confirm current rules with local authorities before operation.
Get our PDF checklist with equipment requirements, registration steps, insurance minimums, and DMV contact info. Includes a printable inspection checklist and cost calculator.
What Makes a UTV Street Legal? Core Requirements Explained
Before state-by-state details, focus on the basics: how your state classifies a UTV and what equipment you must add to pass inspection.
Legal Classifications: UTV vs. ATV vs. LSV
Most states distinguish UTVs (side-by-side seating, steering wheel, foot pedals) from ATVs (straddle seat, handlebars). Some states also route registrations through Low-Speed Vehicle rules, which often limits you to roads posted 35 mph or less.
The Big 7: Common Equipment Requirements
Horn: Commonly must be audible at distance
Mirrors: Rearview plus both side mirrors
Turn signals: Front and rear signals, often with hazards
Brake and tail lights: Rear lighting visible at distance
Headlights: White forward lighting
License plate light: Plate readable at night
Windshield: Glass or polycarbonate depending on state
Equipment Costs: Budget $1,130 to $2,730 for Street Legal Conversion
Your cost depends on what your UTV already has and what your state requires. The biggest swings usually come from windshields and DOT tires.
Component
Cost Range
Required In
Notes
Turn Signal Kit
$150 to $400
Most states
Professional install often adds $100 to $200
Windshield (Glass)
$250 to $700
Many states
Some states add wiper and washer requirements
DOT Tires (Set of 4)
$600 to $1,200
Some states
Recommended even when not required
Horn Upgrade
$30 to $80
Most states
Audibility rules vary
Mirrors
$50 to $150
Most states
Rearview plus both sides is common
Administrative Fees
$50 to $200
All states
Inspection, title, registration, plates
Total estimated cost: $1,130 to $2,730 (average $1,800)
Frequently Asked Questions
What states allow UTVs on public roads?
Montana, South Dakota, Arizona, Utah, Wyoming, and Nevada allow UTVs on most public roads with proper registration. North Carolina, Texas, Florida, and many other states allow limited road use, typically on roads posted 35 to 45 mph or less. California, New York, and others severely restrict or prohibit on-road UTV use.
What equipment is required to make a UTV street legal?
Most states require a horn, mirrors, turn signals, brake and tail lights, headlights, a license plate light, and a windshield. Some states add requirements such as DOT tires or windshield wipers.
How much does it cost to make a UTV street legal?
Budget $1,130 to $2,730 for a basic conversion. Ongoing costs include registration and insurance, commonly $200 to $600 per year for liability coverage depending on state and insurer.
Does my auto insurance cover a street-legal UTV?
Usually no. You typically need a separate powersports policy that explicitly covers street-legal use, not off-road-only coverage.
About the Author
Chuck Price has lived full-time in RVs since 2018 and operates Boondock or Bust as a testing ground for practical travel and gear guides.
2026 RV Membership Costs: Break-Even Math & Real ROI
TL;DR: An RV membership saves money only when you use eligible benefits often enough to recover the annual fee. There is no defensible universal claim that a certain percentage of RVers lose money or that one membership always wins.
RV Overnights public price: $49.99 per year.
Eligible Family RV Association member price: The official offer page currently advertises $29.99 per year, a 40% discount.
FRVA cost: Family RV Association membership has its own $99 annual cost. Do not join FRVA solely to save $20 on RV Overnights.
Best calculation: Divide the full annual cost by your realistic net savings per eligible stay, then round up.
By: Boondock or Bust Editorial Team | Updated: July 23, 2026 | Pricing checked: July 23, 2026 against official program websites and help centers
RV membership comparisons often fail because they treat the annual fee as the only cost and assume every planned stay will qualify. That approach produces attractive break-even claims, but it does not reflect how most RVers travel.
A useful calculation must account for the type of membership, the dates and locations you can actually use, expected host purchases, add-on fees, route changes, and the price of the alternative you would otherwise book. This guide replaces unsupported industry-wide statistics and anonymous survey claims with current official pricing and transparent scenario math.
Membership value depends on eligible usage and the cost you actually avoid.
2026 RV Membership Prices at a Glance
The following prices were checked on July 23, 2026. Temporary promotions can change without notice. The table uses standard or published list prices where possible and identifies time-limited offers separately.
Program
Published Price
Primary Value
Cost Variables to Check
Official Source
RV Overnights
$49.99 per year public price
Host-network overnight stays and trip-planning resources
Host-support purchases, optional paid amenities, added mileage, and current checkout promotion
As of July 23, 2026, the official page displayed a promotional price of $525 for one region, with the offer shown as ending July 31, 2026. That window closes eight days after this update, so verify the current price before using this figure.
Eligible stays in the selected region with no nightly campsite fee
Taxes, fees, availability, reservation rules, extra regions at $140, and Trails Collection at $475
Do not compare temporary sale prices as though they are permanent. On July 23, 2026, the RV Overnights public checkout displayed a temporary $39.99 first-year offer followed by $49.99, and Harvest Hosts displayed sale pricing below its list prices. The break-even examples below use the more stable published list price unless a promotion is clearly dated.
RV Overnights and FRVA: The Correct Cost Comparison
RV Overnights has two prices that must be shown separately:
Public RV Overnights price: $49.99 per year.
Eligible Family RV Association member offer: $29.99 per year, advertised as 40% off.
Family RV Association membership is not included in the $29.99 RV Overnights fee. FRVA currently charges $99 for one year. An RVer who joins FRVA and then buys RV Overnights would therefore pay $128.99 before any optional add-ons or transaction-related fees.
Buyer
Relevant Annual Cost
Economic Takeaway
Not an FRVA member
$49.99 for RV Overnights
Use the public RV Overnights price unless another verified discount applies.
Already an eligible FRVA member
$29.99 incremental RV Overnights cost
The discount saves $20 compared with the public price.
Considering FRVA only to get the RV Overnights discount
$99 FRVA + $29.99 RV Overnights = $128.99
This costs $79 more than buying RV Overnights directly at $49.99. Do not join FRVA solely for this discount.
Considering FRVA for several benefits
Evaluate the $99 FRVA fee separately, then use $29.99 as the incremental RV Overnights cost
The offer can make sense when FRVA’s other benefits already justify its dues.
FRVA Offer and Price-Lock Warning
On July 23, 2026, the main RV Overnights FRVA offer page stated that eligible FRVA members could pay $29.99 every year with promo code FRVA26. Promotional codes are dated and can be retired without notice, so confirm this code is still active at checkout before relying on it. That page also described a lifetime price lock as keeping the sign-up rate in place while the subscription remains active.
However, a linked FRVA checkout page displayed conflicting renewal language stating that the rate would become $49.99 after the first year. Because the official pages are inconsistent, verify the promotional code, first-year charge, renewal amount, and price-lock wording before paying. Save the checkout page or confirmation email for your records.
Different membership types require different formulas. A single formula cannot accurately compare a campground discount club, a host network, and a campground access pass.
Formula 1: Discount Memberships
Break-even eligible nights = Annual membership fee ÷ Discount dollars per eligible night
Round the result up to the next whole night. Count only nights when the selected campground, date, rate, and site qualify.
Example: A $39 Good Sam Standard membership used at a qualifying $60 campground produces a $6 discount at 10%. The calculation is $39 ÷ $6 = 6.5, so the membership breaks even on the seventh eligible night.
Formula 2: Host-Network Memberships
Net savings per stay = Comparable overnight cost − Planned host support − Added travel or amenity cost
Break-even stays = Annual membership fee ÷ Net savings per stay
If net savings per stay is zero or negative, the membership does not break even on cost for that itinerary. You may still value the experience, location, or convenience, but that is a travel preference rather than a financial saving.
Formula 3: Campground Access Passes
Break-even nights = Total annual pass cost ÷ Comparable campground cost avoided per eligible night
Total annual pass cost should include required regions, collections, taxes, fees, paid utilities, and added route costs.
Availability matters. A pass may appear to break even in ten nights, but it provides no savings if the campgrounds you need are unavailable or outside your purchased region.
Worked Break-Even Examples
These are transparent scenarios, not national averages. Replace each assumption with your own planned rates and costs.
RV Overnights Public vs. Eligible FRVA Member Rate
Assume each host stay replaces a paid campground and produces the net savings shown after subtracting the purchase you plan to make and any added travel cost.
Net Savings per Host Stay
Public Price: $49.99
Eligible FRVA Rate: $29.99
$15
4 stays
2 stays
$20
3 stays
2 stays
$25
2 stays
2 stays
$30
2 stays
1 stay
$40
2 stays
1 stay
Example: If a host stay replaces a $50 campground, you plan to spend $20 supporting the host, and the route adds no extra cost, your net savings is $30. The public membership breaks even in two stays. An existing eligible FRVA member breaks even in one stay at the advertised $29.99 rate.
Harvest Hosts Classic
Harvest Hosts states that there are no camping fees at host locations and asks members to support the host through a purchase or donation. Because there is no universal required purchase amount, use your own planned host-support budget.
Net Savings per Stay
Break-Even at $99
$15
7 stays
$20
5 stays
$25
4 stays
$30
4 stays
$40
3 stays
Harvest Hosts may still be worthwhile when the host experience is part of the trip. Do not label the host purchase as wasted money if you would have bought the product, meal, tasting, or attraction anyway. Do subtract it when the purchase is an added expense created by the stay.
Good Sam Standard
Good Sam Standard costs $39 per year and advertises 10% off the nightly rate at Good Sam Campgrounds. Break-even changes with the qualifying nightly rate.
Qualifying Nightly Rate
10% Savings
Break-Even Nights
$40
$4
10 nights
$50
$5
8 nights
$60
$6
7 nights
$80
$8
5 nights
Good Sam also includes other benefits, including fuel and retail offers. Count those only when you would use them without changing your spending solely to justify the membership.
Passport America
Passport America costs $49 per year and advertises 50% off the regular nightly rate at participating campgrounds. The discount is subject to space availability and the Important Campground Notes for each park. Those notes can set eligible days, seasons, stay lengths, reservation rules, and extra charges.
Regular Nightly Rate
50% Savings
Break-Even Eligible Nights
$40
$20
3 nights
$50
$25
2 nights
$60
$30
2 nights
$80
$40
2 nights
The table is valid only when your selected campground and dates qualify. A nominal two-night break-even is irrelevant if the discount is unavailable on the dates you can travel.
Check each Passport America campground’s Important Campground Notes before counting a discounted night.
Thousand Trails Camping Pass
The Thousand Trails page displayed a $525 promotional price for one region through July 31, 2026, with additional regions at $140 and Trails Collection at $475. The official site states that reservations are required and availability is not guaranteed. If you are reading this after July 31, 2026, treat the $525 figure as expired and rerun the math below with the current price.
Using a $55 comparable campground as a scenario:
Dated $525 promotional base pass: $525 ÷ $55 = 9.55, so 10 eligible nights.
Dated $525 promotional pass plus $475 Trails Collection: $1,000 ÷ $55 = 18.18, so 19 eligible nights.
Dated $525 promotional pass plus one added region: $665 ÷ $55 = 12.09, so 13 eligible nights.
These calculations exclude taxes, fees, paid utilities, and travel changes. The Trails Collection also has its own stay rules. As of July 23, 2026, the official program page stated that RV stays could last up to 14 consecutive nights and that a stay longer than four consecutive nights triggered a seven-night wait before another affiliated-resort stay. Verify current stay and reentry rules before booking.
These costs are not necessarily deceptive or universal. They are variables that must be included when they apply to your trip.
Host Support
RV Overnights and Harvest Hosts are built around supporting host businesses. The platforms do not publish one mandatory purchase amount for every stay. Use the amount you realistically expect to spend.
Paid Amenities
Some hosts or campgrounds may charge for hookups, extra people, pets, premium sites, electricity, or other services. A membership discount may apply only to the base nightly rate.
Processing and Handling Fees
Some passes add mandatory fees at checkout that do not appear in the headline price. The federal recreation passes below are the clearest example: the Senior Annual Pass is listed at $20 but costs $32.50 delivered from the USGS Store once processing and handling are added. Always price the pass or membership at final checkout, not at the advertised figure.
Added Mileage
A membership location that requires a detour can erase the savings. Calculate added fuel as:
Added fuel cost = Extra miles ÷ Your real towing or motorhome MPG × Current fuel price
Use your own recent fuel receipts and actual RV fuel economy. Do not rely on a generic national average when the vehicle and route determine the cost.
Availability and Restrictions
Count only nights you can realistically book. For Passport America, read the participating park’s notes. For Thousand Trails, review region access, booking windows, stay rules, and current availability. For host networks, check rig limits, arrival windows, generator rules, pets, road access, and same-day booking options.
Auto-Renewal and Price Changes
Several programs renew automatically. Record the renewal date, current renewal price, cancellation process, and any price-lock terms. Recheck the official offer before renewal because promotional pages and subscription language can change.
A route-level review is more useful than a generic membership ranking.
Which RV Membership Fits Which Travel Pattern?
Travel Pattern
Programs Worth Testing
Main Risk
Decision Test
Short travel days with interest in local businesses
RV Overnights or Harvest Hosts Classic
Host spending or detours erase the avoided campground cost
Map at least three realistic host stays before joining.
Flexible off-peak campground travel
Passport America
Chosen dates or stay length do not qualify
Verify two or three eligible campgrounds on your planned route.
Frequent stays at participating private campgrounds
Good Sam Standard or Escapees
Discount per night is too small to recover the annual fee
Calculate using the actual qualifying rate, not a resort rack rate.
Repeated regional travel near Thousand Trails properties
Thousand Trails Camping Pass
Geographic mismatch or unavailable dates
Build a sample itinerary inside one region before buying add-ons.
Private-property stays with potential multi-night options
Boondockers Welcome
Host availability, hookup fees, or route mismatch
Confirm hosts near actual destinations, not just nationwide totals.
RVers who want community, education, events, and several benefits
FRVA or Escapees
Treating a broad association membership as a camping-only discount
Assign value only to benefits you expect to use.
Membership Alternatives and Complements
A membership is one tool. It does not need to cover every night.
Public-land dispersed camping: The Bureau of Land Management states that most BLM lands allow dispersed camping unless posted otherwise. The general limit is 14 days within a 28-day period, but state and field-office rules can differ. Verify the local rule before arrival.
Federal Recreation Passes: As of July 23, 2026, the USGS Store listed the America the Beautiful Resident Annual Pass at $80 plus a $7.50 handling fee, the Senior Annual Pass at $20 plus a $5 processing fee and a $7.50 handling fee, and the Senior Lifetime Pass at $80 plus a $5 processing fee and a $7.50 handling fee. Both Senior passes are available to U.S. citizens and permanent residents age 62 or older. Those added fees matter: the Senior Annual Pass costs $32.50 delivered, not $20. Buying in person at a federal recreation site or digitally through Recreation.gov uses a different fee structure. A separate Non-Resident Annual Pass costs $250 plus $7.50 handling, which is why the standard pass is now labeled Resident. These passes primarily cover entrance and standard amenity fees, not a universal campground discount. Verify current pass prices, fees, and eligibility rules before purchasing.
Direct campground booking: A campground’s weekly, monthly, shoulder-season, or direct-booking rate may beat a membership discount.
State and local programs: State park passes and resident discounts can provide better value when most travel occurs in one state.
A mixed strategy often provides more flexibility than forcing every trip through one membership.
A Five-Step Membership Decision Process
Map the next 12 months. List the routes, dates, and regions you are likely to use.
Identify eligible stays. Check the current directory, campground notes, region map, rig limits, and booking rules.
Calculate the alternative cost. Use the campground or overnight option you would realistically book without the membership.
Subtract added costs. Include host support, hookups, fuel, processing and handling fees, and required add-ons.
Add a margin of safety. Buy only when expected savings exceed the fee by enough to absorb one cancelled or unavailable stay.
Practical rule: Do not buy because a program claims it can pay for itself. Buy when you can identify enough specific, eligible uses to show that it is likely to pay for itself on your routes.
Frequently Asked Questions
What is the cheapest RV membership in this comparison?
Good Sam Standard is $39 per year among the broadly available paid memberships listed here. Eligible Family RV Association members can receive the RV Overnights offer advertised at $29.99 per year, but FRVA membership has its own $99 annual cost.
Does FRVA membership include RV Overnights at no additional charge?
No. FRVA provides access to a discounted RV Overnights offer. Eligible members still pay the separate RV Overnights fee.
Should I join FRVA only to get the RV Overnights discount?
No. A one-year FRVA membership plus the advertised $29.99 RV Overnights offer totals $128.99. That is $79 more than buying RV Overnights directly at the $49.99 public price. The FRVA route makes financial sense only when you already value FRVA’s other benefits.
How many RV Overnights stays are needed to break even?
It depends on the net savings per stay. At $30 in net savings, the $49.99 public membership breaks even in two stays. The advertised $29.99 FRVA member rate breaks even in one stay for an already eligible FRVA member.
Are Harvest Hosts stays free?
Harvest Hosts states that there are no camping fees at host locations. It asks members to support the host with a purchase or donation. Include the amount you expect to spend when calculating net savings.
Does Passport America always provide 50% off?
The membership provides 50% off the regular nightly rate at participating campgrounds on a space-available basis. Each campground sets its own rules, qualifying dates, stay limits, reservation requirements, and possible extra charges in its Important Campground Notes.
How much does the Senior Pass actually cost?
The Senior Annual Pass is listed at $20 and the Senior Lifetime Pass at $80, but USGS Store orders add a $5 processing fee and a $7.50 handling fee to each. That makes the real delivered cost $32.50 and $92.50 as of July 23, 2026. Both passes require U.S. citizenship or permanent residency and age 62 or older.
Does the America the Beautiful Pass pay for RV camping?
Not generally. The annual pass primarily covers entrance and standard amenity fees at participating federal recreation sites. Some qualifying passholders may receive discounts on certain expanded amenity fees, but campground treatment varies by location and operator.
Verification Notes and Official Sources
This revision removes unsupported survey percentages, market-size claims, named expert quotations, regional density estimates, cancellation statistics, fuel forecasts, and member-behavior claims that could not be verified through credible primary sources.
Methodology: Prices and program rules were checked against official program websites and help centers on July 23, 2026. Break-even figures are arithmetic scenarios based on stated assumptions. They are not predictions, survey findings, or claims about the average RVer.
Update policy: Verify the current checkout price, renewal amount, eligibility requirements, and restrictions before purchasing. Promotional codes and terms can change.
Affiliate disclosure: Some links may generate a commission. That does not change the formulas, source requirements, or recommendation to verify current terms directly with the provider.
Last updated: July 23, 2026 Pricing verification date: July 23, 2026 Recommended next review: August 1, 2026 for the Thousand Trails promotional price, then January 2027 or sooner if a major program changes pricing or terms
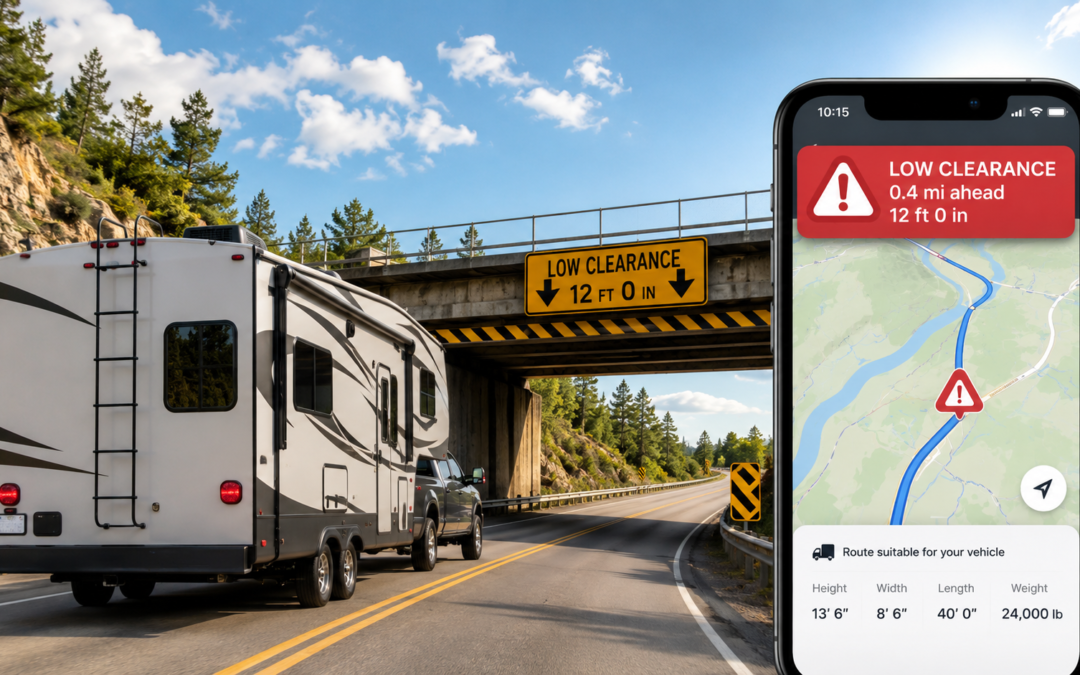
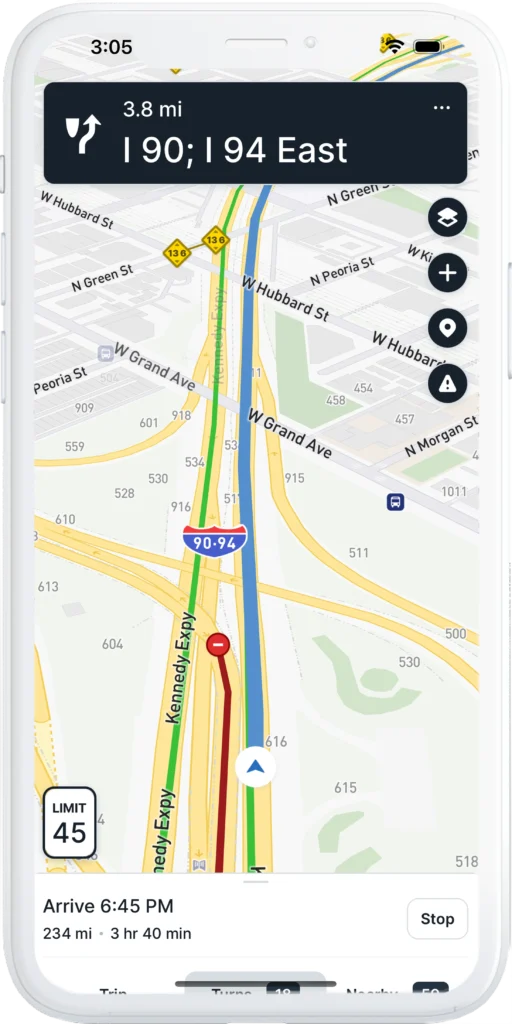
Free truck GPS apps like TruckMap can help RVers check routes for low bridges, weight limits, and restricted roads. TruckRouter.com adds free desktop pre-trip planning with height, weight, and clearance restriction data. Both are useful as secondary safety checks, not as dedicated RV GPS replacements. Truck-routing tools are built for commercial 18-wheelers and do not account for campground access roads, propane restrictions, or RV-specific points of interest. Use them alongside Google Maps and campground arrival instructions, not instead of either.
If you drive a Class A motorhome, a tall fifth wheel, or anything over 10 feet tall, Google Maps has a blind spot that matters. It does not know your vehicle height, length, weight, or propane status. It cannot warn you about a low bridge until you are staring at it through your windshield.
That is not speculation. The U.S. government’s own GPS.gov website confirms it: consumer GPS apps generally do not warn drivers of restricted roads, low bridges, or other information relevant to commercial motor vehicles (GPS.gov, Truck Traffic Routing). The FMCSA has warned that using non-commercial GPS devices in large vehicles contributes to preventable bridge strikes and has issued guidance urging commercial vehicle operators to use navigation systems designed for their vehicle type (FMCSA, Bridge Strike FAQ).
So what can RVers do about it without paying for another subscription? Free truck-routing apps exist. Some of them are genuinely useful as backup planning tools. But most “free RV GPS” advice online is either outdated, subscription-gated, or not actually RV-specific. This guide explains where free truck GPS tools fit, where they fall short, and how to build a safer routing stack without pretending any single app is magic.
Consumer GPS apps do not warn RVers about low bridges or restricted roads. Free truck GPS tools can fill part of that gap.
Google Maps is excellent for drive time, traffic conditions, and finding gas stations. It is not designed for vehicles taller than a standard passenger car. Google Maps does not accept vehicle height, length, weight, or axle count as routing inputs. It cannot filter routes by bridge clearance, weight restriction, or propane prohibition.
As of May 2026, that limitation has no workaround. There is no paid upgrade that adds RV-specific routing to Google Maps. The app routes all vehicles identically, regardless of size.
For a passenger car, this is fine. For a 13-foot-tall fifth wheel or a 45-foot Class A motorhome, it creates real hazards:
Low bridge clearances that Google does not flag until you are committed to the road
Weight-restricted roads that may not support a loaded RV and tow vehicle
Parkways and scenic routes that prohibit commercial vehicles and large RVs
Narrow mountain switchbacks where turning radius matters
Tunnel restrictions that prohibit vehicles carrying propane
The same limitation applies to Waze and Apple Maps. All three are consumer GPS tools designed for cars.
⚠️ Common Misconception
Myth: “Low bridge strikes only happen to semi trucks. RVers don’t need to worry about clearance routing.”
Why it persists: Most bridge strike reporting focuses on commercial trucking incidents, making it easy to assume the problem does not apply to recreational vehicles.
Reality: Industry safety reports estimate that roughly 15,000 bridge strikes occur annually in the United States, many involving vehicles relying on consumer-grade GPS that does not account for clearance restrictions (FMCSA, Bridge Strike Prevention). RV forums document bridge strikes involving Class A motorhomes, fifth wheels with rooftop air conditioners, and travel trailers with raised cargo carriers. Any vehicle over 10 feet tall is at risk on roads with restricted clearance.
What to do: Measure your RV height from ground to tallest point (including roof air conditioners, antennas, and cargo) and enter that dimension into any truck GPS app before routing. Never assume Google Maps or Waze will warn you about a clearance issue. They will not.
Can RVers Use Truck GPS Apps?
Yes, with limits. Free truck GPS apps can help RVers check routes for low clearances, weight restrictions, hazmat-restricted roads, and truck-forbidden segments. Several allow custom vehicle profiles where you enter height, weight, and length.
But truck routing and RV routing are not identical. The core difference: truck GPS apps are designed for commercial 18-wheelers running interstate freight corridors. They optimize for truck stops, weigh stations, diesel fuel, and Hours of Service compliance. RVers need campground access roads, propane-friendly tunnels, scenic routes suitable for large vehicles, and dump station locations.
A truck GPS app should flag a road with a 12-foot bridge clearance if the restriction is in its database. It will not tell you that the campground entrance has a hairpin turn your 42-foot rig cannot make.
The practical use case: treat a free truck GPS app as a secondary route safety check before you drive, not as your only navigation source.
Tool
Cost
Best For
RV Limitation
TruckMap
Free
Live turn-by-turn truck routing with custom vehicle profiles
Built for commercial truckers, not RVers
TruckRouter.com
Free (web only)
Pre-trip desktop planning with height, weight, and width restrictions
No mobile app; desktop planning only
Google Maps
Free
Drive time, traffic, fuel, and general navigation
No vehicle dimension input; cannot warn about low bridges or weight limits
Best Free Option: TruckMap
TruckMap is a free truck-routing app available on iOS and Android as of May 2026. It provides truck-optimized GPS routes with turn-by-turn navigation designed for commercial vehicles.
For RVers, the useful features include:
Custom vehicle profiles where you enter height, weight, and length
Low bridge avoidance based on clearance data
Weight restriction routing that bypasses roads your vehicle cannot legally use
Truck-restricted road avoidance that keeps you off parkways and residential streets not designed for large vehicles
Hazmat routing that avoids tunnels and roads prohibiting hazardous materials (relevant if you carry propane, although commercial hazmat rules may be stricter than those for RVs with fixed propane tanks — verify propane restrictions with posted signage or local DOT rules)
TruckMap generates revenue through ads targeting truck drivers for fuel discounts and load board access. The navigation features are free with no subscription paywall for basic routing.
TruckMap lets you enter custom vehicle dimensions for truck-safe routing. Free on iOS and Android.
What TruckMap does not do for RVers: It does not include campground access instructions, RV-specific points of interest (dump stations, potable water), propane tunnel restrictions specific to recreational vehicles, or scenic route suitability assessments. The app’s database is commercial-trucker-focused: truck stops, weigh stations, diesel fuel, and load boards.
RV use case: Run your planned route through TruckMap before you leave. If TruckMap flags a clearance or restriction issue that Google Maps missed, reroute. If TruckMap and Google Maps agree on the route, you have a higher confidence level that the road is safe for your rig.
TruckRouter.com is a free web-based truck routing tool as of May 2026. It is better for desktop trip planning than live in-cab navigation. Registration is free and takes less than a minute.
TruckRouter provides truck-specific routes with data on:
Weight, height, width, and length restrictions along the planned route
Low clearance warnings for bridges and overpasses
Truck warnings for road segments with known hazards
Toll costs and toll road identification
Truck stop locations along the route
Route elevation data showing grade changes
State mileage reports with Excel export
RV use case: Before a travel day, enter your route into TruckRouter from a laptop. Review the restriction flags and elevation data. If the route shows a low clearance bridge or a steep grade you did not expect, adjust before you are behind the wheel. Print or screenshot the route summary as a backup reference.
Limitation: TruckRouter.com does not have a mobile app. It is a desktop-only planning tool. You cannot use it for live turn-by-turn navigation on the road.
The core question this guide answers: Can RVers use free truck GPS apps to avoid low bridges and restricted roads? Yes, as a secondary safety check. TruckMap provides live turn-by-turn truck routing with custom vehicle profiles. TruckRouter.com provides desktop-based pre-trip planning with restriction data. Neither replaces campground arrival instructions, posted road signs, or an RV-specific GPS for drivers who want a single integrated solution.
Where Free Truck GPS Falls Short for RVers
Free truck GPS tools solve part of the safe-routing problem. They do not solve all of it. The gap between “truck safe” and “RV safe” is real, and pretending otherwise puts your rig at risk.
Free truck routing tools typically do not account for:
Campground entrance roads with tight turns, low tree branches, or unpaved surfaces
RV park access instructions that specify a particular entrance or approach direction
Propane rules by tunnel or bridge that apply to recreational vehicles but not to all commercial trucks
Scenic road suitability for large or heavy RVs
Tight campground turns that a semi truck would never attempt but an RVer might
Gravel and dirt road comfort for vehicles with low ground clearance or long wheelbases
Dump station and potable water locations that are RV-specific points of interest
Class B vs. Class A vs. fifth wheel differences in maneuverability and clearance needs
A truck GPS routes an 18-wheeler between loading docks. An RV GPS should route your rig between campsites. The data requirements are different, and free truck tools were not built with campground data in their systems.
After 35 years of RV travel and testing more navigation tools than I can count, this is the routing workflow I trust for free or low-cost trip planning:
Pre-Trip (Desktop or Laptop)
Google Maps for general drive time, traffic patterns, and fuel stop identification.
TruckRouter.com for a truck-route safety check on the same route. Review height, weight, and clearance flags. Compare against the Google Maps route.
Campground arrival instructions. Read the campground or dispersed site’s specific approach directions. Many BLM sites and RV parks specify which road to use and which to avoid.
On the Road (Mobile)
Google Maps for live navigation, traffic rerouting, and finding services.
TruckMap as a live secondary check if you encounter an unfamiliar road or detour.
State DOT signage and local posted signs. If an app says the road is fine but a posted sign says otherwise, trust the sign. Posted restrictions are legally enforceable. App data is advisory.
The non-negotiable rule: Never ignore a posted sign because an app says the road is fine. Posted bridge clearance signs, weight limit signs, and no-truck signs are placed there by the authority that owns the road. An app’s database may be outdated. The sign is current.
If you plan to boondock on public land, download offline maps while you still have Wi-Fi. Cell data limits make on-the-road downloads impractical, and dispersed camping areas are frequently in dead zones. Our RV internet setup guide covers dual-path connectivity for staying online in remote locations.
When a Paid RV GPS Tool Still Makes Sense
Free truck GPS apps fill a gap. They do not eliminate the need for a dedicated RV navigation solution for everyone. A paid RV GPS tool still makes sense for:
Big Class A motorhomes (35+ feet) where every turn and clearance matters
Tall fifth wheels with rooftop air conditioners pushing total height above 13 feet
Frequent mountain driving where grade warnings and descent alerts reduce brake fade risk
Long-distance trip planning across multiple states with varying restriction databases
RVers who want one integrated system combining safe routing, campground data, and dump station locations in a single interface
Anyone nervous about low bridges or restricted roads who wants maximum coverage rather than a patchwork of free tools
Paid RV GPS tools like RV LIFE, CoPilot GPS, and dedicated Garmin RV units include RV-specific databases that free truck apps do not have. The tradeoff is cost. The benefit is coverage. For high-risk rigs, the cost of a paid GPS subscription is small compared to the potential cost of a single bridge strike or wrong turn.
Bottom Line
Free truck GPS apps can help RVers avoid low bridges, weight-restricted roads, and truck-prohibited segments that Google Maps, Waze, and Apple Maps do not flag. TruckMap provides live truck-safe routing with custom vehicle profiles at no cost. TruckRouter.com adds free desktop pre-trip restriction checks with height, weight, and clearance data.
They are not a perfect replacement for an RV-specific GPS or dedicated trip planner. They do not know about campground access roads, propane tunnel restrictions, or RV-specific points of interest. Use them as a safety check layer in your routing workflow, not as a guarantee.
The safest approach combines free tools with common sense: check the route before you drive, verify with campground arrival instructions, and never override a posted sign because an app told you the road was clear.
Chuck Price
Chuck Price is the founder of Boondock or Bust and has over 35 years of RV travel experience, including extended boondocking across BLM and National Forest land in a 2018 Hymer Aktiv Class B motorhome. His GPS app testing methodology uses documented field routes with real-world hazards. Chuck has been featured on CBC Radio discussing RV boondocking. Learn more about Chuck.
Last updated: May 28,2026. App pricing and subscription models verified as of publication. Confirm current pricing directly with each app before downloading or purchasing.
Yosemite RV Trip Planning: No Reservations, Full Lots by 7:30 AM, and What to Do About It
Your current planning guide for Yosemite in 2026, updated with real-world conditions from the first weeks of the season: parking alerts, digital passes, towing enforcement, RV strategy, and transit backups.
By Chuck Price. Last updated: May 26, 2026 | Estimated read time: 10 minutes
Quick Reference
2026 Entry Rule: No entrance reservation is required at any time of day.
Parking Reality: Lots have been filling by 7:30 AM on weekends and holidays. Tow trucks are active. Illegal parking has led to citations and vehicles towed from meadows and roadsides.
New: Digital Passes: Buy your entrance pass online at Recreation.gov up to two days before your visit. Download it to your phone. Skip the gate line.
New: Text Alerts: Text YNPTRAFFIC to 333111 for real-time parking and traffic alerts. Text YOSEMITE to 333111 for general park alerts.
You Still Need: The entrance fee ($35/vehicle for US residents; nonresidents pay an additional $100/person age 16+ at 11 designated parks including Yosemite), plus any campground, lodging, Half Dome, or wilderness permits tied to your trip. Verify current fees at NPS.
Best Backup Plan: Use YARTS from a gateway community to bypass the parking problem entirely.
Best Pre-Trip Check:NPS Current Conditions page the night before and the morning of your visit.
Golden Rule: Screenshot every reservation, permit, and map before you lose cell service.
May 2026 Update: What We Predicted Is Now Happening
When we published this guide in March 2026, we warned that dropping the entrance reservation would shift the problem from timed access to parking and congestion. That is exactly what has happened. Yosemite recorded its highest spring visitation in a decade. On the first major weekend in May, tow trucks cleared illegally parked vehicles from the Camp 4 overflow lot while the shuttle bus sat trapped behind them. A 1.8-mile line of cars parked illegally along the road between Camp 4 and El Cap Picnic Area. Social media filled with reports of 90-minute entry lines, overflowing lots, and trail congestion.
Both Yosemite and Sequoia National Parks posted warnings on social media about citations and towing for vehicles parked on roadsides, meadows, or in unmarked spots. Visitors reported parking lots full before 7:30 AM on peak days.
This guide has been updated with digital pass options, text-based parking alerts, towing and citation details, Tioga Road status, updated entrance fee details, and revised arrival timing based on observed conditions.
Yosemite in 2026 has no entrance reservation, but parking, traffic, and towing enforcement are the real planning constraints.
What Changed for 2026
In February 2026, Yosemite Superintendent Ray McPadden announced that the park would not use a timed-entry reservation system in 2026. The decision followed a Department of Interior directive to keep national parks open and accessible, and an NPS evaluation of 2025 traffic patterns.
The park entrance fee still applies. Yosemite now relies on active traffic management instead of timed-entry reservations. That includes real-time traffic monitoring, temporary traffic diversions when parking areas fill, and additional staffing at key intersections during peak periods.
What that means for you: Stop planning around a 6am-to-2pm entry window. That mental model is dead. In 2026, your biggest problems are parking, traffic backups, road conditions, towing enforcement, and limited cell service.
New for 2026: Digital Entrance Passes
Yosemite now offers digital entrance passes through Recreation.gov. You can purchase a single-visit pass up to two days before your trip and download it to your phone or digital wallet (Apple Wallet, Google Wallet). This lets you skip the payment step at the entrance gate and move through faster.
The America the Beautiful annual pass is $80 for US residents and $250 for nonresidents. Both versions cover entrance fees at all NPS sites for 12 months and are available as digital downloads through Recreation.gov. Verify current pricing at Recreation.gov before purchasing.
Beginning in 2026, nonresidents (non-US residents) pay an additional $100 per person (age 16 and older) on top of the standard $35 vehicle entrance fee. Children 15 and under are exempt. The nonresident America the Beautiful annual pass ($250) covers the passholder plus three additional passengers and is valid for 12 months. As of May 2026, this fee applies at Yosemite, Sequoia, Kings Canyon, and eight other designated national parks. Fee structures can change. Verify current rates at the NPS Yosemite fees page before your trip.
What You Actually Need to Plan for in 2026
Without an entrance reservation requirement, Yosemite planning gets simpler on paper but harder in practice. The first weeks of the 2026 season confirmed this. The park recorded its highest spring visitation in over a decade. Parking lots filled before mid-morning on weekends. NPS deployed tow trucks and issued citations for illegal parking on meadows and roadsides.
Your working checklist for 2026 should focus on six things:
Digital pass: Buy it before you leave home. It saves time at the gate.
Text alerts: Sign up for YNPTRAFFIC (text to 333111) before you lose cell service.
Road conditions: construction, chain controls, weather delays, and closures.
Parking strategy: Arrive before 7:30 AM on weekends/holidays. Have a backup lot in mind. Plan to park once and stay parked.
Backup transportation: YARTS from a gateway community, or the free in-park shuttle once parked.
Offline readiness: Screenshots of maps, permits, campground confirmations, and your digital pass before you lose service.
The Best 2026 Yosemite Arrival Strategy
Arrival Framework (Updated for 2026 Conditions)
If you want parking: Arrive before 7:30 AM on weekends and holidays. Lots have been filling by mid-morning even on weekdays during peak periods.
If you hate stress: Visit midweek. Avoid arriving between 10 AM and 2 PM on any day during peak season.
If you are driving a larger RV: Have a backup parking target before you enter the Valley. Your options disappear faster than they do for cars.
If you are flexible: Use YARTS from Mariposa, Oakhurst, Groveland, or another gateway community. You bypass the parking problem entirely.
If you are depending on chargers, specific trailhead parking, or oversized spaces: Plan conservatively and assume your first choice will be full.
Park once and stay parked: This is now official NPS guidance. Walk, bike, or shuttle from your parking spot for the rest of the day. Do not give up a spot to repark closer to your next destination.
Earlier Yosemite reservation years trained visitors to think in terms of entry windows. In 2026, replace that with a parking-first model. Your goal is not beating a reservation clock. Your goal is getting in before your preferred lot, shuttle stop, or activity becomes unavailable.
The 2026 season has proven this is not theoretical. On a Thursday before Memorial Day weekend, even visitors who found parking described themselves as lucky. On the preceding weekend, drivers circled lots for hours. Five separate strangers asked one visitor walking through Camp 4 if they were leaving their spot.
Real-Time Alerts: Text Before You Go
Sign Up for Yosemite Text Alerts
These are free NPS text alert services. Sign up before you lose cell service on the drive in.
Traffic and parking alerts: Text YNPTRAFFIC to 333111
General park alerts (emergencies, closures): Text YOSEMITE to 333111
You can also check go.nps.gov/ynptraffic for current conditions when you have service. Example alert: “South Entrance delay is currently about 1.5 hours.”
No text means parking is still technically available somewhere. It does not mean it is easy. If you start receiving alerts, adjust your plan immediately. Consider redirecting to Tuolumne Meadows, Wawona, Hetch Hetchy, or another area outside Yosemite Valley.
Road Conditions and Closure Checks
This is the most important live planning tool for your trip. Check it the night before, the morning you leave, and again whenever you regain service:
Real-Time Conditions
Use the official Yosemite conditions page for road closures, construction, weather issues, and operational alerts.
Tioga Road (Highway 120 East) opened May 15, 2026. Check current status before planning a Tioga Pass trip, as closures can occur due to weather or hazards.
For road status by phone: 209-372-0200 (then press 1, 1).
Do not rely on an old screenshot, a Facebook comment, or a generic travel blog once you are close to Yosemite. The conditions page is the source that matters.
RV, Parking, and Shuttle Reality
RVs can visit Yosemite, but your margin for error is smaller than ever in 2026. With no reservation system filtering demand, parking flexibility drops fast once the Valley gets busy. Even standard vehicles have struggled to find spots this season. For RV travelers, early arrival, conservative expectations, and shuttle use are not just good ideas. They are requirements. For more on RV-specific logistics at national parks, see our boondocking beginner’s guide.
Practical RV Planning Rules (2026 Season)
Arrive before 7:30 AM on weekends and holidays. You need the extra time more than car visitors do.
Have at least two backup parking targets mapped before you enter the Valley.
Do not build your day around finding the perfect close-in space. It will not be there by mid-morning.
Park once. Use the free in-park shuttle to reach your destinations.
Do not park on meadows, roadsides, or in unmarked spots. Tow trucks have been active in 2026, and vehicles parked illegally have been cited and removed.
If your rig is large, review current maps and parking guidance before the trip and be ready to pivot.
Keep charging expectations modest. Do not assume an available charger will be waiting for you.
Towing, Citations, and Illegal Parking: What Is Actually Happening
This is new for 2026 and worth its own section. The elimination of the reservation system has led to a visible increase in illegal parking, and NPS is responding with enforcement.
In early May 2026, tow trucks were actively clearing vehicles from the Camp 4 overflow lot that had been parked at angles blocking the shuttle bus. A continuous line of cars parked illegally along the 1.8-mile stretch of road between Camp 4 and El Cap Picnic Area. Visitors reported being ticketed and towed for parking between trees, in ditches, and on protected meadows.
Both Yosemite and Sequoia National Parks posted warnings on Instagram urging visitors not to park in roadways or unmarked spots, citing safety risks, citations, and towing.
The takeaway: If you cannot find a legal spot, do not improvise. Move to another lot, use the shuttle from where you are, or leave the Valley and try a different part of the park. A towed vehicle ruins your trip far more than a longer walk from a farther lot.
The Best Alternative to Driving: YARTS
If your goal is reducing hassle, not just getting through the gate, YARTS is worth serious consideration. It reduces the need to deal with parking hunts, Valley congestion, and active traffic controls on the busiest days.
If your trip date is fixed and the Valley is likely to be crowded, the lowest-stress move may be leaving the car outside the park and riding YARTS in.
For travelers staying in gateway communities (Mariposa, Oakhurst, Groveland, El Portal, or Merced) or building a long day trip, YARTS bypasses the single biggest failure point: finding and keeping a parking spot in the Valley. If you are planning an extended road trip, see our guide to free camping apps for finding spots near gateway communities, and our RV overnight parking guide for places to stop on the drive in.
The shuttle system inside the Valley is also free, but it has been running at or beyond capacity on peak days in 2026. YARTS gets you into the park without needing to park at all.
Assuming the lack of a reservation means easy access. It does not. Yosemite recorded its highest spring visitation in a decade after dropping the reservation system. No reservation required is not the same as no congestion.
Arriving after 8 AM on a weekend or holiday. Parking lots have been filling by 7:30 AM. If you arrive at 10 AM on a Saturday, expect to circle, get frustrated, or get redirected by traffic management.
Parking illegally. Tow trucks are active. Vehicles have been towed from meadows, ditches, roadsides, and angles blocking shuttle routes. Citations are being issued. This is not a warning. It is what is already happening.
Showing up without offline backups. Screenshot maps, permits, campground confirmations, your digital entrance pass, and key links before you lose service. Cell coverage inside the park is unreliable.
Ignoring alternatives to the Valley. Tuolumne Meadows (Tioga Road opened May 15), Wawona, and Hetch Hetchy offer quality experiences with less congestion. NPS is actively encouraging visitors to explore these areas.
Historical Context: Why Older Yosemite Advice Still Confuses People
Older Yosemite guides often talk about 6am-to-2pm reservation windows, late-May releases, and timed-entry booking fees. That was relevant in prior reservation seasons (2020 through 2025, with variations). It is not the current 2026 rule.
The reservation system was originally introduced during COVID-19 in 2020 to limit capacity. Over time it evolved into a congestion management tool. In April 2025, Interior Secretary Doug Burgum ordered national parks to remain open and accessible. In February 2026, Superintendent McPadden announced the system would not be used for the 2026 season.
A March 2026 survey by the Yosemite Union found that approximately 85% of 135 verified employee responses disapproved of the decision, and more than 300 staff members have publicly called for it to be reversed. The early-season results have added weight to those concerns.
That is why Yosemite planning content keeps going stale. The details that used to matter most are no longer the live constraint. In 2026, parking, road conditions, towing enforcement, and operational changes are the practical bottlenecks.
Frequently Asked Questions
Do you need a reservation to enter Yosemite in 2026?
No. Yosemite is not requiring an entrance reservation in 2026. The standard park entrance fee still applies. However, parking lots have been filling by 7:30 AM on weekends and holidays.
How do I get real-time Yosemite parking and traffic alerts?
Text YNPTRAFFIC to 333111 for traffic and parking alerts. Text YOSEMITE to 333111 for general park alerts including emergencies. Sign up before you lose cell service on the drive in.
Can I buy my Yosemite entrance pass online?
Yes. Yosemite now offers digital entrance passes through Recreation.gov. You can purchase a single-visit pass up to two days before your trip and download it to your phone or digital wallet. This reduces wait time at entrance gates.
What time do Yosemite parking lots fill up?
During the 2026 season, parking lots in Yosemite Valley have been filling by 7:30 AM on weekends and holidays. Midweek lots generally have more availability but can still fill by mid-morning during peak periods. Text YNPTRAFFIC to 333111 for real-time updates.
Can I enter Yosemite after 2 pm without a reservation?
Yes. In 2026, Yosemite is not requiring an entrance reservation at any time of day. However, arriving in the afternoon means parking is likely full in the Valley. Plan to use the shuttle, YARTS, or visit areas outside the Valley.
How much does it cost to enter Yosemite in 2026?
The standard vehicle entrance fee for US residents is $35, valid for seven consecutive days. Beginning in 2026, nonresidents (non-US residents) pay an additional $100 per person (age 16 and older) at 11 designated parks including Yosemite. Fee structures can change. Verify current rates at the NPS Yosemite fees page. Digital passes and America the Beautiful annual passes are available through Recreation.gov.
What if I have a Half Dome permit or campground reservation?
Those are still separate reservations or permits for the activity itself. They matter for your trip, but they are not replacing an entrance reservation because Yosemite is not using an entrance reservation system in 2026.
Is Tioga Road open in 2026?
Tioga Road (Highway 120 East) opened to vehicles on May 15, 2026. Check the NPS Current Conditions page or call 209-372-0200 for real-time status, as closures can occur due to weather or hazards.
Will I get towed for illegal parking in Yosemite?
Yes. In May 2026, NPS actively towed vehicles parked illegally along roadsides, on meadows, and in unmarked spots. Both Yosemite and Sequoia National Parks posted social media warnings about citations and towing. Do not park outside designated areas.
Is Hetch Hetchy included in the 2026 entry policy?
No entrance reservation is required for Hetch Hetchy or any other part of Yosemite in 2026. However, Hetch Hetchy still has its own operating hours and access details. Check current park guidance before visiting.
Official Links to Bookmark
These are the pages that should drive your final planning decisions:
Bottom line: Yosemite is easier to understand in 2026 because there is no entrance reservation requirement. It is harder to execute because the infrastructure cannot absorb unlimited demand. Plan around traffic, parking, towing enforcement, and backups. Arrive early or arrive differently. And download that digital pass before you leave home.