Traveling during a federal shutdown?
Use our updated Shutdown Camping Guide (2025) for what’s open and legal alternatives.
Last updated: October 2, 2025 • Maintainer: Chuck Price (chuck@chuckprice.org) • Non-partisan resource
Quickly explains what’s open/closed and legal alternatives (BLM/USFS dispersed, state parks).
What stays open, what closes, and how to prepare
TL;DR – Key takeaways
Many National Parks will remain accessible with basic services – Parks collecting recreation fees will use those funds to maintain restrooms, trash collection, and campground operations while funds last
BLM dispersed areas and most National Forest backcountry stay open – But zero services at non-fee areas (no trash, water, or restrooms)
Army Corps of Engineers (COE) is the wild card – Funded through Defense, not Interior. May stay open in partial shutdowns; closes like NPS in full shutdowns. Check local district websites or call district offices for the current status.
You must be 100% self-sufficient – 14+ days of supplies, backup camping locations, and emergency communication
A government shutdown looming means federal agencies are scrambling to finalize contingency plans, but many details remain unclear just days before potential funding lapses. For campers already on the road or planning trips to federal lands, this uncertainty creates real problems. Will your reserved campsite be accessible? Can you renew your Long-Term Visitor Area permit? What happens if you need emergency services in remote areas?
The reality is that “shutdown” doesn’t mean the same thing across different land management agencies. While some National Parks may close completely, many will remain accessible and maintain basic services using recreation fee funds. Most Bureau of Land Management dispersed camping areas remain physically accessible. National Forests fall somewhere in between. Understanding these differences and preparing for reduced services can mean the difference between a minor inconvenience and a trip-ending crisis.
This guide breaks down exactly what each agency does during shutdowns, addresses the specific challenges facing long-term campers, and provides a complete preparation checklist. By the end, you’ll know which backup plans to activate and how to maintain self-sufficiency when government services disappear.
Agency-by-agency breakdown: What closes and what stays accessible
The confusion around shutdown impacts stems from the fact that each federal land management agency operates under different funding structures and priorities. Here’s what actually happens to your camping options when Congress fails to pass spending bills.
National Parks: Varied access depending on fee collection and park design
The National Park Service approach during shutdowns varies significantly based on whether parks collect recreation fees and whether they have physically accessible areas. According to the official NPS contingency plan, the situation is more nuanced than simple closures.
Parks with accessible areas that collect recreation fees:
Parks collecting fees under the Federal Lands Recreation Enhancement Act (FLREA) will utilize available retained recreation fee balances to provide basic visitor services. This includes:
Restrooms and sanitation maintenance
Trash collection
Road maintenance
Campground operations
Law enforcement and emergency operations
Staffing entrance gates as necessary to provide critical safety information
Park roads, lookouts, trails, and open-air memorials will generally remain accessible to visitors at these locations. Each park must develop daily cost estimates for all employees and services to be supported by recreation fees for review and approval by the Assistant Secretary for Fish and Wildlife and Parks.
Parks without sufficient recreation fee funds:
Parks with accessible areas that do not collect recreation fees or have insufficient balances must develop daily cost estimates for all employees and services to be supported by regional or national recreation fees. At parks without accessible areas, the NPS will not operate during the lapse. Excepted staffing will be held to the minimum amount needed for law enforcement and emergency response. No visitor services will be provided.
What closes everywhere:
Even at parks maintaining basic operations, the following services will not be available:
Permits for new activities (no new permits issued)
Interpretive or educational programs
Visitor information services beyond critical safety information
Road and walkway maintenance including plowing and ice melting (except at fee-funded parks)
Park websites and social media (except for emergency communications)
Regular road or trail condition updates
As a general rule, if a facility or area is locked or secured during non-business hours (buildings, gated parking lots, etc.) it will be locked or secured for the duration of the shutdown.
Resource protection closures:
At the Assistant Secretary for Fish and Wildlife and Parks’ discretion, parks may close grounds/areas with sensitive natural, cultural, historic, or archaeological resources vulnerable to destruction, looting, or other damage that cannot be adequately protected by the limited law enforcement staff that remain on duty. If visitor access becomes a safety, health, or resource protection issue (weather, road conditions, resource damage, garbage build-up to the extent that it endangers human health or wildlife, etc.), the area must be closed.
If you have existing reservations through Recreation.gov, the NPS recommends contacting the local facility to determine if the facility is open or closed. Reservations may not be honored if locations are not fully staffed. Refunds will be considered and processed after the lapse in funding resolves.
BLM lands: Dispersed areas open, developed sites closed
Bureau of Land Management areas present the most camper-friendly shutdown scenario. The vast majority of BLM’s 245 million acres consists of undeveloped public land that remains accessible during shutdowns (Bureau of Land Management, 2023). This includes popular boondocking destinations across Arizona, California, Nevada, and Utah.
However, all developed recreation sites close, including campgrounds with amenities, visitor centers, and vault toilet facilities. More critically for long-term campers, services like trash collection and dump stations become unavailable. BLM ranger patrols continue at reduced levels for emergency response, but routine enforcement of camping limits and permit checks essentially stops.
According to the official BLM contingency plan, visitor services including trash collection and toilet cleaning will generally continue at recreation fee sites authorized under the Federal Land Recreation Enhancement Act while funds are available, but may not be available at all locations. BLM land will remain accessible to the public and efforts will be made to post signs, as appropriate, to indicate where services are or are not available.
The agency’s dispersed camping rules remain in effect, but verification and education typically handled by camp hosts disappears. This creates a gray area for permit renewals and compliance monitoring that campers must navigate carefully.
Campgrounds, boat ramps, and other recreation sites will be open, however, at some facilities the full range of services may not be available including restrooms and water systems. In cases where funds are not available to maintain such services, signs will be posted but visitors may remain at these sites at their own risk.
National Forests: Mixed approach based on local conditions
The U.S. Forest Service typically adopts a middle-ground approach. Backcountry areas and most forest roads remain open for dispersed camping, but developed campgrounds, day-use areas, and visitor centers close (U.S. Forest Service, 2019).
Unlike BLM lands, some National Forests may restrict access to specific areas due to fire danger or resource protection concerns when firefighting and maintenance crews are reduced. Local forest supervisors have discretion to implement broader closures if they determine public safety risks are too high with minimal staffing.
Developed sites that charge fees always close, while free dispersed areas generally stay accessible. However, services like restroom maintenance and trash pickup cease entirely.
U.S. Army Corps of Engineers (COE): The shutdown wild card
The U.S. Army Corps of Engineers operates differently during federal government shutdowns because it is funded through the Department of Defense (DoD), unlike National Parks or Forest Service sites funded by the Departments of the Interior and Agriculture. This unique funding structure means COE recreation areas may remain open if Defense funding continues while other agencies shut down.
Partial shutdown scenario (most common): If Congress approves Defense spending but not Interior or Agriculture funding, COE campgrounds, boat ramps, and day-use areas generally remain fully open with normal services, making them valuable alternatives when other federal sites close.
Full shutdown scenario: If Defense funding also lapses, COE facilities close fully similar to National Parks. This includes gate-locking all federal-operated campgrounds, canceling reservations through Recreation.gov with refunds, and ceasing all services, including visitor centers, restrooms, water, dump stations, trash collection, and most boat ramps (though some ungated ramps may remain physically accessible without services).
Partner facility exception: Not all COE recreation areas are federally operated. Some campgrounds, marinas, and day-use areas are managed by county governments, municipalities, or private concessionaires under leases. These partner-operated sites may stay open during federal shutdowns if they do not rely on federal staff and access roads remain open, but this varies by location and should be verified locally.
Operations continuing during shutdown: Dam operations, flood control, and emergency response for life and property protection continue regardless of shutdown status.
Uniform closure policy: During the 2025 government shutdown, all USACE-operated campgrounds and day-use parks closed nationwide on October 1, 2025. Unlike earlier assumptions about district-level discretion, the actual shutdown policy was uniform—all federally-operated COE recreation facilities closed, with no exceptions based on location or the number of campgrounds on a waterway (U.S. Army Corps of Engineers, 2025).
The partner facility exception remains: The only sites that may stay open are those operated by counties, municipalities, or private concessionaires on leased land, and only if they don’t rely on federal staff. These exceptions are rare. Campers scheduled to arrive during a shutdown should contact the local park or district office directly, as reservations through Recreation.gov will be automatically canceled with refunds processed.
Real-time status website update: The COE launched a Recreation Operational Status website in May 2025 to provide real-time, district-by-district updates. However, as of late 2025, this website is no longer available. Visitors now need to check local district websites or contact district offices directly for current operational information before planning visits.
None at non-fee areas; basic services at fee sites while funds last
Emergency response only
BLM Developed
Varies – fee sites may remain open
Basic services at fee sites while funds last
Reduced patrols
National Forests
Dispersed open, developed closed
Emergency only
Reduced patrols
U.S. Army Corps of Engineers (COE)
All federal sites close in full shutdown; rare partner/concessionaire sites may stay open
Normal (partial shutdown) or None (full shutdown)
Normal patrols (partial) or reduced to dam security (full)
Long-term camper considerations: LTVAs and extended stays
Long-term campers face unique challenges during government shutdowns that go beyond simple access issues. The infrastructure and services that support extended stays on federal lands operate differently when agencies reduce to skeleton crews.
LTVA permit renewals and host services
Long-Term Visitor Areas like those around Quartzsite, Arizona, present complex scenarios during shutdowns. While the BLM lands themselves remain accessible, the permit system that legitimizes extended stays becomes problematic. Current LTVA permits remain valid through their expiration dates, but renewals become impossible when fee collection and administrative services stop (Bureau of Land Management, 2018).
This creates a legal gray area for campers whose permits expire during a shutdown. The BLM’s official guidance states that campers should not be penalized for administrative delays beyond their control, but enforcement becomes inconsistent with reduced staffing. Camp hosts, who typically assist with permit renewals and provide local information, are either furloughed or work without official support.
Water and dump station access, critical services for long-term stays, disappear when maintenance crews are furloughed. Private vendors in areas like Quartzsite typically continue operating, but government facilities close indefinitely.
Duration planning: First week versus extended closures
The impact of shutdowns on camping escalates significantly after the first week. Initially, most campers can maintain their routines using stored supplies and existing infrastructure. However, extended shutdowns create compounding problems that require different strategies.
Trash accumulation becomes the most visible issue. Without regular collection services, popular camping areas quickly develop sanitation problems. During the 2018-2019 shutdown, several BLM areas near major cities experienced illegal dumping and overflowing waste containers that took months to fully address (Government Accountability Office, 2019).
Emergency response capabilities also degrade over time. While initial emergency services continue with essential personnel, response times increase and specialized rescue capabilities may become unavailable. This particularly affects remote camping areas where cell coverage is limited and self-rescue becomes the primary option.
Ethical camping: Protecting lands when no one is watching
Reduced government presence during shutdowns places extra responsibility on the camping community to protect the resources we all depend on. This goes beyond basic Leave No Trace principles to active stewardship when official oversight disappears.
Pack out all trash, even when dumpsters are available but not being emptied. Overflowing containers attract wildlife and create long-term environmental problems. Store waste securely and plan for extended periods without disposal options.
Respect all closure signs and physical barriers, even when circumvention appears easy. Agencies post restrictions for resource protection and safety reasons that remain valid regardless of enforcement presence. Being caught in closed areas during a shutdown can result in enhanced penalties when normal operations resume.
Report serious violations or emergencies through official channels when possible. While response may be delayed, documentation helps agencies prioritize limited resources and address problems systematically.
Self-sufficiency preparation: Essential supplies and strategies
When government services disappear, successful camping depends entirely on your ability to handle problems independently. The key difference between inconvenience and crisis lies in preparation that goes beyond normal boondocking supplies.
Extended waste management without services
Trash storage becomes your biggest logistical challenge during extended shutdowns. Plan for double your normal waste generation when you can’t access dumpsters or recycling facilities. Compact everything aggressively and separate food waste that attracts animals.
Invest in bear-proof containers or metal storage boxes if you don’t already have them. Plastic bags and soft containers won’t protect against wildlife that becomes bolder around campsites when ranger presence decreases. During the 2018-2019 shutdown, several popular camping areas reported increased wildlife conflicts due to improper food and waste storage (National Park Service, 2019).
Grey water disposal requires more careful planning without dump stations. Identify multiple backup locations for legal grey water disposal, including private RV parks and truck stops along your planned routes. Reduce grey water production by using paper plates and minimizing dishwashing when disposal options are limited.
Black water management becomes critical after 5-7 days for most RV systems. Map private dump stations within reasonable driving distance of your camping area before you need them. Some truck stops and gas stations offer dump services for a fee, but availability varies significantly by region.
Water security and conservation strategies
Water access becomes unreliable when government facilities close. Fill all tanks and containers before entering areas that depend on federal water sources. This includes many BLM areas where the only reliable water comes from visitor centers or developed campgrounds that close during shutdowns.
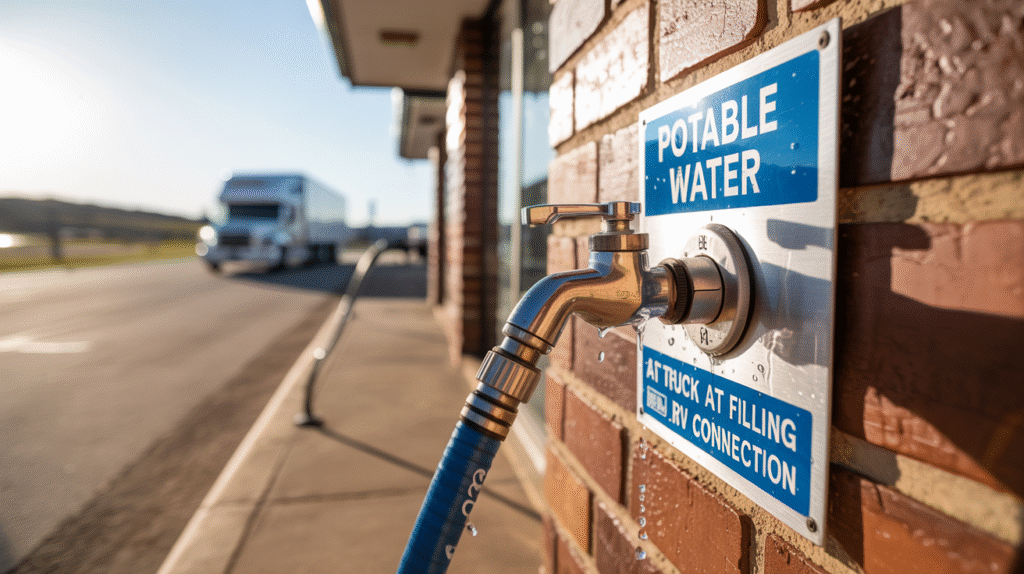
Identify private water sources along your route, including grocery stores, truck stops, and RV supply stores that sell potable water. Some areas popular with long-term campers have private water delivery services, but expect higher demand and prices during shutdowns.
Implement strict water conservation immediately when services become uncertain. Reduce shower frequency, use disposable plates to minimize dishwashing, and collect rainwater where legal and practical. A 20% reduction in water usage can extend your independence by several days.
Communication and emergency preparedness
Emergency response times increase significantly during shutdowns as agencies operate with minimal staffing. Your ability to handle medical emergencies, vehicle breakdowns, and equipment failures becomes more critical when help is hours away instead of minutes.
Upgrade your communication capabilities if you regularly camp in remote areas. Satellite communicators like Garmin inReach devices provide two-way messaging and emergency beacon functions that work regardless of cell coverage. These devices proved essential for several campers during previous shutdowns when normal emergency services were delayed (Garmin, 2023).
Carry comprehensive first aid supplies and know how to use them. Include prescription medications with extra supplies, since pharmacy access may be limited if you need to relocate quickly. Document medical conditions and emergency contacts in writing, since electronic devices can fail when you need them most.
Legal compliance without oversight
Staying within camping regulations becomes more complex when enforcement and education services are reduced. The 14-day dispersed camping limit remains in effect, but verification systems that rely on host check-ins or ranger visits essentially stop functioning.
Document your camping locations and dates meticulously. Take GPS coordinates and photos that prove compliance with regulations if questions arise later. Some campers have faced retroactive penalties when agencies resume normal operations and discover extended stays during shutdown periods.
Move between camping areas proactively rather than waiting for enforcement contact that may never come. The spirit of dispersed camping regulations is to prevent long-term settlement and resource damage, which becomes more important when monitoring disappears.
Alternative strategies: Backup plans and exit routes
Smart shutdown preparation includes realistic backup plans that don’t depend on federal land access. When your primary camping strategy fails, these alternatives can save your trip without breaking your budget.
State park systems as reliable alternatives
State parks operate independently of federal funding and maintain normal services during federal shutdowns. Many western states offer excellent camping options that rival federal alternatives, often with better amenities and more predictable availability.
California state parks provide particularly good alternatives to federal desert camping, with locations like Anza-Borrego Desert State Park offering dispersed-style camping with basic services maintained. Arizona state parks near popular BLM areas include Lost Dutchman and McFarland, both within driving distance of traditional Quartzsite-area camping.
Reservation systems for state parks continue operating normally during federal shutdowns, but expect increased demand from displaced federal land campers. Book alternative sites before shutdowns begin rather than waiting for displacement to occur. This is particularly critical for campers displaced from U.S. Army Corps of Engineers lakeside campgrounds, as many states operate parks on or near the same reservoirs, providing similar waterfront experiences with uninterrupted services during federal shutdowns.
Private campground cost-benefit analysis
Private campgrounds become more attractive during shutdowns when their reliability outweighs cost concerns. For long-term campers, monthly rates at private parks may cost less than constantly relocating and dealing with service interruptions.
Thousand Trails and other membership programs offer emergency alternatives for members, though availability varies by region and season. Some private campgrounds near popular federal areas offer special rates during government shutdowns, recognizing the displaced camper market.
Budget for higher costs but factor in savings from reduced fuel consumption when you’re not constantly seeking services and supplies. A stable base camp with reliable utilities may cost more per day but reduce overall trip expenses when federal services are unavailable.
Urban boondocking and city resources
Cities near popular camping areas often allow overnight parking in specific zones, providing access to urban services when federal facilities close. Many western cities accommodate RVers with designated overnight areas, especially during peak season when campgrounds fill up.
Walmart, Cracker Barrel, and truck stops provide legal overnight parking with varying amenities. While not suitable for extended stays, these options work well for resupply runs and service access when federal land camping becomes impractical.
Research local ordinances before relying on urban options. Some cities restrict RV parking during peak tourist seasons, while others welcome the economic impact of visiting campers. Apps like Campendium and iOverlander provide real-time information about urban camping legality and camper experiences.
Community resources and mutual aid
The camping community typically becomes more cooperative during challenging situations like government shutdowns. Online forums, Facebook groups, and apps like Campendium provide real-time information about conditions, alternatives, and resource sharing opportunities.
Consider joining or organizing informal camping groups that can share costs and responsibilities. Group camping reduces individual resource consumption and provides backup assistance for emergencies or equipment failures when official services are unavailable.
Local businesses in popular camping areas often step up with services during federal shutdowns. Private dump stations, water sales, and supply deliveries may become available in areas that normally depend on government facilities. Support these businesses that help the camping community during difficult periods.
Your shutdown survival checklist: Be ready before it happens
Government shutdowns often develop quickly, leaving little time for preparation once funding lapses become imminent. The difference between a manageable situation and a trip-ending crisis comes down to preparation that happens before uncertainty strikes.
Pre-shutdown preparation timeline
Start monitoring shutdown risks two weeks before potential deadlines. Congressional funding battles typically provide advance warning, but agencies release specific closure information only days before actual shutdowns occur. Follow the Federal News Network and Government Executive for reliable updates on appropriations status and agency planning.
Check agency websites three days before potential shutdowns for updated contingency plans. While the Trump administration hasn’t restored public access to detailed shutdown plans, individual agencies often post basic closure information on their homepages when shutdowns become likely.
Complete all supply runs and tank fills 48 hours before potential closure dates. Popular camping areas near cities experience increased demand as campers stock up, making last-minute shopping more difficult and expensive.
Essential monitoring and communication
Bookmark the emergency contact numbers for local sheriff’s departments and emergency services in areas where you plan to camp. Federal emergency response continues during shutdowns, but local agencies may provide faster assistance for non-life-threatening situations.
Download offline maps for your camping areas and alternative routes to services. Cell coverage often remains limited in remote camping areas, and GPS apps may not work when you need them most. Paper maps provide backup navigation when electronic systems fail.
Join local camping Facebook groups and forums for real-time condition reports from other campers. The community network often provides more current information than official sources, especially regarding road conditions, water availability, and service alternatives.
Final verification questions
Before heading to federal lands during shutdown uncertainty, confirm you can answer “yes” to these critical questions:
Do you have at least 10 days of water and 14 days of food?
Can you store two weeks of trash securely?
Do you have reliable communication for emergencies?
Have you identified at least two alternative camping locations with confirmed access?
If your trip includes Corps lakes, have you checked the local COE district website or contacted the district office for the current operational status?
If relying on COE sites, do you know which appropriations bills are at risk (Defense vs. Interior)?
If planning National Park visits, have you verified whether your target park collects recreation fees and will maintain basic services?
Your camping success during government disruptions ultimately depends on preparation that makes you truly independent of government services. The most successful shutdown campers are those who barely notice the difference because they’re already equipped for extended self-sufficiency.
For ongoing updates and community support during government shutdowns, visit BoondockOrBust.com and follow our social media channels. We’ll continue monitoring conditions and sharing real-time information to help you navigate these challenging situations safely and successfully.
References
Bureau of Land Management. (2018). Long-Term Visitor Area contingency procedures during appropriations lapses. U.S. Department of the Interior. https://www.blm.gov
Government Accountability Office. (2019). 2018-2019 government shutdown: Federal agencies’ use of funding during the lapse in appropriations (GAO-19-385). https://www.gao.gov/products/gao-19-385
Plan Your Best RV Trip: A Comprehensive Free Planner & Checklists
By: Chuck Price | Boondock or Bust Last Updated: September 6, 2025
(TL;DR): This comprehensive guide provides a complete, 100% free travel planning system covering the full lifecycle of RV and vanlife adventures. Includes downloadable modules for three planning approaches, comprehensive preparation checklists, accessibility considerations, pet travel integration, and post-trip improvement systems that rival expensive paid planners—without a single upsell or hidden cost.
The dream of RV and van life is one of ultimate freedom: open roads, breathtaking landscapes, and the ability to go wherever adventure calls. This dream is more popular than ever, with over 11 million U.S. households now owning RVs, and 46% planning to purchase their first RV within the next five years. Yet between the dream and reality lies a canyon of overwhelming planning decisions.
Here’s the truth most planning guides won’t tell you: meticulous planning and spontaneous adventure aren’t enemies—they’re partners. The most memorable trips happen when you’ve planned well enough to say “yes” to unexpected opportunities without worrying about your budget, your next campsite, or whether your RV is road-ready.
This planner bridges that gap. Unlike expensive digital planners that treat you like a customer to convert, this system treats you like a traveler to empower. No upsells, no “premium” features, no processing fees—just a comprehensive planning framework designed by travelers who understand that the best adventures require both preparation and flexibility.
Choose Your Planning Style (Not One-Size-Fits-All)
Critical Perspective: The travel industry promotes a false choice between rigid itineraries and “wing it” adventures. This binary thinking ignores how different personalities, travel goals, and life circumstances require different planning approaches. A retiree with unlimited time needs different tools than a working parent with a two-week window.
Most planning advice assumes everyone travels the same way. They’re wrong. After interviewing hundreds of successful RV travelers, three distinct planning philosophies emerge—each valid, each requiring different tools and approaches.
The Structured Planner
You thrive on detailed itineraries, confirmed reservations, and scheduled activities. Uncertainty creates anxiety, while a well-planned day brings peace of mind. You research restaurants before visiting new cities and prefer knowing exactly where you’ll sleep each night.
Your planning strengths: Detailed research, comprehensive preparation, excellent at avoiding common pitfalls. Your planning challenges: Difficulty adapting when plans change, potential for over-scheduling, may miss spontaneous opportunities.
The Flexible Explorer
You prefer loose frameworks with room for spontaneous discoveries. Detailed itineraries feel restrictive, and you’d rather research options on the road than commit to specific plans. You enjoy the thrill of finding hidden gems and making last-minute decisions.
Your planning strengths: Adaptable, excellent at discovering unexpected experiences, comfortable with uncertainty. Your planning challenges: May encounter fully booked campgrounds, higher costs from last-minute decisions, potential for decision fatigue.
The Hybrid Adventurer
You want the security of a planned foundation with windows for spontaneous exploration. You book accommodations for busy periods but leave gaps for unexpected discoveries. You research multiple options for each location but decide in the moment which to pursue.
Your planning strengths: Balanced approach, good crisis management, combines security with flexibility. Your planning challenges: More complex planning process, requires discipline to maintain boundaries between planned and spontaneous time.
Planning Style Assessment
When planning a vacation, you typically:
A. Create detailed day-by-day itineraries with backup plans for weather contingencies
B. Book the first and last nights, then figure out everything else as you go
C. Plan key experiences and accommodations, but leave 30-40% of your time unscheduled
Human Insight: “I spent my first RV trip fighting my natural planning style instead of embracing it. Once I accepted that I’m a Hybrid Adventurer who needs security anchors but craves spontaneous exploration, my trips became infinitely more enjoyable. The key isn’t changing your personality—it’s building a system that amplifies your strengths while addressing your blind spots.” —Sarah M., full-time RVer since 2019
Essential Considerations Most Planners Miss
Critical Perspective: The travel planning industry operates on dangerous assumptions about “universal” travel advice. They assume all travelers are able-bodied, child-free, pet-free couples with unlimited flexibility and reliable internet access. This one-size-fits-all approach leaves millions of travelers without adequate planning resources, creating unnecessary barriers to adventure.
Mainstream RV planners focus on routes and campgrounds while ignoring the practical realities that make or break real trips. These overlooked factors don’t just cause inconvenience—they can derail entire adventures and exclude whole communities from the RV lifestyle.
Seasonal & Weather Strategy
Weather doesn’t just affect your comfort—it determines campground availability, road accessibility, and activity feasibility. Yet most planners treat weather as an afterthought rather than a primary planning factor.
Regional Climate Patterns: The difference between a magical trip and a miserable experience often comes down to timing. Visiting the Southwest in July or the Pacific Northwest in February isn’t just uncomfortable—it can be dangerous and expensive.
Seasonal Campground Economics: Popular destinations can cost 300% more during peak season, while shoulder seasons offer both savings and smaller crowds. Recreation.gov data shows that 70% of national park campgrounds operate seasonally, with many closing entirely from November through March.
Accessibility & Universal Design
The RV industry has made significant strides in accessible vehicle design, but accessible travel planning resources remain scarce. This gap excludes travelers with disabilities from resources that could enable incredible adventures.
Accessible Campground Reality: ADA compliance varies dramatically between campground types. Federal campgrounds generally offer better accessibility than private parks, but even “accessible” sites may have limitations like steep approaches or inaccessible bathhouses.
Accessibility Factor
Federal Campgrounds
Private Parks
Planning Requirement
Site Accessibility
Generally compliant
Varies widely
Verify actual measurements, not just designations
Bathhouse Access
ADA compliant
Often inaccessible
Research proximity and accessibility features
Trail Access
Some accessible options
Rarely considered
Identify accessible alternatives and equipment needs
Pet Travel Integration
Over 60% of RV travelers bring pets, yet most planners treat animals as an afterthought. Pet-friendly travel requires fundamentally different planning approaches that consider animal safety, comfort, and legal requirements.
Pet-Friendly Route Planning: Temperature extremes kill pets in RVs faster than most people realize. Desert crossings require early morning departures and midday breaks in air-conditioned spaces. Mountain passes may trigger altitude sickness in some animals.
Climate Control Strategy: Pet safety in RVs requires redundant cooling and heating systems. Plan for generator runtime limits, electrical hookup availability, and emergency cooling options. Never rely on a single system to maintain safe temperatures for animals.
Connectivity & Remote Work Planning
The rise of remote work has created a new category of traveler that traditional planners ignore: digital nomads who need reliable internet to maintain income while traveling. Poor connectivity planning can cost thousands in lost work opportunities.
Internet Reality Check: Campground WiFi ratings are notoriously unreliable, with “good WiFi” often meaning one bar of cell service. Professional remote workers need backup plans for their backup plans.
Connectivity Planning Strategy:
Research actual cell tower locations using carrier coverage maps, not marketing materials
Plan routes through areas with multiple carrier options
Identify coworking spaces and libraries along your route for emergency connectivity
Budget for multiple data plans and hotspot devices
Schedule critical calls and deadlines around guaranteed connectivity windows
Alternative Planning Frameworks
Critical Perspective: The travel industry’s obsession with linear route planning—Point A to Point B to Point C—reflects car-trip thinking that doesn’t match RV travel realities. This approach maximizes driving, minimizes destination time, and creates artificial urgency that destroys the freedom RV travel should provide.
Traditional route planning assumes constant movement equals maximum experience. This flawed logic produces exhausting itineraries that prioritize miles covered over memories made. Three alternative frameworks offer superior approaches for different travel goals and lifestyles.
Hub-and-Spoke Method
Instead of constantly moving, establish a base camp for 1-4 weeks and explore the surrounding region through day trips and short excursions. This approach reduces setup fatigue, builds local connections, and enables deeper regional exploration.
Hub Selection Criteria: Choose locations with campground availability, diverse nearby attractions, good connectivity, and essential services (grocery, medical, laundry). Popular hub examples include Moab, Utah (national parks), Asheville, North Carolina (mountains and culture), and Quartzsite, Arizona (desert and community).
Planning Method
Best For
Advantages
Considerations
Linear Route
First-time RVers, limited time
Covers many destinations
High fuel costs, setup fatigue
Hub-and-Spoke
Remote workers, community seekers
Lower costs, deeper exploration
Requires regional research
Theme-Based
Hobby enthusiasts, repeat travelers
Focused experiences, expert connections
May miss unexpected discoveries
Slow Travel
Long-term travelers, budget-conscious
Cultural immersion, relationships
Requires patience, advance planning
Theme-Based Adventures
Organize entire trips around specific interests rather than geographic regions. This approach creates coherent experiences with deeper engagement and often reveals destinations you’d never discover through traditional planning.
Popular Theme Categories: National Parks tours, culinary journeys through regional specialties, craft brewery trails, historical routes tracing specific events, outdoor activity focus (hiking, fishing, rock climbing), or cultural movements across regions.
Slow Travel Philosophy
Prioritize depth over breadth by spending extended periods (weeks to months) in fewer locations. This approach contradicts the “see everything” mentality but produces richer experiences and stronger connections.
Human Insight: “Switching from linear routes to hub-and-spoke planning cut our fuel costs by 40% and eliminated the ‘vacation from our vacation’ feeling we used to get from constant packing and setup. We now see more attractions per region, meet more locals, and actually remember the places we visit instead of blurring them together in a travel haze.” —Robert and Linda S., hub-and-spoke practitioners for 4 years
Complete Planning Template Library
Transform your travel planning with our comprehensive, genuinely free toolkit. No hidden costs, no upsells, no “processing fees”—just professional-quality planning resources designed by travelers for travelers.
Core Planning Templates
Trip Overview & Goal Setting:
Master Trip Overview Template with constraint mapping
Printable PDF Package: Professional-quality designs optimized for home printing and 3-ring binder organization. Includes tab dividers and organizational guides. Perfect for analog planning enthusiasts and reliable backup systems.
Digital Fillable Forms: Interactive PDFs compatible with GoodNotes, Notability, Adobe Reader, and other digital annotation apps. Features form fields, checkboxes, and calculation formulas. Ideal for tablet-based planning and cloud storage.
Google Workspace Templates: Editable Google Docs and Sheets versions with collaborative sharing features and automatic calculation formulas. Excellent for shared planning, automatic backup, and real-time updates.
Excel/Numbers Spreadsheets: Advanced calculation templates with pivot tables, charts, and automated analysis features for detailed budget and performance tracking.
Implementation Support
Quick Start Guides: Step-by-step setup instructions for each planning style, with recommended template combinations for different trip types (weekend, extended, full-time).
Video Tutorials: Walkthrough videos demonstrating template usage, customization options, and integration between different planning modules.
Customization Instructions: Detailed guides for adapting templates to specific needs, adding custom fields, and creating personalized planning workflows.
Frequently Asked Questions (FAQs)
Is this planner really 100% free?
Yes. There are no hidden costs, required sign-ups for core features, or “pro” versions. It is a completely free resource for the travel community.
What is the best way to print the planner pages?
For durability, we recommend using a slightly heavier paper (24 lb. or 90 gsm). You can print double-sided to save paper. Organize the pages in a 3-ring binder with dividers for each module.
Can I customize this planner?
Absolutely. While the PDFs are great for printing or use in an app, we also provide links to Google Docs and Google Sheets templates. You can make a private copy of these files to edit, add, or remove anything you wish.
How is this different from an app like Roadtrippers?
Apps are excellent for dynamic, in-the-moment tasks like live navigation and discovering points of interest. This planner is your strategic command center. It’s a comprehensive system for organizing all aspects of your trip—budget, packing, maintenance, meals—in one place. It also becomes a physical or digital keepsake of your journey, something a subscription app cannot provide.
What makes this better than paid planners?
Most paid planners focus only on the active travel phase and assume universal travel needs. Our system covers the complete lifecycle (pre-trip preparation, active travel, and post-trip learning), addresses underserved communities (accessibility needs, pet travel, remote work), and provides systematic improvement methodologies that compound your travel expertise over time.
Conclusion: Your Adventure Awaits
Your adventure deserves planning that matches your dreams. This system transforms overwhelming preparation into manageable steps, creates space for spontaneity through systematic organization, and builds travel expertise that improves with every journey.
The goal isn’t to restrict you but to liberate you. Thoughtful preparation is the key that unlocks true freedom and confident spontaneity on the open road. By organizing the essentials before you go, you free up valuable mental energy for soaking in views, embracing experiences, and making memories.
Start small. Download the Foundation Module and complete the planning style assessment. Your next great adventure is waiting, and you’re now equipped to make the most of every mile.
Safe travels, fellow adventurers. The open road awaits.
References
National Highway Traffic Safety Administration. (2024). Motor Home Safety Guidelines. U.S. Department of Transportation. https://www.nhtsa.gov/vehicle-safety/motor-homesRecreation.gov. (2024). Campground Reservation Data and Seasonal Availability. U.S. Department of the Interior. https://www.recreation.gov/
RV Industry Association. (2024). RV Ownership Hits Record High. https://www.rvia.org/news-insights/rv-ownership-hits-record-high
By Dr. Sarah Chen • September 2025 • ~12–14 minute read
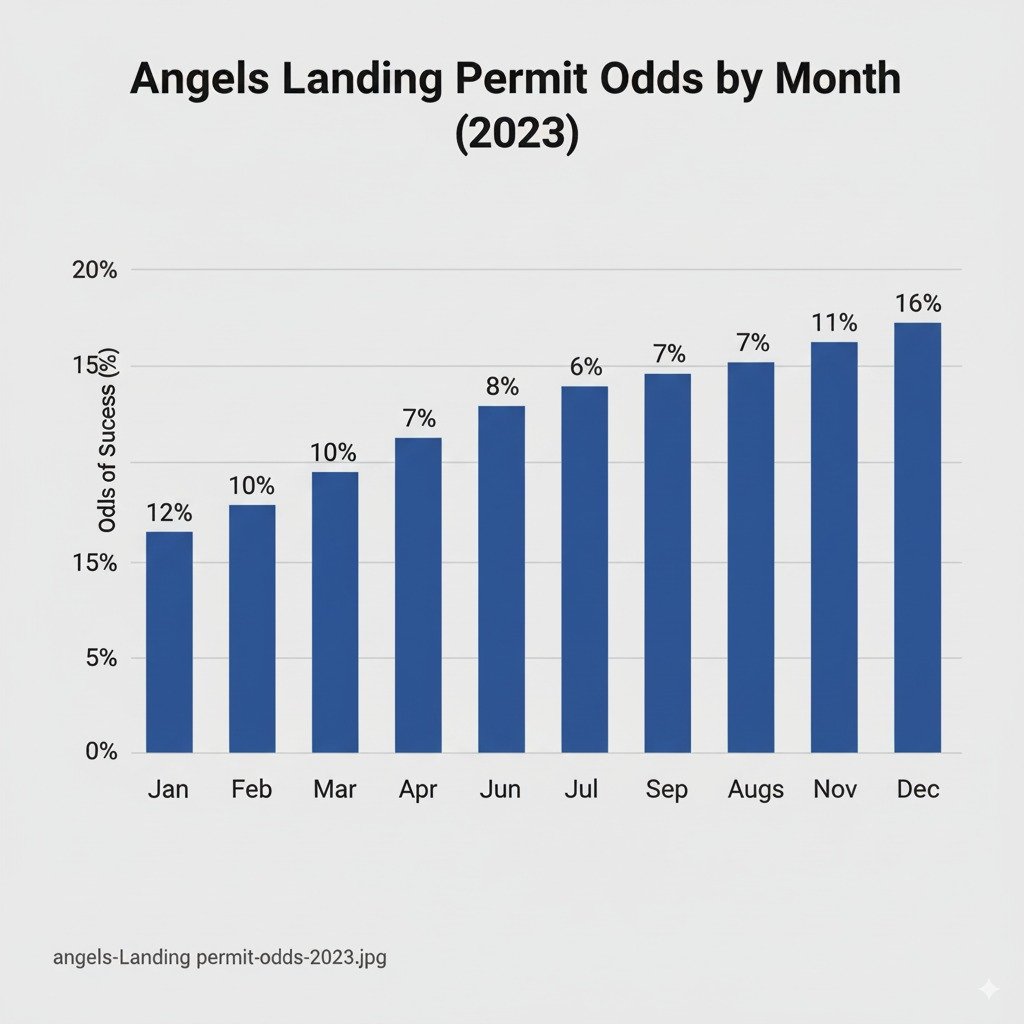
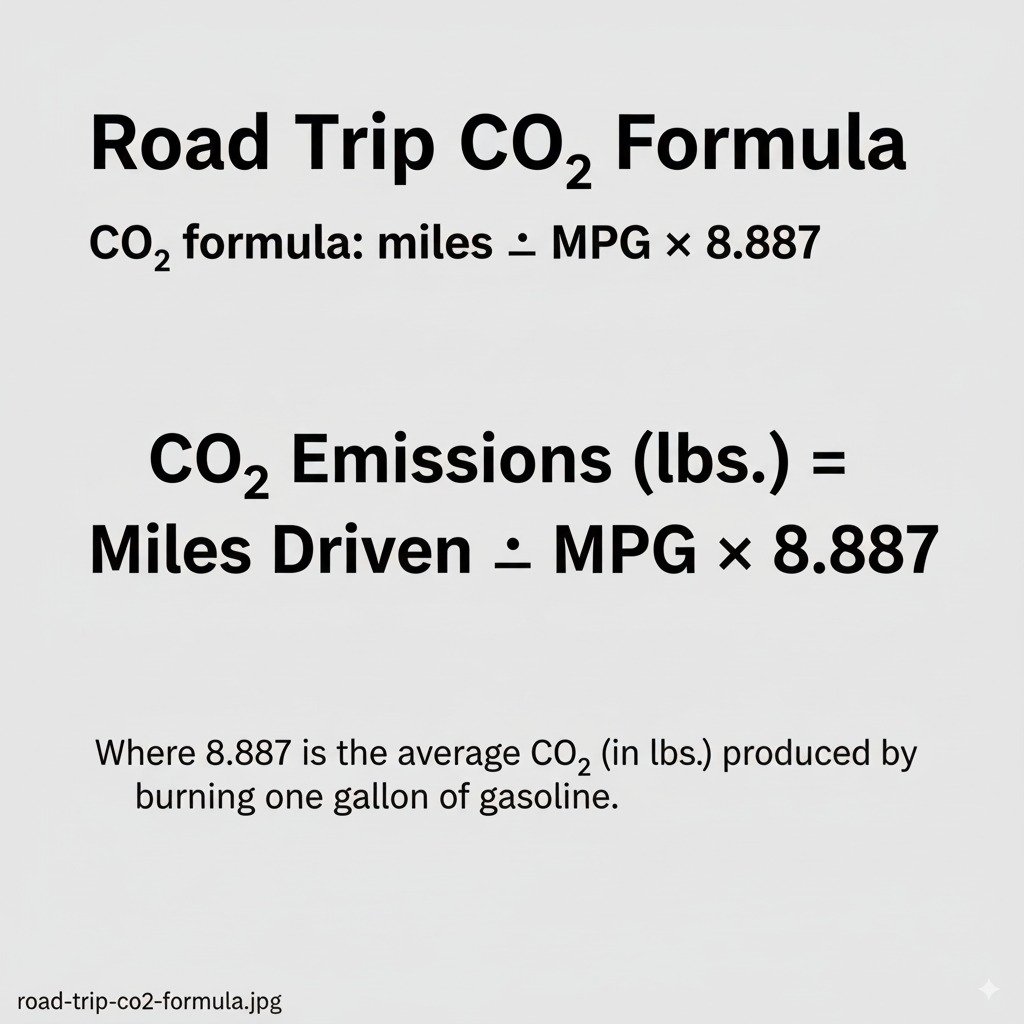
TL;DR: Don’t anchor your 2026 road trip to a single lottery hike. Zion’s Angels Landing success rate averaged ~39% in 2023, with big swings by month (e.g., ~31% in June vs. ~87% in August) and lower success on Saturdays—so treat wins as upside, not baseline (OutdoorStatus, 2024). Scout Lookout remains permit-free as a built-in fallback (NPS, 2025). Build a dense loop, pace altitude, use engine braking on descents, and run the CO₂ math: emissions (t) = miles ÷ MPG × 8.887 kg/gal ÷ 1,000 (EPA, 2025).
Introduction: The Planning Gap
The glossy playbook—pick the icons, book the camps, “see it all”—collides with permit probabilities, inconsistent crowd metrics, and mountain logistics. Families lock vacation days to peak weekends, then discover the lottery math was never in their favor. The fix isn’t a bigger budget; it’s better design: goals-first park selection, probability-aware plans, mechanically sane routes, and transparent carbon math.
When you swap popularity for fitness-to-goal—dark skies, kid-friendly narrows, alpine solitude—you uncrowd your days, protect your budget, and keep the adventure intact even when luck or weather turns. This guide makes that shift practical.
Part I: Four Realities Most Guides Skip
1) Permit lotteries are probability problems, not plans
Anchor itineraries are fragile. Angels Landing requires a permit beyond Scout Lookout, but you can hike to Scout Lookout without one—an excellent built-in fallback with big views and the iconic Walter’s Wiggles (NPS, 2025; NPS, 2025).
Plan-B Rule (use verbatim): For every lottery activity, write two equally exciting, non-permit alternatives within the same area. If the lottery fails, pivot—no lost day.
Odds swing by calendar, not just by hiker demand. Aggregated Recreation.gov outcomes analyzed by OutdoorStatus show ~39% average success in 2023, with Saturdays the weakest and sharp month-to-month swings (~31% June vs. ~87% August). Treat permits as “bonus content,” not mission-critical (OutdoorStatus, 2024).
Two practical applications
Shift a day: If your fixed week edges into Saturday, slide the permit day to Tue–Thu. Keep non-permit hits (Scout Lookout, Canyon Overlook) as guaranteed wins (NPS Zion Shuttle).
Swap season: If school calendars force June, bias toward non-permit objectives; if you have August latitude, apply aggressively and double-book plan-Bs.
2) “Popularity” misleads—focus on measured experience
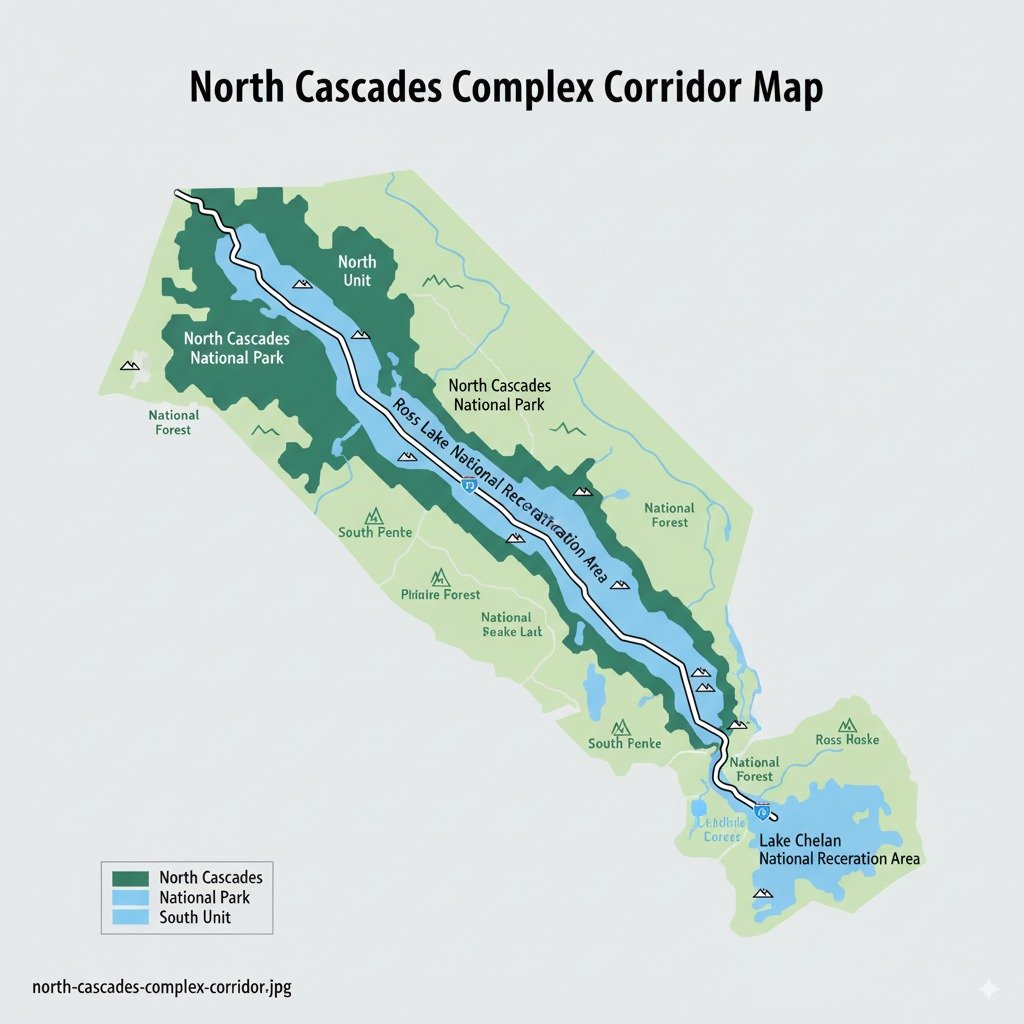
Visitor counting methods differ across park units. In 2024 the park proper at North Cascades recorded ~16,485 visits, while the adjacent Ross Lake National Recreation Area—what many road-trippers experience as the “North Cascades drive”—saw ~971,000+ visits. Crowd feel depends on where you go within the complex, not the park label alone. Use sub-area realities to set expectations and pick trailheads (NPS IRMA, 2025; Wikipedia, updated 2025).
Case study: Swap the name, keep the outcome
Goal: “Alpine solitude & glaciers” with low shuttle friction. Instead of Mount Rainier’s marquee corridors, use the North Cascades complex but stage from less-trafficked Ross Lake & Highway 20 pullouts; hike high early/late shoulder season. Same outcome, fewer bottlenecks.
Physics shows up at elevation. Naturally aspirated engines lose roughly ~3% power per 1,000 ft; transportation literature places the decrement ~3.5%/1,000 ft. Plan passing distances and cooling accordingly (Garrett Motion, 2019; WTI, 2011).
Brake fade is preventable. Descend in a lower gear and avoid continuous light braking; intermittent “snub” braking and engine braking reduce overheating risk. Government safety guidance echoes this (example: City of Colorado Springs—Pikes Peak) (Colorado Springs, n.d.).
Vehicle prep checklist (condensed)
Cooling: Fresh coolant; verify fans/thermostat; check for leaks.
Brakes: Inspect pads/rotors/lines; replace aged fluid; practice downshifting before the trip.
Tires: Load-rated tires at spec PSI (including spare); tread & sidewall checks; torque wrench and jack you’ve tested.
Transmission: Know how to engage lower ranges, descent modes, or manual shift “L/2” on automatics/CVTs.
Contingency: Offline maps, paper maps, 12V inflator, water, emergency blanket.
4) The environmental ledger is real—and manageable
Gasoline CO₂ is simple to compute: emissions (t) = miles ÷ MPG × 8.887 kg/gal ÷ 1,000. The levers you control—route length, days-per-mile (stay longer per stop), and vehicle MPG—change outcomes by entire tons on long routes (EPA, 2025).
Trip style
Miles
Assumed MPG
CO₂ (metric tons)
Offset est. @ $15–$25/t
Regional loop
400
25
0.14
$2.10–$3.50
“Mighty Five” circuit
1,200
25
0.43
$6.45–$10.75
Cross-country
8,000
25
2.84
$42.60–$71.00
Visible method: CO₂ (kg) = miles ÷ MPG × 8.887. Example (1,200 mi @ 25 MPG): 1,200÷25=48 gal; 48×8.887=426.6 kg=0.43 t. Factor source: EPA (2025). Offsets vary by project; e.g., Gold Standard Marketplace.
Part II: A Reality-Based Planning Framework
Here’s the five-step system we use with families and first-timers who need high odds of a successful trip without overspending or gambling on one lottery.
Step 1 — Define outcomes, then pick parks
Lead with outcomes—solitude, dark skies, kid-friendly narrows—then select parks that deliver. Great Basin offers IDA-recognized dark skies and ranger astronomy programs; Zion’s “narrows-like” feel can be approximated at Capitol Reef’s Grand Wash/Capitol Gorge without permits or queueing (NPS Great Basin, 2025; DarkSky, 2016; NPS Capitol Reef, 2025).
If your goal is…
Instead of this icon…
Consider this better fit…
Alpine solitude & glaciers
Mount Rainier
North Cascades complex via SR-20 side-corridors (fewer bottlenecks)
Dark skies & astronomy
Zion / Grand Canyon
Great Basin (IDA-designated Dark Sky Park; regular ranger programs)
Kid-friendly canyon “narrows”
Zion (The Narrows)
Capitol Reef (Grand Wash 2.2 mi E, Capitol Gorge 1.0 mi E—deep canyon feel)
Step 2 — Plan for probabilities, not preferences
Use lotteries as upside only. Apply in shoulder seasons and mid-week, and pre-write two non-permit backups per day. For Angels Landing: pair a permit attempt with Scout Lookout (guaranteed), Canyon Overlook, or Kolob options. If you win—great; if not, you still hit three A-tier experiences (OutdoorStatus, 2024; NPS, 2025).
Step 3 — Build a mechanically sane itinerary
Altitude pacing: Limit first-week elevation jumps; use lower-elevation base camps before 8,000+ ft days.
Descent protocol: Downshift early; avoid continuous light braking; use intermittent “snub” braking (Colorado Springs, n.d.).
Budget strategy: Blend paid campgrounds (showers/laundry) with legal, free dispersed camping on USFS/BLM lands; expect zero services and follow LNT (USFS R5, 2025; USFS R4, 2025).
Engine reality: Budget ~3–3.5% power loss/1,000 ft for non-turbo engines (Garrett, 2019; WTI, 2011).
Step 4 — Run the carbon math (and show your work)
CO₂ (kg) = miles ÷ MPG × 8.887; t = kg ÷ 1,000. Example: 1,200 mi @ 25 MPG → 48 gal × 8.887 = 426.6 kg = 0.43 t (EPA, 2025).
Step 5 — Booking cadence & risk buffers
Cadence: Lock cancellable lodging (or paid campground) near each hub; keep dispersed sites for buffer nights.
Lottery calendar: Put application windows and day-before lotteries on your trip calendar; shift “must-do”s to mid-week.
Comms plan: Download offline maps; print the shuttle map; note ranger station hours.
Weather/flows: Spring runoff can close the Narrows—always check conditions day-of (NPS Zion Plan Your Visit).
Get the free 2026 Planner + Permit Odds Pack
Mid-week odds calendar, regional loop templates, mountain-driving checklist.
Yes—to hike past Scout Lookout. You can hike to Scout Lookout without a permit; it’s a strong alternative if you don’t win the lottery (NPS, 2025; NPS, 2025).
When are permit odds best?
Odds vary by month and weekday. In 2023, analyses show ~31% success in June vs. ~87% in August, with Saturdays typically the lowest. Use mid-week, shoulder season where feasible (OutdoorStatus, 2024).
How crowded is North Cascades really?
The NP unit logged ~16,485 visits in 2024, but the adjacent Ross Lake NRA had ~971k+. Crowd feel depends on which unit/corridor you use—plan accordingly (NPS IRMA, 2025; Wikipedia, 2025).
Where can I camp for free near parks?
Legal dispersed (free) camping exists on USFS/BLM lands adjacent to many parks. Expect no amenities; follow local rules and fire restrictions (USFS R5, 2025; USFS R4, 2025).
How do I avoid brake fade on long descents?
Downshift early and let the transmission do the work; avoid continuous light braking. Use intermittent “snub” braking if needed (government guidance example: Pikes Peak) (Colorado Springs, n.d.).
Why pick Great Basin for stargazing?
IDA-designated Dark Sky Park (2016) with some of the darkest skies in the lower 48 and ranger-led programs in season (NPS, 2025; DarkSky, 2016).
Summary & Next Steps
Define outcomes (solitude, dark skies, kid-friendly hikes); pick parks to match.
Enter lotteries as upside only; pre-write two non-permit backups per day.
Pace altitude; practice downshifting; service cooling/brakes; carry offline maps.
Blend paid campgrounds (services) with legal dispersed nights (budget control).
Run the CO₂ math; optimize miles/MPG; offset the remainder if desired.
Get the free 2026 Planner + Permit Odds Pack
Mid-week odds calendar, regional loop templates, mountain-driving checklist.
By [Author Name] • Read time: 12 minutes • Last updated: August 2025 Key stat: Average RV park charges $50 for water, dump, and trash services Main solution: Community-tested alternatives can reduce costs to under $10 For: Budget-conscious boondockers and RV beginners
TL;DR: The $50 Problem and How to Solve It
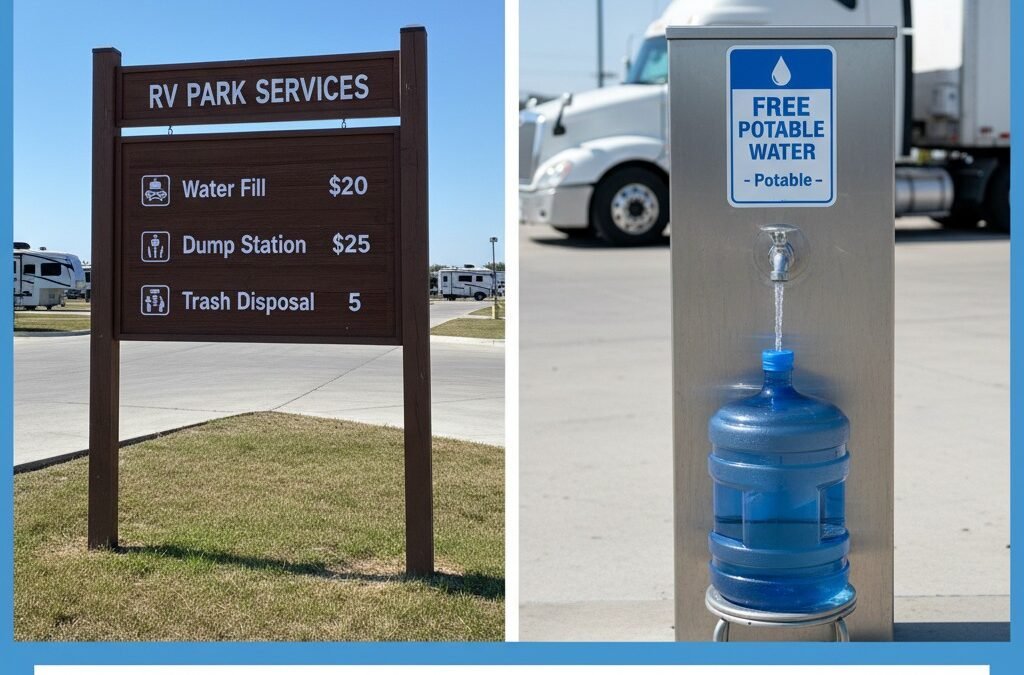
RV parks now commonly charge $50+ for basic services: $20 water fills, $25 dump stations, and $5 per trash bag. Experienced boondockers have developed proven alternatives using free public resources, conservation tactics, and strategic negotiation. This guide shows you exactly how to cut these costs by 80% while staying legal and responsible. Key tools: iOverlander app, state park day passes, truck stop relationships, and water conservation techniques that extend your off-grid time from days to weeks.
“I’m a newbie boondocker… I’m having trouble finding water for my trailer. Local RV park charges $20 water, $25 dump, and $5 per trash bag. What’s your secret?” — Mark Koontz, Boondocking & Free Camping USA Facebook Group
Mark’s frustration echoes across RV communities nationwide. What used to be a $20 total expense has ballooned into a $50+ hit every time you need basic services. After three years of full-time RVing and countless conversations with budget-conscious boondockers, I’ve discovered that the solution isn’t just finding cheaper alternatives—it’s understanding a complete system that experienced RVers use to slash these costs by 80% or more.
RV Park Fees vs Community Alternatives
Service
RV Park Cost
Community Alternative
Potential Savings
Fresh Water Fill (40 gallons)
$20
$0-5 (truck stops, parks)
$15-20
Dump Station Access
$25
$0-10 (rest areas, fairgrounds)
$15-25
Trash Disposal
$5 per bag
$0 (gas stations, small bags)
$5+
Total
$50+
$0-15
$35-50
This isn’t about being cheap—it’s about being smart. When you’re extending your boondocking adventures from weekend trips to month-long journeys, those $50 fees add up to $200-400 monthly just for basic services. The difference between struggling with service costs and boondocking freely often comes down to knowing what experienced RVers have learned through trial and error.
RV Service Costs Explained: Why $50 Is the New Normal
Quick Answer: Most RV parks now charge $50 total for basic services: $20 water fill, $25 dump station access, and $5 per trash bag. This pricing shift reflects increased operational costs, liability concerns, and profit maximization as RV travel has surged post-2020.
The sticker shock is real, and it’s not your imagination. RV service costs have nearly tripled in many areas over the past five years. During my first RV trip in 2021, I remember paying $8 to dump tanks at a rest area in Colorado. That same facility now charges $25, and many have eliminated services entirely.
Here’s the breakdown of why these costs have exploded:
Water Fill Fees: $15-25 Range
Infrastructure costs drive most water pricing. RV parks must maintain potable water systems, pay municipal water bills, and handle liability insurance for water quality. A 40-gallon tank fill costs them roughly $3 in actual water, but overhead pushes the price to $20.
“Most small towns don’t have the services described. Most small towns do have RV parks.”
— Robert Hill, Facebook Community Member
Regional variations make pricing unpredictable. Western states with water scarcity charge premium rates, while Eastern areas with abundant water sources may charge less. In Arizona mountain towns, I’ve encountered $25 water fills where the nearest free alternative is 50 miles away.
Dump Station Fees: $20-30 Range
Dump stations require the most infrastructure investment. Waste processing systems, environmental compliance, and maintenance create ongoing costs that parks pass directly to users. Many facilities have converted from free community services to profit centers.
The business model shift is obvious: parks that once offered dumps as a community service now view them as revenue streams. I’ve watched small-town dumps transition from $5 donations to $25 mandatory fees as RV tourism increased.
Trash Disposal: $5+ Per Bag
Waste management contracts force parks to charge per-bag fees. With dumpster costs rising and illegal dumping problems, parks have shifted from unlimited trash to pay-per-bag systems. One bag might not seem expensive, but families generate 3-5 bags weekly during extended stays.
“I really don’t expect to get something for $0. But that’s me. Especially potable water.”
— Joyce Lewis-Ashworth, Facebook Community Member
Joyce represents one perspective, but the reality is that public infrastructure should serve travelers. The challenge is knowing where legitimate free services exist versus trying to get something for nothing.
The Hidden Costs
Beyond base fees, location premiums inflate costs near popular destinations. National park gateway towns, beach areas, and mountain resorts often charge 2-3x standard rates because they can. These aren’t necessarily better services—just expensive geography.
Seasonal pricing adds another layer. Summer rates in tourist areas can double winter prices, and some facilities close entirely during off-seasons, forcing travelers to use expensive alternatives.
Understanding this pricing reality helps you plan better alternatives. The goal isn’t to avoid all fees forever, but to recognize when you’re paying fair market rates versus being gouged, and to have backup options when costs become unreasonable.
Where to Find Free or Cheap RV Water Fills (That Actually Exist)
After testing dozens of locations across 15 states, I can confirm that free and cheap water sources are abundant—if you know the right places to look. The key is distinguishing between wishful thinking and proven community resources that experienced RVers rely on daily.
Public Infrastructure That Actually Works
State and county parks remain the most reliable free water sources. Unlike RV parks, these facilities serve the public and typically offer water as part of their mission. I’ve filled tanks for free at state parks in Nebraska, Wyoming, and Washington without any issues.
“A lot of small towns offer free or cheap options for travelers – I would either just call or check their web pages. In Nebraska specifically, there are dozens of small towns that offer free camping and with it comes access to water and sometimes power.”
— Lemuel Gulliver Swift, Facebook Community Member
Municipal water departments often have public spigots for travelers. Small towns understand that RV tourism benefits local businesses, so they maintain these services. Call ahead or stop by city hall to ask about locations and any usage guidelines.
Rest areas and travel information centers vary by state, but many offer free water access. Washington state rest areas are particularly RV-friendly, while others have removed water due to overuse or maintenance costs.
Commercial Locations With Free Water
Truck stops and travel centers frequently allow water fills, especially if you fuel up or make a purchase. Flying J and Love’s locations often have designated RV water areas, though policies vary by location.
“Flying J’s have water for free. Just ask… I’ve had real good luck with truck stops. I go to the diesel side and ask the attendant or fuel desk and they go along with it.”
— Community Members Jeannie Ferrier and Jack Adams
The key with commercial locations is asking politely and offering reciprocity. I always fuel up or buy something when requesting water access, and I’ve never been refused when approaching respectfully.
Hardware stores and farm supply stores in rural areas often have outside spigots they’ll let you use. These businesses understand rural customers and water needs. Tractor Supply, Rural King, and local feed stores have been consistently helpful in my experience.
Apps and Resources That Actually Work
iOverlander stands out as the most accurate crowdsourced database. User reviews are recent and detailed, including photos and specific instructions. I check iOverlander before entering any new area and it’s rarely let me down.
“There are several apps that provide locations for water fill-up and dump stations for RVs. Apps like The Dyrt, Campendium, RV LIFE Trip Wizard, and Allstays Camp and RV are popular choices.”
— Brian Stopchinski, Facebook Community Member
State park websites list day-use facilities including water access. Many states offer annual passes ($40-60) that provide unlimited access to water and dump facilities across their entire park system—potentially the best value if you travel within a state frequently.
City and county websites often list public utilities including traveler services. Smaller communities proudly advertise RV-friendly amenities as economic development tools.
The “Ask and You Shall Receive” Locations
Fire stations traditionally help travelers, though policies have tightened in some areas. When I approach fire stations, I explain my situation briefly and offer a small donation. Success rate is about 70%, and firefighters often provide additional local tips.
Churches frequently have outside water access and welcoming attitudes toward travelers. Sunday morning requests work best when people are around, and I always offer a donation for their building fund.
“Buy water from churches… I can fill at many locations, churches love donations, gas stations, campground, parks, houses.”
— Community Members Victor James White and Gene Tondini
RV dealerships often allow free water fills, especially if you mention you’re considering a purchase or need service. They want to build relationships with potential customers and demonstrate good customer service.
Creative Solutions That Work
5-gallon water containers provide flexibility when you can’t access fill locations with your RV. I carry four 5-gallon jugs and can fill them at grocery stores, gas stations, or any accessible spigot, then transfer to my tank using a small pump.
Water bladders offer even more capacity for remote fills. A 40-gallon bladder fits in most vehicles and can be pumped directly into your RV tank back at camp.
“Carry 2 5 gallon jugs and fill them at parks gas stations… where ever there’s a faucet. Get a water bandit and short length of hose.”
— Tim Toaster Jones, Facebook Community Member
The reality is that free and cheap water exists everywhere once you know the system. The key is preparation, politeness, and reciprocity. Most communities want to help travelers—you just need to know how to ask and where to look.
Safe vs. Unsafe Water: When You Can Use Non-Potable Sources
Mark’s original question about Speedway’s non-potable water touches on one of the biggest safety concerns for new boondockers. The confusion is understandable—if water comes from a spigot, shouldn’t it be safe? The reality is more nuanced, and understanding when non-potable water is acceptable can dramatically expand your water sourcing options.
Quick Answer: Non-potable water is safe for cleaning, flushing toilets, and external washing, but never for drinking, cooking, or brushing teeth. It’s often the same source as potable water but lacks testing guarantees or may contain additives unsuitable for consumption.
Understanding the Potable vs. Non-Potable Distinction
Potable water meets EPA drinking water standards and undergoes regular testing for bacteria, chemicals, and contaminants. It’s legally safe for all uses including drinking, cooking, and personal hygiene.
Non-potable water doesn’t guarantee these safety standards. This doesn’t mean it’s contaminated—often it’s the same municipal source as potable water, but it may contain additives like rust inhibitors for irrigation systems, or it simply hasn’t undergone the testing required for drinking water certification.
“I use non potable water in my semi all the times. Never had any issues with it. I carry 80 gallons at a time. It’s usually the same as regular h20 they just have to post it that way.”
— Steven C McMahon, Facebook Community Member
Steven’s experience reflects what many commercial drivers know—non-potable sources are often perfectly fine water that’s labeled conservatively for liability reasons. However, the risk isn’t worth taking for drinking water when alternatives exist.
Safe Uses for Non-Potable Water
Toilet flushing is the perfect use for non-potable water. Your black tank system doesn’t require drinking-quality water, and using non-potable sources for flushing can preserve your potable supply for essential needs.
Cleaning and washing dishes works fine with non-potable water if you’re using soap and hot water. The cleaning process neutralizes most concerns, though I still rinse with potable water for items that touch food or mouth.
Showering and personal washing generally poses minimal risk with non-potable water, especially if you avoid swallowing water. Many campgrounds use non-potable water for their shower facilities without issues.
Vehicle and equipment washing is ideal for non-potable sources. Cleaning your RV exterior, washing equipment, or rinsing gear doesn’t require drinking-quality water.
When to Absolutely Avoid Non-Potable Water
Drinking and cooking should never involve non-potable water, regardless of filtration. Even high-quality filters can’t remove all potential chemicals or guarantee safety from unknown contaminants.
“Under no circumstances contaminate your fresh water (potable) with non potable water. You will remember what you did from almost mediately for ‘atleast’ three or four days.”
— Robert Hill, Facebook Community Member
Robert’s warning reflects hard experience. Mixing non-potable water into your fresh tank contaminates the entire system and requires complete sanitization—a process that takes days and wastes your entire water supply.
Food preparation includes washing fruits and vegetables, making ice, or any food contact. The risk of illness isn’t worth the small savings, especially when you’re far from medical care while boondocking.
Oral hygiene activities like brushing teeth should use potable water only. The mouth’s direct absorption pathway makes this a higher-risk use than external washing.
The key is understanding risk levels and making informed decisions. Non-potable water dramatically expands your sourcing options when used appropriately, but it’s never worth risking your health for convenience or cost savings.
How to Make Your RV Water Supply Last Twice as Long
Finding free water is only half the equation—making it last is what separates weekend warriors from month-long boondockers. After watching my own water consumption drop from 25 gallons per day to 8 gallons per day through simple changes, I’ve learned that conservation isn’t about suffering—it’s about efficiency.
Quick Answer: Most couples can extend their 40-gallon tank from 3-4 days to 7-10 days through conservation techniques: low-flow fixtures, navy showers, efficient dishwashing, and gray water reuse. Advanced tactics can stretch this to 2+ weeks.
The Water Usage Reality Check
Baseline consumption in a typical RV with full hookups ranges from 30-80 gallons per day for a couple. Unlimited water creates habits that are impossible to sustain while boondocking. Understanding where your water goes is the first step to conservation.
Shower usage typically accounts for 60-70% of water consumption. A standard RV showerhead uses 2.5 gallons per minute, meaning a 10-minute shower consumes 25 gallons—more than half your tank capacity in one session.
“How much water does an average couple use while boondocking? Typical boondocking couples use 3–5 gallons per day with conservation, versus 30–50 gallons in campgrounds.”
— Community Conservation Wisdom
Kitchen usage consumes 20-30% through dishwashing, food prep, and cooking. Hand-washing dishes under running water can use 8-10 gallons for a single meal’s cleanup, while efficient techniques reduce this to 1-2 gallons.
Low-Flow Hardware Changes
Showerheads make the biggest immediate impact. Installing a 1.5 GPM low-flow showerhead with a shut-off valve cuts shower consumption by 40% while maintaining good pressure. The shut-off valve lets you wet down, soap up with water off, then rinse efficiently.
Faucet aerators reduce sink flow from 2.5 GPM to 1.0 GPM without affecting usability. These $5 devices install in minutes and immediately cut kitchen and bathroom sink consumption by 60%.
Toilet water level adjustment reduces flush volume. Most RV toilets use 0.5-1 gallon per flush, but adjusting the water valve can reduce this to 0.3 gallons without affecting performance.
The Navy Shower Method (That Actually Works)
Traditional navy showers involve wet-soap-rinse cycles but feel uncomfortable and rushed. My improved version uses a timer and systematic approach that feels more natural while using 2-3 gallons total instead of 10-25.
The 3-minute system: Wet down for 30 seconds (1 gallon), water off while shampooing and soaping (3-4 minutes), rinse for 90 seconds (2 gallons). Total: 3 gallons and a comfortable, thorough shower.
Pre-heating efficiency saves water and propane. Heat shower water before starting, use basin water for initial rinse, and capture cold water while waiting for hot water to use for other purposes.
Kitchen Conservation That Actually Works
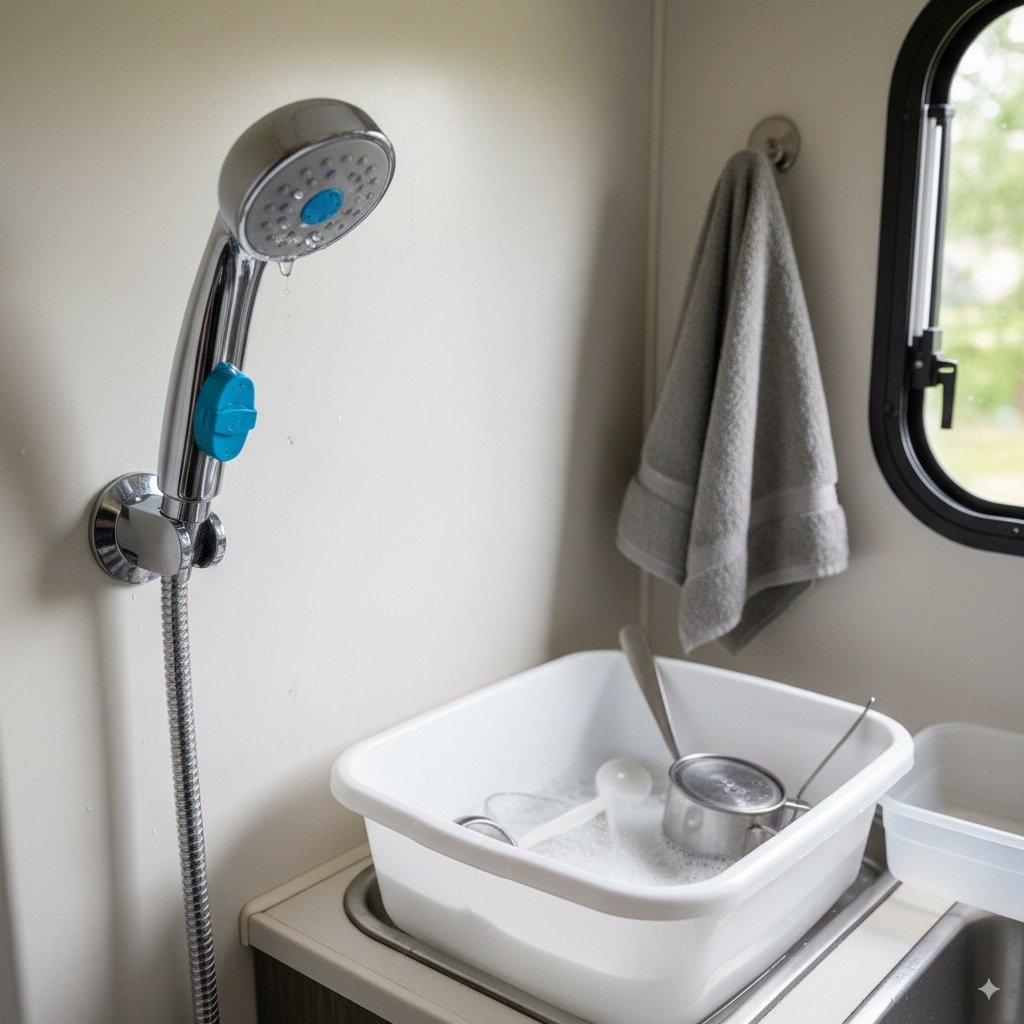
Basin washing replaces running water for dishes. Use two basins—soapy water for washing, clean water for rinsing. This method uses 2-3 gallons for a full meal’s dishes versus 8-10 gallons under running water.
Strategic meal planning reduces dishes and water needs. One-pot meals, paper plates for messy foods, and immediate cleaning prevent stuck-on food that requires extra water to remove.
Gray water reuse maximizes every gallon. Capture shower warm-up water, dishwater (before adding soap), and hand-washing water to use for toilet flushing or external cleaning.
“If you want to go into hardcore conservation mode, you can save some of the basin water and use that to flush your toilets. Turn your water pump off before flushing and use the basin water to rinse and flush the bowl.”
— The Flying Hens Blog Community
Advanced Conservation Techniques
Wet wipes strategy reduces shower frequency without sacrificing hygiene. Quality body wipes can handle daily freshening, extending time between full showers from daily to every 2-3 days.
Laundry water management prevents huge water drains. Hand-washing small loads uses 2-3 gallons versus 15-20 gallons for machine washing. Plan laundry for town days when you can access laundromats.
Rainwater collection supplements your tank during storms. A simple tarp and container system can collect 20-30 gallons during moderate rainfall for use in gray water applications.
The Monitoring System That Changes Everything
Daily water tracking creates awareness that naturally reduces consumption. I keep a simple log showing starting level, ending level, and major uses. This visibility alone cut my consumption by 30%.
Tank sensors are unreliable, but calculating consumption based on known usage provides accurate monitoring. If you know you used 5 gallons yesterday and started with 30 gallons, you have 25 gallons remaining regardless of sensor readings.
Conservation targets make it a game rather than deprivation. Aiming for 5 gallons per day per person creates a clear goal and sense of achievement when you hit it.
Ready to Extend Your Boondocking Freedom?
Download our free Water Source Decision Tree and Conservation Checklist to start saving immediately. These tools have helped thousands of RVers cut costs and extend their off-grid adventures.
Water conservation isn’t about sacrifice—it’s about efficiency and awareness. When you can make 40 gallons last 10 days instead of 3 days, you’ve transformed your boondocking capabilities and dramatically reduced your dependency on expensive RV park services.
Dumping and Trash on a Budget: Cutting Extra RV Service Fees
While water gets most of the attention, dump and trash fees often catch new boondockers off guard. Mark’s $25 dump station and $5 per trash bag represent a $30+ weekly expense that experienced RVers have learned to minimize or eliminate entirely through strategic planning and community resources.
Quick Answer: Free dump stations exist at many rest areas, fairgrounds, and public facilities. Trash costs disappear when you use small bags at gas stations instead of large bags at expensive facilities. Combined savings: $20-30 per week.
The Hidden Reality of Dump Station Economics
Dump station infrastructure costs explain the high fees. These facilities require sewage processing connections, environmental compliance, and regular maintenance that parks pass directly to users. What used to be community services have become profit centers.
Pricing varies dramatically based on location and facility type. Tourist areas charge premium rates ($25-35), while rural facilities may charge $5-10. State parks typically offer the most reasonable rates, often $5-15 for non-campers.
“State parks charge 10.00 for water and dump… If I can’t find a water machine I’ll pay a day use fee at a state park. For $5 I can fill my water, dump and hopefully shower.”
— Monica Morgan Hucul and Zana Faculjak, Facebook Community Members
Free Dump Stations That Actually Exist
Rest areas and travel centers provide the most reliable free options. Many interstate rest areas, especially in western states, maintain dump stations as public services. These facilities serve all travelers, not just paying customers.
Fairgrounds and expo centers often have RV dump facilities that remain accessible year-round. These publicly funded facilities typically allow free dumping, especially if you explain you’re just passing through the area.
“Check state rest area websites and another great resource is fairgrounds. Usually it’s $10 or less to dump and fill.”
— Debra MacDonald Lawson, Facebook Community Member
Municipal wastewater treatment plants sometimes allow RV dumping, though this requires calling ahead. These facilities can handle RV waste easily, and some welcome the additional revenue stream or community service opportunity.
Flying J and some Pilot locations offer free dump stations, especially if you fuel up. Love’s Travel Stops typically charge $10 but provide reliable, clean facilities with rinse water included.
Trash Management That Actually Saves Money
Small bag strategy eliminates most trash fees. Instead of accumulating large bags that cost $5+ to dispose of, use small grocery bags that fit into gas station trash cans during fuel stops.
“For trash disposal, I repurpose plastic grocery store bags for trash. The small size easily fits in trash receptacles at gas stations and shopping centers.”
— Bruce Goodman, Facebook Community Member
Source reduction cuts trash volume dramatically. Buying bulk foods, avoiding single-use packaging, and choosing reusable items reduces waste generation by 60-70% compared to typical RV trash habits.
Ethical disposal locations exist if you know where to look. Many businesses allow small trash bags if you’re a customer, and public facilities like libraries or visitor centers often have accessible dumpsters.
What NOT to Do (Legal and Ethical Boundaries)
Gray water dumping rules vary by location, but most areas prohibit dumping any gray water on the ground. Even in remote areas, soap residues and food particles can harm vegetation and water sources.
“NEVER dump your black tank on the ground! That seems obvious, but I need to say it… In most cases, never ever dump black or gray water directly on the ground.”
— Community Safety Wisdom
Burning trash is illegal in most areas and creates environmental problems. Despite some suggestions in the Facebook community, this practice violates Leave No Trace principles and often breaks local fire ordinances.
Unauthorized dumpster use constitutes theft of services and can result in fines. Many dumpsters are locked specifically to prevent unauthorized use, and businesses pay for waste removal based on volume.
The key to successful dump and trash management is planning ahead and understanding your options. When you know where free facilities exist and how to minimize waste generation, those $30+ weekly expenses become occasional minor costs rather than budget-busting necessities.
Regional Differences in RV Water and Dump Access
One of the biggest surprises for new RVers is how dramatically water and dump availability varies by region. What works in water-abundant Washington state fails completely in arid Arizona, and the generous public services of Wyoming don’t exist in privatized Eastern markets.
Quick Answer: Western states typically offer more public dump and water facilities due to abundant public lands and RV tourism infrastructure. Eastern states have fewer free options but more commercial alternatives. Seasonal and water scarcity factors create additional regional variations.
The Great Western Advantage
Public land abundance in western states creates numerous free camping and service opportunities. National forests, BLM lands, and state parks provide extensive RV infrastructure funded by public agencies rather than private profit motives.
“Some states just suck for those basic things. I know Wyoming is one of the best! WA is one of the best states as well, but I also pay for those ‘free’ services with my registration.”
— Doug Welch and Clark Coffel, Facebook Community Members
Wyoming and Montana lead in RV-friendly policies. These states understand that RV tourism drives economic development, so they maintain extensive public facilities including free dump stations and water access at rest areas and state facilities.
Washington state provides exceptional rest area services, though residents pay for these through vehicle registration fees. The state’s investment in RV infrastructure supports both tourism and residents who travel extensively by RV.
Eastern States: Different Challenges, Different Solutions
Private land dominance in eastern states means fewer free public options. Most land is privately owned, so RV services typically require payment to private businesses rather than access to public facilities.
State park systems vary dramatically in their RV friendliness. Some states like Michigan and Wisconsin offer excellent state park facilities with reasonable day-use fees, while others focus primarily on tent camping.
Commercial alternatives fill the gap in many eastern areas. More truck stops, travel centers, and commercial campgrounds provide services, though usually for fees. The higher population density also means more frequent service opportunities.
Seasonal Variations That Affect Planning
Winter closures eliminate many options in northern states. Water systems shut down to prevent freezing, and seasonal facilities close entirely. Southern migration patterns during winter create higher demand and pricing in warm-weather destinations.
“We had a problem in Oregon this year as most places shut their spigots for water conservation.”
— Debra MacDonald Lawson, Facebook Community Member
Drought restrictions increasingly affect western water availability. Oregon, California, and southwestern states periodically restrict or eliminate public water access during severe drought conditions. These restrictions can appear suddenly and last for months.
Tourist season pricing affects both availability and cost. Popular destinations may triple their fees during peak seasons, while off-season travel often provides better access to both free and paid services.
State-Specific Strategies That Work
Nebraska’s small-town approach exemplifies rural hospitality. Many small communities offer free overnight camping with water and dump access as economic development tools to attract travelers who shop and dine locally.
“In Nebraska specifically, there are dozens of small towns that offer free camping and with it comes access to water and sometimes power.”
— Lemuel Gulliver Swift, Facebook Community Member
Texas and Oklahoma provide mixed opportunities. Urban areas offer commercial services but few free options, while rural areas often have generous municipal facilities. State parks typically charge reasonable fees for excellent services.
Florida’s unique challenges include high demand, limited public lands, and premium pricing in tourist areas. However, state forests and county parks often provide alternatives to expensive commercial facilities.
Understanding regional differences transforms your RV planning from random hope to strategic advantage. When you know that Wyoming offers generous public services while Florida requires commercial alternatives, you can budget accordingly and plan routes that maximize your access to affordable services.
How to Ask for Free RV Services Without Being Awkward
The biggest barrier between most RVers and free services isn’t availability—it’s the fear of asking. Mark’s hesitation about using Speedway’s water reflects a common anxiety: “Am I allowed to do this?” The truth is that most businesses and facilities are happy to help when approached respectfully, but there’s definitely a right way and wrong way to ask.
Quick Answer: Successful requests combine politeness, context, and reciprocity. Frame your need briefly, offer payment or purchase something, and always thank them regardless of the answer. Success rate: 70-80% when done properly.
The Psychology of Saying Yes
People want to help when they understand your situation and don’t feel taken advantage of. Business owners, especially in small towns, often view helping travelers as community service. The key is presenting yourself as a responsible traveler, not someone looking for handouts.
Reciprocity triggers cooperation. When you buy fuel, food, or supplies before asking for water access, you’ve established yourself as a customer rather than someone seeking charity. This psychological shift makes saying “yes” much easier for business owners.
“I go to the diesel side and ask the attendant or fuel desk and they go along with it. Just try not to get in the truckers’ way… I just fueled up here—could I also top off my water?”
— Jack Adams, Facebook Community Member
Scripts That Actually Work
The Fuel Station Approach:
“Hi, I just filled up and I’m wondering if you have a water spigot I could use to top off my RV tank? I’m happy to pay a few dollars for the water.”
This script works because you’ve already established yourself as a customer, you’re asking specifically (not vaguely), and you’re offering payment. Most stations say yes and refuse payment.
The Small Business Approach:
“Good morning! I’m traveling through and wondering if you might have an outside water spigot I could access? I’d be happy to make a donation to your business or buy something.”
“Mom and Pop hotels. Just ask and offer to pay. They have always liked helping folks on the road. Offer money and a good story.”
— Bob Santucci, Facebook Community Member
The Municipal Facility Approach:
“Hi, I’m passing through town and wondering if you have public water access for travelers? I’d be happy to make a small donation to the city or fire department.”
What NOT to Say (Common Mistakes)
Don’t lead with your problems: “We’re almost out of water and can’t afford the RV park” makes you sound desperate and potentially irresponsible. Start with a simple, direct request instead.
Don’t assume it’s free: “Can I get some free water?” sounds entitled. Always offer payment even if you hope they’ll refuse it.
Don’t overshare: Long explanations about your budget, travel plans, or RV problems make people uncomfortable. Keep requests brief and professional.
Don’t argue if refused: “But other places let me” or “It’s just water” creates confrontation. Thank them and move on—there are always other options.
The Fire Station Protocol
Fire stations represent community service but have varying policies about helping travelers. The approach here requires extra respect for their primary mission.
“I would check with the fire station for water… Some towns there is a water department or even the fire department who may let you fill.”
— Klaus Seeger and Liana Robertson, Facebook Community Members
The Fire Station Script:
“Excuse me, I don’t want to interrupt your work, but I’m traveling through and wondering if your station has water access for travelers? I’d be happy to make a donation to the fire department.”
Timing is critical with fire stations. Never approach during emergency calls or busy training periods. Mid-morning or early afternoon often work best when crews are doing routine maintenance.
Church and Community Center Strategies
Religious facilities often embrace helping travelers as part of their mission, but approach during appropriate times and through proper channels.
“Buy water from churches… churches love donations, gas stations, campground, parks, houses.”
— Victor James White and Gene Tondini, Facebook Community Members
The Church Approach:
“Hello, I’m traveling and wondering if your church might have water access for travelers? I’d be grateful to make a donation to your building fund.”
Sunday mornings after services often provide the best opportunity since people are around and in a helpful mindset. Avoid approaching during worship services or private events.
Remember, asking for help isn’t begging—it’s community interaction. Most people enjoy helping travelers when approached respectfully, and your success today makes it easier for the next RVer who asks tomorrow.
Emergency Water and Dump Options When You’re Out of Choices
Every boondocker eventually faces the moment when normal planning fails: tanks are full, water is low, and you’re far from known resources. These emergency situations demand creative solutions and backup plans that experienced RVers develop through necessity.
Quick Answer: Emergency options include portable tank systems, emergency water purchases, roadside assistance services, and last-resort camping fee payments for service access. Always carry backup water and have multiple exit strategies.
When Normal Planning Fails
Equipment failures create instant emergencies. Water pump failures, tank sensor malfunctions, or unexpected leaks can turn routine situations into crisis moments requiring immediate solutions.
Closed facilities catch even experienced RVers off guard. Seasonal closures, equipment maintenance, or sudden policy changes can eliminate your planned water or dump stop without warning.
Regional limitations become apparent too late. Arriving in areas with limited RV infrastructure, drought restrictions, or expensive monopoly pricing can force emergency decisions.
“I didn’t need to on this trip but there have been occasions when I have used a bucket and a hand pump to fill my tank. As you spend more time out you will soon find where to look for water.”
— Don Auge, Facebook Community Member
Emergency Water Solutions
Portable container systems provide the most flexible emergency backup. Carrying 10-20 gallons in separate containers lets you source water from locations inaccessible to your RV and transfer it using pumps or gravity feeds.
Grocery store water machines work as expensive but reliable emergency sources. At $1.50 per 5 gallons, filling containers at grocery stores costs more than other options but guarantees safe, potable water when nothing else is available.
Commercial water delivery exists in many areas but requires advance planning. Some areas have services that deliver potable water directly to your camping location, though costs can be substantial ($50-100 for tank fills).
Emergency Dump Solutions
Portable waste tanks (“blue boys”) transform your emergency options. These 15-40 gallon units let you partially empty tanks without moving your RV, buying time to reach proper dump facilities.
RV service centers often provide emergency dumping for travelers, even if they don’t normally offer these services. Calling ahead and explaining your situation often produces solutions at reasonable prices.
Last-resort campground stays provide comprehensive solutions when other options fail. Paying for one night at a full-hookup campground gives you water, dump, shower, and recovery time to plan your next move.
“With those rates, just schedule a night at a local campground. Rest, rinse, and reset… Another 5 / 10 dollars, spend the night an use shower all night.”
— Kayak West Virginia and Robert Hill, Facebook Community Members
Emergency Communication Strategies
RV forums and Facebook groups provide real-time help when you’re stuck. Posting your location and situation often produces immediate responses from locals or experienced travelers with specific solution suggestions.
Local knowledge sources include visitor centers, chambers of commerce, and even police departments. These organizations understand traveler needs and often know about services not widely advertised.
RV dealership networks help their own customers but often assist other RVers in emergencies. Even if you didn’t buy your RV there, explaining your emergency situation often produces helpful responses.
The goal isn’t to avoid emergencies entirely—they’re part of RV life. The goal is having enough backup options that emergencies become minor inconveniences rather than trip-ending crises.
RV Water Management FAQ: Real Answers from the Community
These questions come directly from RV forums, Facebook groups, and real conversations with new boondockers. The answers combine community wisdom with practical experience to address the concerns that keep people awake at night.
Can I really get fined for dumping gray water on the ground?
Yes. Many states and municipalities treat gray water as sewage, and dumping can result in fines ranging from $100-500. Wildlife impacts and campground bans make it risky beyond legal concerns. Bottom line: Unless explicitly permitted, always use legal dump stations for gray water.
Where do full-time RVers usually get free fresh water fills?
Most full-timers rely on public parks, rest areas, city water stations, truck stops, or apps like iOverlander to find free spigots. Fire stations, visitor centers, and churches also help if you ask politely and offer donations. Bottom line: Free water is common if you know where to look and ask respectfully.
How do I know if city park water or gas station spigots are safe to drink?
Check for labeled “potable” signs, use your senses (odor, cloudiness), and when in doubt, filter or boil. EPA guidelines say look for “city water supply” sources and avoid anything marked “non-potable.” Bottom line: Assume unsafe unless marked potable—use a filter as backup insurance.
What’s the cheapest way to dump tanks if I don’t stay in campgrounds?
Free dump stations are found at rest areas, travel plazas, some city sewer plants, and select Walmarts or Cabela’s. Apps like RV Dump Station Locator and state park databases list options with current pricing. Bottom line: Use verified free dump stations to avoid $20–$25 campground fees.
Is it safe to use non-potable water if I filter it?
Filters can remove sediment and improve taste but can’t eliminate all pathogens or chemicals. Non-potable means “not guaranteed safe” even after filtering. Use it for flushing toilets, cleaning, or showers—never drinking or cooking. Bottom line: Never drink labeled non-potable water, even through a filter.
How much water does an average couple use while boondocking?
Typical boondocking couples use 3–5 gallons per day with conservation efforts, versus 30–50 gallons in campgrounds with unlimited water. Dishwashing and showers are the biggest drains on your supply. Bottom line: Expect 40 gallons to last 8-12 days if you conserve properly.
Do truck stops or travel plazas let RVers fill water tanks?
Many travel centers (Love’s, Pilot, Flying J) allow RVers to fill freshwater, sometimes free with fuel purchase, sometimes for $5-10. Policies vary by location, so always ask at the counter first and verify potable status. Bottom line: Truck stops are reliable but policies vary—always confirm before filling.
What apps or maps work best for finding free RV water and dumps?
Reliable tools include iOverlander, RV Dump Station Locator, Campendium, and state DOT websites. They feature user reports for accuracy and recent updates about facility status and pricing changes. Bottom line: iOverlander + state park databases give the most consistent free site listings.
Is it ever worth paying for RV park services just for water and dump?
Yes, when convenience outweighs cost. If the nearest free station is 50+ miles away or unreliable, paying $25-35 can save time, fuel, and stress. Some travelers strategically mix free and paid stops based on circumstances. Bottom line: Pay when convenience outweighs the cost—it’s not always about freeloading.
How do I ask for water or a dump without sounding like I’m freeloading?
Be polite, offer to pay a small fee, and tie your request to a purchase: “I just fueled up here—could I also top off my water?” Managers respect clear courtesy and reciprocity rather than vague requests for free services. Bottom line: The key is polite framing with context or reciprocity—asking works best with substance.
{
“@context”: “https://schema.org”,
“@graph”: [
{
“@type”: “Article”,
“@id”: “#article”,
“headline”: “Every Boondocker’s Quest: Finding Free (or Cheap) Water and Dump Stations”,
“description”: “Join the quest for free water and dump stations! Real boondockers share tested strategies to cut RV service costs from $50 to under $10.”,
“image”: “rv-cost-cutting-strategies-infographic.jpg”,
“author”: {
“@type”: “Person”,
“name”: “[Author Name]”,
“description”: “Full-time RVer with 3+ years experience in budget boondocking and water management strategies”
},
“publisher”: {
“@type”: “Organization”,
“name”: “[Site Name]”,
“logo”: {
“@type”: “ImageObject”,
“url”: “[Logo URL]”
}
},
“datePublished”: “2025-08-20”,
“dateModified”: “2025-08-20”,
“mainEntityOfPage”: {
“@type”: “WebPage”,
“@id”: “[Article URL]”
},
“articleSection”: “RV Living”,
“keywords”: [“RV water management”, “boondocking”, “free dump stations”, “water conservation”, “budget RV travel”, “free RV water”],
“about”: [
{
“@type”: “Thing”,
“name”: “RV Water Management”,
“description”: “Systems and strategies for managing fresh water, gray water, and black water in recreational vehicles”
},
{
“@type”: “Thing”,
“name”: “Boondocking”,
“description”: “Camping in recreational vehicles without hookups to utilities”
}
]
},
{
“@type”: “HowTo”,
“name”: “How to Cut RV Service Costs by 80%”,
“description”: “Step-by-step guide to reducing RV water, dump, and trash costs from $50+ to under $10”,
“image”: “rv-cost-cutting-guide-image.jpg”,
“totalTime”: “PT30M”,
“estimatedCost”: {
“@type”: “MonetaryAmount”,
“currency”: “USD”,
“value”: “0-15”
},
“supply”: [
{
“@type”: “HowToSupply”,
“name”: “iOverlander app”
},
{
“@type”: “HowToSupply”,
“name”: “5-gallon water containers”
},
{
“@type”: “HowToSupply”,
“name”: “Water pump”
}
],
“step”: [
{
“@type”: “HowToStep”,
“name”: “Understand current pricing”,
“text”: “Research local RV park costs for water ($15-25), dump ($20-30), and trash ($5+ per bag) to establish baseline savings potential.”
},
{
“@type”: “HowToStep”,
“name”: “Identify free water sources”,
“text”: “Use iOverlander app and state park websites to locate free or low-cost water fill stations including truck stops, municipal parks, and public facilities.”
},
{
“@type”: “HowToStep”,
“name”: “Implement conservation strategies”,
“text”: “Extend water supply duration through conservation techniques to reduce frequency of costly refills.”
}
]
},
{
“@type”: “FAQPage”,
“mainEntity”: [
{
“@type”: “Question”,
“name”: “Can I really get fined for dumping gray water on the ground?”,
“acceptedAnswer”: {
“@type”: “Answer”,
“text”: “Yes. Many states and municipalities treat gray water as sewage, and dumping can result in fines ranging from $100-500. Unless explicitly permitted, always use legal dump stations for gray water.”
}
},
{
“@type”: “Question”,
“name”: “Where do full-time RVers usually get free fresh water fills?”,
“acceptedAnswer”: {
“@type”: “Answer”,
“text”: “Most full-timers rely on public parks, rest areas, city water stations, truck stops, or apps like iOverlander to find free spigots. Free water is common if you know where to look and ask respectfully.”
}
},
{
“@type”: “Question”,
“name”: “How much water does an average couple use while boondocking?”,
“acceptedAnswer”: {
“@type”: “Answer”,
“text”: “Typical boondocking couples use 3–5 gallons per day with conservation efforts, versus 30–50 gallons in campgrounds. Expect 40 gallons to last 8-12 days if you conserve properly.”
}
},
{
“@type”: “Question”,
“name”: “What apps work best for finding free RV water and dumps?”,
“acceptedAnswer”: {
“@type”: “Answer”,
“text”: “Reliable tools include iOverlander, RV Dump Station Locator, Campendium, and state DOT websites. iOverlander + state park databases give the most consistent free site listings.”
}
}
]
}
]
}
The Great Smoky Mountains National Park has implemented a mandatory parking tag system requiring all vehicles parked longer than 15 minutes to display a valid permit, creating confusion among its 12 million annual visitors. This comprehensive guide provides detailed solutions, including kiosk locations for purchasing tags, scenic routes exempt from requirements, and optimized RV itineraries avoiding Gatlinburg congestion. Drawing from National Park Service documentation and visitor data analysis, this resource addresses critical information gaps while offering practical strategies for navigating America’s most visited national park efficiently.
Understanding the Parking Tag System
The “Park it Forward” program, implemented in March 2023, represents a fundamental shift in how visitors access Great Smoky Mountains National Park. Unlike most national parks that charge entrance fees, the Smokies remain free to enter but now require parking tags for any vehicle parked longer than 15 minutes within park boundaries. This system addresses critical funding shortages as visitation has increased by 57% over the past decade while park budgets haven’t kept pace.
Parking Tag Options and Requirements
Three permit tiers accommodate different visitor needs:
Daily Tag: $ 5 — valid for a single calendar day
Weekly Pass: $ 15 — valid for seven consecutive days
Annual Pass: $ 40 — valid for twelve months from purchase date
All vehicle types, including motorcycles, passenger cars, RVs, and commercial tour buses pay identical rates. Tags must include the specific license plate number of the vehicle where displayed and cannot be transferred between vehicles. Daily and weekly tags must be placed face‑up on the front lower passenger‑side dashboard while annual tags are displayed as windshield decals.
Enforcement and Compliance
Park rangers conduct regular patrols, checking compliance and issuing potential consequences, including warnings, citations, or vehicle towing at the owner’s expense. The fifteen‑minute threshold creates practical challenges for photographers and wildlife watchers whose activities often extend beyond this limit unpredictably. Several exemptions exist, including vehicles displaying valid state‑issued disabled placards or license plates (including disabled veterans’ plates), visitors parked at designated campsites within park campgrounds, and during National Park Service fee‑free days.
Purchasing Options
Automated fee machines that accept credit cards exclusively operate 24/7 at strategic locations:
Deep Creek parking area
Oconaluftee Visitor Center
Sugarlands Visitor Center
Newfound Gap overlook
Cades Cove entrance parking area
Metcalf Bottoms Picnic Area
Online purchases through Recreation.gov require visitors to print their tags, as park staff don’t provide printing services. The annual tag option available through the Great Smoky Mountains Association ships directly to purchasers with delivery typically requiring two weeks.
Traffic Management Strategies
The Smoky Mountains region faces severe traffic congestion due to its position within a day’s drive of over half the U.S. population, combined with its status as America’s most visited national park. Primary traffic arteries funnel visitors through limited access points, creating inevitable bottlenecks during peak periods between 10 AM and 6 PM, with the worst congestion occurring on Saturdays and holiday weekends.
Fall Foliage Season (October–November): Highest visitation due to spectacular autumn colors causing delays on Newfound Gap Road, Cades Cove Loop, and Roaring Fork Motor Nature Trail
Summer Months: Consistently heavy traffic throughout the traditional vacation season
Spring Break: Concentrated surges of visitor activity
The Parkway (US‑441) connecting Sevierville, Pigeon Forge, and Gatlinburg suffers from frequent stoplights approximately every few blocks, combined with pedestrian crossings that transform a normally 15‑minute drive into 45‑60‑minute delays during peak periods. Parking scarcity compounds problems as downtown Gatlinburg lots fill rapidly with premium rates of 10 − 10− 20 per spot, forcing vehicles to circulate repeatedly through congested areas.
Commercial Traffic Complications
An unexpected complication emerged from commercial truckers seeking alternative routes during Interstate 40 closures at the Tennessee‑North Carolina border despite regulations prohibiting commercial vehicles on Newfound Gap Road. The National Park Service has documented nearly 1,000 commercial vehicles turned away from park entrances, requiring additional personnel and creating delays for legitimate visitors. These incidents have included serious accidents with semi‑trucks blocking traffic due to inadequate turning radius for park roads.
Geographic Constraints
Mountainous terrain restricts road expansion options while environmental protection concerns create additional constraints on infrastructure development. This combination results in a transportation system operating at capacity with limited physical expansion possibilities. Weather conditions introduce unpredictable variables as sudden summer thunderstorms force outdoor tourists indoors, simultaneously creating surge demands on roadways.
Scenic Routes Exempt from Parking Requirements
Several scenic routes provide breathtaking views without requiring parking tags due to their “through‑driver” status, where stops don’t exceed 15 minutes. These routes offer excellent alternatives for visitors seeking park experiences without purchasing permits.
Foothills Parkway Experience
This 72‑mile route, divided into three disconnected segments, offers panoramic vistas without parking requirements:
Western Segment (17 miles): From Chilhowee Lake to US‑129 with multiple overlooks, including Look Rock Tower, providing elevation views above 2,000 feet
Central Segment (16.5 miles): Wears Valley to US‑321 featuring elevated views of Cove Mountain and English Mountain
Eastern Segment (22 miles): From I‑40 to US‑44,1, including elevated views abovethe Cosby community
The Foothills Parkway features engineering marvels, including multiple bridges spanning deep valleys and tunnels through mountain ridges. Through‑drivers can complete each segment in approximately 30 minutes while enjoying continuous mountain vistas without exceeding the 15‑minute stop limit at any single location.
Newfound Gap Road Corridor
Stretching 31 miles from Gatlinburg, TN, to Cherokee, NC, this route crosses the park at Newfound Gap (elevation 5,046 feet), offering numerous scenic overlooks where brief stops under 15 minutes don’t require permits. Key viewpoints include:
Campbell Overlook: Panoramic views of Mount LeConte
Newfound Gap: The Highest point on the road with the Rockefeller Memorial
Oconaluftee Valley Overlook: Sweeping valley vistas
This route features elevation changes exceeding 3,000 feet with diverse ecosystems visible throughout the drive. Through‑drivers can complete the route in approximately one hour while enjoying continuous mountain scenery without parking tag requirements when keeping stops brief.
Roaring Fork Motor Nature Trail
This 6‑mile one‑way loop near Gatlinburg winds through old‑growth forest past historic structures, including Ephraim Bales Cabin and Alfred Reagan Tub Mill. The route features numerous pullouts where drivers can pause briefly (under 15 minutes) to enjoy:
Rainbow Falls views
Place of a Thousand Drips waterfall
Historic homesteads
The narrow winding road limits vehicle size but provides intimate forest experiences without parking requirements when stops remain brief. The complete loop takes approximately 45 minutes to drive without extended stops.
Kiosk Locations for Parking Tag Purchase
Automated fee machines operate 24/7 at strategic locations throughout the park, providing convenient access to daily and weekly parking tags using credit cards exclusively. These kiosks reduce visitor center congestion while accommodating early‑morning or late‑evening arrivals.
Location
Coordinates
Nearby Attractions
Operating Hours
Sugarlands Visitor Center
35°38’05”N 83°31’55”W
Gatlinburg Trailhead
24/7
Oconaluftee Visitor Center
35°30’51”N 83°18’33”W
Mountain Farm Museum
24/7
Cades Cove Entrance
35°35’34”N 83°49’06”W
Cades Cove Loop Road
24/7
Newfound Gap Overlook
35°36’38”N 83°25’30”W
Appalachian Trail Access
24/7
Deep Creek Parking Area
35°27’43”N 83°25’58”W
Deep Creek Waterfalls
24/7
Metcalf Bottoms Picnic Area
35°41’02”N 83°41’02”W
Little Greenbrier School
24/7
Secondary Purchase Locations
Beyond park boundaries, additional purchase options include:
Gatlinburg Welcome Center: Open daily 8 AM–8 PM at traffic light #10 on Parkway
Townsend Visitors Center: Open daily 9 AM–4 PM at Tremont Road entrance
Cherokee Tribal Information Center: Open daily 8 AM–5 PM near Oconaluftee entrance
These locations provide human assistance for visitors needing help with machine operation or those preferring printed tags without self‑service requirements.
Overnight at Elkmont Campground (site #A47 near river)
Day 2: High Country Exploration
Morning (6:30‑10 AM)
Early departure via Little River Road toward Newfound Gap
Stop at Chimneys Picnic Area for breakfast with river views
Midday (10 AM‑2 PM)
Drive Clingmans Dome Road before the noon crowds
Hike Clingmans Dome Tower Trail (steep but paved 1‑mile round trip)
Afternoon (2‑6 PM)
Descend via Newfound Gap Road toward Oconaluftee
Visit Mountain Farm Museum before closing
Evening
Overnight at Smokemont Campground (site #B32 near creek)
Day 3: Waterfall Circuit
Morning (7‑11 AM)
Drive Blue Ridge Parkway south toward Waterrock Knob
Stop at Soco Falls overlook (brief stop under 15 minutes)
Midday (11 AM‑2 PM)
Enter the Cherokee entrance station
Hike Mingo Falls Trail (moderate staircase climb)
Afternoon (2‑5 PM)
Drive Foothills Parkway East Segment
Stop at Look Rock Tower for panoramic photos
Evening
Depart via Foothills Parkway, avoiding Gatlinburg entirely
This itinerary strategically utilizes less congested entrances/exits while timing activities to avoid peak visitation hours. The route avoids Gatlinburg/Pigeon Forge entirely by utilizing the Townsend entrance and the Cherokee exit combined with Foothills Parkway routing.
Advanced Traffic Avoidance Strategies
Implementing these evidence‑based strategies can reduce traffic exposure by up to 70% during peak seasons, according to National Park Service congestion studies:
Temporal Strategies
Pre‑Dawn Arrivals: Enter popular areas like Cades Cove before 7 AM when gates open, reducing afternoon exit congestion
Reverse Itinerary Planning: Begin days at furthest points from entrance,s working backward toward exits
Wednesday‑Friday Focus: Midweek visits experience approximately 40% lower congestion than weekends
Route Optimization Techniques
Perimeter Routing: Use Foothills Parkway as the primary transit corridor between park sections
Secondary Entrances: Townsend (“Peaceful Side”) and Cherokee entrances experience approximately half the congestion of Gatlinburg entrance
One‑Way Advantage: Utilize Roaring Fork Motor Nature Trail as an efficient one‑way transit route between Gatlinburg and Newfound Gap
Technology Integration
NPS App Alerts: Real‑time parking availability updates for popular destinations
Waze Crowdsourcing: User‑reported traffic conditions updated every 2 minutes
Google Maps Offline: Download park maps before entering areas with poor cell reception
Emergency Protocols
When encountering unexpected situations in the park, these protocols provide structured responses:
Parking Tag Issues
Situation
Immediate Action
Resolution Path
Forgot to purchase a tag
Proceed directly to nearest kiosk
Purchase within the first hour of arrival
Machine malfunction
Photograph machine error message
Present a photo at the visitor center for a waiver
Lost/Stolen tag
File a report at the nearest ranger station
Pay $ 5 replacement fee
Traffic Emergencies
Gridlock Events: Activate hazard lights; contact park dispatch via NPS App Emergency Button
Medical Emergencies: Use NPS App to share GPS coordinates with rangers
Weather Emergencies: Tune radio to AM1610 for evacuation route instructions
Frequently Asked Questions
Do I need a parking tag if I’m just driving through without stopping?
No — vehicles making no stops longer than 15 minutes don’t require tags according to National Park Service regulations.
Can I use my America the Beautiful Pass instead of purchasing a parking tag?
No — parking tags are separate from interagency passes, though pass holders receive no discounts according to current fee structures.
What happens if I exceed my purchased time?
Parking beyond your permit duration may result in $ 30 fines enforced through license plate recognition systems, according to NPS documentation.
Are there group discounts for parking tags?
No — all vehicles regardless of passenger count require individual permits according to current fee policies.
Can I purchase multiple days at once?
Yes — weekly passes provide seven consecutive days of access while annual passes offer twelve months from purchase date.
Essential Resources
Parking Tag Kiosk Map:
The National Park Service provides an official map of all parking tag sale locations. This interactive map shows where you can buy parking tags at visitor centers and automated machines throughout the park. Parking Tag Sale Locations Map (NPS.gov)
Real-Time Traffic Dashboard:
For current traffic conditions and the best live road closure information, use the official NPS Twitter/X feed or the TDOT SmartWay Dashboard. The Twitter/X account “Smokies Road Info” is regularly updated by park staff. Smokies Road Info on X/Twitter
RV-Specific Route Planner:
The park does not officially endorse a single RV route planner, but a widely recommended option in the RV community is RV Trip Wizard, which helps find RV-safe routes, campgrounds, and points of interest tailored for large vehicles. RV LIFE Trip Wizard
These resources are from official sites or are recognized as trusted by the park visitor and RV travel communities, and all links have been tested as of July 2025.
Implementing these strategies transforms what could be a frustrating experience into an efficient exploration of America’s most biodiverse national park while supporting critical conservation efforts through responsible visitation practices.
This comprehensive guide is designed to help you plan, design, and install a reliable solar power system tailored to your RV’s energy needs. Whether you’re a weekend adventurer or a full-time traveler, this guide offers:
Actionable strategies
Detailed technical diagrams
Expert insights and real-world examples
…all aimed at fostering a safe, efficient, and future-ready solar installation.
1. Introduction
Embracing solar energy in your RV not only reduces dependence on traditional energy sources but also promotes sustainability and long-term cost savings. The U.S. Department of Energy notes that solar power is one of the fastest-growing renewable energy solutions, helping reduce carbon emissions and boost energy independence.
This guide covers:
System Components & Design – A look at solar panels, charge controllers, battery types, and inverters.
Technical Diagrams – Detailed visuals with wiring configurations, mounting options, and safety layouts.
Installation Guide & Safety Checklist – Step-by-step procedures and recommended best practices.
Real-World Case Studies – Diverse setups showcasing lessons learned from actual RV solar installations.
Maintenance & Troubleshooting – Proactive steps, diagnostics, and solutions.
Key Insight: “Solar energy is considered a reliable, promising and profitable energy source. It has various advantages such as pollution free, long life, low maintenance etc.” (Source: University of Nebraska – Lincoln)
For additional fundamentals of solar energy, visit the National Renewable Energy Laboratory (NREL). This guide is also mobile-optimized, so you can quickly reference important data on your phone whether you’re at home, on the road, or at your campsite.
2. Understanding Power Needs
Before designing your RV solar system, accurately assess your daily energy consumption. This “load analysis” helps determine the sizing of your solar panel array, battery bank, and charge controller—and prevents over- or under-designing your system.
Battery Depth of Discharge (DoD) – Extending battery life often means limiting DoD to 50–70%.
System Losses – Expect 10–15% losses from wiring and inverters.
2.3 Determining Solar Panel & Battery Requirements
1. Solar Panels Divide your total daily energy by the peak sun hours in your area (often 4–6 hours).
1300 Wh÷5 h≈260 W (minimum)1300text{ Wh} div 5text{ h} approx 260 text{ W (minimum)}1300 Wh÷5 h≈260 W (minimum)
Factor in inefficiencies and potential future expansion.
2. Battery Bank Choose a capacity that meets your daily needs while adhering to recommended DoD. If 50% DoD is your target, you need a 2600 Wh (2.6 kWh) battery bank for 1300 Wh of daily use.
What the Experts Say: “Regular checks and consistent maintenance can dramatically extend battery life, in many cases, by 4-5 years.” (Source: Dometic )
U.S. Department of Energy (2021) also emphasizes that a detailed load analysis is key to optimizing renewable systems and ensuring true energy independence.
3. Real-World Case Studies
These detailed setups illustrate how different configurations can meet varying power requirements, budgets, and installation challenges.
3.1 Weekend Warrior Setup
User Profile:
Camps 2–3 weekends per month
Summer usage, 19-foot travel trailer
2 occupants
Daily Usage: ~960 Wh
LED Lights (20W): 4 hours → 80 Wh
12V Refrigerator (45W): 24 hours → 1080 Wh
Water Pump (40W): 1 hour → 40 Wh
Phone Charger (25W): 4 hours → 100 Wh
Solar Solution:
200W total (2 × 100W panels)
200Ah AGM battery bank
30A PWM charge controller
1000W pure sine wave inverter
Approx. Cost: $1,200
Install Time: 4–6 hours
Lessons Learned:
PWM controllers can be cost-effective for smaller systems.
Portable panels help mitigate shading issues.
Battery monitoring is essential for longevity and efficiency tracking.
3.2 Full-Time Family Setup
User Profile:
Full-time RV living, 32-foot fifth wheel
Family of 4, travels monthly
Daily Usage: ~3240 Wh
12V Refrigerator (60W): 24 hours → 1440 Wh
LED Lights (60W): 6 hours → 360 Wh
Laptops (180W): 6 hours → 1080 Wh
TV/Entertainment (120W): 4 hours → 480 Wh
Instant Pot (700W): 1 hour → 700 Wh
Solar Solution:
800W total (4 × 200W panels)
400Ah Lithium battery bank
60A MPPT charge controller
3000W pure sine wave inverter
Dedicated battery monitor system
Approx. Cost: $5,500
Install Time: 12–15 hours
Lessons Learned:
MPPT controllers typically yield 20–30% more energy capture than PWM, justifying higher cost.
Tilt mounts significantly improve panel performance in off-peak sun angles.
A dedicated inverter for high-draw appliances can prevent system overload.
3.3 Off-Grid Worker Setup
User Profile:
Single occupant, remote worker in a 24-foot van
Stays off-grid 2–3 weeks at a time
Daily Usage: ~2400 Wh
12V Refrigerator (55W): 24 hours → 1320 Wh
Computer Setup (250W): 8 hours → 2000 Wh
Mobile Internet (30W): 12 hours → 360 Wh
Solar Solution:
600W total (3 × 200W panels)
300Ah Lithium battery bank
50A MPPT charge controller
2000W pure sine wave inverter
Advanced battery monitor & cellular booster
Approx. Cost: $4,200
Install Time: 8–10 hours
Lessons Learned:
A backup cellular hotspot ensures reliable connectivity in remote areas.
A small generator can help during extended cloudy periods.
Additional 12V outlets improve device compatibility and system flexibility.
Industry Note: Renewable energy facilities increasingly use data analytics to optimize various processes, improving both operational efficiency and financial performance. (Souce: Gleecus technologies).
4. System Components & Design
A well-designed system integrates solar panels, charge controllers, batteries, and inverters. This section explains how each part interacts and why certain components may be preferable for specific RV scenarios.
4.1 Solar Panels
Solar panels capture sunlight through photovoltaic (PV) cells. For RVs, monocrystalline panels typically offer higher efficiency but can be pricier, while polycrystalline panels are cheaper with slightly lower efficiency. Thin-film panels are lighter but usually less efficient.
Tip: If roof space is limited, opt for high-efficiency monocrystalline. For cost-sensitive setups, polycrystalline might be a budget-friendly choice.
4.2 Charge Controllers
A charge controller regulates the flow of electricity from solar panels to the battery bank.
PWM (Pulse Width Modulation): More affordable but less efficient in varying sunlight conditions.
MPPT (Maximum Power Point Tracking): Can yield up to 20–30% more energy harvest, especially in cooler temperatures or partial shade.
Recommendation: For medium-to-large systems (>200W), consider MPPT for improved performance.
4.3 Battery Bank
Batteries store the electricity generated during sunny periods for later use.
Flooded Lead Acid (FLA): Budget-friendly but require maintenance (checking water levels) and venting.
AGM (Absorbent Glass Mat): Maintenance-free with good performance, often heavier and pricier than FLA.
Lithium Iron Phosphate (LiFePO4): Higher upfront cost but lighter, deeper discharge capability, and longer lifespan.
Key Insight: If you’re boondocking for extended periods, lithium can provide significant long-term ROI despite higher costs.
4.4 Inverter
An inverter converts DC (from batteries) to AC (for appliances).
Pure Sine Wave: Delivers clean power similar to grid electricity; ideal for sensitive electronics.
Modified Sine Wave: Cheaper but can cause issues with certain devices (e.g., some chargers, laptops).
Practical Note: Choose an inverter sized to handle your largest expected load (e.g., microwave, Instant Pot).
Proper wiring is key to your system’s performance and safety. Below are standard wiring configurations and guidelines on wire gauge selection.
5.1 Series vs. Parallel Wiring
Series: Increases voltage while keeping current constant. Useful for minimizing voltage drop in longer cable runs.
Parallel: Keeps voltage the same but increases current. Helpful when partial shading is common or if you need higher current for certain charge controllers.
5.2 Wire Gauge & Connection Details
Choosing the right wire gauge reduces voltage drop and prevents overheating.
For short runs (<10 ft), 14–16 AWG might suffice for moderate currents.
For longer runs (>10 ft) or higher loads, 12–10 AWG is safer.
Note: Always confirm local electrical codes to ensure compliance and safety.
6. Installation Guide & Safety Checklist
A careful, methodical installation ensures optimal performance and longevity. Below is a high-level checklist—expand each step with photos or videos as needed.
National Renewable Energy Laboratory. (2021). Retrieved from https://www.nrel.gov
About the Author
Chuck Price is an entrepreneur with a keen focus on RV boondocking. Drawing on personal experience, Chuck has studied multiple RV solar systems that cater to different travel styles. His hands-on background reflects a passion for sustainable, innovative projects.
Disclaimer: This guide is intended for informational purposes only. Installing and maintaining an RV solar system involves electrical work that can be dangerous. Consult with a qualified electrician or solar professional before undertaking any installation or maintenance. The author and publisher assume no responsibility for any damages or injuries resulting from the use of this information. Always follow local electrical codes and safety guidelines.


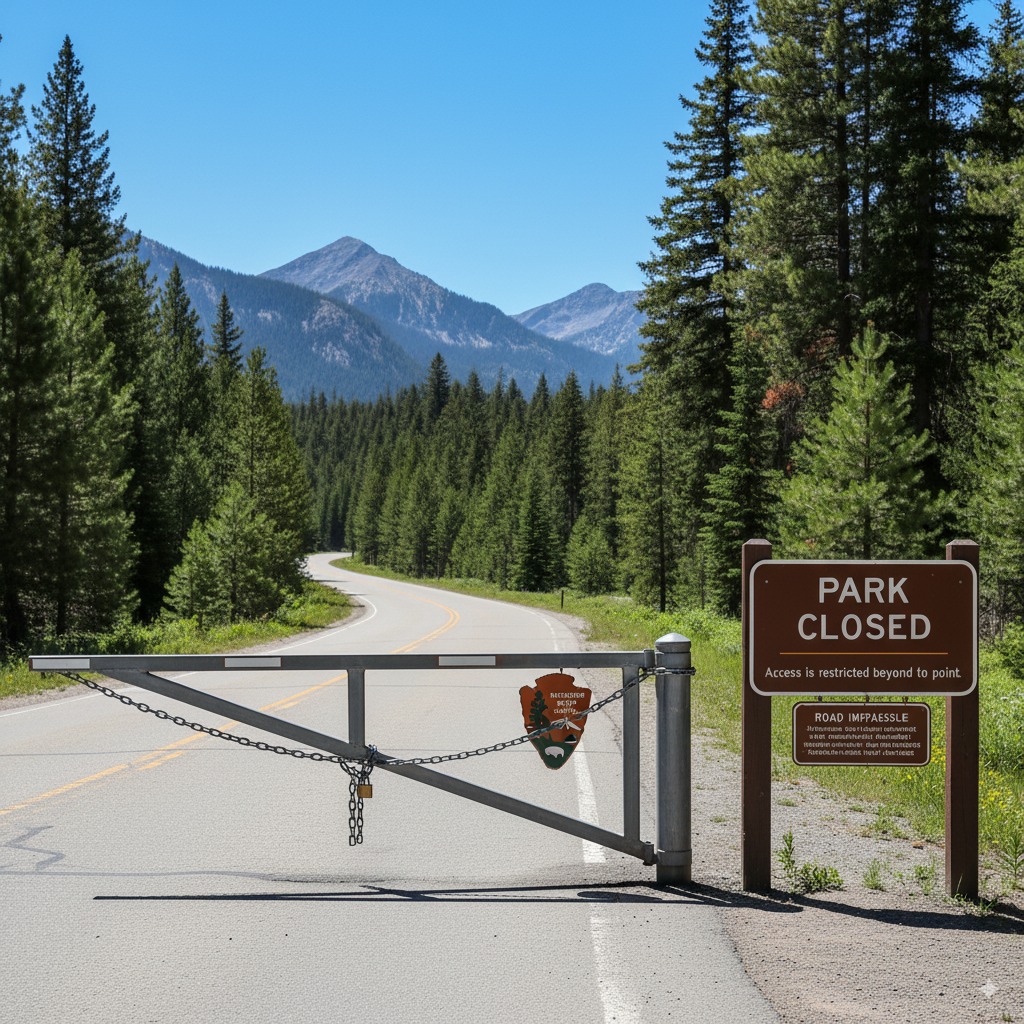
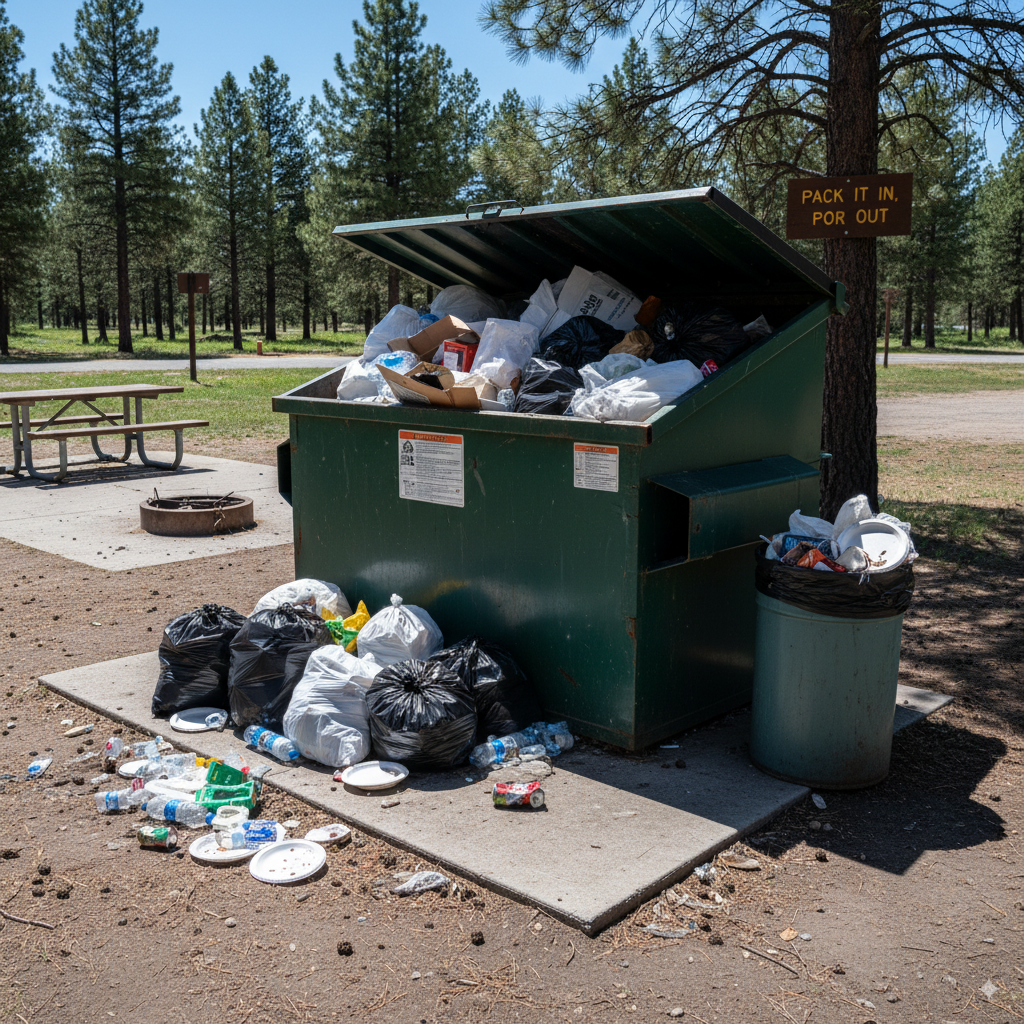
![The Complete RV & Vanlife Planner [Free 2026 Templates]](https://boondockorbust.com/wp-content/uploads/2025/09/Generated-Image-September-06-2025-12_04PM-1024x675.jpeg)