Resources

Are UTVs and ATVs Street Legal? State-by-State Laws
The Complete State-by-State Guide to Street Legal UTV and Side-by-Side Laws By Chuck Price, Boondock or Bust | Full-time RVer, 35+ years UTV experience, 47 states traveled Last updated: February 2, 2026 Read time: 15 minutes | Key stat: Montana and South Dakota...

Are RV Memberships Worth It? Break-Even Math for 2026
2026 RV Membership Costs: Break-Even Math & Real ROI TL;DR: An RV membership saves money only when you use eligible benefits often enough to recover the annual fee. There is no defensible universal claim that a certain percentage of RVers lose money or that one...
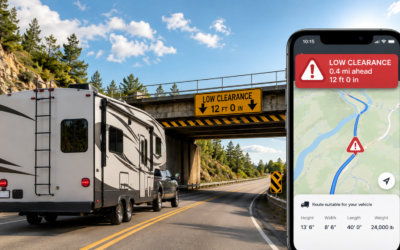
Free Truck GPS Apps for RVers: Smart Backup Tool or Risky Shortcut?
Quick Answer Free truck GPS apps like TruckMap can help RVers check routes for low bridges, weight limits, and restricted roads. TruckRouter.com adds free desktop pre-trip planning with height, weight, and clearance restriction data. Both are useful as secondary...

Yosemite RV Trip Planning: No Reservations, Full Lots by 7:30 AM, and What to Do About It
Yosemite RV Trip Planning: No Reservations, Full Lots by 7:30 AM, and What to Do About It Your current planning guide for Yosemite in 2026, updated with real-world conditions from the first weeks of the season: parking alerts, digital passes, towing enforcement, RV...
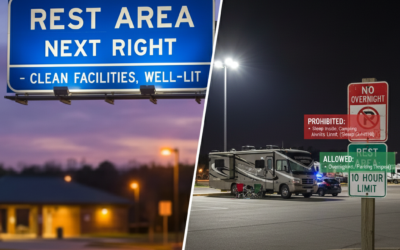
Rest Area Rules by State: Can You Sleep Overnight?
The Ultimate Guide to Overnight Parking Rules for RV and Car Travelers Last reviewed: May 2026 Reviewed by Chuck Price, 35+ years RV travel expert | Content cross-checked against official state DOT and federal transportation sources. See References. Imagine pulling...
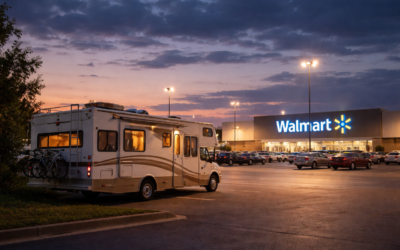
Walmart Overnight RV Parking Policy by State — Your 2026 Survival Guide
Walmart Overnight RV Parking Rules by State Quick Answer: Walmart's corporate policy permits overnight RV parking, but approval depends on individual store managers, local ordinances, and parking availability. Of roughly 4,600 U.S. stores, the Walmart Locator...

How to Work Remotely While Boondocking
Last updated: May 2026 | Equipment pricing verified May 2026 — confirm current rates before purchase How to Work Remotely While Boondocking: Power, Connectivity, and Setup By Chuck Price — 35+ years of RV travel, 118 documented boondocking locations across 38 states...
How to Find and Manage Fresh Potable Water
RV Boondocking Water Management: Fresh and Potable Water How to store, find, filter, and conserve fresh water while camping off-grid. Last Updated: May 20, 2026 | Reading Time: ~22 min | Author: Chuck Price, Boondock or Bust Quick Answer: How much fresh water do you...

Quick Guide to Finding RV Dump Stations Near You
RV Dump Stations: Apps, Costs, and Waste Disposal Find black tank and gray tank disposal facilities, compare finder apps, check fees, and verify local disposal rules before you detour. By Chuck Price Last updated: May 20, 2026 Chuck Price has 35+ years of RV camping...