by Chuck Price | Nov 11, 2025 | Boondocking-Guide
RV life. Visions of sun-drenched vistas and the siren call of the open road dance in our heads. But let’s be honest, between the breathtaking views lies a less glamorous reality. A reality that lurks beneath the floorboards, patiently awaiting its moment of… release. Yes, my friends, let’s talk about RV waste. That brown, gravity-assisted reality that demands our attention. Ignoring it isn’t just unpleasant; it’s a biohazard on wheels.
This isn’t some fluffy, aspirational guide to the RV lifestyle. Consider this a no-nonsense manual for the responsible RVer. We’re not just talking about how to dump; we’re talking about why it matters and how to do it in a way that’s kind to your rig, your nose, and the planet.
The “Good Old Days” (and How Bad They Were)
Imagine, if you will, a simpler time. An era when the automobile was still a novelty, and “RV” was less a lifestyle and more a glorified camping trip. Back then, early RVs often had rudimentary toilets, but the concept of waste disposal was… shall we say… laissez-faire. It appears the prevailing philosophy was “dump it wherever, and let nature sort it out.” Gray water? Straight to the dirt. One can only imagine the olfactory symphony emanating from these early campsites.
Then there’s the story of the “Thermasan Waste Destruction System” from the 1960s, a bizarre footnote in RV history. This contraption, supposedly a marvel of engineering, attempted to incinerate black water using engine exhaust, then spray the resulting… ahem… “effluent” onto the road. One can only imagine the “unpleasant hot diaper smell” reported by those unfortunate enough to experience it firsthand. It was a pungent testament to the adage that just because you can do something doesn’t mean you should.
Thankfully, the tides began to turn. The 1960s brought forth a revolution, spearheaded by Thetford. Slide-action valves, low-profile toilets, RV-specific toilet paper (Aqua-Soft® – a true pioneer!), and tank treatments (Aqua-Kem®) emerged. This was the dawn of segregated black and gray tanks, a monumental leap forward in RV sanitation and the collective well-being of noses everywhere.
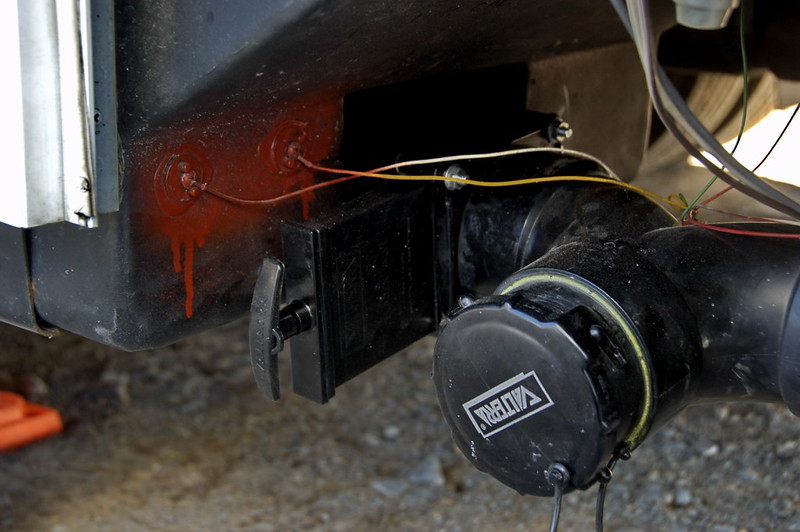
Image by:Dave Bezaire via flickr
Understanding Your RV’s Naughty Bits: Black, Gray, and Solid
Let’s delve into the anatomy of your RV’s nether regions. We must become intimately acquainted with the “Big Three”:
- Black Water: The undisputed heavyweight champion of unpleasantness. This is where toilet waste, toilet paper, and other… biological necessities reside. It demands respect, careful handling, and a healthy dose of chemical intervention (or at least a well-aimed enzymatic onslaught).
- Gray Water: The slightly less offensive cousin of black water. Comprising shower water, sink runoff, and laundry discharge, it’s a cocktail of soaps, food particles, and assorted grime. While less hazardous, it’s still not an invitation for indiscriminate dumping.
- Solid Waste: The mundane, yet ever-present, world of trash. Food scraps, packaging, and the detritus of daily life. Managing it responsibly is just as crucial as dealing with the liquid elements.
These delightful concoctions reside within your RV’s holding tanks, those unsung heroes (or villains, depending on your perspective) of the open road. They come in various sizes, so understanding your tank capacity is vital. This knowledge informs your water usage and dictates the frequency of those inevitable dumping expeditions.
Why does all this matter? Because improper waste disposal isn’t just a breach of etiquette; it’s an environmental catastrophe waiting to happen. We’re talking water pollution, soil contamination, and a direct threat to public health – human and critter alike.
The Great Debate: To Treat or Not to Treat? (and Other Controversies)
Ah, the age-old question: black tank additives – gimmick or godsend? The debate rages on in RV forums and around campfires.
- The Believers: Zealots of enzyme-digesting treatments (e.g., RV Digest-It Ultra, Happy Camper), swearing by their ability to liquefy solids, prevent the dreaded “pyramiding” (a geological phenomenon best avoided in your black tank), and eradicate odors.
- The Skeptics: Purists who contend that ample water and proper flushing are all that’s required. They view additives as a needless expense or, worse, a source of harmful chemicals.
- The (Tentative) Consensus: Avoid bleach or harsh chemicals at all costs. They obliterate beneficial bacteria and can wreak havoc on your system. Eco-friendly, enzyme/bacterial treatments are the generally preferred route.
Then there’s the thorny issue of gray water. The “almost innocent” offender.
- The Gray Area (Pun Intended): While less perilous than black water, discharging it into the wild is illegal in most places (national parks, national forests, etc.). It harbors soap, food particles, and bacteria, all capable of harming the environment, generating unpleasant smells, and summoning unwanted pests.
- The Boondocker’s Dilemma: Some intrepid boondockers, parked on private land or in truly remote locations, contemplate repurposing “nature-safe” gray water for irrigation. The key word here is “contemplate.” Always consult local regulations first.
Finally, a word of caution: THINK. TWICE. Before dumping your RV tanks into a residential septic system. RV chemicals and sheer volume can overwhelm the delicate biological balance of a home system, leading to a costly and unpleasant reckoning.
Dumping Day: Your Step-by-Step Guide to Not Making a Mess
Dumping day. That moment of truth, where your RV waste management skills are put to the test. Fear not, for I shall guide you through the process, step by meticulous step.
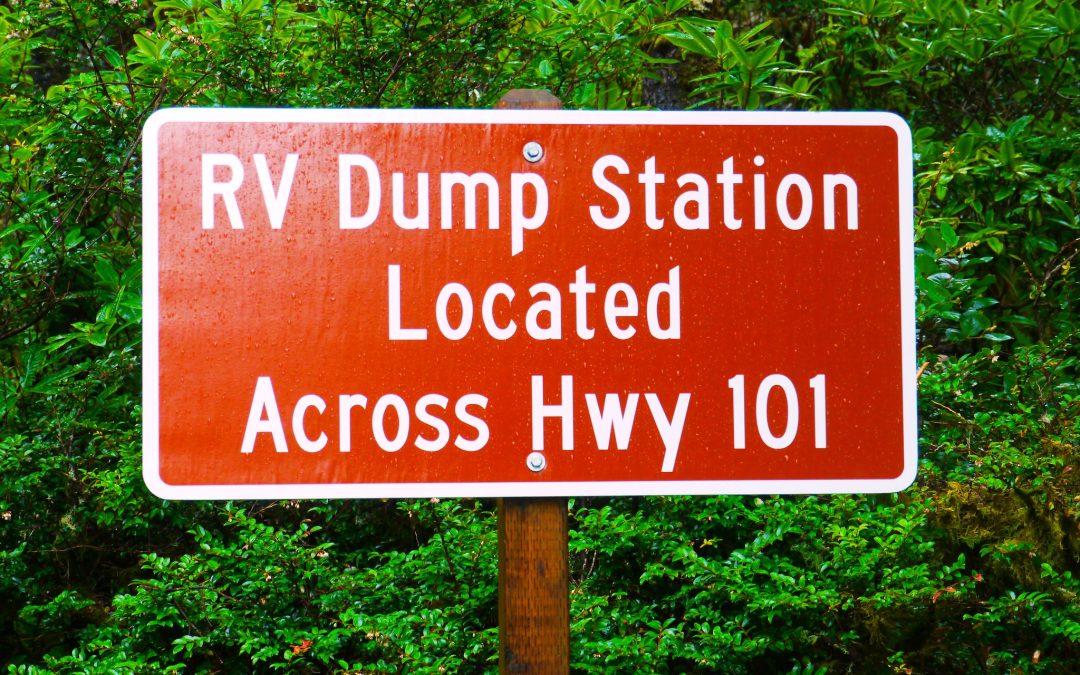
- The Golden Rule: ALWAYS utilize designated RV dump stations. These are typically found at campgrounds, RV parks, truck stops, and rest areas. Discharging onto the ground or into storm drains is illegal and utterly reprehensible.
- Gear Up, Buttercup: Arm yourself with disposable gloves, a reliable sewer hose (preferably with a clear adapter for visual confirmation of… progress), a sewer hose support (to ensure that crucial downhill flow), and a dedicated rinse hose (NEVER use your drinking water hose for this purpose!).
- The Ritual:
- Prep: Gloves on, position your RV strategically, connect the hose securely.
- Black First: Open the black tank valve and let it drain completely. This initial onslaught removes the most concentrated waste.
- Flush the Black (Seriously, Do It): Employ your RV’s built-in flush or a dedicated wand. Continue flushing until the water runs clear. Close the valve.
- Gray’s Turn: Open the gray tank valve. This soapy deluge helps to cleanse your sewer hose.
- Disconnect & Rinse: Close the gray valve, disconnect the hose, and rinse it thoroughly with non-potable water. Eradicate any spills.
- Treat It: Add water and your chosen tank treatment (if you’re a believer) to the black tank.
- Portable Tanks (Blue Boys/Honey Wagons): Your boondocking allies! These enable you to extend your off-grid stays by transporting waste to a dump station without relocating your entire rig. Be mindful: they become exceptionally HEAVY when full.
- Home Dumping: Permissible in many areas if you have a sewer cleanout or macerator pump (for transfer to a household toilet/septic system, with approval). Once again, diligently verify local regulations, and NEVER discharge into a storm drain.
Keeping It Clean & Green: Best Practices & Maintenance Magic
Maintaining a clean and eco-conscious RV waste system is an ongoing endeavor.
- RV-Safe TP: It disintegrates faster, precluding clogs.
- Water, Water Everywhere (in Moderation): Use ample water when flushing, but conserve it strategically (navy showers, pre-cleaning dishes) to extend tank life and boondocking capabilities.
- Regular Cleaning: Flush after each dump and perform a deep clean every few months. Routinely inspect hoses and connections for leaks.
- Odor Control: Utilize enzyme treatments, keep tank valves closed between dumps, and prevent grease from entering the gray water drain.
- Reduce, Reuse, Recycle: Segregate trash, minimize single-use plastics, and locate recycling facilities at campgrounds. Composting food scraps is a game-changer.
- Eco-Friendly Products: Opt for biodegradable soaps and tank treatments.
The Future is (Hopefully) Less Stinky: Innovations on the Horizon
The future of RV waste management is brimming with intriguing possibilities.
- Automated Dumping Systems: Imagine a single button that triggers an automated emptying and rinsing sequence, potentially even recycling gray water for flushing! Companies like Pebble Flow and PPO Innovations are pioneering this technology.
- Smart Sanitation: Thetford’s iNDUS system employs an app to monitor tanks, automatically dispense additives, and recycle gray water for toilet flushing, dramatically extending off-grid duration.
- Macerator Pumps Go Mainstream: These garbage disposal-esque pumps liquefy waste, facilitating easier dumping, even uphill and into portable tanks.
- Composting Toilets: A burgeoning trend! They separate liquids and solids, eliminate black tanks, minimize water usage, and generate odorless compost.
- Bigger & Better Tanks: Newer RV designs are incorporating larger tank capacities.
- Hydrojetting: For an exhaustive deep clean, professional services are deploying high-pressure water jets to obliterate caked-on debris from tank walls.
- Greener RV Parks: Expect more eco-conscious wastewater treatment systems (aerobic treatment units, membrane bioreactors) and comprehensive recycling/composting programs at campgrounds.
Conclusion: Happy Trails Mean Responsible Dumping
RVing is a wondrous pursuit. Mastering waste management only enhances the experience.
Your mission, should you choose to accept it: Be clean, be green, be legal. Safeguard yourself, your rig, and the pristine landscapes you traverse.
Now, venture forth and embrace the open road, confident in your mastery of the RV waste game.
Resources
- RV Travel – RV Waste Management Guide: https://www.rvtravel.com/rv-waste-management-guide/ Description: This comprehensive guide from RV Travel covers topics such as understanding RV waste systems, proper waste disposal techniques, and maintaining your RV’s holding tanks.
- Good Sam – A Comprehensive Guide to RV Holding Tanks: https://www.goodsam.com/camping/articles/a-comprehensive-guide-to-rv-holding-tanks/ Description: Good Sam provides an in-depth guide on RV holding tanks, including types of tanks, capacity, how to maintain them, and how to prevent common issues.
- The Dyrt – How to Dispose of RV Waste Safely and Responsibly: https://thedyrt.com/magazine/lifestyle/how-to-dispose-of-rv-waste/ Description: The Dyrt offers a detailed article on disposing of RV waste safely and responsibly, including tips for black water, grey water, and solid waste disposal.
- RVshare – A Beginner’s Guide to RV Waste Management: https://rvshare.com/blog/beginners-guide-to-rv-waste-management/ Description: RVshare’s beginner’s guide to RV waste management covers everything from types of waste to proper disposal practices, including advice on choosing the right waste management system for your RV.
- Campanda – The Ultimate Guide to RV Holding Tanks: https://www.campanda.com/magazine/ultimate-guide-rv-holding-tanks/ Description: Campanda’s ultimate guide to RV holding tanks provides detailed information about the different types of holding tanks, their functions, and how to maintain them for optimal performance.

by Chuck Price | Nov 11, 2025 | Boondocking-Guide
I. Introduction: Escape to Louisiana’s Untamed Beauty
Craving an escape where the air is clean, the stars are bright, and the only sounds are the rustling of leaves and the gentle murmur of a river? Ditch the city hustle and discover Bogue Chitto State Park! Nestled in the heart of Washington Parish, a mere hour north of New Orleans, lies a sprawling natural haven begging to be explored. Bogue Chitto isn’t just a park; it’s an immersion into a landscape of rolling hills, clear streams, and rivers that carve their way through the Louisiana wilderness. But this isn’t a static postcard scene; Bogue Chitto is growing, evolving, and perpetually adding new layers to its already impressive tapestry of natural wonders. Get ready for thrills, tranquility, and a whole lot of Louisiana charm!
II. A Whisper from the Past: Roots of “Big Creek”
The name itself whispers tales of the past. “Bogue Chitto.” Say it aloud, let it roll off your tongue. It’s Choctaw, you see, meaning “big creek.” A fitting name, indeed, for the lifeblood of this land. Imagine the Choctaw people, their lives intrinsically linked to this very river, their villages echoing with the sounds of nature. Their footprints may have faded, but their connection to the land remains etched in the name. Even the echoes of early European settlers and the passage of figures like General Andrew Jackson resonate within these ancient trees. Yet, despite its deep historical roots, the park itself is a relatively recent marvel, officially opening its gates in 2010, a testament to our enduring desire to preserve and celebrate these wild spaces.
III. Your Adventure Awaits: What to Do (and Love!) Right Now
Bogue Chitto State Park is a playground sculpted by nature and refined by thoughtful design.
Nature’s Playground:
-
Trails for Every Pace: Lace up your boots (or saddle up your horse – BYOH, Coggins required) and explore miles of scenic trails. Whether you’re a seasoned hiker, a leisurely biker, or an equestrian enthusiast, the park offers paths for every pace and passion. Keep your eyes peeled for the local inhabitants: deer gracefully navigating the undergrowth, raccoons peeking from behind trees, and a symphony of over 170 bird species filling the air with song.
-
River Rhapsody: The Bogue Chitto River beckons. Surrender to its gentle currents with a tubing adventure, paddle along its serene surface in a canoe or kayak – these are local favorites for a reason. For the anglers among us, eleven stocked lakes promise a tranquil escape and the thrill of the catch.
-
Fricke’s Cave: A geological oddity awaits at Fricke’s Cave (though it’s more of a gorge, really). Delicate sandstone spires, sculpted by eons of wind and water, stand as silent sentinels. Boardwalks protect this fragile landscape while allowing visitors to marvel at its unique beauty.
-
Family Fun Zone: Beyond the wilder aspects, Bogue Chitto embraces family fun. A fantastic water playground, complete with a thrilling 200-foot slide and a splash pad, provides endless entertainment for the young (and young at heart). A disc golf course offers friendly competition amidst the natural beauty.
Rest Your Wild Heart: Accommodations to Suit Every Style:
-
Camping Under the Stars: From rustic tent sites, where the stars are your only roof, to spacious RV spots boasting full hookups (and even Wi-Fi for those who can’t fully disconnect), Bogue Chitto caters to every camping preference.
-
Cozy Cabins: For those seeking a touch of modern comfort, charming cabins offer a picturesque retreat overlooking the park’s bluffs.
-
Equine Retreat: A dedicated campground awaits you and your equine companion.
The Buzz:
What’s the verdict from those who’ve wandered these paths before? The consensus is clear: Bogue Chitto is a “true treasure,” lauded for its breathtaking beauty, well-maintained facilities, and a pervasive sense of peace. Visitors rave about the park’s ability to transport them to a world far removed from the stresses of daily life.
IV. Keeping It Real: Challenges & Important Considerations
No exploration is complete without acknowledging the shadows that dance alongside the light.
-
River Respect: The Bogue Chitto River, while inviting, demands respect. Strong currents, submerged debris, and the potential for flash flooding are real hazards. Prioritize safety above all else; life jackets are not optional – they are essential.
-
Water Quality Watch: Transparency is paramount. Past sewage spills and ongoing concerns about fecal coliform levels are realities that must be addressed. Fish consumption advisories for mercury also exist. However, it’s equally important to emphasize the ongoing conservation efforts dedicated to improving water quality and protecting this vital resource.
-
Navigational Niggles: Some visitors have noted winding, unlabeled roads within the park. Continuous improvements are underway to enhance navigation and ensure a seamless experience.
-
The Management Challenge: Managing a landscape as diverse as Bogue Chitto presents inherent challenges. Wetlands mitigation, periodic flooding, and erodible soil demand constant vigilance and innovative solutions.
V. The Future is Blooming: Exciting New Adventures on the Horizon!
Bogue Chitto isn’t resting on its laurels; it’s actively expanding and enhancing its offerings.
-
Massive Expansion! In May of 2025, the park grew by over 800 acres – a staggering 45% increase! This expansion, fueled by key partnerships and the Louisiana Outdoors Forever Fund, opens up a world of new possibilities.
-
Trailblazer’s Dream: Imagine an additional 35 miles of trails beckoning mountain bikers, hikers, and equestrian enthusiasts. Epic jump trails and adaptive-friendly paths, designed with the expertise of NORBA, promise to cater to a wide range of abilities and adrenaline levels.
-
Boulder Bonanza! Prepare for something entirely new: a proposed outdoor bouldering playground, training center, and pavilion. Project scope and completion dates can change; check the Louisiana State Parks page for the current status before planning around this amenity.
-
Ever-Expanding Conservation: The commitment to conservation extends beyond the park’s boundaries. Ongoing restoration projects, including potential long-leaf pine restoration, and the establishment of the nearby Bogue Chitto Wildlife Management Area, demonstrate a dedication to protecting this vital habitat for generations to come.
-
Recent Wins: The momentum is palpable. 2023 saw the completion of a new equestrian campground, enhancements to the mountain bike area (including showers, a repair station, and pump tracks), and the creation of the accessible Interpretive Ranger Jordan Brooks Smith Kids Trail.
VI. Conclusion: Your Louisiana Adventure Awaits!
Bogue Chitto State Park is more than just a park; it’s a dynamic tapestry woven from rich history, stunning natural beauty, endless recreational opportunities, and a future brimming with exciting possibilities. It is a place where the whispers of the past mingle with the promises of tomorrow, where the tranquility of nature meets the thrill of adventure. Whether you seek a serene escape to reconnect with yourself and the natural world, or an adrenaline-fueled exploration of its wilder corners, Bogue Chitto State Park promises an unforgettable Louisiana experience.
Pack your bags, grab your gear, and discover why this “big creek” is making big waves in Louisiana’s outdoor scene!
FAQ
Q1. What is Bogue Chitto State Park?
A1. Bogue Chitto State Park is a natural haven located in Louisiana that spans over 1,786 acres of lush greenery, featuring rolling hills, scenic rivers, and crystal-clear streams.
Q2. What outdoor recreational activities can visitors enjoy at Bogue Chitto State Park?
A2. Visitors to Bogue Chitto State Park can enjoy a range of outdoor recreational activities, including hiking, biking, horseback riding, canoeing, kayaking, tubing, swimming, and fishing.
Q3. What accommodations are available at Bogue Chitto State Park?
A3. Bogue Chitto State Park offers RV and tent campsites plus four upland cabins. The park also lists group-camp and lodge accommodations; inventory, amenities, and availability vary, so confirm the current options with Louisiana State Parks before booking.
Q4. What kind of wildlife can visitors expect to see at Bogue Chitto State Park?
A4. Visitors to Bogue Chitto State Park can expect to see a variety of wildlife, including deer, raccoons, and various bird species. The park is also home to hardwood forests, cypress-tupelo swamps, and wetlands, which are all natural habitats for many other species.
Q5. What is Bogue Chitto State Park’s commitment to preserving Louisiana’s natural beauty?
A5. The staff at Bogue Chitto State Park is committed to preserving Louisiana’s natural beauty by working closely with local conservation organizations to protect the park’s delicate ecosystems and wildlife habitats. The park also promotes sustainable practices such as recycling and reducing energy consumption.
Resources
- Louisiana State Parks Official Website – Bogue Chitto State Park: https://www.crt.state.la.us/louisiana-state-parks/parks/bogue-chitto-state-park/index
- National Park Service – Louisiana: https://www.nps.gov/state/la/index.htm
- Louisiana Department of Wildlife and Fisheries – Bogue Chitto Wildlife Management Area: https://www.wlf.louisiana.gov/page/bogue-chitto
- The Nature Conservancy – Louisiana: https://www.nature.org/en-us/about-us/where-we-work/united-states/louisiana/
- U.S. Fish and Wildlife Service – Louisiana Ecological Services: https://www.fws.gov/lafayette/
by Chuck Price | Oct 29, 2025 | Boondocking-Guide
Fix 8 Common Problems Fast
Your RV air conditioner shuts down during a boondocking trip in 95°F heat. Is it a power supply issue, a dirty filter, or compressor failure? RV AC problems typically stem from three main causes: electrical issues, airflow restrictions, or mechanical component failure. Most failures occur during off-grid camping when power limitations stress the system.
This comprehensive troubleshooting guide provides structured diagnostic steps for identifying and resolving common RV AC problems. Based on analysis of manufacturer service manuals from Coleman, Dometic, and Furrion, plus diagnostic procedures from the National RV Training Academy (NRVTA, 2025), this guide synthesizes best practices for both emergency repairs and preventive maintenance. The content includes three comparison tables—a troubleshooting matrix mapping eight common problems to DIY and professional solutions, a maintenance schedule with time estimates, and an essential tools checklist. Each section provides clear decision points distinguishing when to attempt DIY repairs versus calling a mobile RV technician, with specific focus on power management strategies for boondocking and off-grid scenarios.
Understanding RV AC Power Requirements for Off-Grid Camping
RV air conditioners require 30-50 amp shore power or a generator producing at least 3,600 watts to sustain the compressor’s startup surge and continuous operation. A standard 13,500 BTU unit draws approximately 3,600 watts during the initial 2-3 second startup, then stabilizes at 1,300-1,500 watts while running (PickHVAC, 2025). The 15,000 BTU models require even more power, surging to 7,000-8,000 watts at startup before settling to 1,800-2,000 watts continuous draw (RenewableWise, 2024).
The startup surge creates the primary challenge for boondocking. Standard portable generators under 3,000 watts cannot handle this initial demand without tripping breakers. RV electrical systems operate on either 30-amp (3,600 watts maximum) or 50-amp (12,000 watts maximum) configurations (PickHVAC, 2025). When boondocking with a 30-amp system, running the microwave (1,000W), refrigerator (600W), and water heater (1,400W) simultaneously consumes 3,000 watts—leaving only 600 watts available, insufficient for AC startup.
Voltage drop compounds these power constraints. AC compressors require minimum 108 volts to operate efficiently; voltage below this threshold causes increased amperage draw, overheating, and premature compressor failure (Roadtrippers, 2025). Campground voltage commonly drops below 105 volts during peak usage periods on hot summer days, forcing AC units to work harder and consume more power.
Boondocking-specific solutions include soft-start devices (Micro-Air EasyStart, SoftStartRV) that reduce startup surge by 65-70%, enabling AC operation on smaller 2,000-2,200 watt generators (Micro-Air, 2025). Solar panel systems alone cannot power RV AC units without massive battery banks (1,200+ amp-hours) and 3,000+ watt inverters due to the sustained power requirements. Understanding your RV’s electrical capacity prevents approximately 90% of AC failures during off-grid camping, according to power management best practices outlined by certified RV technician training programs (NRVTA, 2025).
Common RV Air Conditioner Problems: Troubleshooting Matrix
Eight problems account for 95% of RV AC failures in both on-grid and boondocking scenarios. These issues range from simple power supply problems to complex mechanical failures requiring professional refrigerant handling. Most filter and breaker issues resolve in under 15 minutes with basic tools, while refrigerant leaks or compressor failures require EPA-certified technicians due to federal regulations on refrigerant handling (the applicable EPA technician certification requirements).
The troubleshooting matrix below maps symptoms to root causes, distinguishing between DIY-accessible repairs and scenarios requiring professional intervention. Time estimates reflect average completion times for experienced RVers with basic mechanical skills. Difficulty ratings range from Easy (no technical expertise required) to Advanced (electrical testing required). According to diagnostic procedures taught by the National RV Training Academy, systematic troubleshooting starting with the simplest potential causes (dirty filter, tripped breaker) resolves approximately 60% of AC failures without requiring tools beyond a screwdriver and vacuum cleaner (NRVTA, 2025).
| Problem |
Symptoms |
Likely Cause |
DIY Solution |
Call Pro When |
Difficulty |
| No Power |
Unit won’t turn on, no lights, no fan noise |
Tripped breaker at pedestal or RV panel; loose shore power connection |
Check pedestal breaker (reset if tripped); verify RV power cord fully seated; check RV breaker panel |
Burnt wiring smell detected; breaker trips immediately after reset |
Easy (5 min) |
| Blowing Warm Air |
Fan runs normally, no cool air output |
Failed start capacitor; low refrigerant; compressor failure; dirty condenser coils |
Test capacitor with multimeter ($40-80 tool); clean condenser coils on roof; verify compressor engages (listen for “thunk” sound) |
Compressor won’t start after capacitor test; oily residue around fittings (refrigerant leak); compressor hums but doesn’t start |
Medium (30 min) |
| Weak Airflow |
Cool air present but minimal output |
Frozen evaporator coils; severely clogged filter; crushed ductwork; blocked vents |
Clean/replace filter; switch to fan-only mode to melt ice (30-60 min); inspect ductwork for kinks |
Ice reforms within 24 hours despite clean filter; persistent freezing indicates low refrigerant |
Easy (15 min) |
| Water Leaks |
Dripping water inside RV; water stains on ceiling |
Clogged drain pan; blocked drain holes; loose roof gasket; cracked drain pan |
Clear drain pan debris; tighten mounting bolts (torque to manufacturer specs); check gasket seal |
Drain pan physically cracked; water intrusion continues after gasket replacement |
Easy (20 min) |
| Strange Noises |
Grinding, squealing, rattling, or clicking sounds |
Loose shroud bolts; debris in fan blades; dry fan motor bearings; failing motor |
Tighten shroud bolts; remove debris (leaves, twigs); oil fan motor with 3-in-1 oil (2-3 drops per port) |
Grinding continues after oiling; motor bearing failure (replacement required) |
Easy-Medium (20 min) |
| Short Cycling |
Unit turns on/off every 2-3 minutes |
Frozen evaporator coils; faulty thermostat; dirty coils restricting airflow |
Melt ice using fan mode; clean both evaporator and condenser coils; check thermostat battery (replace if low) |
Thermostat replacement needed; control board malfunction |
Medium (45 min) |
| Frozen Coils |
Visible ice buildup on evaporator fins |
Restricted airflow (dirty filter); attempting to cool below ambient +20°F; low refrigerant charge |
Clean filter immediately; ensure intake vents unblocked; switch to fan mode to melt ice completely (1-2 hours) |
Freezing recurs within 24 hours; indicates refrigerant leak requiring evacuation and recharge |
Easy (30 min) |
| Breaker Trips Repeatedly |
Power cuts out, must manually reset |
Low campground voltage (under 108V); overloaded circuit (too many appliances); generator undersized for AC load |
Test voltage with multimeter (must be 108V+); turn off other 120V appliances before AC startup; upgrade to 3,600W+ generator for 13,500 BTU unit |
Voltage consistently under 105V at campground; dedicated circuit required |
Medium (20 min) |
Data Sources: Troubleshooting procedures compiled from Coleman MACH Service Manual diagnostic flowcharts, Dometic Technical Service Bulletin DTB-2024-08, National RV Training Academy (NRVTA) technician certification curriculum, and RV Technical Institute (RVTI) Level 2 competency standards. Time estimates represent average DIY completion for RVers with basic mechanical experience. Professional intervention required for EPA-regulated refrigerant systems under EPA Section 608 for stationary systems or Section 609 for motor-vehicle air conditioning, as applicable.
⚠️ Critical Safety Note: Never attempt to discharge or test capacitors without proper training and discharge tools. Capacitors store electrical charge even when power is disconnected and can deliver dangerous shocks. Refrigerant handling requires the applicable EPA technician certification. Unauthorized venting violates federal law, and maximum civil penalties are adjusted for inflation; EPA listed up to $124,426 per day per violation effective January 8, 2025. Check the current EPA requirements and penalty schedule.
Most RV AC failures during boondocking stem from insufficient generator capacity or low voltage conditions. A quality 3,000-watt generator paired with a soft-start device handles 13,500 BTU units reliably, while 15,000 BTU models require 4,000+ watts without soft-start modifications (Micro-Air, 2025). Filter maintenance alone prevents approximately 40% of weak airflow and frozen coil issues—monthly cleaning in dusty desert boondocking environments is essential.
Essential RV AC Maintenance Schedule
Preventive maintenance reduces RV AC failure rates by 70% and extends unit lifespan from 7 years to 12+ years, according to manufacturer service guidelines and RV technician best practices. Regular maintenance tasks prevent the three primary failure modes: airflow restriction (dirty filters, clogged coils), electrical issues (degraded connections, worn components), and mechanical wear (fan motor bearings, compressor stress). The maintenance schedule below prioritizes tasks by frequency and difficulty level, with increased frequency recommended for full-time RVers and those camping in dusty desert environments (Great American RV, 2025).
Monthly filter inspections represent the single highest-impact maintenance task. Interior return air filters should be cleaned regularly—weekly if you have pets or camp in dusty conditions, as dirty filters reduce airflow efficiency and cause the AC unit to work harder (Great American RV Coleman, 2025). The mixing divider above the ceiling assembly requires annual inspection to ensure proper air separation between return and supply sides, as deteriorated foam allows air mixing that causes coil freezing.
Exterior maintenance requires accessing the roof-mounted unit. Remove the AC shroud carefully to avoid damaging condenser coils, then spray AC coil cleaner on the coils and rinse with low-pressure water—never use high-pressure jets that bend delicate cooling fins (Great American RV Coleman, 2025). Professional annual inspections cost $150-250 but prevent $2,000+ compressor replacement by identifying refrigerant leaks, electrical connection degradation, and mounting hardware looseness before catastrophic failure occurs (AA Mobile RV Repair, 2025).
| Task |
Frequency |
Time Required |
Best Season |
Skill Level |
| Clean/replace air filter |
Monthly (weekly if dusty/pets) |
10 minutes |
Year-round |
Beginner |
| Inspect roof gasket seal |
Every 6 months |
15 minutes |
Spring, Fall |
Beginner |
| Check mixing divider tape |
Annually |
20 minutes |
Spring |
Beginner |
| Clean condenser coils (exterior) |
Annually (bi-annually if dusty) |
45 minutes |
Spring |
Intermediate |
| Straighten cooling fins |
Annually |
30 minutes |
Spring |
Intermediate |
| Check mounting bolts torque |
Every 6 months |
10 minutes |
Spring, Fall |
Beginner |
| Test capacitors with multimeter |
Annually |
20 minutes |
Spring |
Advanced |
| Professional inspection |
Annually |
60-90 minutes |
Pre-season |
Professional |
| Clean drain pan/clear drain |
Annually |
20 minutes |
Spring |
Intermediate |
Citation: Schedule based on Coleman, Dometic, and Furrion manufacturer maintenance guidelines compiled from Great American RV support documentation and AA Mobile RV Repair service protocols. Frequency doubles for full-time RVers and those camping in dusty Southwest environments.
Seven essential tools handle 90% of DIY RV AC repairs, with total investment under $200 for a complete troubleshooting kit. The digital multimeter with clamp-on amperage testing capability represents the single most valuable diagnostic tool, enabling voltage verification (minimum 108V requirement), capacitor testing, and amperage draw measurement during compressor operation. Klein Tools manufactures a reliable clamp-style multimeter with capacitance testing for approximately $60 at Home Depot, suitable for testing RV AC capacitors rated at 10 microfarads (HeatSync Labs, 2025).
Capacitor testing requires specific multimeter capabilities. A multimeter with capacitance mode allows measuring the capacitor value and comparing it to the specification printed on the capacitor’s side—values outside the rated range indicate capacitor failure requiring replacement (It Still Runs, 2019). The capacitance reading should fall within ±10% of the labeled specification for proper operation (Technical Hot & Cold Parts, 2022).
Fin combs prevent costly coil replacement. Bent cooling fins restrict airflow by up to 40%, forcing the compressor to work harder and increasing power consumption. Fin comb sets ($15-25) include multiple comb sizes for 8, 10, 12, and 14 fins per inch spacing, matching common RV AC coil configurations. Straightening bent fins takes 15-20 minutes and prevents $300-500 coil replacement costs (AA Mobile RV Repair, 2025).
⚠️ Critical Safety Note: When discharging motor run and motor start capacitors, always use an insulated screwdriver or insulated tool—capacitors store dangerous electrical charge even when power is disconnected, creating serious shock risk that can be fatal (It Still Runs, 2019). Never attempt capacitor testing or replacement without proper discharge procedures and insulated tools.
💡 Boondocking Toolkit Priority: For off-grid camping, prioritize the multimeter (voltage testing for generator output verification) and thermometer set (Delta-T measurement confirms 20°F temperature drop indicating proper cooling). These two tools diagnose 80% of boondocking-related AC failures caused by low generator voltage or inadequate cooling performance.
When to Call a Professional RV Technician
Three AC issues require licensed technicians due to EPA regulations and safety hazards: refrigerant leaks, compressor replacement, and electrical system modifications. EPA regulations under Section 608 of the Clean Air Act require that technicians who maintain, service, repair, or dispose of equipment that could release refrigerants into the atmosphere must be certified (EPA, 2024). Federal law prohibits unauthorized refrigerant handling, with maximum civil penalties adjusted periodically for inflation; verify the current EPA penalty schedule rather than relying on an old fixed amount. RV AC units contain regulated refrigerants requiring EPA Section 608 Type II certification for legal servicing.
Mobile RV technicians service boondocking locations, eliminating the need to move your RV to a shop. Service call fees range from $125-175 depending on location, with hourly labor rates averaging $125-175 per hour (Gilley Mobile RV, 2025; Open Road RV, 2025). Total diagnostic and repair costs typically run $200-400 for common issues like capacitor replacement ($30-80 parts) or fan motor repair ($150-250 parts), completed in 2-4 hours. Annual professional AC maintenance services cost $125-300 for the first unit, preventing $2,000+ compressor failure through early detection of refrigerant leaks, electrical degradation, and component wear (Nerdy Nomad RV, 2025; GSO Mobile RV, 2025).
Five critical signs requiring professional intervention:
- Refrigerant leaks – Oily residue around fittings, hissing sounds, or frost buildup on refrigerant lines indicates refrigerant escape requiring EPA-certified recovery, leak repair, evacuation, and recharge ($300-600)
- Electrical burning smell – Acrid odor from control box or wiring suggests overheating connections, degraded wiring insulation, or control board failure ($200-500 repair)
- Persistent coil freezing – Ice reformation within 24 hours despite clean filter and proper airflow indicates low refrigerant charge or failed expansion valve ($250-450)
- Compressor failure symptoms – Compressor hums but won’t start, makes grinding/rattling noises, or trips breaker immediately suggests mechanical seizure or electrical fault ($800-1,500 replacement)
- Digital control error codes – Flashing LED patterns or fault codes displayed on thermostat indicate control board diagnostics requiring manufacturer-specific interpretation
Professional mobile technicians arrive fully equipped with refrigerant recovery equipment, leak detection tools, vacuum pumps, and manufacturer-specific replacement parts. They typically diagnose the problem within 30-60 minutes and provide written estimates before beginning repairs. Most offer same-day or next-day service during peak RV season, with weekend/emergency service available at premium rates ($200-250 service calls plus hourly labor).
Insurance and warranty considerations: Attempting DIY refrigerant work voids manufacturer warranties and homeowner’s insurance coverage for refrigerant-related damages. Professional repairs include parts and labor warranties (typically 90 days to 1 year), providing recourse if the same problem recurs. EPA-certified technicians carry liability insurance covering refrigerant handling accidents, electrical system damage, and roof access incidents.
Boondocking-Specific AC Management Strategies
Running RV AC while boondocking requires generator capacity of 3,600+ watts for 30-amp systems (13,500 BTU units) or 7,000+ watts for 50-amp systems (dual 15,000 BTU units), with solar panels alone insufficient for compressor startup surge. Standard portable generators under 3,000 watts cannot handle the 2,400-3,600 watt startup surge without tripping breakers or stalling. Soft-start devices reduce AC startup current by up to 75%, enabling 13,500 BTU units to operate on 2,000-2,200 watt generators like the Honda EU2200i (Micro-Air, 2025).
Generator sizing for boondocking AC operation:
- 13,500 BTU unit without soft-start: 3,600W minimum generator (Honda EU3200i, Champion 3400i, Westinghouse iGen4500)
- 13,500 BTU unit with soft-start: 2,200W generator sufficient (Honda EU2200i, Yamaha EF2200iS) – 40% fuel savings
- 15,000 BTU unit without soft-start: 4,000W minimum generator
- 15,000 BTU unit with soft-start: 3,000W generator sufficient (Honda EU3000iS)
- Dual AC units with soft-starts: 4,500-5,000W generator handles two 13,500 BTU units on 50-amp systems
Soft-start devices (Micro-Air EasyStart $299-349, SoftStartRV $319) reduce the initial power surge from 2,400 watts to 600-800 watts through adaptive learning technology that gradually ramps up voltage over 2-3 seconds. Installing soft-starts on both AC units not only helps when plugged into 30-amp shore power but makes life easier for generators, enabling RVs to take full advantage of both air conditioner units (RV Geeks, 2025). Installation requires basic electrical skills (30-60 minutes per unit) or professional installation ($100-150 labor per unit).
Shade parking strategies reduce AC runtime by 30-40% in desert boondocking environments. Parking with the RV’s longest side facing north minimizes afternoon solar gain through windows. Setting up portable shade structures (EZ-Up canopies, awnings fully extended) over the RV roof reduces metal roof surface temperatures from 140°F to 95°F, decreasing interior heat load. Strategic parking under tree cover provides natural cooling, though be cautious of sap drips on roof membranes and overhanging branches during wind events.
Power management during boondocking AC operation:
- Appliance cycling – Run microwave, electric water heater, and induction cooktop separately from AC compressor cycles to avoid overloading generator
- Thermostat optimization – Set AC to 78-80°F during peak heat (versus 72°F) reduces runtime by 25% while remaining comfortable
- Fan-only mode – Use fan circulation during mild periods (under 85°F ambient) to move air without compressor operation
- Night cooling – Open windows after sunset when ambient drops below 70°F, run fans instead of AC
- Load balancing – Turn off 12V devices (furnace fans, water pump when not in use) to reduce inverter load on battery bank
Solar panel systems alone cannot power RV AC without massive infrastructure: 1,200+ amp-hour lithium battery bank ($4,000-8,000), 1,200+ watts solar panels ($1,500-3,000), and 3,000+ watt inverter ($1,200-2,000). Even with this setup, cloudy days and high-draw periods deplete batteries faster than solar can recharge. Most boondockers rely on generators for AC operation, using solar primarily for lights, refrigerator, and 12V systems.
Boondocking AC runtime fuel calculations (13,500 BTU with soft-start on 2,200W generator):
- Honda EU2200i in eco mode: 0.5 gallons/hour (8 hours runtime per gallon at 25-50% load)
- Running AC 6 hours daily: 3 gallons fuel/day
- Week-long boondocking trip: 21 gallons fuel capacity needed
- Propane generator alternative (Champion 3400 Dual Fuel): 2.5 lbs propane/hour AC runtime
Supplemental cooling options for extreme heat: Portable evaporative coolers (swamp coolers) consume only 75-150 watts and provide 10-15°F cooling in dry climates under 30% humidity. MaxxAir or Fantastic Fan roof vents with thermostatic controls pull hot air out while drawing cooler air through windows. Reflective window covers (Reflectix, insulated shades) block 90% of radiant heat gain through glass.
Frequently Asked Questions About RV AC Troubleshooting
Q1: How often should I clean my RV air conditioner filter?
A: Clean reusable foam or mesh filters monthly during active use, or weekly in dusty desert environments. If you have pets, filter cleaning should be done even more frequently, as dirty filters reduce airflow efficiency and cause the AC unit to work harder (Great American RV Coleman, 2025). Disposable filters should be replaced every 30-60 days per manufacturer specifications. Visually inspect filters every two weeks—if you see visible dust accumulation or discoloration, clean immediately regardless of schedule.
Q2: Why does my RV AC freeze up while boondocking?
A: Frozen coils result from three primary causes: restricted airflow due to dirty filters, low voltage from undersized generators (AC units require minimum 108 volts), or attempting to cool below ambient temperature by more than 20°F. Clean the filter first, verify generator voltage with a multimeter, and ensure thermostat is set no lower than ambient minus 20°F. Switch to fan-only mode to melt ice completely (1-2 hours) before restarting cooling. If freezing recurs within 24 hours despite clean filter and proper voltage, suspect low refrigerant charge requiring professional service.
Q3: Can I run my RV air conditioner on solar panels alone?
A: Solar panels alone cannot handle the 2,400-3,600 watt AC startup surge without massive battery banks (1,200+ amp-hours lithium) and large inverters (3,000+ watts minimum). This infrastructure costs $6,000-11,000 and still requires sunny conditions—cloudy days deplete batteries faster than solar can recharge. Generator or shore power remains necessary for standard RV AC units. Soft-start devices reduce startup power but don’t eliminate the sustained 1,300-1,500 watt continuous draw during operation. Most successful boondockers use solar for 12V systems and lights, reserving generators specifically for AC operation.
Q4: What does it mean when my RV AC makes a clicking sound but won’t start?
A: Clicking indicates the thermostat is calling for cooling and the control board is attempting to engage the compressor, but the compressor isn’t starting. This symptom points to a failed start capacitor (most common), stuck compressor relay, or compressor motor failure. Test the capacitor with a multimeter in capacitance mode—if the reading falls outside ±10% of the rated value printed on the capacitor label, the capacitor requires replacement (It Still Runs, 2019). Capacitor replacement costs $30-80 for the part plus 30-45 minutes labor if hiring a technician. If a new capacitor doesn’t resolve clicking, the compressor itself has likely failed ($800-1,500 replacement).
Task: Diagnose RV AC Problem in 3 Steps
Follow this 3-minute diagnostic sequence to identify your RV AC issue before calling a technician:
Step 1: Verify Power Supply (60 seconds)
- Check campground pedestal breaker—reset if tripped
- Inspect RV panel breakers—reset any tripped 120V AC breakers
- Verify shore power cord fully seated at pedestal and RV inlet
Result: If power restored, problem solved. If breaker trips immediately upon reset, indicates short circuit requiring professional electrical diagnosis.
Step 2: Inspect Air Filter (90 seconds)
- Remove ceiling return air vent cover (typically 2-4 screws)
- Remove filter and hold to light—if you cannot see light through filter, it’s clogged
- Clean with vacuum or replace if disposable
Result: If filter is dirty, clean and wait 10 minutes for AC to restart after cooling thermostat. If AC still doesn’t cool, proceed to Step 3.
Step 3: Listen for Compressor Engagement (60 seconds)
- Set thermostat to coldest setting with fan on HIGH
- Listen at ceiling unit for compressor startup—should hear distinct “thunk” or “click” followed by humming
- Check roof unit external cover—compressor should vibrate when running
Result: If compressor clicks but doesn’t start, suspect capacitor failure ($30-80 DIY repair or $150-250 professional). If no sound at all, check thermostat battery or call technician for control board diagnosis.
Safe Actions (no tools required):
- ✓ Checking and resetting breakers
- ✓ Inspecting and cleaning filters
- ✓ Listening for compressor engagement
- ✓ Verifying thermostat battery replacement
Requires Human Judgment (safety hazards):
- ⚠️ Voltage testing with multimeter (electrical shock risk)
- ⚠️ Capacitor testing and replacement (stored charge danger)
- ⚠️ Refrigerant leak detection (EPA certification required)
- ⚠️ Decision to attempt repair versus calling technician
When to Stop and Call Professional:
- 🛑 Burnt electrical smell detected
- 🛑 Breaker trips repeatedly after reset
- 🛑 Visible damage to wiring or control board
- 🛑 Compressor runs but no cooling after 30 minutes
- 🛑 Ice reforms on coils within 24 hours after cleaning filter