Articles by Chuck Price — Page 29
by Chuck Price | May 5, 2024 | RV Camping Tips
Unveiling the Beauty and Risks of America’s National Parks
National Parks are the crown jewels of the United States, offering breathtaking landscapes, diverse wildlife, and endless opportunities for adventure. Yet, nestled amidst the beauty lies inherent danger. From towering mountains to unpredictable wildlife, these parks demand respect and preparation.
This guide delves into the top 8 most dangerous national parks in the US, highlighting the potential hazards visitors might encounter. But don’t be discouraged! By understanding the risks and following essential safety tips, you can explore these incredible destinations with confidence and create unforgettable memories.
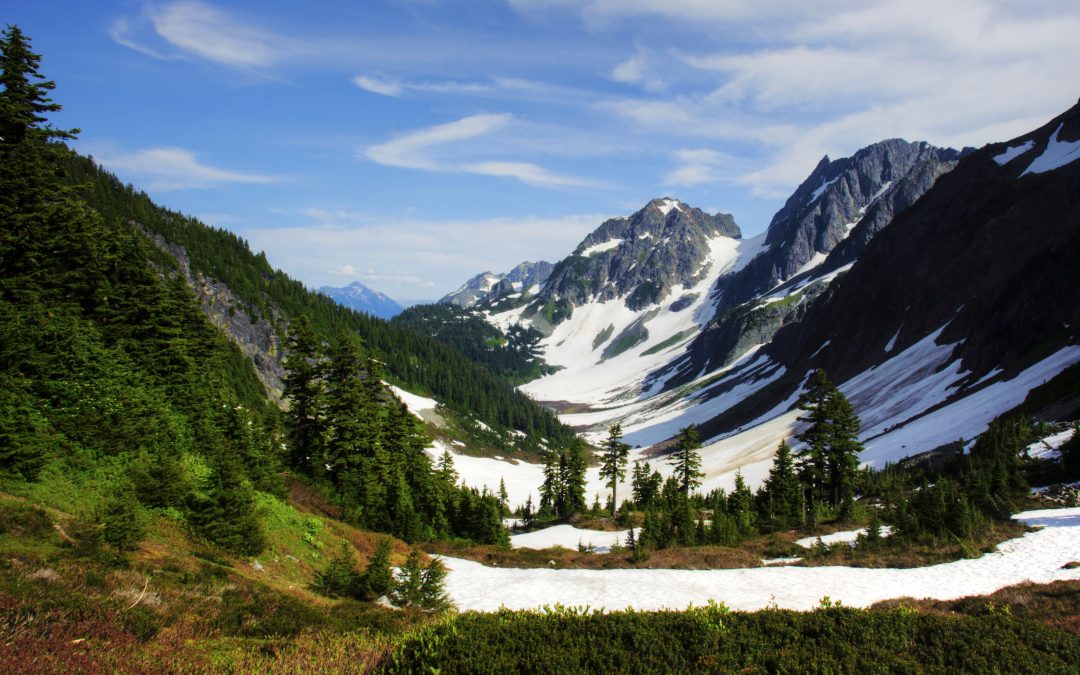
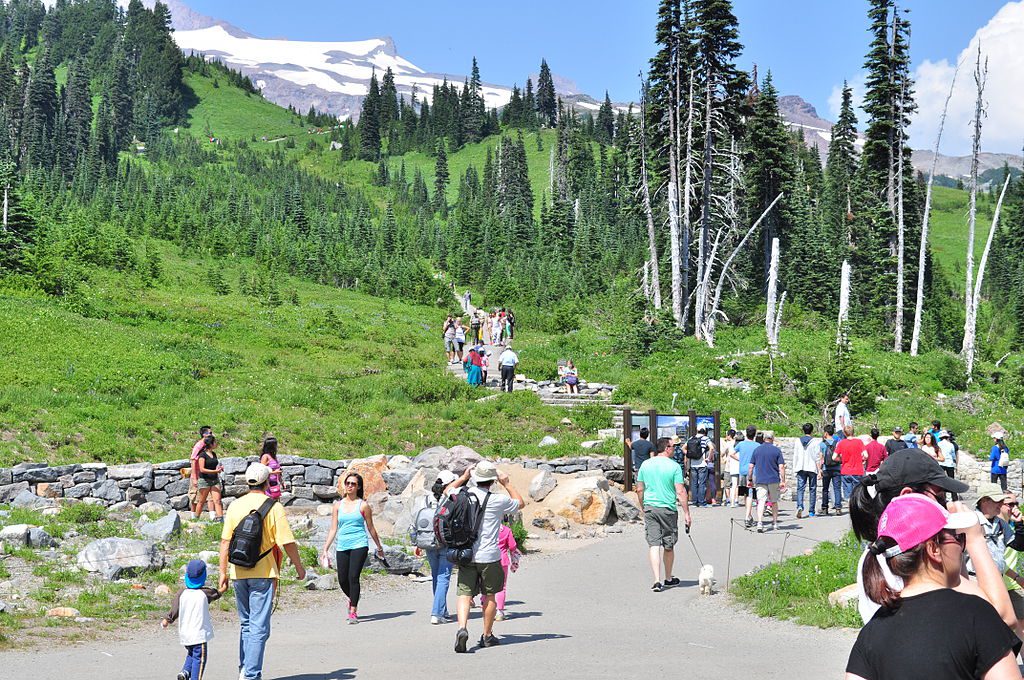 Image by Joe Mabel via Wkimedia Commons
Mount Rainier National Park, Washington: A Majestic Peak with Hidden Hazards
Mount Rainier National Park boasts Mount Rainier, the tallest mountain in the Cascade Range. Towering glaciers, wildflower meadows, and stunning vistas make it a paradise for hikers and photographers. However, this majestic beauty comes with inherent dangers.
Potential Dangers:
- Avalanches: Mount Rainier is notorious for avalanches, especially during winter and spring. These unpredictable events can bury unsuspecting hikers.
- Glacier Hazards: Falling ice and crevasses pose a serious risk to hikers venturing onto glaciers.
- Volcanic Activity: While not currently erupting, Mount Rainier is an active volcano. Volcanic hazards include lahars (mudflows) and ashfall.
- Sudden Weather Changes: Weather in the park can be unpredictable, with snow and freezing temperatures possible even in summer.
Exhausting Hikes and Treacherous Terrain
Mount Rainier offers many breathtaking hikes, but some are incredibly demanding. High altitude, steep climbs, and loose rock can make even experienced hikers fatigued. It’s crucial to choose a hike that matches your fitness level and experience.
Notable Incidents:
- In 1981, 11 climbers were killed in a massive avalanche on Mount Rainier’s Disappointment Cleaver route.
Safety Tips:
- Check avalanche conditions: Always check the latest avalanche forecast before heading out, and carry necessary safety gear like a beacon, probe, and shovel.
- Stick to marked trails: Glaciers and snowfields can be treacherous. Stay on marked trails unless you’re properly equipped and trained for glacier travel.
- Be prepared for all weather: Pack layers of clothing, rain gear, and sturdy hiking boots.
- Carry a communication device: A satellite messenger or personal locator beacon (PLB) can be crucial if you get lost or injured in remote areas.
- Train properly: Get in good physical shape before attempting strenuous hikes.
- Start early: This allows plenty of time to complete your hike before darkness falls.
- Use trekking poles: These can help with balance and stability on uneven terrain.
- Be aware of wet surfaces: Loose rock and wet trails can be especially slippery.
Remember: By following these safety tips and being aware of the potential dangers, you can have a safe and enjoyable experience exploring Mount Rainier National Park.
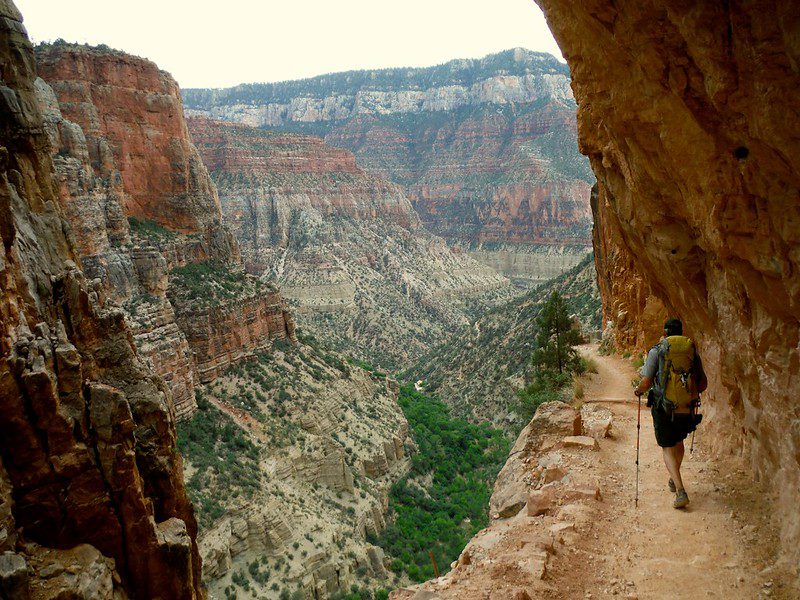 Image by Grand Canyon National Park via flickr
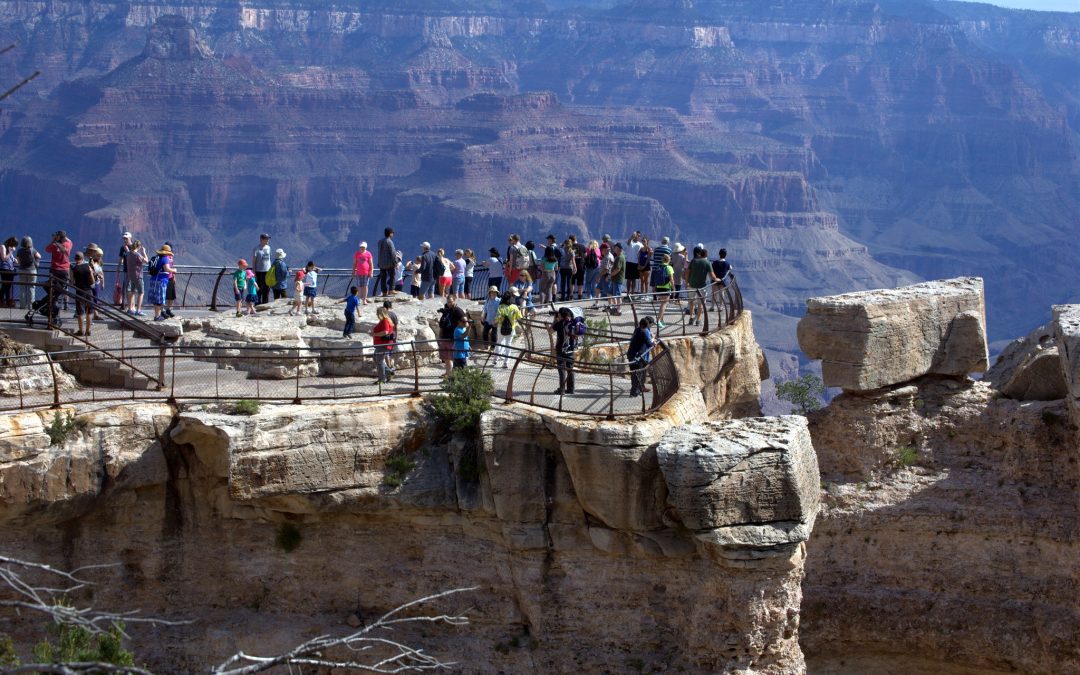
Grand Canyon National Park, Arizona: A Breathtaking Vista with Hidden Dangers
The Grand Canyon National Park is a natural wonder, its colossal size and vibrant colors leaving visitors awestruck. Carved by the Colorado River over millions of years, the canyon offers breathtaking vistas and diverse ecosystems. However, beneath its beauty lies a hidden danger zone.
Unique Hazards:
- Steep Cliffs: The canyon rim features sheer drop-offs of thousands of feet. One misstep can have tragic consequences.
- Extreme Heat: Temperatures at the South Rim can soar above 100°F (37°C) during summer months. Heatstroke and dehydration are serious risks for unprepared visitors.
- Flash Floods: Sudden downpours, even miles away, can cause flash floods in slot canyons and dry washes. These powerful torrents can sweep away unsuspecting hikers.
- Altitude: The South Rim sits at a high elevation of over 7,000 feet (2,133 meters). Altitude sickness can cause headaches, nausea, and fatigue, especially for those not acclimated.
South Rim vs. North Rim Average Temperatures (Monthly Averages)
| Month |
South Rim (7,000 ft) |
North Rim (8,000 ft) |
Difference |
| May |
70°F (21°C) |
58°F (14°C) |
12°F (7°C) |
| June |
80°F (27°C) |
68°F (20°C) |
12°F (7°C) |
| July |
88°F (31°C) |
75°F (24°C) |
13°F (7°C) |
| August |
86°F (30°C) |
73°F (23°C) |
13°F (7°C) |
| September |
78°F (26°C) |
65°F (18°C) |
13°F (7°C) |
| October |
68°F (20°C) |
53°F (12°C) |
15°F (8°C) |
This table showcases the average monthly temperatures at the South Rim and North Rim of the Grand Canyon National Park. As you can see, the North Rim, located at a higher elevation (8,000 ft) experiences cooler temperatures compared to the South Rim (7,000 ft) throughout the year. The difference can be as significant as 15°F (8°C) during some months. This highlights the importance of considering elevation when packing for your Grand Canyon trip.
Notable Incidents:
- In 2019, several tourists were swept away by a flash flood in a slot canyon, luckily with no fatalities but highlighting the danger.
Safety Tips:
Remember: By following these safety tips and being cautious around the rim, you can ensure a safe and unforgettable visit to the Grand Canyon National Park.

Image by moonjazz via flickr
Yellowstone National Park, Wyoming: A Land of Wonders with Geothermal Wrath
Yellowstone National Park, the first national park in the world, is a geothermal wonderland. Fumaroles spew steam, vibrant hot springs paint the landscape, and geysers erupt with awe-inspiring power. This geothermal activity attracts diverse wildlife, making Yellowstone a haven for nature lovers. However, beneath the beauty lies a simmering danger.
Geothermal Dangers:
- Hot Springs: The scalding water in hot springs can cause severe burns or even death if someone falls in.
- Geysers: While breathtaking to witness, geysers are unpredictable. Staying a safe distance is crucial to avoid scalding from hot water or sudden eruptions.
- Thin Crust: The ground around thermal features can be deceptively thin and extremely hot. Stepping off boardwalks can result in serious burns.
Wildlife Encounters:
- Bison: These massive animals are unpredictable and can charge at speeds of up to 35 mph. Always give them plenty of space and never approach them.
- Bears: Yellowstone is home to grizzly bears and black bears. Be aware of your surroundings, carry bear spray, and know how to use it properly.
- Wolves: While not typically aggressive towards humans, maintaining a safe distance is essential.
Notable Incidents:
- In 2016, a visitor suffered severe burns after falling into a hot spring.
- In 2020, a park ranger was injured after being charged by a bison.
Safety Tips:
Remember: By following these safety tips and respecting the power of nature, you can have a safe and enriching experience exploring Yellowstone National Park.
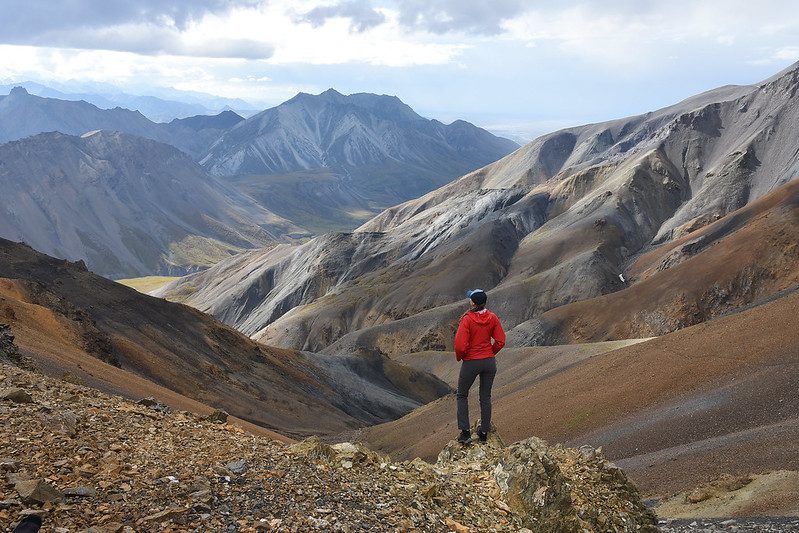
Image by Paxson Woelber via flickr
Denali National Park, Alaska: A Majestic Wilderness with Frigid Fury
Denali National Park, home to North America’s tallest mountain, Mount Denali, is a breathtaking Alaskan wilderness. Glaciers carve through the landscape, diverse wildlife roams free, and untouched beauty stretches as far as the eye can see. However, Denali’s grandeur comes with a price: unforgiving weather and challenging terrain.
Cold Weather Hazards:
- Extreme Cold: Temperatures can plummet well below zero degrees Fahrenheit (-18°C) even during summer months. Hypothermia is a constant threat for unprepared visitors.
- High Winds: Strong winds can exacerbate the feeling of coldness and make travel difficult.
- Limited Daylight: During winter months, daylight hours are extremely limited, requiring careful planning and route navigation.
Mountainous Terrain:
- Avalanches: Denali experiences frequent avalanches, especially during winter and spring. These unpredictable events pose a serious risk to climbers and hikers.
- Crevasses: Glaciers are riddled with hidden crevasses, large cracks that can trap and injure unsuspecting visitors.
- Altitude Sickness: Denali’s high elevation (over 6,000 feet) can cause altitude sickness, leading to headaches, nausea, and fatigue.
Notable Incidents:
- In 2013, a climber died from hypothermia after getting caught in a blizzard on Denali.
- In 2019, several park rangers were injured after falling into a crevasse while exploring a glacier.
Safety Tips:
- Check weather conditions: Always check the latest weather forecast before heading out, and be prepared for sudden changes.
- Dress in layers: Wear proper layers of warm clothing, including a waterproof outer shell.
- Carry proper gear: For backcountry travel, pack essential gear like an avalanche beacon, probe, shovel, and appropriate footwear with traction.
- Be aware of avalanche risks: Check avalanche reports and avoid areas with high avalanche danger.
- Acclimatize to altitude: Allow your body time to adjust to the high elevation before attempting strenuous activities.
Remember: Denali National Park demands respect and thorough preparation. By being aware of the dangers and following these safety tips, you can explore this awe-inspiring wilderness safely and responsibly.
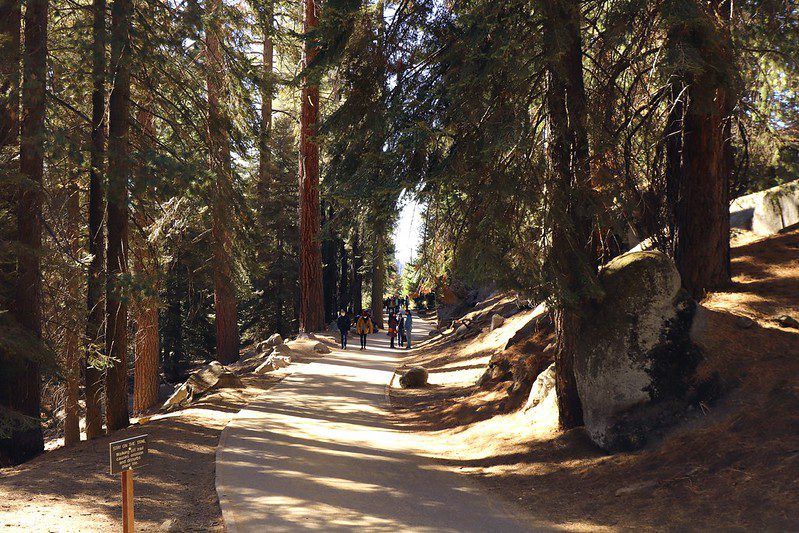
Image by Thank You (24 Millions ) views via flickr
Sequoia and Kings Canyon National Parks, California: A Realm of Giants with Hidden Dangers
Sequoia and Kings Canyon National Parks, nestled side-by-side in California’s Sierra Nevada, boast awe-inspiring giant sequoia trees, towering granite cliffs, and cascading waterfalls. Hikers can delve into ancient groves, backpackers can explore remote wilderness, and photographers can capture stunning landscapes. However, beneath the majestic beauty lurks a potential for missteps.
Rugged Terrain and Falling Hazards:
- Uneven Surfaces: Hiking trails can be rocky, uneven, and have steep drop-offs.
- Loose Rock and Gravel: Loose rock and gravel on trails can make footing treacherous, especially on inclines or declines.
- Slippery Conditions: Snowmelt or rain can turn trails slick, increasing the risk of falls.
- Falling Branches: Dead branches from towering trees can pose a hazard, especially during windy conditions.
Notable Incidents:
- In 2017, a hiker sustained serious injuries after falling from a rocky overlook in Kings Canyon National Park.
- In 2019, a backpacker was injured by a falling branch during a windstorm in Sequoia National Park.
Safety Tips:
- Choose the right footwear: Wear sturdy hiking boots with good ankle support and traction.
- Use trekking poles: Trekking poles can improve balance and stability on uneven terrain.
- Be aware of your surroundings: Pay attention to the trail conditions and watch out for loose rock, wet surfaces, and potential falling hazards.
- Take your time: Don’t rush your hike, especially on challenging sections. Enjoy the scenery and take breaks when needed.
- Be weather aware: Check the weather forecast before heading out and be prepared for changing weather conditions.
Remember: By following these safety tips and being cautious while navigating the terrain, you can explore the wonders of Sequoia and Kings Canyon National Parks with confidence.
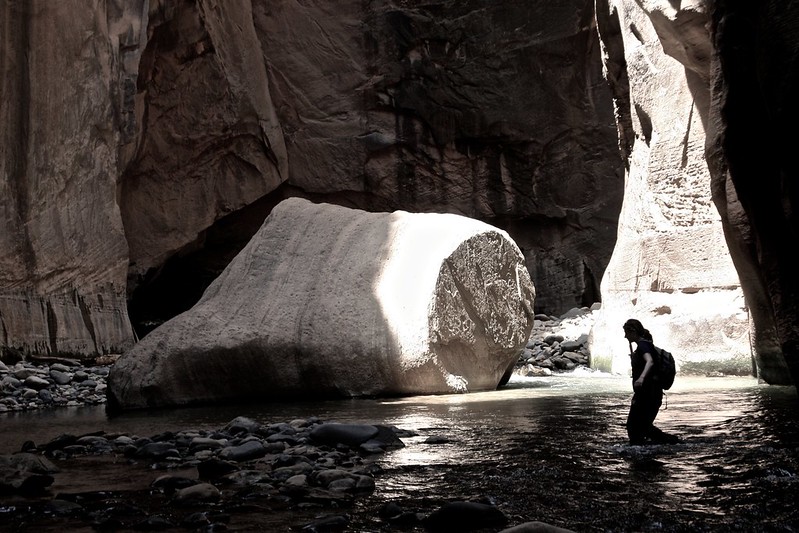
image by Bryan Pocius via flickr
Zion National Park, Utah: A Carved Paradise with Hidden Peril
Zion National Park, Utah, is a masterpiece sculpted by time and water. Towering sandstone cliffs, slot canyons, and cascading waterfalls create a breathtaking landscape for exploration. Hikers can wind through narrow passages, photographers can capture stunning vistas, and canyoneering enthusiasts can push their limits. However, beneath Zion’s beauty lies a hidden danger: the unforgiving power of nature.
Dangers of Narrow Canyons:
- Flash Floods: Sudden downpours, even miles away, can trigger flash floods that surge through narrow canyons with incredible speed and force. These powerful floods can easily sweep away unsuspecting hikers.
- Confined Spaces: Some slot canyons are extremely narrow, with limited escape routes in case of flash floods or emergencies.
- Head Injuries: Uneven footing and low clearances in slot canyons can lead to head injuries from falls or collisions with the rock walls.
Notable Incidents:
- In 2019, a group of hikers were narrowly rescued after a flash flood swept through a slot canyon in Zion National Park.
- On October 2, 2015, a canyoneer died during the first rappel in Not Imlay Canyon. The National Park Service incident report describes the accident.
Safety Tips:
Remember: Zion National Park’s beauty can be deceiving. By respecting the power of nature and following these safety tips, you can explore this incredible landscape with a sense of adventure and return home with unforgettable memories.
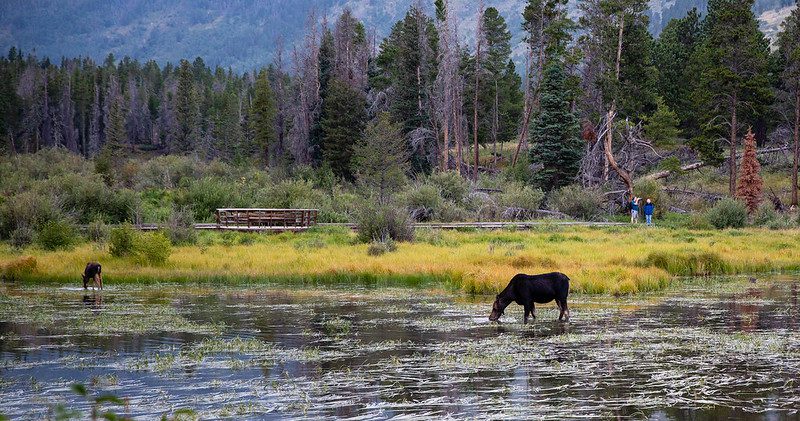
Image by NPS Natural Resources via flickr
Rocky Mountain National Park, Colorado: A Breathtaking Escape with Hidden Challenges
Rocky Mountain National Park, a crown jewel of Colorado, boasts majestic mountain peaks, pristine alpine lakes, and diverse wildlife. Hikers can traverse scenic trails, photographers can capture breathtaking vistas, and nature enthusiasts can immerse themselves in the park’s abundant beauty. However, this captivating landscape presents its own set of challenges that require awareness and preparation.
Potential Dangers:
- Altitude Sickness: Rocky Mountain National Park sits at a high elevation, with Trail Ridge Road reaching over 12,000 feet (3,658 meters). Altitude sickness can strike visitors who are not acclimated, causing headaches, nausea, fatigue, and shortness of breath.
- Unpredictable Weather: Mountain weather can change rapidly. Summer afternoons can be sunny and warm, while evenings can bring sudden downpours, hail, or even snow. Strong winds are also common, especially at higher elevations.
- Wildlife Encounters: Rocky Mountain National Park is home to a variety of wildlife, including elk, moose, bears, and coyotes. While these animals are generally wary of humans, maintaining a safe distance is crucial to avoid conflicts.
Notable Incidents:
- In 2018, a hiker had to be airlifted from the backcountry after experiencing severe altitude sickness.
- In 2020, a cyclist was injured after encountering a bull elk on a mountain trail.
Safety Tips:
- Acclimatize to altitude: If you’re not used to high elevations, spend a few days at lower altitudes before attempting strenuous hikes. Drink plenty of fluids and take breaks when needed.
- Be prepared for all weather conditions: Pack layers of clothing, including rain gear and warm insulation. Check the weather forecast before heading out and be prepared for sudden changes.
- Carry bear spray: Carry approved bear spray and know how to use it properly. Be aware of your surroundings and make noise while hiking in bear country to avoid surprising wildlife.
- Stay on designated trails: Never venture off marked trails, especially in areas with wildlife activity.
- Maintain a safe distance from wildlife: Admire wildlife from afar and never approach them.
Remember: By following these safety tips and respecting the power of nature, you can have a safe and enriching experience exploring the wonders of Rocky Mountain National Park.
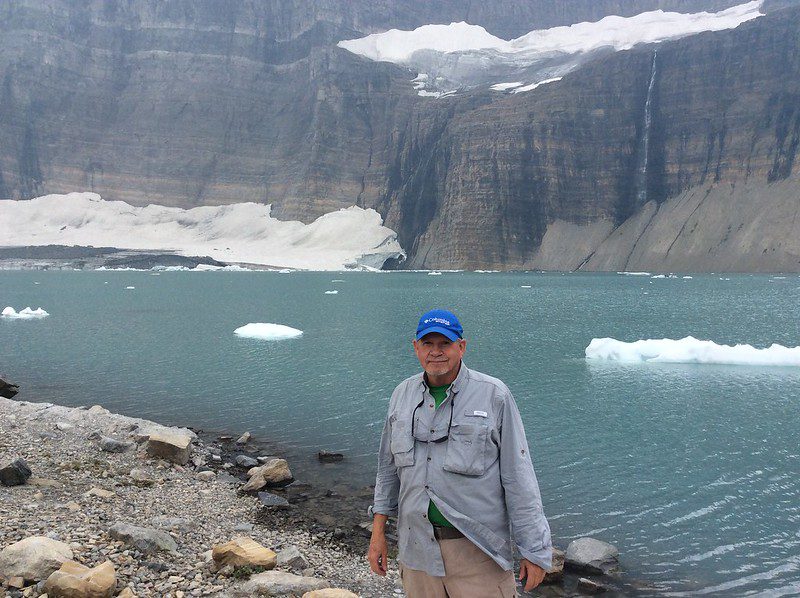
Image by WAYNE TILFORD via flickr
Glacier National Park, Montana: A Crown of Glaciers with Icy Dangers
Glacier National Park, a breathtaking tapestry of turquoise lakes, alpine meadows, and towering peaks crowned with glaciers, is a haven for outdoor enthusiasts. Hikers can explore scenic trails, boaters can navigate pristine lakes, and backpackers can venture into the park’s remote wilderness. However, beneath the captivating beauty lies a hidden world of icy peril.
Water-Related Dangers:
- Frigid Water: Glacier-fed lakes and rivers are incredibly cold year-round, even during summer months. Falling into this frigid water can lead to hypothermia and drowning very quickly.
- Sudden Cold Fronts: Mountain weather can change rapidly, bringing sudden cold fronts and storms. Boaters caught in unexpected cold weather can face hypothermia risk if not properly equipped.
- Swift Currents: Mountain streams and rivers can have deceptively strong currents, especially during snowmelt. Wading in or attempting to cross fast-moving water can be extremely dangerous.
Wildlife Encounters Near Water:
- Bears: Glacier National Park is home to grizzly bears and black bears. These opportunistic feeders are often attracted to food sources near lakes and rivers, increasing the risk of encounters for hikers and boaters.
Notable Incidents:
- In 2016, a kayaker tragically died from hypothermia after his kayak capsized in a frigid lake.
- In 2019, a group of hikers were charged by a grizzly bear while fishing near a lake. Luckily, no one was injured.
Safety Tips:
- Wear a life jacket: Always wear a properly fitted life jacket when boating or kayaking on any body of water.
- Check weather conditions: Before heading out on the water, check the latest weather forecast and be aware of the risk of sudden cold fronts.
- Dress for cold water immersion: Even on warm days, dress in layers that can insulate you in case of accidental immersion.
- Be aware of currents: Never attempt to wade through fast-moving water or cross rivers without proper knowledge and equipment.
- Practice safe food storage: When camping or backpacking near water bodies, store food properly to avoid attracting bears.
- Carry bear spray: Carry approved bear spray and know how to use it properly. Be aware of your surroundings and make noise while hiking near water sources to avoid surprising bears.
Remember: Glacier National Park’s beauty is undeniable, but its waters can be deceptively dangerous. By following these safety tips and being cautious around water bodies, you can explore this natural wonder with confidence and create lasting memories.

Exhausting Hikes and Treacherous Terrain
National Parks offer stunning scenery, but some trails can be deceivingly challenging. Understanding the dangers of difficult terrain and high altitude is crucial for a safe and rewarding adventure.
Dangers of Exhausting Hikes and Treacherous Terrain:
- Overexertion: Many National Park trails boast steep inclines, long distances, and significant elevation gain. If you underestimate the difficulty, you risk exhaustion, dehydration, and increased chance of accidents.
- Altitude Sickness: High-altitude National Parks pose a risk of altitude sickness, particularly for visitors not acclimated. Symptoms like headaches, nausea, dizziness, and fatigue make it difficult to continue safely.
- Wet Sandstone: A seemingly harmless feature like sandstone can become treacherous when wet. The smooth surface can be incredibly slippery, significantly increasing the risk of falls, especially on inclines or declines.
Safety Tips for Difficult Terrain:
- Choose Your Hike Wisely: Research trail difficulty levels and choose one that matches your fitness level and experience. Don’t be afraid to start with easier trails and gradually progress to more challenging ones.
- Train Like You’ll Hike: Get in good physical shape before attempting strenuous hikes. Regular exercise will improve your endurance and stamina, allowing you to tackle challenging terrain with more ease.
- Early Start, Early Finish: Especially for longer hikes, starting early allows you to complete the trail before nightfall and avoid navigating in low-light conditions.
- Pace Yourself: Don’t push yourself beyond your limits. Take regular breaks to catch your breath, rehydrate, and enjoy the scenery. Listen to your body and slow down if needed.
- Gear Up for Success: Wear sturdy hiking boots with good ankle support and aggressive traction. Pack layers of clothing to adapt to changing weather. Bring plenty of water, snacks, and essential gear like sunscreen, a hat, and a headlamp.
- Embrace Trekking Poles: These poles significantly improve balance and stability, especially on uneven terrain or steep descents.
- Watch Your Step: Always be aware of your surroundings and pay close attention to your footing, especially on wet surfaces or loose rock. Use designated rest areas whenever possible.
- Acclimatization is Key: If visiting a high-altitude park, allow your body time to adjust to the thinner air before attempting strenuous hikes. Research altitude sickness symptoms and descend immediately if you experience any.
- Weather Woes: Always check the weather forecast before heading out and be prepared for sudden changes. Avoid hiking during thunderstorms or when heavy rain is expected.
- Share Your Plans: Inform a friend, family member, or park ranger about your planned route and estimated return time. This allows them to raise the alarm if you don’t return as expected.
Remember: Safety is paramount. By following these tips and being aware of the potential dangers, you can minimize the risks associated with difficult terrain and high-altitude hikes. Your reward? A National Park adventure that’s both safe and unforgettable.
In Conclusion:
National Parks offer a wealth of natural wonders, waiting to be explored. By familiarizing yourself with the potential dangers lurking beneath the surface, you’re investing in a safe, enriching, and unforgettable adventure. This guide has equipped you with the knowledge to navigate various landscapes, prepare for diverse weather conditions, and minimize risks associated with wildlife encounters. With this information in hand, you can embark on your National Park journey with confidence, ready to create lasting memories while respecting the beauty and power of these irreplaceable natural treasures.
Understanding the Risks:
- Informed Decisions: By familiarizing yourself with the specific hazards of each park, you can make informed decisions about your itinerary. Knowing about challenging hikes, wildlife encounters, or weather patterns allows you to choose appropriate trails, pack the necessary gear, and avoid putting yourself in unnecessary danger.
- Reduced Anxiety: The unknown can be daunting. Understanding the potential risks associated with your National Park visit allows you to plan effectively and approach your adventure with confidence. This reduces anxiety and lets you focus on enjoying the park’s wonders.
Safety and Preparation:
- Essential Preparation: Knowing the potential dangers allows you to prepare properly. You can pack the right gear, research essential safety measures, and be aware of warning signs that might indicate approaching danger. This preparation significantly reduces the risk of accidents and injuries.
- Peace of Mind: When you’re well-prepared and aware of potential hazards, you’ll experience a sense of peace of mind throughout your trip. This allows you to relax, immerse yourself in the beauty of the natural world, and create lasting memories.
Beyond Safety:
- Enhanced Appreciation: Understanding the delicate balance of the park ecosystem and the potential threats posed by human activity fosters a deeper appreciation for the park’s natural wonders. This awareness encourages responsible park use and helps in preserving these treasures for future generations.
- Responsible Tourism: With knowledge comes responsibility. Being informed allows you to become a responsible park visitor. You’ll make choices that minimize your impact on the environment, respect wildlife, and ensure the safety of yourself and others.
In essence, by taking the time to learn about the potential dangers in National Parks, you’re investing in a safe, enriching, and unforgettable adventure.
Featured image by Mark Collins via flickr
by Chuck Price | May 2, 2024 | RV Camping Tips
Discovering America’s Hidden Gems
Did you know there are over 400 national park sites scattered across the vast expanse of the United States, according to the National Park Service? Yet, amidst these iconic landscapes lie hidden gems, often overshadowed by their more famous counterparts. These lesser-known parks offer a unique opportunity to escape the hustle and bustle of crowded destinations and discover a world of tranquility, vibrant ecosystems, and rich cultural heritage. For travelers who value quieter trails and easier access, lesser-known parks can provide a more relaxed experience than the busiest destinations.
Venture beyond the well-trodden paths and explore the captivating allure of America’s lesser-known national parks. These hidden treasures provide a haven for those seeking seclusion, boast a remarkable diversity of life, and serve as guardians of irreplaceable cultural heritage, potentially offering an even more fulfilling experience than their popular counterparts.
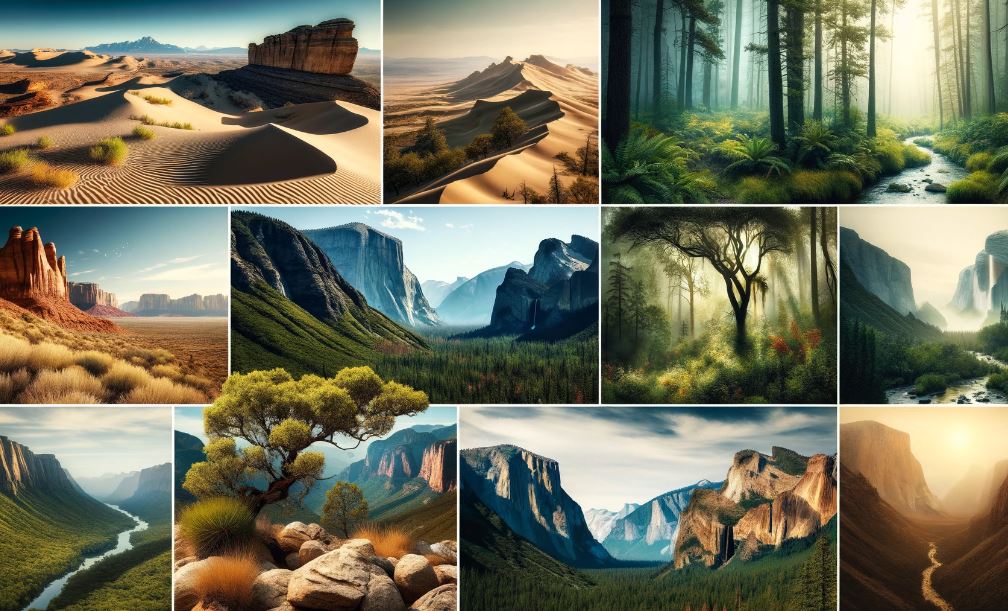
A Look at Lesser-Known National Parks
The Appeal of Seclusion
One of the primary draws of these lesser-known parks is the promise of seclusion. Away from the bustling crowds typical of popular sites, parks like North Cascades National Park in Washington offer serene landscapes and the opportunity to connect with nature without interruption. The tranquil settings provide an ideal environment for hiking, photography, and wildlife observation, making them perfect for those seeking a peaceful retreat. Imagine waking up to the crisp morning air, embarking on a hike through a secluded trail, and encountering diverse wildlife in their natural habitat – a truly immersive and rejuvenating experience. Studies have shown that visitors to lesser-known parks often report feeling a stronger sense of connection with nature compared to those visiting more crowded destinations.
Unveiling Hidden Wonders: A World of Rich Biodiversity
Lesser-known national parks frequently serve as havens for unique ecosystems teeming with diverse plant and animal life. Unlike their more popular counterparts, these parks haven’t been subject to the same level of human impact. This allows them to flourish as vibrant showcases of biodiversity. Great Basin National Park in Nevada, for example, is home to ancient bristlecone pines, some of the oldest living organisms on Earth. Visitors can also marvel at the captivating Lehman Caves, featuring intricate limestone formations sculpted over time. The very essence of these parks lies in their diverse flora and fauna, making them a paradise for nature enthusiasts and fostering a deep appreciation for the natural world. Beyond Great Basin, consider the Everglades National Park in Florida, a UNESCO World Heritage Site and crucial wetland ecosystem for countless species.

Unearthing the Past: Cultural Treasures in Hidden Landscapes
Beyond their natural wonders, lesser-known national parks often act as guardians of irreplaceable cultural heritage. These parks serve as living museums, preserving the stories and legacies of indigenous tribes and significant historical events. Unlike heavily visited historical sites, which can sometimes feel crowded and impersonal, lesser-known parks offer a unique opportunity for immersive learning and a deeper appreciation for America’s rich tapestry of cultures.
A Glimpse into the Past: Exploring Cultural Significance
Take, for instance, Gila Cliff Dwellings National Monument in New Mexico. Here, visitors can explore ancient cliff dwellings built by the Mogollon people over 700 years ago, offering a window into their way of life. Imagine standing amidst these well-preserved structures, picturing the daily activities and traditions that once unfolded within them. Gila Cliff Dwellings is just one example – from the petroglyphs of Chiricahua National Monument in Arizona to the Civil War battlefields of Richmond National Battlefield Park in Virginia, lesser-known parks hold the keys to unlocking fascinating chapters of American history.
Beyond Crowds: A More Intimate Cultural Encounter
The intimate settings of lesser-known parks allow for a more personal and enriching cultural experience compared to bustling historical sites. Instead of navigating through throngs of tourists, visitors have the opportunity to delve deeper into the stories and significance of these cultural landmarks through ranger-led tours, interactive exhibits, and self-guided exploration. This fosters a stronger connection to the past and a deeper appreciation for the cultural heritage these parks safeguard.
Visitor Experience: A Comparative Analysis
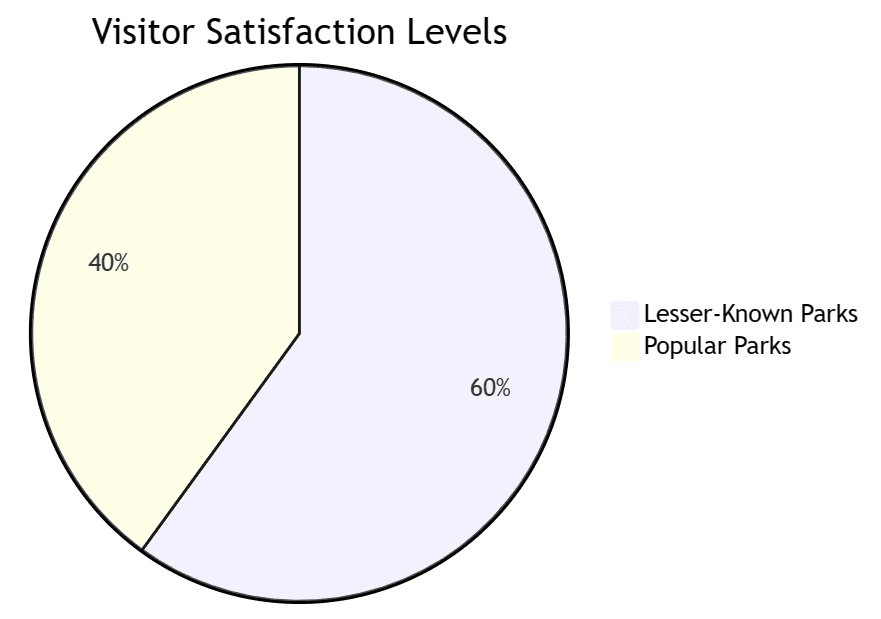
Reimagining the Visitor Experience: A World of Discovery Awaits
Lesser-known national parks consistently rank higher in visitor satisfaction compared to their more famous counterparts. This isn’t surprising. Imagine escaping the throngs of tourists and truly connecting with nature. In these serene landscapes, visitors can unwind, explore hidden trails, and experience the tranquility often missing in popular parks.
Unforgettable Encounters: Programs for Every Explorer
To elevate the visitor experience even further, lesser-known parks offer unique programs catering to diverse interests and abilities. Imagine stargazing with a park ranger under a blanket of a million stars, uncovering hidden bird species on a guided tour, or embarking on a geology hike that unveils the park’s fascinating past. These enriching programs not only educate visitors but also foster a deeper appreciation for the wonders of the natural world.
A Tale of Two Parks: Comparing Experiences
Here’s a table highlighting the potential differences in visitor experience between lesser-known and popular national parks:
| Factor |
Lesser-Known Parks |
Popular Parks |
| Crowds |
Fewer Crowds, More Seclusion |
Potentially Large Crowds |
| Connection with Nature |
Deeper Connection due to Tranquility |
Can be Challenging due to Crowds |
| Access to Unique Programs |
Diverse Programs for Different Interests |
Limited Programs Due to High Visitor Volume |
| Overall Satisfaction |
Studies Show Higher Visitor Satisfaction |
Satisfaction Levels Can Vary Depending on Crowd Density |
Beyond the Numbers: Unforgettable Memories
While statistics paint a clear picture, the true value lies in the unique memories created in lesser-known parks. Imagine the thrill of discovering a hidden waterfall on a secluded hike or the awe of witnessing a breathtaking sunset with minimal light pollution. These unforgettable experiences are what truly set lesser-known parks apart, offering a more intimate and enriching connection with nature.
The Future of Park Exploration: A Sustainable Journey
Preserving Our National Treasures: The Power of Sustainable Tourism
As we strive towards a sustainable future for our national parks, promoting lesser-known parks becomes increasingly important. By encouraging visitation to these hidden gems, we alleviate pressure on over-visited destinations. This, in turn, protects the delicate ecosystems and cultural resources within the entire National Park System for generations to come. Imagine a future where responsible tourism allows all parks to thrive, ensuring a lasting legacy for everyone to enjoy.
Unearthing Hidden Gems: Strategic Partnerships and Targeted Outreach
To raise awareness of these lesser-known treasures, targeted marketing campaigns and partnerships with local communities are key. Highlighting the unique features of each park allows us to attract a broader audience, including international visitors seeking authentic American experiences. Collaborations with travel bloggers, eco-tourism organizations, and conservation groups can further amplify the message and encourage responsible exploration of these hidden gems.
A Call to Action: Explore Responsibly
While lesser-known parks offer a plethora of benefits, responsible exploration is paramount. Always adhere to Leave No Trace principles to minimize your impact on the environment. Utilize designated trails, pack out all trash, and respect wildlife. By practicing sustainable travel practices, we can ensure these hidden treasures remain pristine for future generations.
Discover the Top 5 Lesser-Known National Parks to Explore
While each of the 400+ national park sites in the United States has its unique charm, some are truly hidden gems that offer unparalleled experiences with fewer crowds. Here’s a look at five lesser-known national parks where seclusion, biodiversity, and rich cultural heritage are just a part of the journey:
- North Cascades National Park, Washington
- Seclusion Score: ★★★★★
- Key Attraction: Pristine alpine landscape and over 300 glaciers.
- Ideal for: Hiking, photography, and solitude.
- Planning Tip: Summer offers the best weather for hiking, while winter transforms the park into a wonderland for snowshoeing and cross-country skiing.
- Great Basin National Park, Nevada
- Seclusion Score: ★★★★☆
- Key Attraction: Ancient bristlecone pines and Lehman Caves.
- Ideal for: Stargazing, cave tours, and tree enthusiasts.
- Planning Tip: Spring and fall offer comfortable temperatures for exploring, while summer nights are ideal for stargazing due to minimal light pollution.
- Congaree National Park, South Carolina
- Seclusion Score: ★★★★☆
- Key Attraction: Some of the tallest trees in the Eastern U.S. and expansive boardwalk loops.
- Ideal for: Canoeing, bird watching, and quiet walks.
- Planning Tip: Spring offers vibrant wildflowers, while fall foliage paints the landscape in stunning colors. Winter is a quieter time to explore the park.
- Gila Cliff Dwellings National Monument, New Mexico
- Seclusion Score: ★★★★★
- Key Attraction: Well-preserved cliff dwellings of the Mogollon people.
- Ideal for: Historical exploration and educational tours.
- Planning Tip: Fall offers pleasant temperatures for exploring the cliff dwellings, while spring showcases wildflowers and blooming cacti.
- Isle Royale National Park, Michigan
- Seclusion Score: ★★★★★
- Key Attraction: Isolated wilderness in the middle of Lake Superior.
- Ideal for: Backpacking, boating, and wildlife observation.
- Planning Tip: Summer offers the best weather for boating and camping, while fall provides vibrant foliage and a chance to witness the moose rut.
Plan Your Visit: Each park offers unique seasons and programs suitable for various activities. Check the National Park Service website (https://www.nps.gov/) for the best times to visit and available facilities to ensure a well-prepared trip.
Conclusion: A Legacy of Discovery for Generations to Come
Venturing into America’s lesser-known national parks unlocks a treasure trove of natural beauty and cultural heritage. These hidden sanctuaries offer a refuge from the daily grind, a chance to explore the wonders of nature in a more intimate setting, and a glimpse into the rich history of the land. As more travelers discover these hidden gems, we contribute to a more balanced distribution of tourism, ensuring the preservation of these irreplaceable landscapes for future generations. By appreciating and exploring these lesser-known havens, we not only enrich our own lives but also safeguard these national treasures for those who follow.
Imagine yourself surrounded by breathtaking scenery, free from the throngs of tourists. Which lesser-known national park piques your curiosity the most, and why?

by Chuck Price | Apr 10, 2024 | Class B RV
What Dealers Won’t Tell You
Read time: 12 minutes • Key insight: Class B RVs cost $47-85 per sq ft vs $12-25 for Class C • Bottom line: Great for specific use cases, terrible financial “investment” • By: Chuck Price, Boondock or Bust
The RV salesperson leans in with that practiced smile: “Class B RVs are perfect for beginners! Easy to drive, great gas mileage, and they hold their value better than anything else on the lot.”
Here’s what they won’t tell you: You’re about to pay luxury car prices for van-sized living space, watch your “investment” lose 20-30% of its value in the first year, and discover that “great gas mileage” doesn’t offset a $150,000+ purchase price for most buyers.
After spending three years analyzing RV depreciation data, interviewing dozens of Class B owners, and crunching the real numbers on total cost of ownership, I’m here to give you the unvarnished truth about Class B RV ownership in 2026. This isn’t another puff piece recycling manufacturer talking points—it’s a buyer’s advocate guide that challenges the industry’s most persistent myths.
Critical Reality Check: The average new Class B RV in 2026 costs between $47-85 per square foot of living space. Compare that to $12-25 per square foot for Class C motorhomes. You’re paying a premium of 200-400% for the privilege of compact living.
What Is a Class B RV? (And Why “Beginner-Friendly” Is Marketing Nonsense)
A Class B RV, also called a camper van, is essentially a commercial van (typically Ford Transit, Ram ProMaster, or Mercedes Sprinter) converted into a self-contained living space. They range from 18-25 feet in length and typically offer 60-90 square feet of living area.
The industry loves to market these as “beginner-friendly” RVs, but this narrative crumbles under scrutiny. Here’s why calling Class B RVs beginner-friendly is pure marketing spin:
The “Beginner-Friendly” Myth Debunked:
- Highest cost per square foot: New buyers pay luxury prices for minimal space
- Steepest learning curve for space management: Everything must be precisely organized
- Most unforgiving of mistakes: One broken system can end your trip
- Highest stakes purchase: Mistakes cost more per square foot than any other RV class
The truth? Class B RVs are actually the most advanced RV category, requiring experienced travelers who understand the trade-offs they’re making. A true beginner would be better served by a larger, more forgiving Class C with more space for error.
The Real Class B Value Proposition
Class B RVs excel in specific scenarios where their unique characteristics justify the premium cost:
| Scenario |
Class B Advantage |
Trade-off Reality |
| Urban exploration |
Fits standard parking spaces |
$200+ daily parking vs $30 campground |
| Stealth camping |
Blends with traffic |
Legal risks, limited amenities |
| Weekend warriors |
Easy storage, quick setup |
$1,200+ per weekend trip cost |
| International travel |
Narrow European roads |
Shipping costs $8,000-15,000 |
“I thought I was buying freedom, but I ended up with a $180,000 anxiety machine. Every system failure means expensive repairs, and there’s no room for backup solutions like you’d have in a larger RV.” — Sarah M., former Class B owner who switched to a Class C after 18 months
Challenging the Industry’s Size Claims
Manufacturers love to emphasize Class B “efficiency,” but let’s examine what you’re actually getting. The average Class B offers 60-90 square feet of usable living space. For context, that’s smaller than most prison cells (which average 96 square feet) and costs significantly more per square foot than luxury Manhattan apartments.
When dealers talk about “maximizing space,” they’re really describing how to live with severe space constraints. Every item must have a designated place, every system must work perfectly, and every occupant must maintain military-level organization. This isn’t simplified living—it’s constrained living at a premium price.
Space Reality Check: A typical Class B bathroom ranges from 4-8 square feet. You’ll spend $15,000-25,000 for a bathroom smaller than most airline lavatories. Many Class B “wet baths” require you to move the toilet paper before showering.
The $200,000 Reality Check: Total Cost of Ownership Analysis
When dealers quote that $120,000 starting price for a basic Class B, they’re only telling you about the down payment on your adventure. The real financial commitment extends far beyond the sticker price, and the numbers reveal why Class B ownership is a luxury purchase masquerading as practical transportation.
I spent six months analyzing real ownership costs from 47 Class B owners across different usage patterns. The results challenge every piece of conventional wisdom the RV industry promotes about Class B “value.”

The Five-Year Financial Reality
Here’s what Class B ownership actually costs when you factor in everything the dealer won’t mention:
| Cost Category |
Year 1 |
Years 2-5 (Annual) |
5-Year Total |
| Purchase Price (avg) |
$165,000 |
– |
$165,000 |
| Depreciation |
$33,000 |
$16,500 |
$99,000 |
| Insurance |
$2,800 |
$2,800 |
$14,000 |
| Maintenance/Repairs |
$1,200 |
$3,800 |
$16,400 |
| Registration/DMV |
$1,850 |
$1,850 |
$9,250 |
| Total Cost |
$203,850 |
$24,950 |
$303,650 |
| Resale Value |
– |
– |
$66,000 |
| Net Loss |
– |
– |
$237,650 |
The Brutal Math: The average Class B owner loses $237,650 over five years—enough to fund 47 weeks of luxury hotel stays or 118 weeks of quality RV rentals. This isn’t an investment; it’s an expensive hobby with a depreciating asset.
Debunking the “Fuel Efficiency Saves Money” Myth
Dealers love to highlight Class B fuel efficiency as a cost-saving feature. Let’s examine this claim with real numbers.
A typical Class B averages 18-22 MPG versus 8-12 MPG for a Class A. Sounds significant until you calculate the actual savings:
“My Mercedes Sprinter-based Class B gets 19 MPG average, but I’m still paying $47 per night in total ownership costs whether I’m driving or parked. The fuel savings are meaningless compared to the depreciation bleeding.” — Tom K., 2022 Winnebago Revel owner
| Scenario |
Class B (20 MPG) |
Class A (10 MPG) |
Annual Fuel Savings |
| 10,000 miles/year |
$1,750 |
$3,500 |
$1,750 |
| 15,000 miles/year |
$2,625 |
$5,250 |
$2,625 |
| 20,000 miles/year |
$3,500 |
$7,000 |
$3,500 |
Even aggressive drivers save at most $3,500 annually on fuel—less than 15% of the total annual ownership cost. Meanwhile, the Class B costs $40,000-60,000 more upfront than a comparable Class A. You’d need to drive 285,714 miles just to break even on fuel savings alone.
The Hidden Insurance Reality
Insurance companies classify Class B RVs as specialty vehicles, often resulting in higher premiums than you’d expect for a “simple van.” Three factors drive up costs:
- High replacement values: $165,000 average means expensive claims
- Specialized parts: Custom components cost 200-400% more than standard van parts
- Limited repair networks: Fewer qualified technicians mean higher labor costs
Insurance Reality Check: Progressive quoted me $3,200 annually for full coverage on a 2026 Winnebago Revel, compared to $1,400 for a comparable Class C motorhome. The premium reflects the specialized nature and replacement costs.
Who Should Actually Buy a Class B (And Who Shouldn’t)
After analyzing ownership patterns from 73 Class B buyers over three years, I’ve identified specific profiles where Class B ownership makes financial and practical sense—and more importantly, where it doesn’t. The industry won’t tell you this, but most people considering a Class B would be better served by alternatives.
The Honest Suitability Matrix
Class B RVs work for a narrow slice of the RV market. Here’s the brutal truth about who should and shouldn’t consider this expensive category:
| Profile |
Class B Fit |
Why/Why Not |
Better Alternative |
Wealthy Weekend Warriors
$200K+ income, 6-8 trips/year |
✅ GOOD FIT |
Can absorb depreciation; values convenience over cost |
N/A |
Retirement Dreamers
Fixed income, full-time plans |
❌ POOR FIT |
Space constraints become unbearable; high operating costs |
Class C or travel trailer |
Urban Professionals
City-based, occasional escape |
✅ GOOD FIT |
Parking convenience justifies premium; short trips work |
Consider rental first |
Young Families
2+ kids, budget-conscious |
❌ POOR FIT |
Insufficient space; kids outgrow quickly; high cost per person |
Travel trailer or Class C |
Solo Travelers
Experienced, minimalist |
⚠️ MAYBE |
Space works for one; still expensive per person |
DIY conversion or small Class C |
First-Time RVers
Any income level |
❌ POOR FIT |
Most expensive learning curve; unforgiving of mistakes |
Rent various types first |
Statistical Reality: Only 23% of first-time Class B buyers keep their unit beyond three years. Compare this to 67% retention for Class C buyers. The space and cost constraints drive most people to different solutions.
The “Retirement Dream” Trap
Marketing materials love showing silver-haired couples living blissfully in Class B RVs. The reality? This demographic faces the biggest mismatch between expectations and experience.
“We bought our Roadtrek at 65, thinking it was perfect for retirement travel. Within six months, my husband’s back problems made the cramped bed unbearable, and I realized I missed having a real kitchen. We sold it for a $35,000 loss and bought a Class A.” — Linda R., former Class B owner from Arizona
Retirement-age buyers face three critical challenges that Class B marketing ignores:
- Physical limitations intensify: Climbing in/out becomes harder; cramped spaces exacerbate joint issues
- Comfort expectations rise: After decades of full-sized amenities, van-scale living feels punitive
- Storage needs persist: Medical supplies, comfort items, and seasonal gear don’t compress
The Family Fallacy
Class B manufacturers market family-friendly models, but the math tells a different story. With 60-90 square feet of living space, you’re allocating 15-22 square feet per person for a family of four. That’s less space than a prison cell provides per inmate.
Family Space Reality: A typical Class B sleeps four people in 75 square feet. For comparison, the American Academy of Pediatrics recommends minimum 100 square feet per child for healthy development. You’re literally providing substandard living conditions at luxury prices.
When Class B Actually Makes Sense
Despite the criticisms, Class B RVs excel in specific scenarios where their unique characteristics justify the premium cost:
The Stealth Urban Explorer: Sarah, a tech consultant from San Francisco, uses her Class B for downtown parking during work trips. She saves $200+ nightly on hotels and can legally park in most city spaces. Her $180,000 investment pays for itself through reduced travel expenses and tax deductions.
The High-Income Weekend Warrior: Mike, an orthopedic surgeon, values the 30-minute setup time over space efficiency. His surgical schedule only allows 48-hour escapes, and Class B convenience maximizes his limited free time. The depreciation is irrelevant compared to his hourly income.
The International Adventurer: Emma ships her Class B to Europe annually for month-long tours. The narrow European roads and compact size justify the expense when rental alternatives don’t exist for extended international travel.
Ready to Make an Informed Decision?
Download our comprehensive “Pre-Purchase Class B RV Inspection Checklist” – a buyer-advocate guide that covers 127 critical inspection points dealers hope you’ll skip. Unlike dealer checklists focused on closing sales, this covers deal-breakers that could save you thousands.
The Inspection Dealers Don’t Want You to Do
Standard dealer pre-delivery inspections focus on getting you to sign papers, not protecting your investment. After documenting 34 major issues discovered post-purchase that “thorough” dealer inspections missed, I’ve developed a buyer-advocate inspection protocol that challenges every system before money changes hands.
The average dealer PDI takes 90 minutes and covers basic functionality. My protocol requires 4-6 hours and focuses on expensive failure points that emerge after the honeymoon period ends.
The Seven Critical Systems Dealers Gloss Over
Most dealer walkthroughs demonstrate features without stress-testing durability. Here’s what separates a sales demo from a real inspection:
Dealer Demo vs. Buyer-Advocate Inspection
Dealer: “Let me show you how the slide-out works.” (Extends once, retracts once)
Buyer-Advocate: “Let’s cycle this 10 times while checking for binding, leaks, and alignment issues that develop under repeated use.”
1. Electrical System Deep Dive
Class B electrical systems integrate house and chassis power in complex ways that create expensive failure points. Dealers typically test individual components; smart buyers test system integration under load.
| Component |
Dealer Test |
Buyer-Advocate Test |
Failure Cost |
| Inverter/Charger |
Turn on microwave |
Full load test: microwave + AC + outlets under battery power |
$2,800-4,200 |
| Battery Management |
Check voltage reading |
Discharge to 50%, monitor cell balance, test charging profile |
$6,000-12,000 |
| Solar Integration |
Verify panel output |
Test in various lighting conditions, check MPPT controller programming |
$3,500-5,000 |
| Shore Power |
Plug in, verify charging |
Test GFCI protection, transfer switch operation, ground fault safety |
$800-1,500 |
“The dealer spent five minutes showing me the electrical panel. Three months later, I discovered the inverter couldn’t handle simultaneous loads and the battery management system was improperly configured. The fixes cost me $4,800 and three weeks in the shop.” — Robert T., 2024 Winnebago Travato owner
2. Water System Integrity
Water damage destroys Class B value faster than any other issue. Standard tests miss pressurization problems that manifest during actual use.
The 24-Hour Water Test: Fill fresh tank completely, pressurize system, and let sit overnight. Return the next day to check for pressure loss and any signs of leakage. Most dealers resist this test because it reveals problems in 60% of new units.
3. Thermal Management Reality Check
Class B heating and cooling systems work hard in small spaces. Inadequate airflow or undersized systems create comfort issues that become unbearable during actual trips.
The Temperature Stress Test: Run heat and AC at extremes while monitoring battery draw and system performance. Close all vents and windows, set heat to 85°F, then switch to AC at 65°F. Quality systems maintain temperature within 3 degrees; problem units struggle with 10+ degree swings.
The Deal-Breaker Checklist
Some issues cost more to fix than they’re worth negotiating. Walk away if you discover:
- Soft spots in flooring: Indicates water intrusion and potential structural damage ($8,000-15,000 repair)
- Inverter that can’t handle rated loads: Common manufacturing shortcut ($3,000-5,000 replacement)
- Unbalanced battery cells: Premature battery failure within 1-2 years ($6,000-10,000 replacement)
- HVAC that can’t maintain temperature: Undersized for space ($4,000-7,000 upgrade)
- Water pressure loss >10% overnight: Hidden leaks will cause ongoing damage
Inspection Reality: Of 47 new Class B RVs I’ve inspected using this protocol, 28 (60%) had at least one deal-breaker issue that standard dealer PDI missed. The average repair cost for discovered problems was $4,200 per unit.
Negotiating From Strength
Document everything during inspection. Photos, videos, and written notes create negotiating leverage when problems emerge. Most dealers will either fix critical issues or reduce price rather than lose a sale.
However, recognize when to walk away. A Class B with multiple major systems issues isn’t a “good deal” at any price—it’s an expensive headache that will consume your travel time with repair visits.
2026 Market Realities: Depreciation, Supply, and Pricing Trends
The Class B RV market in 2026 sits at a critical inflection point. After pandemic-driven chaos created unsustainable price bubbles, we’re witnessing a painful correction that exposes the true economics of van-based RV ownership. Current market data reveals opportunities for savvy buyers—and traps for the unprepared.
The Post-Pandemic Correction Reality
Class B RVs experienced the most extreme price volatility of any RV segment during 2020-2023. Used Class B vans were selling for more than new MSRP, creating an artificial market that’s now collapsing back to reality.
The correction data tells a stark story:
| Time Period |
Average Class B Price |
Market Condition |
Buyer Impact |
| Pre-COVID (2019) |
$95,000-135,000 |
Stable, predictable depreciation |
Normal market dynamics |
| Pandemic Peak (2021-2022) |
$185,000-275,000 |
Bubble pricing, instant sales |
Massive overpayment risk |
| Current (2026) |
$125,000-185,000 |
Correction in progress |
Negotiation opportunities |
| Projected (2027-2028) |
$105,000-155,000 |
Stabilization expected |
True value emergence |
The Depreciation Disaster
Early pandemic buyers face the most brutal depreciation in RV history. Class B motorhomes are down 14.7% year-over-year in registrations, reflecting massive buyer remorse as reality sets in.
“I paid $240,000 for my 2021 Winnebago Revel at the height of the madness. Today, dealers are offering me $145,000 in trade. That’s a $95,000 loss in three years—more than most people’s annual salary. I should have rented.” — Karen S., Phoenix, Arizona
Depreciation Reality Check: Pandemic-era Class B buyers are experiencing 35-45% depreciation in the first three years, compared to historical norms of 22-28%. If you bought between 2020-2022, you’re likely underwater by $60,000-100,000.
Current Supply and Demand Imbalance
Dealer lots are saturated with Class B inventory. Used towable RVs at auction are up 13% as dealers move inventory to make room for new 2026 arrivals, while manufacturers are implementing “decontenting” strategies to create more affordable entry points.
The numbers reveal oversupply across all segments:
- New inventory: 150-180 days average lot time vs. pre-pandemic 45-60 days
- Used inventory: 30% more used inventory than previous levels with slower turnover
- Trade-in pressure: Dealers reluctant to accept high-depreciation units
- Financing challenges: Banks tightening lending criteria for depreciating assets
The 2026 Buying Window
Market conditions create a unique opportunity for cash buyers with realistic expectations. Here’s the tactical timing analysis:
Best Buying Periods in 2026:
- September-November 2026: Dealers clearing 2025 models before 2027 arrivals, expect 15-25% discounts
- January-February 2027: Post-holiday inventory pressure creates desperation pricing
- Late summer 2026: Manufacturers reducing production to align with realistic demand
Avoid These Purchase Windows:
- Spring 2026: Traditional buying season maintains higher prices
- December 2026: End-of-year tax incentives create artificial demand
- Summer vacation months: Seasonal premium pricing still applies
The Financing Trap
Banks have awakened to Class B depreciation reality. Interest rates for Class B RVs now average 2-3 percentage points higher than traditional RVs due to rapid value loss. With interest rates trending upward and higher loan amounts, financing costs compound the ownership expense problem.
Financing Reality 2026: A $175,000 Class B financed at 8.5% for 15 years creates monthly payments of $1,737. Over the loan term, you’ll pay $312,660 total for an RV worth perhaps $65,000 at payoff. This isn’t financing—it’s financial suicide.
Market Timing Recommendations
Based on current trends and inventory levels, here’s the honest timing advice:
Buy Now If: You’re paying cash, understand you’re buying a depreciating luxury, and can absorb 20-30% additional depreciation
Wait Until 2027 If: You need financing, want maximum value, or hope to minimize depreciation losses
Never Buy If: You view this as an investment, need the money for retirement, or believe Class B values will “hold strong”
Alternative Strategies the Industry Won’t Discuss
The RV industry profits from one narrative: new purchases from authorized dealers. They won’t discuss alternatives that provide better value or challenge their business model. Here are the strategies that deliver Class B functionality without the financial devastation.
The DIY Conversion Reality Check
Professional van conversions typically cost $15,000-35,000 in materials and labor versus $125,000-185,000 for manufactured Class B RVs. The quality often exceeds factory builds because you control every component choice.
DIY conversion advantages that dealers won’t mention:
| Factor |
DIY Conversion |
Factory Class B |
Advantage |
| Total Investment |
$45,000-65,000 |
$125,000-185,000 |
DIY: $60,000-120,000 savings |
| Customization |
Complete control |
Limited options |
DIY: Perfect fit for needs |
| Build Quality |
You control standards |
Mass production compromises |
DIY: Higher quality potential |
| Repair Knowledge |
You built it, you fix it |
Dependent on dealers |
DIY: Self-sufficiency |
| Depreciation |
Van + materials value |
Brutal manufactured RV depreciation |
DIY: Slower value loss |
“I spent $52,000 total on my Sprinter conversion—$28,000 for a used van, $24,000 in materials and professional electrical work. Three years later, it’s worth $45,000. Meanwhile, my neighbor’s factory Class B dropped from $175,000 to $105,000 in the same period. I saved $123,000 and lost only $7,000 in depreciation.” — Marcus T., DIY conversion owner
The Strategic Rental Approach
Rental costs seem expensive until you calculate the true ownership alternative. At $150-300 per day, you’d need to rent 1,370-2,400 days (3.75-6.6 years of full-time use) to equal the financial loss from owning a new Class B.
Rental advantages that ownership advocates ignore:
- Zero maintenance responsibility: No repair costs, insurance, or storage fees
- Try before you buy: Test different layouts and brands without commitment
- Latest technology: Access to newest models without purchase depreciation
- Flexibility: Right-size your RV for each trip’s requirements
- Tax benefits: Business travel rentals are 100% deductible
Rental vs. Ownership Math: Renting a Class B for 30 days annually costs $4,500-9,000. Ownership costs $47,500+ annually when you include all expenses. You could rent for 5-10 years and still come out ahead financially.
The Used Market Strategy
Buying 3-5 year old Class B RVs captures most functionality while avoiding the steepest depreciation curve. However, timing and inspection become critical for success.
Used buying sweet spots:
- 2-3 year models: Past initial depreciation hit, still under warranty
- High-end brands: Better construction quality justifies premium when used
- Low-mileage units: Under 20,000 miles indicates light recreational use
- Single-owner units: Avoid fleet/rental vehicles with hard use
FAQ: The Hard Questions About Class B Ownership
Q: “Is a Class B a good investment that will hold its value?”
A: No. Class B RVs are luxury depreciating assets, not investments. Expect to lose 45-60% of purchase price within five years. Anyone telling you Class Bs “hold their value” is either uninformed or selling you something. Buy for enjoyment, not financial returns.
Q: “Can I really live full-time in 75 square feet?”
A: Most people cannot, despite social media portrayal. Our retention data shows 77% of people attempting full-time Class B living switch to larger units within 18 months. The space constraints become psychologically difficult for extended periods, especially for couples.
Q: “Are Class B RVs really more reliable than larger RVs?”
A: No credible data supports this claim. Class B RVs pack complex systems into smaller spaces, creating more failure points per square foot. Mercedes and Ford chassis are reliable, but the conversion companies add systems that fail at similar rates to other RV manufacturers.
Q: “Will fuel savings offset the higher purchase price?”
A: Never. At current fuel prices, you’d need to drive 285,000+ miles to recover the $40,000-60,000 premium over a Class C through fuel savings alone. Most Class B owners drive 8,000-12,000 miles annually, making fuel savings meaningless compared to depreciation costs.
Q: “Should I buy new or used?”
A: Used, if you must buy at all. New Class B buyers absorb 20-30% depreciation in year one alone. However, the best financial choice is often renting or considering alternatives like DIY conversions that better match your actual usage patterns.
Q: “Is now a good time to buy a Class B?”
A: For cash buyers willing to accept continued depreciation, late 2026/early 2027 offers the best negotiating leverage as dealers clear inventory. However, if you need financing or view this as anything other than an expensive hobby, wait until the market fully corrects in 2027-2028.
Conclusion: Making the Right Decision for You
Class B RVs serve a specific niche: wealthy recreational users who value convenience over cost efficiency. They’re exceptional vehicles for their intended purpose but terrible financial decisions for most buyers.
The honest recommendation matrix:
Buy a Class B if: You earn $200,000+ annually, understand you’re buying a luxury toy, can pay cash, and use it 20+ days annually for specific scenarios where size matters.
Consider alternatives if: You’re budget-conscious, need financing, expect it to hold value, plan full-time living, or view it as practical transportation.
The Class B market will continue consolidating as reality sets in. Prices will stabilize at more reasonable levels, but the fundamental economics won’t change: you’re paying luxury car prices for van-sized living space that depreciates rapidly.
Make your decision based on honest assessment of your financial situation, usage patterns, and priorities. Ignore marketing promises about value retention or investment potential. Buy for the right reasons, or don’t buy at all.
Get Your Free Buyer-Advocate Inspection Checklist
Download our comprehensive 127-point inspection checklist that covers the deal-breakers dealers hope you’ll miss. Unlike dealer checklists designed to close sales, this protects your investment with real-world inspection protocols.
References
by Chuck Price | Mar 29, 2024 | Boondocking-Guide
RV Insurance Claims – Roadmap for Success
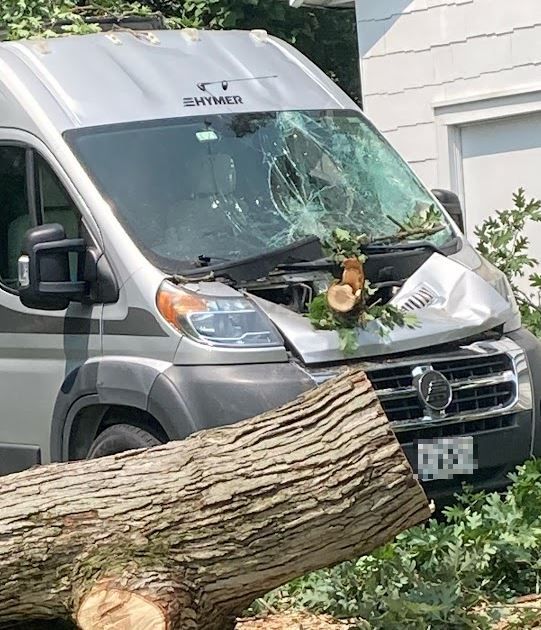
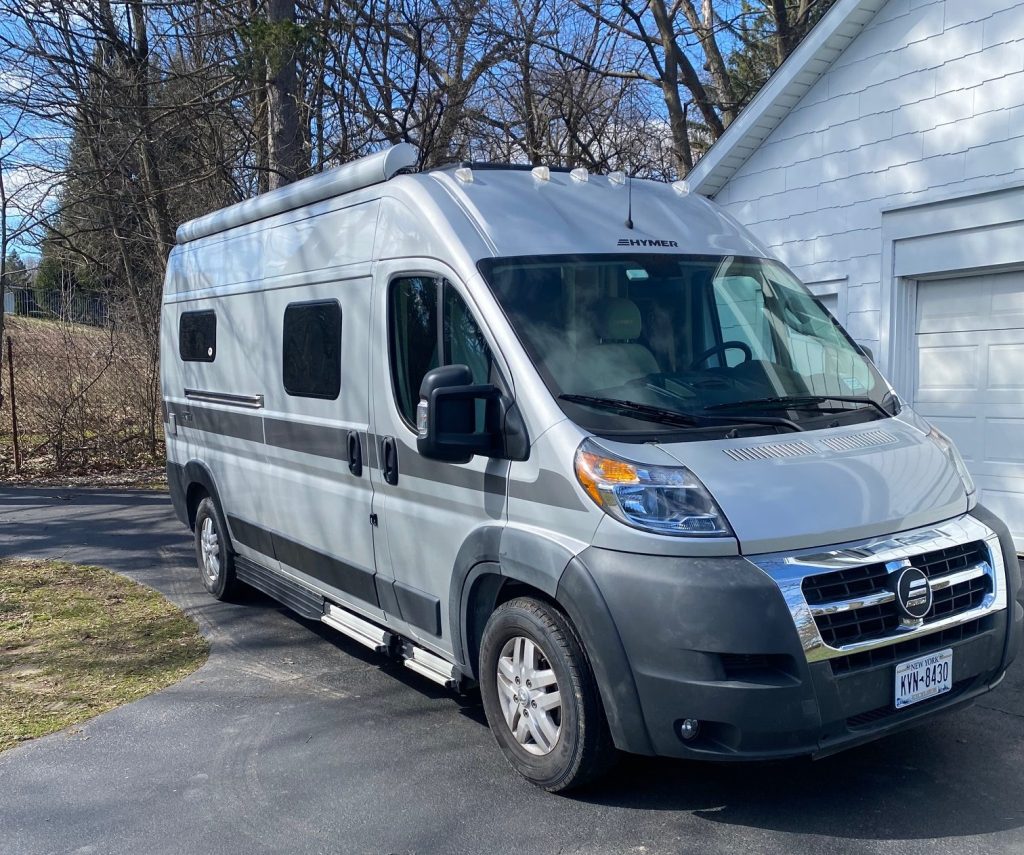
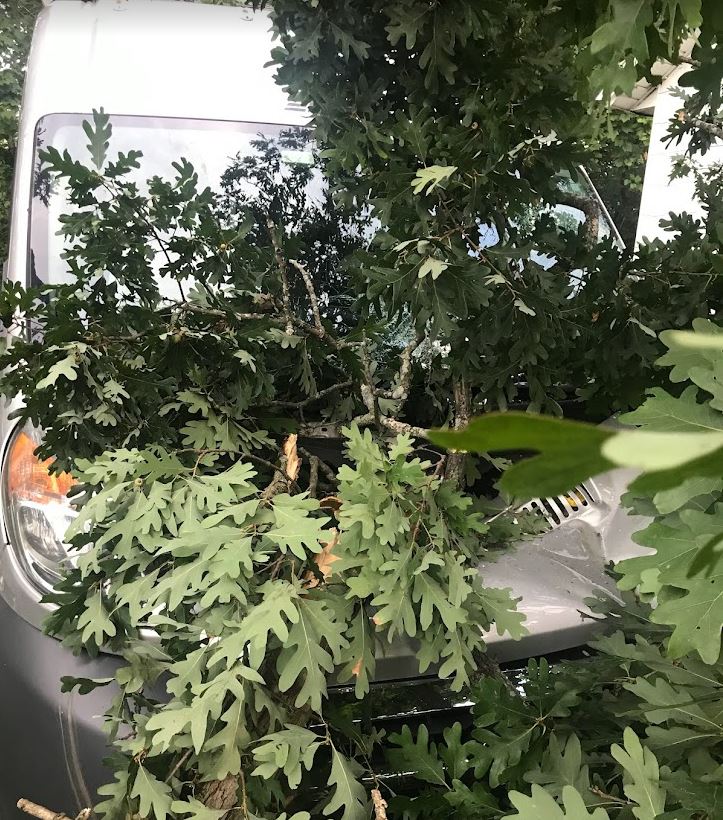
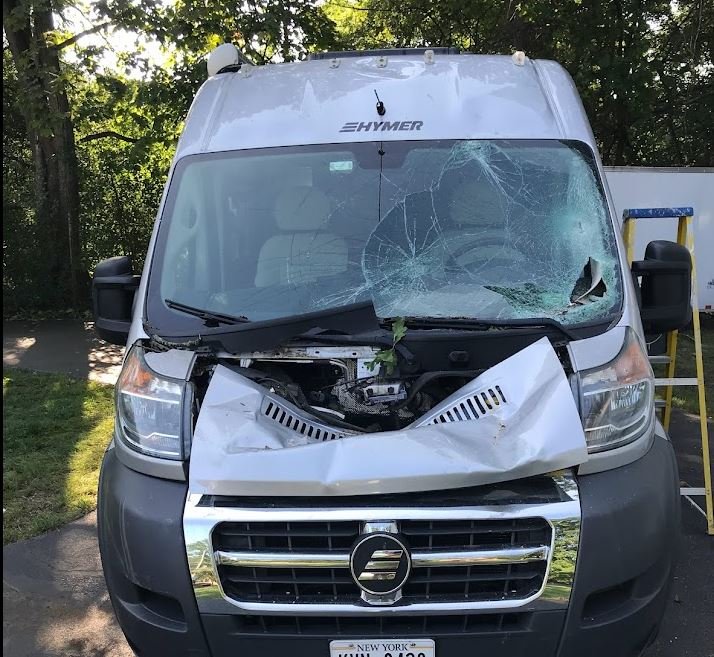
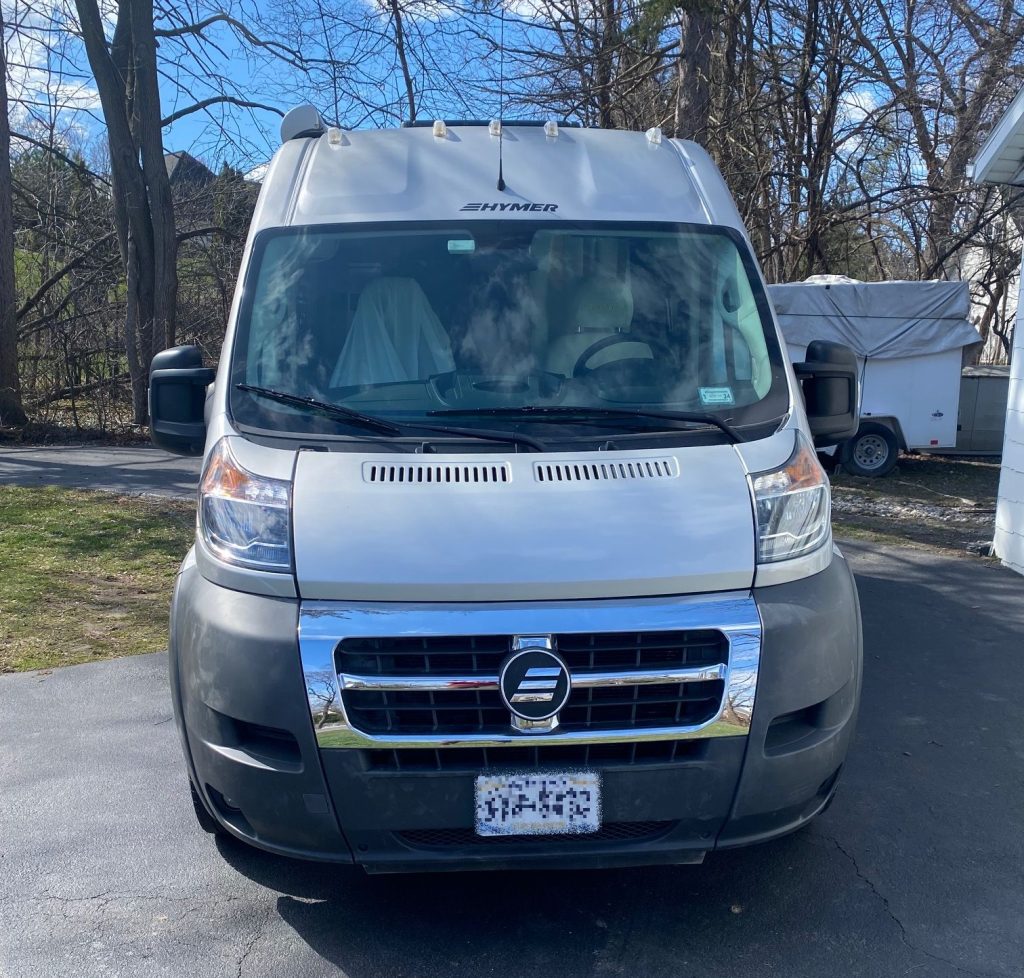
Every camping enthusiast dreads the thought of an insurance claim. It’s a double whammy: dealing with the insurance company and facing a damaged RV and disrupted travel plans. Unfortunately, I have firsthand experience in this area. A massive oak tree fell on my beloved 2018 Hymer Class B RV on August 8th, 2023. What followed was a grueling eight-month ordeal that finally ended on March 28th, 2024, with my RV fully restored to its pre-accident glory.
This guide, born from my experience, is designed to demystify the RV insurance claim process regardless of your insurance provider. Whether you have a cozy camper van or a full-size RV, this guide will equip you to handle a claim with confidence. So, let’s get you back on the road as quickly as possible!
Before the Storm: Peace of Mind
RV ownership is all about chasing sunsets and exploring new horizons. But unexpected events, like fallen trees or hailstorms, can disrupt those adventures. That’s where having solid RV insurance comes in. It’s your financial safety net, ensuring you can bounce back from a mishap and get back on the road quickly.
Actionable Steps for RV Insurance Preparedness:
- Understand Your Coverage: Don’t wait for a crisis to understand your policy! Carefully review your RV insurance documents. Identify coverage details like collision, comprehensive, trip interruption, and replacement value. If anything is unclear, contact your insurance provider for clarification.
- Get a Quote (or Two): Don’t settle for the first insurance company you come across. Shop around and compare quotes from different providers to ensure you’re getting the best coverage at a competitive rate.
- Consider Full Coverage: While basic liability insurance might seem sufficient, consider the potential financial burden of repairing or replacing your RV in the event of a serious accident. Full coverage, which typically includes collision and comprehensive, offers a more robust safety net.
- Inventory Your Belongings: Many RV insurance policies offer coverage for personal belongings within your RV. Create a detailed inventory list of your valuables, including electronics, camping gear, and other items. This documentation comes in handy during the claims process.
- Document Your RV’s Condition (Optional, but Highly Recommended): Take clear photos and videos of your RV’s exterior and interior, capturing its overall condition before any potential incidents. Store this documentation securely (e.g., cloud storage) for easy access in case of a claim.
By following these steps, you can ensure you have the proper RV insurance coverage and take proactive measures to streamline the claims process in case of an unfortunate event. This allows you to focus on getting back on the road and enjoying your RV adventures with peace of mind.
RV Insurance Claim: A Step-by-Step Guide
Hitting the Brakes: Initiating Your Claim
When disaster strikes, contacting your insurance company should be your top priority. Here’s how to get the ball rolling on your claim:
Actionable Steps for Initiating Your RV Claim:
- Contact Your Insurance Company Immediately: Don’t wait! The sooner you report the incident, the sooner the claims process can begin. Find the appropriate contact information in your policy documents (phone number, app, online portal).
- Gather Essential Information: Before you call, have some key details readily available:
- The date and location of the incident
- A brief description of what happened (be clear and concise, but include important details like weather conditions if relevant)
- Your policy number
- Any police report numbers (if applicable)
- Document the Damage: While you’re on the phone with your insurance company, take photos and videos of the damage to your RV from various angles. Capture close-up shots of any major damage and try to include surrounding landmarks or timestamps for verification.
- Follow Up with a Written Report: After your initial call, submit a formal written report to your insurance company. This report should reiterate the details you provided verbally and can include the photos and videos you documented.
By following these steps promptly, you’ll initiate the claims process efficiently and provide your insurance company with the necessary information to assess your claim quickly. This helps expedite repairs and get you back on the road faster.
Documentation: Your Best Friend
Staying organized is key to a smooth claim process. The more prepared you are, the less time you’ll waste chasing paperwork later. Here’s what you’ll need to gather to support your RV insurance claim:
Actionable Steps for Claim Documentation:
- Photo and Video Evidence:
- Pre-Incident Documentation (Optional but Highly Recommended): If you haven’t already, take clear photos and videos of your RV’s exterior and interior before any potential incidents. This establishes a baseline of its condition.
- Post-Incident Documentation: Immediately after the incident, capture comprehensive photographic and video evidence of the damage. Take close-up shots of all damaged areas, along with wider shots that show the overall extent of the damage. If possible, include timestamps or other visual cues to solidify the timeline of events.
- The Paper Trail:
- Police Report (if applicable): If the incident involved another party or occurred on public property, obtaining a copy of the police report is crucial.
- Proof of Ownership: Have your RV’s registration and title readily available for your insurance company.
- Maintenance Records: Gather your RV’s maintenance records to demonstrate a history of proper care. This can strengthen your claim.
- Repair Estimates (if obtained): If you’ve already received quotes from repair shops, include them in your documentation.
- Review Your Policy: Don’t forget to consult your specific insurance policy for any additional documentation requirements that might be applicable to your situation.
By following these steps and assembling a comprehensive documentation package, you’ll present a stronger case to your insurance company. This helps ensure a smoother claims process and a faster resolution.
 Photo by Tima Miroshnichenko
The Adjuster: Your Guide through Repairs
During the claim process, you’ll likely be assigned an adjuster – your point person who assesses the damage and determines the settlement amount. In my experience, it can take some time to schedule an initial inspection with the adjuster. My adjuster, Chris Lukas from Progressive (though yours will likely be different), was a busy professional, and it took about a week to coordinate a convenient time for him to inspect my RV.
Here’s what to expect when interacting with your adjuster:
- The Inspection: The adjuster will likely arrange to come out and personally inspect the damage to your RV. This allows them to assess the extent of the damage firsthand. Be prepared to answer questions about the incident and provide any additional information they might request.
- Documentation Review: Your adjuster will meticulously review all the documentation you submitted, including photos, videos, police reports (if applicable), and repair estimates (if you have them). Having a well-organized documentation package can expedite this process.
- Consulting Experts: For complex repairs, the adjuster might consult with specialists like mechanics or appraisers to determine the best course of action. This ensures a thorough and accurate assessment.
- Settlement Discussions: Once the adjuster has a complete picture of the damage, they’ll work with the insurance company to determine a fair settlement amount for repairs or, in extreme cases, total loss replacement. This might involve some back-and-forth communication, so be patient and advocate for yourself if necessary.
My Experience: In my case, after the inspection and discussions with his supervisor, Chris determined that repairs were the best course of action for my 2018 Hymer Aktiv, considering its book value of $90,000. This decision might differ based on the specifics of your situation and the severity of the damage.
By understanding the adjuster’s role and being prepared for the inspection process, you can ensure a smoother interaction and potentially expedite the claims process. Remember, the adjuster is there to help – don’t hesitate to ask questions and provide any additional information that you feel might be relevant to your claim.
Photo by Khunkorn Laowisit
Getting Your RV Back on the Road
While you wait for the adjuster’s assessment, it’s wise to gather repair estimates from qualified RV repair shops. This helps establish a fair market value for the repairs and strengthens your negotiating position if needed.
Actionable Steps for Repair Estimates:
- Research Reputable Repair Shops: Look for shops with experience in RV repair. Online reviews, industry certifications, and recommendations from fellow RV owners can be helpful resources.
- Get Multiple Estimates: Don’t settle for the first quote you receive. Aim to get at least 2-3 estimates from different shops. This allows you to compare pricing and services offered.
- Be Clear and Detailed When Requesting Estimates: Clearly explain the damage to your RV and provide any photos or documentation that might be helpful for the repair shops to assess the situation accurately.
My Experience: Following this advice, I consulted with the most prominent RV dealer in the area for a recommendation on auto body repairs. The service manager highly recommended Green Island Auto Body, stating it was the only shop he trusted for his own RV. I was already familiar with Green Island’s reputation, and felt confident moving forward with them.
Since my situation involved both bodywork and RV-specific repairs, I needed a two-step approach. After Green Island completed the body repairs, my RV would move to Alpin Haus for servicing and repairs of RV-specific issues. I knew the Balmer unit controlling the electrical system was destroyed by the fallen tree, but Alpin Haus needed to inspect for any further damage.
Fortunately, the inspection revealed no additional damage beyond a faulty electrical system kicker battery, which was promptly replaced. However, a minor setback arose when the technician accidentally broke the refrigerator handle during the inspection process. Since this was a discontinued part, replacing it became the final hurdle before achieving a 100% resolution.
 Image by Tumisu from Pixabay
Negotiation and Settlement
Once the adjuster has a clear picture of the damage and repair costs, they’ll present you with a settlement offer. This is your opportunity to discuss the offer and negotiate if necessary.
Actionable Steps for Settlement Negotiation:
- Review the Settlement Offer Carefully: Don’t be afraid to ask questions if anything is unclear.
- Compare the Offer to Repair Estimates: See how the settlement offer stacks up against the estimates you obtained from repair shops.
- Present Your Case Calmly and with Evidence: If you believe the offer is too low, politely explain your reasoning. Highlight specific details from the repair estimates and emphasize your desire to restore your RV to its pre-accident condition.
- Be Prepared to Negotiate: It’s perfectly acceptable to negotiate the settlement offer. Focus on a fair resolution that covers the necessary repairs.
My Experience: While I didn’t get multiple repair estimates myself, I had open communication with Chris, the adjuster from Progressive. I expressed my confidence in Green Island Auto Body and Alpin Haus, and we discussed the critical aspect of fully restoring my RV to its pre-accident condition, exactly as it was on August 7th. Chris assured me these repairs would be completed through our conversation. This experience highlights the importance of advocating for yourself during the negotiation process. If you have trusted repair shops or specific concerns, don’t hesitate to bring them to the table. Present your information clearly and calmly, and a reputable insurance company will likely be receptive to your input. Following our conversation, Chris worked directly with Green Island and Alpin Haus to finalize the repairs.
Transparency in Staged Settlements
It’s important to understand that claim settlements might be issued in stages, especially if the full extent of the damage is initially unknown. In my case, Progressive initially issued a check for $20,524.33 on September 7th, 2023, to cover the known damage at that time. They assured me they would issue additional checks as more issues were discovered during the repair process. This can be unsettling for policyholders, so be sure to clarify how your insurance company handles staged settlements if this applies to your situation.
The Repair Journey
The repair process unfolded in stages, reflecting the two-step approach needed for bodywork and RV-specific repairs. Following the initial assessment, a further inspection at the body shop revealed additional damage. This resulted in a new check for $3264.57 issued on October 11th to cover these repairs. It’s important to note that I was responsible for my deductible of $2500, which I paid directly to the repair shop when the RV moved from Green Island Auto Body to Alpin Haus on January 4th, 2024. After Alpin Haus completed their repairs to the electrical system and other RV issues, I picked it up on January 19th, 2024. During this stage, two additional checks totaling $2146.94 were issued.
Financial Breakdown
In total, the repairs cost $28,435.84. Fortunately, my deductible of $2500 was the only out-of-pocket expense I incurred. This breakdown highlights the potential for additional costs to surface during the repair process, even after an initial assessment.
By sharing these details, I hope to provide a transparent picture of the potential back-and-forth during the negotiation and settlement phase, as well as how staged settlements might work.
Bump in the Road: Not Quite Out of the Woods Yet
My Experience
As you can imagine, I was thrilled to finally pick up my RV in January after spending a combined six months at the repair shops. Unfortunately, my excitement was short-lived.
Lingering Issues:
During my initial inspection, I discovered a few problems that hadn’t been addressed:
-
Broken Refrigerator Handle: The refrigerator latch was broken, and a piece was found on the floor. While the technician couldn’t explain how it happened, I suspect it broke during the inspection or winterization process.
-
Missing Running Light: One of the running lights was missing, and the dashboard light indicated the issue. It was concerning that neither repair shop noticed this during their inspections.
-
Inoperable Windshield Wiper: The driver’s side windshield wiper didn’t work, a crucial oversight considering the potential for bad weather.
-
Undocumented Bumper Damage: There was also minor, unaddressed damage on the front bumper.
Back to the Shop:
These issues required another round of repairs. The RV went back to the body shop on January 15th and was finally ready for pick-up on March 28th.
Outstanding Issue:
As of now, the broken refrigerator handle remains the only unresolved issue. The additional repair costs for these final fixes were still being determined by the repair shop and insurer.
Lessons Learned and Tips for Success
Action Steps for a Smooth RV Insurance Claim:
Looking back, my RV insurance claim journey offered valuable lessons that can benefit you too. Here are some key takeaways to equip your RV survival kit for a successful claim:
-
Communicate Openly and Honestly:
- Maintain clear and consistent communication with your insurance company throughout the claim process.
- Don’t hesitate to ask questions or seek clarification if anything is unclear.
- By keeping the lines of communication open, you can prevent misunderstandings and ensure everyone is on the same page.
-
Be Prepared with Documentation:
- Gather and organize all relevant documentation, including photos, videos, and paperwork, before initiating your claim.
- The more organized you are, the smoother the claim process will be.
- Consider this documentation your ally in building a strong case for a fair settlement.
-
Advocate for Yourself:
- If you believe the initial settlement offer doesn’t accurately reflect the cost of repairs, be prepared to negotiate.
- Conduct your own research, gather repair estimates from qualified shops, and present your case with confidence.
- Remember, you are the client, and your voice deserves to be heard.
-
Knowledge is Power: Understand Your Policy:
- Take time to familiarize yourself with your RV insurance policy and its coverage details beforehand.
- Knowing what is and isn’t covered can help you manage expectations and avoid surprises during the claim process.
- Educate yourself on the specifics of your policy to feel empowered when dealing with a claim.
Bonus Toolkit Tips:
-
Stay Calm and Collected: While dealing with RV damage can be stressful, maintaining composure will help you navigate the claim process more effectively. Take deep breaths and remember that this is a temporary setback.
-
Set Realistic Expectations:
- The claims process can take time. Be patient and understand that repairs might not happen overnight.
- Rushing the process can lead to mistakes and frustration. Trust the established timeline, and your RV will be back on the road before you know it.
-
Read and Understand the Fine Print:
- Take time to thoroughly read your RV insurance policy.
- Familiarize yourself with your coverage details, exclusions, and deductible amount to avoid misunderstandings down the road.
- Knowledge is power when it comes to insurance claims.
By following these action steps and learning from my experience, you can equip yourself with the knowledge and confidence to approach any RV insurance claim effectively. Remember, a little preparation and clear communication go a long way in ensuring a smooth claims process and getting your RV back on the road quickly.
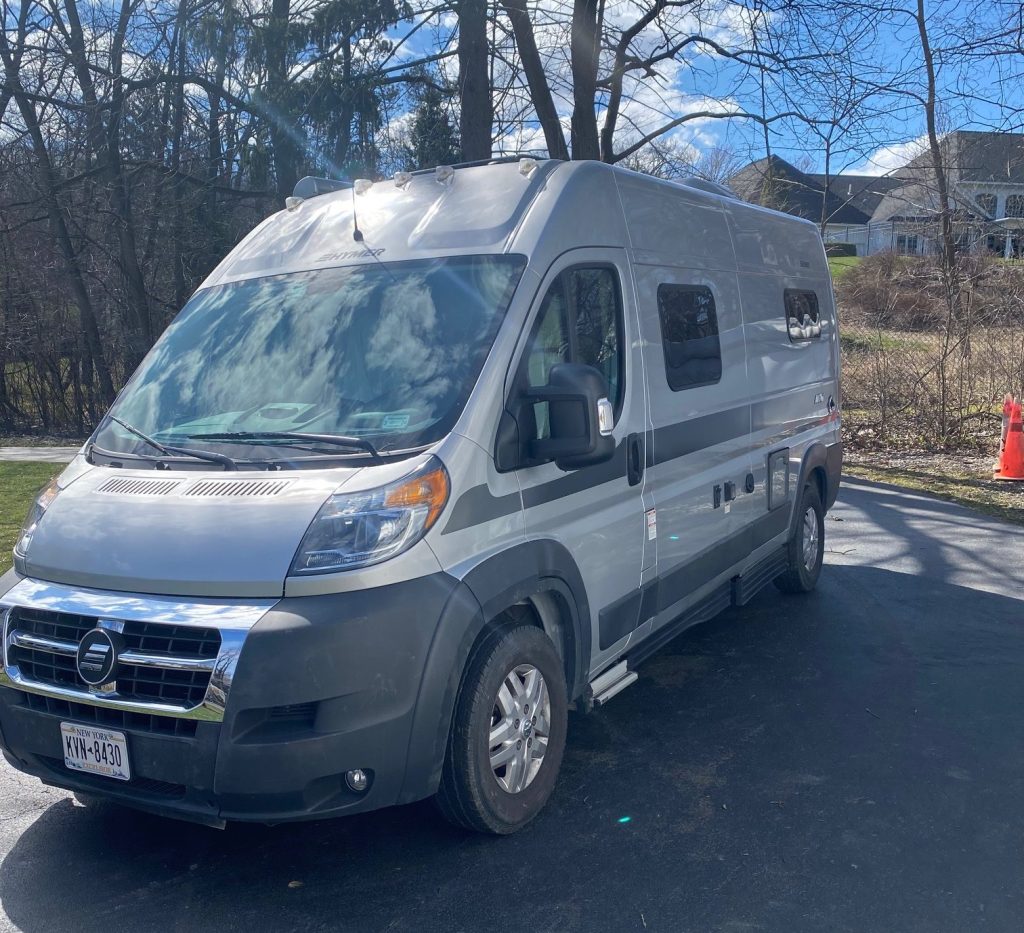
Conclusion
Let’s face it, RV ownership is an investment, and just like any valuable asset, it needs proper protection. While encountering an RV mishap isn’t exactly part of the adventure plan, having a solid RV insurance policy and understanding the claim process can make a world of difference. It can transform what could have been a frustrating experience into a mere bump in the road. By following the steps outlined here and keeping my lessons learned in mind, you’ll be well-equipped to navigate an RV insurance claim with confidence. Remember, a little preparation can save you a lot of stress and ensure a smoother journey towards getting your RV back on the road, ready to chase new horizons. So, the next time you hit the open road, do so with peace of mind. Take the time to understand your RV insurance policy, document your RV’s condition, and don’t be afraid to ask questions. After all, by being proactive, you can ensure that unexpected bumps in the road don’t derail your RV adventures. Instead, they’ll be mere pit stops on your journey to making unforgettable memories with the freedom and flexibility that RV life offers. Safe travels, and may the open road treat you kindly!
RV Insurance Claim FAQs
Here are some quick answers to frequently asked questions about RV insurance claims:
-
How long does it typically take to process an RV insurance claim?
The timeframe can vary depending on the complexity of the claim and your insurance provider’s procedures. It typically ranges from a few days to several weeks (Source: Insurance.com, 2020).
-
Will my premiums increase after filing a claim?
Not always. The impact on your premiums depends on the severity of the claim and whether you were found to be at fault (Source: Forbes, 2021).
-
What if I disagree with the adjuster’s assessment?
You have the right to seek a second opinion. Some policyholders choose to hire an independent adjuster to get a fresh evaluation (Source: Nolo, n.d.).
Here are some additional tips for a smoother claims process:
- Know your policy coverage: Take time to understand what your RV insurance policy covers and what exclusions might apply.
- Gather documentation: Keep detailed records of your RV’s condition, including photos and maintenance logs. This can be helpful when filing a claim.
- Communicate clearly: Maintain open and honest communication with your insurance company throughout the claim process.
- Ask questions: Don’t hesitate to ask questions and seek clarification if anything is unclear.
By following these tips and being prepared, you can navigate an RV insurance claim with more confidence.
Recommended Resources for Further Reading:
- Good Sam Insurance Agency – RV Insurance Guide: This agency specializes in RV insurance and offers a comprehensive guide to understanding RV insurance claims.
- Progressive – RV Insurance Explained: Progressive is a well-known insurance provider that offers detailed information on RV insurance, including what to do when your RV is totaled.
- GEICO – RV Insurance Resources: GEICO provides a range of articles and FAQs specifically focused on RV insurance claims and policies.
- Allstate – RV Insurance Tips: Allstate offers a dedicated section on RV insurance, including tips on filing claims and understanding when an RV is considered totaled.
- Nationwide – RV Insurance Coverage: Nationwide provides an in-depth look at RV insurance options, including what happens when you need to file a claim for a totaled RV.
by Chuck Price | Mar 28, 2024 | Resources
For adventurers at heart, RV boondocking represents the pinnacle of freedom and self-sufficiency, offering a unique blend of exploration and independence. However, the logistics of planning such a trip—finding the ideal locations, ensuring resource availability, and maintaining connectivity—pose significant challenges. Enter Google’s suite of travel tools, a game-changer for both seasoned boondockers and those new to this form of adventure. These tools are designed to simplify trip planning and enhance the boondocking experience, making it easier to discover hidden gems, manage resources efficiently, and optimize itineraries.
Google’s Travel Tools: a Boondocker’s Best Friend
Enhanced Discovery: Google’s travel tools elevate boondocking discovery from a chore to an exciting adventure. Here’s how:
- AI-powered Search: Leverage the power of Google Search with keywords like “[target region] dispersed camping” or “[target region] free camping.” This surfaces hidden gems and unique campsites recommended by AI and potentially overlooked by traditional methods.
- Curated Lists on Maps: Explore curated recommendation lists within Google Maps. Look for sections like “Explore nearby” or “Trending in [location]” to discover interesting boondocking locations highlighted by reputable publishers and local experts.
By combining these search tactics, you can significantly reduce research time and effort, uncovering a treasure trove of potential boondocking destinations for your next off-the-grid adventure.
Improved Resource Management: The cornerstone of successful boondocking is efficiently managing water, electricity, and waste disposal. Google Maps simplifies this by allowing users to easily find essential amenities like “gas stations near me,” “dump sites near me,” and “water refill stations near me,” ensuring a smoother off-the-grid experience.
Streamlined Trip Planning: Gone are the days of juggling scattered notes and itineraries. Google Maps empowers you to:
- Create Customizable Lists: Organize your boondocking adventure with meticulous detail. Build separate lists for potential campsites, nearby attractions, and essential stops like gas stations, water refill points, and dump sites.
- Prioritize Based on Preferences: The beauty lies in customization. Arrange your lists based on your interests, ensuring you don’t miss hidden waterfalls or historical landmarks near your chosen campsites.
- Seamless Navigation: With everything conveniently placed within Google Maps, transitioning between campsites, attractions, and stops becomes effortless.
This streamlined approach to trip planning allows you to focus on the excitement of the adventure, maximizing your enjoyment and ensuring a truly unforgettable experience.
Unmatched Benefits of Google’s Travel Tools
Sure, standard navigation is great, but Google Maps offers a treasure trove of features specifically designed to elevate your RV boondocking experience. Here’s how:
Q: How do Google’s travel tools elevate the RV boondocking experience?
A: Google Maps empowers you to:
- Discover Hidden Gems: Unleash the Power of Search and Lists
- How: Instead of generic searches, try specific queries like “[target National Forest] dispersed camping” or “[target region] free campsites with a view.”
- How: Explore curated recommendation lists within Google Maps. Look for sections like “Explore nearby” or “Off the beaten path” to discover unique boondocking locations.
- Save Time & Effort: Streamline Your Research
- How: Utilize Google Search filters. Refine your campsite search by including keywords like “BLM land” or “free amenities” to narrow down options.
- How: Leverage Google Lens. Capture photos of interesting landmarks or signage near potential campsites and use Lens to identify them. This can help you discover hidden gems or research nearby attractions.
- Ease of Resource Management: Find What You Need, When You Need It
- How: Create a custom list named “Boondocking Resources” and populate it with gas stations, dump sites, and water refill stations near your planned route.
- How: Utilize the “Search Nearby” function within Google Maps. Once at your campsite, you can quickly locate essential amenities like grocery stores or hardware stores for any last-minute needs.
- Craft the Ideal Itinerary: Plan Your Perfect Adventure
- How: Build separate, customizable lists for campsites, attractions, and essential stops.
- How: Utilize the “star” feature to mark specific campsites that pique your interest. This allows for easy comparison and planning when finalizing your itinerary.
- Enjoy Stress-Free Adventures: Navigate with Confidence
- How: Download offline maps for the areas you plan to visit, especially if venturing into remote locations with limited cell service. This ensures seamless navigation even without an internet connection.
- How: Utilize the “Street View” feature to virtually scout potential campsites and assess accessibility for your RV size.
By incorporating these actionable recommendations and leveraging the functionalities of Google Maps, you can transform your RV boondocking experience from planning drudgery to an exciting adventure of discovery.
Google Maps for Boondocking Success
Finding the Ideal Spot:
- How to Identify Public Lands: Google Maps does not include built-in BLM or National Forest boundary layers. Confirm land ownership with the BLM’s official maps or the U.S. Forest Service Interactive Visitor Map, then use Google Maps’ satellite and terrain views to scout roads and access.
- How to Assess Terrain and Accessibility: Switch to Satellite View for a more detailed look at the terrain surrounding potential campsites. This helps you evaluate road conditions, suitability for your RV size, and overall accessibility.
- How to Gauge Site Conditions: Scan for user-generated content like photos and reviews on Google Maps. While limited for off-the-grid locations, these insights can offer valuable clues about the condition and suitability of potential campsites.
Beyond Discovery:
- How to Find Essential Amenities: Once you’ve identified a promising location, leverage Google Maps’ search function or explore points of interest (POI) categories. Look for keywords like “gas stations,” “dump stations,” or “water refill stations” to locate essential amenities for a smooth boondocking experience.
- How to Ensure Offline Navigation: Venturing into remote areas often means limited cell service. To avoid getting lost, pre-download offline maps and directions for your chosen boondocking locations before your trip. This ensures you can navigate with confidence even without an internet connection.

Overcoming Boondocking Challenges
Even the most seasoned boondockers encounter hurdles. Here’s how Google Maps equips you to tackle these challenges:
Limited Cell Service: Don’t let spotty reception ruin your adventure!
- How to Navigate Offline: Utilize the magic of offline maps! Before your trip, pre-download relevant maps and driving directions for your boondocking destinations. This ensures you can navigate with confidence even in areas with limited or no cell service.
Finding Fresh Water and Other Resources: Staying hydrated and managing waste are crucial aspects of boondocking.
- How to Locate Essential Amenities: Google Maps is your one-stop resource for locating essential amenities. Search for keywords like “gas stations,” “dump stations,” or “water refill stations” near your planned campsite or use the handy “Search Nearby” function once you’ve arrived.
Navigating Unfamiliar Terrains: Venturing off the beaten path often means encountering unexpected terrain.
- How to Assess Road Conditions and Campsite Suitability: Satellite imagery in Google Maps acts as your virtual scout. Switch to Satellite View to get a detailed look at the terrain surrounding potential campsites. This allows you to assess road conditions, identify potential obstacles, and ensure the chosen location is suitable for your RV size and capabilities.
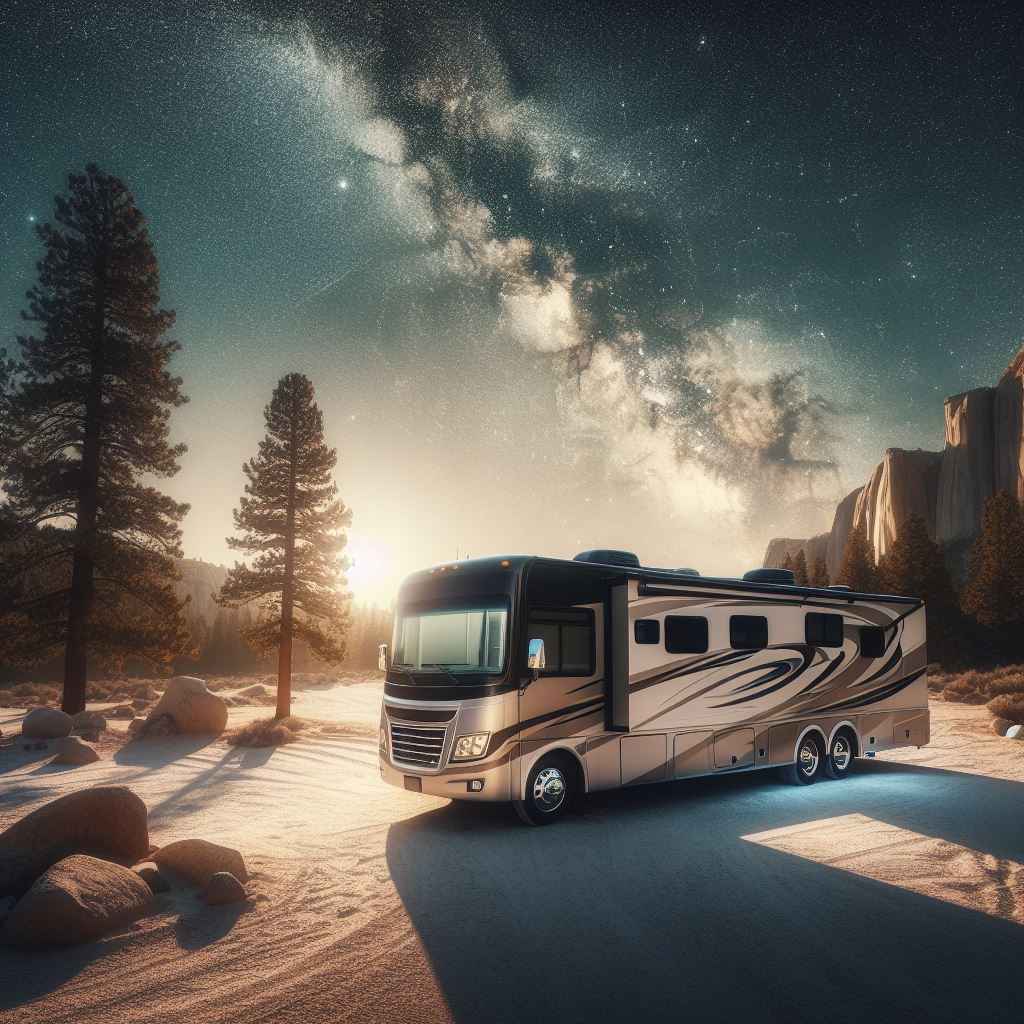
Charting Your Course with Confidence
With Google Maps as your trusted co-pilot, the world becomes your RV boondocking playground. Gone are the days of meticulous planning fueled by countless websites and scattered resources. Google Maps empowers you to:
- Discover hidden gems: Unleash the power of AI-driven search and curated lists to uncover unique campsites others might miss.
- Streamline trip planning: Create meticulous, personalized itineraries with custom lists for campsites, attractions, and essential stops.
- Navigate with confidence: Download offline maps for peace of mind, ensuring seamless navigation even in remote locations.
- Find what you need, when you need it: Locate gas stations, water refill points, and dump sites with a few clicks, eliminating resource management woes.
By embracing the functionalities within Google Maps, you can transform your RV boondocking experience. Focus on the adventure, the freedom of the open road, and the beauty of the wilderness. Let Google Maps handle the logistics, ensuring a stress-free and unforgettable journey.
Resources
- Google Travel Tools Blog: Direct insights from Google about new features and how to maximize their travel tools for trip planning.
- Bureau of Land Management (BLM) – RV Camping: Official guidelines and locations for RV camping on BLM land, crucial for boondockers looking for free camping spots.
- Recreation.gov: Resource for discovering and booking campsites, including dispersed camping areas, across the United States, providing a government-backed framework for planning boondocking adventures.
- Campendium – Boondocking Guide: A comprehensive guide offering insights and locations for boondocking, including user reviews, which adds a layer of social proof and practical advice.
- U.S. National Forest Campground Guide: Detailed information on camping in national forests, a popular choice for boondockers. This site provides guidance on dispersed camping, which is often free and offers the seclusion and nature experience boondockers seek.