This guide provides a comprehensive overview of boondocking (also known as dry camping), an RVing practice that involves camping without connections to external utilities like water, electricity, or sewer. It aims to offer a balanced perspective for beginners, detailing the advantages, disadvantages, essential tips, and realistic expectations for this off-grid lifestyle.
Introduction: What is Boondocking?
Boondocking, or dry camping, is RVing without utility hookups. It appeals to RVers for its offering of freedom, immersion in nature, and potential cost savings.
The Allure of Off-Grid: Pros of Boondocking
Boondocking offers several compelling advantages:
Unparalleled Freedom & Solitude:
Grants access to remote and scenic locations, often on Bureau of Land Management (BLM) land and in National Forests, where developed campgrounds are scarce.
Allows RVers to escape crowded campgrounds and enjoy solitude.
Provides opportunities to wake up to stunning views without other people present and experience nature’s quiet.
Cost Savings:
Boondocking is often free or requires only a low-cost permit, significantly reducing camping expenses.
This budget-friendly approach makes travel more accessible and enables longer adventures.
Deeper Connection with Nature:
Offers an immersive outdoor experience, fostering a deeper connection with nature.
Exceptional stargazing due to less light pollution.
Abundant wildlife viewing opportunities.
Provides a chance to disconnect from modern life’s distractions and appreciate the natural world.
Self-Sufficiency & Skill Development:
Encourages self-sufficiency and the development of valuable skills.
RVers learn to manage resources carefully, conserve water and power, and troubleshoot problems independently.
Fosters a sense of accomplishment and resilience, echoing principles from “RV Fire Safety Guide.”
The Realities of Roughing It: Cons of Boondocking
Boondocking also presents challenges that require careful consideration:
Limited Resources (Water, Power, Waste):
Primary challenge is limited availability of water, power, and waste disposal.
Strict conservation is essential to extend stays, often requiring creative solutions.
Finding dump stations and fresh water refills requires planning.
No hookups for electricity or sewer necessitate reliance on generators or solar power.
Increased Planning & Preparation:
Demands more planning and preparation than traditional campground stays.
Route planning is critical, requiring scouting of locations in advance for accessibility and suitability.
Stocking adequate supplies of food, water, and fuel is crucial.
Comfort & Convenience Trade-offs:
Less luxurious than full-hookup sites, requiring acceptance of certain inconveniences.
Dealing with dust is common.
Showers may be less frequent due to water conservation efforts.
Safety & Security Considerations:
Paramount in remote locations with potential isolation.
Wildlife encounters are possible, requiring awareness and caution.
Emergency preparedness is crucial due to unreliable cell service, necessitating alternative communication methods (echoing advice from “RV Fire Safety Guide”).
Importance of fire extinguishers, safe cooking practices, awareness of local fire bans, and safe generator use is emphasized.
Essential Boondocking Tips for Beginners
To ensure a comfortable and responsible off-grid adventure, beginners should consider these tips:
Consult official Bureau of Land Management (BLM) and National Forest websites for up-to-date regulations.
Scout locations ahead of time, especially for larger RVs, to ensure accessibility and suitability.
Master Resource Management:
Water Conservation: Implement strategies like “navy showers” (turning off water while soaping), efficient dishwashing (scraping food, wiping dishes, minimal water with biodegradable soap), and potentially using grey water for toilet flushing.
Power Management: Consider solar panels for renewable energy. Propane generators are often preferred for efficiency. Use LED lighting to minimize energy consumption and diligently monitor battery levels. Reduce reliance on electronics.
Waste Management: Embrace the “pack it in, pack it out” principle. Reduce trash by removing excess packaging before the trip. Use small, sealable bags for daily waste for easy disposal at appropriate bins.
Practice Leave No Trace Principles:
Minimize environmental impact by properly disposing of waste, respecting wildlife, and leaving areas as found or better.
Ensure Safety & Security:
Have a reliable communication method (e.g., satellite messenger) if cell service is unreliable.
Carry an emergency kit with first aid supplies, a weather radio, and extra fuel/water.
Secure the RV by locking doors and hiding valuables.
Inform someone of your itinerary.
Keep a fully charged fire extinguisher accessible.
Inspect propane lines and appliances regularly.
Be aware of local fire danger levels and restrictions for campfires or generators.
Never leave a campfire unattended.
Have a shovel and water nearby for campfires.
Know Your Rig:
Understand your RV’s capabilities, including tank capacities (fresh, grey, black water).
Test your off-grid setup before long trips to identify potential issues.
Consider modifications like a composting toilet or larger battery bank to extend boondocking capabilities.
Boondocking vs. Dispersed Camping: What’s the Difference?
Boondocking: A broad term for RVing without hookups in undeveloped areas.
Dispersed Camping: Specifically refers to camping on public lands outside designated campgrounds, typically without amenities.
Relationship: All dispersed camping is boondocking, but not all boondocking is dispersed camping (e.g., parking overnight at a Wal-Mart is boondocking but not dispersed camping).
Conclusion: Is Boondocking for You?
Boondocking offers a unique and rewarding RV lifestyle, but it requires careful consideration of its pros and cons. With proper planning, preparation, and a spirit of self-sufficiency, beginners can enjoy the freedom, cost savings, and connection with nature that boondocking provides.
Boondocking: Pros and Cons Table
Feature
Pros
Cons
Location Freedom
Access to unique, scenic, and secluded spots; less crowded.
Limited access for larger rigs; can be remote and isolated.
Cost
Often free or very low-cost camping.
Initial investment in gear (solar, larger tanks) may be needed.
Resources
Encourages self-sufficiency and resourcefulness.
Limited water, power, and waste capacity; requires strict conservation.
Privacy & Solitude
High levels of peace, quiet, and personal space.
Can feel isolated; potential for reduced security.
Planning
Spontaneity once set up; unique adventure potential.
Requires extensive pre-trip planning and research.
Comfort
Authentic outdoor experience.
Fewer amenities (no hookups, limited showers); dealing with elements (dust).
Safety
(Potentially) less exposure to crowds.
Remote locations can mean limited cell service and slower emergency response; Fire Risk.
Frequently Asked Questions
What is the difference between boondocking and dispersed camping? Is boondocking legal?
Boondocking refers to camping without hookups in undeveloped areas. Dispersed camping is a specific type of boondocking on public lands such as BLM and National Forest land, outside designated campsites and with no amenities.
Boondocking is legal where permitted, but rules vary by agency. Always check stay limits, fire restrictions, closures, and road conditions before setting up.
How can I find safe and legal boondocking spots?
Reliable resources include Campendium, iOverlander, FreeCampsites.net, The Dyrt, and official BLM/USFS websites.
Look for recent reviews, local regulations, fire danger levels, and weather advisories before choosing a site.
Do I need a special RV for boondocking?
No special RV is required, but some features make off-grid camping easier, including:
– Larger fresh water and waste tank capacity
– Solar power or a generator
– Efficient lighting (LED)
– Good batteries (AGM or lithium)
– Higher clearance for rougher roads (optional)
What resources are most important to conserve while boondocking?
You’ll be limited by three things:
– Fresh water
– Battery power
– Grey/black tank capacity
Using navy showers, efficient dishwashing, LED lights, and mindful electronics use can extend your stay dramatically.
How should I handle trash and waste when boondocking?
Follow “pack it in, pack it out.” Remove packaging before your trip, store daily waste in sealed bags, and never burn or bury trash.
Human waste should go into the RV’s black tank and be dumped at a proper station.
Greywater rules vary—check local regulations before draining anything.
Is boondocking safe?
Boondocking is generally safe when using good judgment. Park in visible, level areas, trust your instincts, lock doors at night, and remain aware of wildlife and terrain hazards.
Most boondockers report quiet, peaceful experiences.
What are the key fire safety tips for boondocking?
Carry a working fire extinguisher, follow local fire restrictions, keep generator exhaust clear, inspect propane lines regularly, and keep campfires small, contained, and attended.
Always fully extinguish fires before leaving or going to sleep.
For many seasoned tent campers, the allure of the open road eventually leads to a new consideration: RV life. This article is crafted for those contemplating the transition, offering an honest perspective on the pros, cons, and essential preparations for making the shift from canvas to comfort. Drawing from personal experience, we’ll navigate the challenges and joys of embracing a new way to explore the wilderness.
As a tent camper, you’ve likely built your own mental picture of “real camping”: sleeping on the ground, waking up to the sounds of nature, cooking over an open fire, and relaxing in the woods. An RV doesn’t replace that magic—but it does completely change how you experience it.
Moving from the raw simplicity of tent camping to the relative luxury of an RV involves significant emotional and lifestyle adjustments. Initially, you might feel a perceived loss of connection with raw nature, but this quickly gives way to new freedoms. RVing allows for longer explorations, the joy of home-cooked meals in remote settings, and the comfort of a real bed.
Be prepared for gear accumulation; RV life often means acquiring more equipment for enhanced comfort and convenience, redefining what it means to “rough it.” Your “camp box” becomes a rolling tiny home—complete with systems, storage, and a lot more responsibility.
Selecting the right RV is critical. Key considerations include towing requirements, driveability, and overall convenience. RVs come in various types:
Travel Trailers & Fifth Wheels: Offer spacious living and often require a separate, capable tow vehicle.
Motorhomes (Class A, B, C): Provide all-in-one convenience, with varying levels of luxury and maneuverability.
Niche Options: Pop-ups, hybrids, and truck campers cater to specific needs, such as lightweight towing or minimalist camping.
Matching your RV to your camping style—whether prioritizing boondocking, campground amenities, or family space—is paramount for a satisfying experience.
A significant adjustment for new RVers is understanding the complex onboard systems. No matter how “turnkey” a rig looks on the lot, you’ll eventually become part driver, part caretaker, and part mobile facilities manager. Mastering water management, electrical systems, and propane usage is crucial for a smooth and enjoyable RV experience.
Water Management: Fresh, Grey, and Black Tanks (Oh My!)
Your RV’s water system includes a fresh water tank for potable water, grey water tanks for sinks and showers, and black water tanks for the toilet. Water conservation is essential, especially when boondocking, because tank capacity—not your thirst—often dictates how long you can stay.
Proper disposal at designated dump stations is a fundamental skill. Additionally, vital maintenance tasks like winterizing and de-winterizing are necessary to prevent freezing damage. For more safety information, refer to an RV fire safety guide and your manufacturer’s manuals.
Electrical Systems: Powering Your Adventures
RV power comes from several sources:
Shore Power: 30 or 50 amp connections at campgrounds power appliances and charge batteries.
Off-Grid: Batteries, inverters, and solar panels provide power when not connected to shore power.
Generators: Can supplement off-grid systems for higher power demands.
Developing basic electrical troubleshooting skills will prove invaluable on the road. Consider investing in an RV surge protector for shore power connections so a bad pedestal doesn’t fry your system.
Propane & Appliances: Heating, Cooking, and Cooling
Propane powers essential RV appliances like the water heater, furnace, and stove. Propane safety is paramount, requiring constant awareness of leaks and proper usage. RV refrigerators, water heaters, and furnaces demand regular maintenance and inspection. Air conditioning units are crucial for cooling but have significant power demands, especially when off-grid.
Driving or towing an RV is vastly different from a car and requires practice and patience. Understanding towing fundamentals—hitches, weight distribution, and braking systems—is crucial. Maneuvering, especially backing up, requires careful planning and practice in safe, open areas.
Route planning must account for your RV’s height, weight, and width to avoid narrow roads and low clearances. Consider vehicle accessories like extended towing mirrors, brake controllers, and upgraded suspension components if you’re towing near your vehicle’s limits.
Finding Your Campsite: Beyond the Familiar Tent Spots
RVing necessitates a different campsite selection strategy than tent camping. Options range from well-equipped campgrounds to dispersed camping on public lands. Key aspects include advance planning, understanding campground reservations, and embracing boondocking when it fits your style.
Campground Reservations: The New Reality
Booking campsites often requires months of advance planning, especially for popular spots or during peak seasons. You’ll encounter various campground types (public vs. private) and hookup options. Full hookups (water, sewer, electric) offer maximum convenience, while dry camping sites lack utility connections.
Not all “RV parks” feel like nature escapes. Some are essentially paved parking lots with hookups. If you’re coming from tent camping and craving scenery, read reviews and check photos before you book.
Embracing Boondocking: Free Camping with a Wild Side
Boondocking, or dispersed camping, offers solitude and a deep connection with nature, much like primitive tent camping but with RV comforts. You can find free spots on BLM (Bureau of Land Management) and National Forest land. Apps like Campendium, iOverlander, and The Dyrt are invaluable resources.
Essential skills include water conservation, power management (consider solar kits), and proper waste disposal. Adhering to Leave No Trace principles is crucial if you want these places to remain open and beautiful.
Note: This is a general map for trip planning. Always verify specific boondocking regulations, road conditions, and stay limits with local land management agencies (BLM, National Forest, state lands) before you go.
RV Maintenance & Hidden Costs: More Than Just Fuel
Beyond the initial purchase price and fuel, RV ownership involves ongoing expenses. Routine maintenance—checking tires, roof, seals, and appliances—is vital to prevent major issues. Unexpected repairs are inevitable, so a dedicated budget is essential.
Also factor in storage costs, especially during the off-season. Insurance, registration, taxes, and optional extended warranties all represent recurring expenses that add up over time.
Prioritizing safety is paramount for peace of mind and a safe travel experience. This includes fire prevention, diligent tire care, wildlife awareness, and preparedness for roadside emergencies.
RV Fire Safety: Prevention and Preparedness
RVs present unique fire risks due to flammable materials, propane, and complex electrical systems. Essential safety devices include smoke detectors and carbon monoxide detectors, which must be tested regularly. Propane safety, including leak detection and safe appliance operation, is paramount.
Electrical safety involves avoiding overloads and inspecting for faulty wiring. Emergency preparedness requires clearly marked exits and a rehearsed escape plan. According to the U.S. Fire Administration’s Data Snapshot on recreational-vehicle fires, an estimated 4,200 RV fires annually between 2018 and 2020 resulted in 15 civilian deaths, 125 civilian injuries, and $60.3 million in property loss. Always have a working RV fire extinguisher readily accessible.
Tire Care: Regular inspection and proper inflation are crucial for blow-out prevention.
Wildlife Awareness: Practice bear safety and proper food storage in bear country.
Roadside Emergencies: Be prepared to handle breakdowns and have a plan for roadside assistance.
Making it Home: Customization and Comforts
One of the joys of RV ownership is personalizing your living space to reflect your style and needs. Interior modifications can enhance practicality and comfort, from better mattresses and storage solutions to upgraded lighting and seating. Outdoor living spaces, created with awnings, mats, and camp kitchens, effectively extend your living area.
For families, kid-friendly RVing involves creating fun, safe, and comfortable environments for everyone. Think bunk spaces, organizing bins, blackout curtains, and a few “bad weather” activities stored away for rainy days.
Resources
RVIA (Recreational Vehicle Industry Association) – https://www.rvia.org/
This organization represents the RV industry and provides industry statistics, research, and other resources.
GoRVing – https://www.gorving.com/
GoRVing is a well-known platform for RV enthusiasts that provides helpful tips, information, and resources on RVing.
Good Sam Club – https://www.goodsam.com/
The Good Sam Club is a popular RV club in the United States, offering discounts on campgrounds, fuel, and other services.
RV Life – https://rvlife.com/
RV Life is a popular online magazine focused on RVing and the RV lifestyle. They provide comprehensive articles, reviews, and resources.
National Park Service (NPS) – https://www.nps.gov/
The NPS website provides information about national parks and camping regulations, which may be useful for RV campers.
Boondocking is camping in an RV on undeveloped land without hookups, while budget boondocking emphasizes doing so affordably. Boondocking, also known as dry camping or dispersed camping, allows RVers to experience nature away from crowded campgrounds (Roadtrippers.com). This guide explores how to embrace budget boondocking, balancing adventure with financial savings.
Understanding the Basics: Your Budget-Friendly Boondocking Foundation
Is Boondocking Legal? Understanding the Rules & Regulations
Boondocking is legal on many public lands, but understanding the specific rules and regulations is crucial. The Bureau of Land Management (BLM) and National Forest Service (NFS) often allow dispersed camping, but restrictions may apply (BLM.gov). Always check for stay limits, permit requirements, and fire restrictions before setting up camp. The “Leave No Trace” principles are essential to protecting these free spots for everyone.
Types of Free & Low-Cost RV Camping
There are several types of free and low-cost RV camping, each offering a unique experience. Dispersed camping provides true wilderness freedom, while roadside overnighting (Wallydocking, rest stops) offers convenient, though less scenic, options. Membership programs such as Harvest Hosts and Boondockers Welcome provide private-property stays for an annual fee. Current plan context: Harvest Hosts Classic is $99 per year, Harvest Hosts + Boondockers Welcome is $169 per year, and All Access is $179 per year. New members can use BOONDOCK20 for 20% off the first year of any plan. Verify current plan terms before joining.
Finding Your Free Campsite: Tools and Strategies for Budget Travelers
Essential Apps & Websites for Spotting Free Sites
Several apps and websites can help you discover free campsites. Campendium, iOverlander, and FreeCampsites.net are popular resources for finding boondocking locations. Google Maps satellite view can be invaluable for scouting potential spots, assessing accessibility, and identifying potential hazards.
Local Knowledge: Ranger Stations & Fellow RVers
Ranger stations and fellow RVers are invaluable sources of local knowledge for finding boondocking spots. Rangers can provide information on current conditions, restrictions, and hidden gems in the area. Fellow RVers often share their experiences and recommendations on forums and social media groups.
Choosing the Right Spot: Accessibility, Safety, and Connectivity
Choosing the right boondocking spot involves considering accessibility, safety, and connectivity. Rig size considerations are paramount; ensure your RV can safely navigate the roads and terrain leading to the site. Cell signal and satellite internet access may be important for staying connected and safe.
Preparing Your RV for Off-Grid Living: Smart Gear for Saving Money
Water Wisdom: Conserving Your Most Precious Resource
Conserving water is crucial for extending your boondocking stays. Fresh water capacity and management are key; know how much water your RV holds and plan your usage accordingly. Grey & black tank management is also important, portable waste tanks can provide extra capacity. Cost: ~$100-250 USD. Adopting water-saving habits like navy showers can significantly reduce water consumption. Water filters & purification systems help ensure access to safe drinking water. Cost: ~$20-150 USD
Powering Your Adventure: Budget-Conscious Energy Solutions
Budget-conscious energy solutions are essential for powering your boondocking adventures. Battery systems are the foundation; house batteries store power for later use, and upgrades can increase capacity. Solar power offers a renewable energy source, and even a basic portable panel can make a difference. Generators provide a reliable backup power source, but use them wisely to conserve fuel and minimize noise. LED lighting upgrades are a simple way to reduce energy consumption. Cost: ~$5-50 USD
Solar Power Basics: Getting Started Affordably
Getting started with solar power affordably is easier than you might think. Portable solar panels are a great entry point, offering flexibility and ease of setup. Cost: ~$200-500 USD. Inverters convert DC power from your batteries or solar panels to AC power for running household appliances. Cost: ~$100-400 USD.
Packing Smart: Food, Essentials, and Emergency Preparedness
Packing smart is crucial for a successful and safe boondocking trip. Meal planning and cooking on-board can save money and reduce waste. An Instant Pot or grill can be versatile cooking tools. An emergency kit and roadside assistance plan are essential for dealing with unexpected situations. Basic Kit Cost: ~$50-150 USD
Boondocking Etiquette: Being a Good Steward of Free Spaces
Quiet Hours & Generator Use
Respecting quiet hours and using generators responsibly is essential for maintaining good boondocking etiquette. Be mindful of noise levels, especially during established quiet hours. Limit generator use to necessary times and consider using quieter models.
Waste Disposal: Pack It In, Pack It Out
Proper waste disposal is crucial for preserving the natural beauty of boondocking locations. The “pack it in, pack it out” principle is fundamental; take all trash and waste with you when you leave. Dispose of waste properly at designated facilities.
Respecting Other Campers & Wildlife
Respecting other campers and wildlife ensures a harmonious boondocking experience. Maintain a safe distance from other campsites and avoid disturbing their privacy. Observe wildlife from a distance and never feed them.
Maximizing Your Budget Boondocking Experience: Advanced Tips
Slow Travel: Save on Fuel, Savor the Journey
Slow travel can significantly reduce fuel consumption and enhance your boondocking experience. Driving at slower speeds improves fuel efficiency. Savoring the journey allows you to explore hidden gems and connect with the local environment.
Finding Free or Low-Cost Activities
Many free or low-cost activities can enrich your boondocking adventures. Hiking, biking, and nature photography are excellent ways to explore the outdoors. Visiting local museums, parks, and historical sites can provide cultural experiences without breaking the bank.
Seasonal Considerations: Chasing Good Weather to Save on HVAC
Chasing good weather can reduce your reliance on heating and cooling systems, saving energy and money. Boondocking in milder climates minimizes the need for HVAC. Consider seasonal migrations to optimize your comfort and minimize energy consumption.
Common Boondocking Mistakes to Avoid (and How to Save Money by Avoiding Them)
Underestimating Resource Needs (Water, Power)
Underestimating your resource needs is a common boondocking mistake that can lead to discomfort and unnecessary expenses. Carefully calculate your water and power consumption based on your planned activities and climate. Bring extra supplies and have backup plans in case of unexpected shortages.
Poor Trip Planning (Fuel, Supplies)
Poor trip planning can result in wasted fuel, missed opportunities, and potential safety hazards. Plan your route carefully, taking into account road conditions, fuel stops, and supply availability. Check weather forecasts and be prepared for changing conditions.
Ignoring RV Maintenance
Ignoring RV maintenance can lead to costly repairs and downtime. Regularly inspect your RV’s systems, including tires, brakes, batteries, and plumbing. Address minor issues promptly to prevent them from escalating into major problems.
Conclusion: Your Path to Affordable RV Adventures
Recap of Key Budget Boondocking Principles
Budget boondocking combines the freedom of RV travel with the financial benefits of free camping. By understanding the rules and regulations, conserving resources, and planning carefully, you can enjoy incredible adventures without breaking the bank.
Embrace the Journey, Not the Expense
Embrace the journey and not the expense and discover the joys of affordable RV travel.
FAQs
Q: What are the best free camping spots in the US?
A: National Forests and BLM land are great options for free camping in the US.
Q: What gear do I need for boondocking?
A: Necessary gear for boondocking can include a tent or RV, sleeping bags, cooking equipment, and more. We estimate that the necessary equipment cost will be around 200-300 USD.
Q: Are there any permits or fees required for boondocking?
A: Some areas may require permits or have fees for boondocking. It’s important to research local regulations and restrictions before you go.
Q: How much solar power do I need for boondocking?
A: The amount of solar power you need for boondocking will depend on your energy usage. A 100-watt solar panel is a good starting point for most boondockers.
Q: Can I use a portable generator while boondocking?
A: Yes, you can use a portable generator while boondocking, but it’s important to be aware of noise regulations and fuel usage.
Takeaway
Boondocking on a budget can be a rewarding and cost-effective way to experience the great outdoors. By following the tips and advice in this ultimate guide, you can plan your trip, conserve resources, and dispose of waste in an environmentally-friendly way. We encourage you to try boondocking for yourself, and to share your experiences with other outdoor enthusiasts.
Resources
United States Forest Service (USFS) Dispersed Camping Guidelines: The United States Forest Service (USFS) provides guidelines for dispersed camping (https://www.fs.usda.gov/visit/know-before-you-go/dispersed-camping), which is camping outside of designated campgrounds in national forests. The guidelines cover topics such as choosing a campsite, setting up camp, and practicing Leave No Trace principles to minimize impact on the environment.
Bureau of Land Management (BLM) Camping Information: This website (https://www.blm.gov/programs/recreation/camping) provides information about camping on public lands managed by the Bureau of Land Management (BLM) in the United States. It includes information on campgrounds, fees, permits, and other regulations to help visitors plan their camping trip.
Campendium’s Comprehensive Guide to Free Camping in the US: This comprehensive guide (https://www.campendium.com/free-camping) provides information on free camping options across the United States, including national forests, Bureau of Land Management lands, and other public lands. The guide includes details on amenities, accessibility, and nearby attractions.
Solar Power for Boondocking and RV Camping: This website (https://www.parkedinparadise.com/rv-solar/) offers information on using solar power for boondocking and RV camping, including tips on selecting solar panels, installing a solar power system, and maintaining it. It also includes information on battery systems and inverters to help campers stay powered up while off the grid.
Waste Disposal Tips and Regulations for Boondocking: This website (https://www.thewanderingrv.com/rv-waste-disposal/) provides guidance on how to properly dispose of waste while boondocking or camping off the grid. It includes information on black water and gray water tanks, composting toilets, and other waste disposal methods. The website also highlights regulations and best practices to help campers minimize their impact on the environment.
This guide outlines three primary camping options in and around Death Valley National Park: National Park Service (NPS) campgrounds, private RV parks, and dispersed camping on Bureau of Land Management (BLM) land.
Path 1: Developed Camping (NPS Campgrounds)
Death Valley National Park features nine developed campgrounds with varying amenities.
Campground Details:
Furnace Creek Campground
Type:
Developed
Season:
Year-round
Sites:
136
Reservations:
Accepted during the cooler season (Oct 15 – Apr 15) and strongly recommended; book via Recreation.gov or 1-877-444-6777. FCFS from Apr 16 – Oct 14.
Max RV Length:
35 ft
Amenities:
Water, flush toilets, dump station, tables, fire rings. Full hookups available.
Cost:
Approx. $30-$44
Notes:
Closest to visitor center, busiest campground.
Texas Spring Campground
Type:
Developed
Season:
Fall-Spring
Sites:
106
Reservations:
FCFS
Max RV Length:
35 ft
Amenities:
Water, flush toilets, tables, fire rings
Cost:
$20 per night
Notes:
Near Furnace Creek, seasonal. Generators not allowed.
Sunset Campground
Type:
Developed
Season:
Fall-Spring
Sites:
230
Reservations:
FCFS
Max RV Length:
Any
Amenities:
Water, flush toilets, dump station
Cost:
Approx. $18
Notes:
Paved lot, open area, overflow for Furnace Creek.
Stovepipe Wells Campground
Type:
Developed
Season:
Year-round
Sites:
190
Reservations:
FCFS
Max RV Length:
25 ft (RV)
Amenities:
Water, flush toilets, dump station (paid nearby)
Cost:
Approx. $18
Notes:
Near Stovepipe Wells Village.
Mesquite Spring Campground
Type:
Developed
Season:
Year-round
Sites:
40
Reservations:
FCFS
Max RV Length:
35 ft
Amenities:
Water, flush toilets, tables, fire rings
Cost:
$20 per night
Notes:
Northern part of park, quieter.
Emigrant Campground Closed
Type:
Developed
Season:
Year-round
Sites:
10
Reservations:
FCFS
Max RV Length:
No RVs
Amenities:
Water, pit toilets
Cost:
Free
Notes:
Tent only, small, no fires. *Campground, water, and restrooms are closed due to flood damage as of late August 2025.*
Wildrose Campground Free
Type:
Developed
Season:
Year-round
Sites:
23
Reservations:
FCFS
Max RV Length:
25 ft
Amenities:
Pit toilets, water (seasonal)
Cost:
Free
Notes:
High elevation, cooler, rough road access. Prone to high winds.
Thorndike Campground Free
Type:
Developed
Season:
Seasonal
Sites:
6
Reservations:
FCFS
Max RV Length:
No RVs
Amenities:
Pit toilets, no water
Cost:
Free
Notes:
High elevation, cooler, tent/small rig.
Mahogany Flat Campground Free
Type:
Developed
Season:
Seasonal
Sites:
9
Reservations:
FCFS
Max RV Length:
No RVs
Amenities:
Pit toilets, no water
Cost:
Free
Notes:
Highest elevation, 4WD recommended.
Key Regulations:
Campfires permitted only in designated fire rings.
Quiet hours enforced.
Pets must be leashed and restricted to developed areas.
Generator operating hours may be limited.
Getting a Campsite:
Furnace Creek Campground accepts reservations (highly recommended) during its peak season (Oct 15 – Apr 15). All other NPS campgrounds are FCFS, requiring early arrival, especially during peak season. Visitor center or ranger station updates can aid in finding spots. These campgrounds are less busy during the hottest months.
Path 2: Private Campgrounds (RV & Hookup Guide)
Private RV parks offer enhanced amenities like full hookups (water, electricity, sewer), restrooms with showers, laundry, and recreational facilities.
The Ranch at Death Valley RV Park
Formerly Furnace Creek Ranch. Offers RV camping with access to resort amenities.
Oasis RV Resort is slated to open in 2026.
Currently, RVs can use Fiddler’s Campground adjacent to the Furnace Creek Golf Course.
Services:
Sites without hookups, but guests access resort amenities (water, restrooms, nearby dump stations).
Seasonality:
Year-round, but summer is extremely hot.
Reservations:
Accepted year-round, booking in advance is advisable.
Stovepipe Wells Village RV Park
Offers 14 full-hookup sites for RVs up to 40 feet.
Services:
Electrical (30/50 amps), sewer, and water hookups.
Seasonality:
Year-round.
Reservations:
Recommended due to limited sites.
Amenities:
Access to Stovepipe Wells Village amenities (swimming pool, showers, Wi-Fi in hotel lobby, Toll Road Restaurant, general store).
Cost:
One of the pricier options.
Nearby Private Options Outside the Park:
Panamint Springs Resort: Located west of the park, offering tent cabins, tent sites, RV dry sites, and full hookup RV sites.
Path 3: Dispersed Camping (Boondocker’s Guide)
Dispersed camping (boondocking) allows free camping outside established campgrounds, typically without amenities, requiring self-sufficiency and Leave No Trace principles.
Dispersed Camping Inside Death Valley National Park:
Permitted in specific areas along designated backcountry roads.
Regulations:
Allowed only on designated backcountry roads.
Parking often required within a certain distance of the road.
Prohibited within one mile of any developed area or water source.
Campfires may be restricted or prohibited; use existing fire rings where allowed.
Designated Backcountry Road Camping:
Popular roads include Titus Canyon Road, Echo Canyon Road, and Cottonwood Canyon Road, often requiring high-clearance or 4WD vehicles. Always check road conditions.
Dispersed Camping Outside the Park on BLM Land:
Vast BLM land surrounds Death Valley NP, offering more extensive and flexible dispersed camping.
Generally fewer restrictions than within the park.
Popular BLM Areas:
Alabama Hills Recreation Area (near Lone Pine)
Ballarat Ghost Town (western boundary)
Areas along Minnietta Road
Facilities are typically non-existent.
Essential Boondocking Tips:
Leave No Trace Principles: Pack out everything, dispose of waste properly, avoid disturbing vegetation/wildlife.
Self-Sufficiency: Carry ample water (at least 1 gallon/person/day, more is better), consider portable power (solar, generator), plan for waste disposal.
Research: Thoroughly research road conditions and access; many roads require high-clearance/4WD. Check with NPS or BLM for advisories.
Safety: Be aware of extreme heat, carry a reliable communication device (satellite phone, PLB), let someone know your itinerary.
When to Visit: Death Valley’s Camping Seasons
Best Times for Camping: Late October through April, offering moderate temperatures for outdoor activities and comfortable sleeping.
Winter & Shoulder Seasons: Offer the most pleasant camping conditions with mild daytime and cool nighttime temperatures.
Important General Tips for All Death Valley Campers
Water: Carry at least one gallon per person per day; more is recommended. Water sources are limited.
Waste Management: Pack out everything you pack in, including trash and food scraps. Use designated toilets; if none available, bury human waste 6 inches deep and 200 feet from water sources.
Wildlife Awareness: Store food properly in airtight containers to avoid attracting animals. Never feed wildlife.
Cell Service: Limited and unreliable. Do not rely on cell phones for navigation or communication. Consider a satellite device. Inform someone of your itinerary.
Emergency Preparedness: Carry a first-aid kit, map, compass, flashlight. Know how to treat heatstroke and dehydration. In case of vehicle breakdown, stay with your vehicle.
Death Valley National Park provides a remarkable camping experience for those who prepare adequately, plan carefully, and respect the environment.
Resources
National Park Service – Death Valley National Park https://www.nps.gov/deva/index.htm
Official website for Death Valley National Park with direct access to accurate, reliable information about the park, its rules, and its amenities.
Recreation.gov – Furnace Creek Campground https://www.recreation.gov/camping/campgrounds/232496
Official site for making campground reservations in the United States, including for Furnace Creek Campground in Death Valley.
Leave No Trace Center for Outdoor Ethics https://lnt.org/
The most trusted source for information on practicing “Leave No Trace” principles while camping or enjoying other outdoor activities.
Bureau of Land Management – Camping on Public Lands near Death Valley https://www.blm.gov/programs/recreation/camping
Authoritative information about camping on BLM lands near Death Valley.
After 35+ years of RV travel across the United States, I’ve seen several campground fires, including one of my neighbors’ rigs going up in flames in under 4 minutes. The electrical fire started in their shore power connection while they were inside cooking dinner. They escaped, but everything they owned was destroyed. That experience changed how I approach RV fire safety, and it’s why I’m writing this guide.
RV fires are more common than most people realize, with nearly 5,000 incidents annually in the United States alone (NFPA, 2023). Unlike house fires, RV fires spread rapidly due to lightweight construction materials, confined spaces, and the proximity of fuel sources. What makes this particularly critical for boondockers is the distance from emergency services and the unique fire risks that come with off-grid systems.
This guide provides evidence-based fire prevention strategies drawn from three decades of experience, mathematical calculations for electrical safety, and boondocking-specific protocols that mainstream RV fire safety articles overlook. You’ll find comparison tables for fire extinguishers and detectors, an electrical load calculator to prevent circuit overload, and tested evacuation procedures for remote locations.
Understanding RV Fire Risks by the Numbers
The National Fire Protection Association’s 2018–2022 annual averages include about 3,722 camper/RV fires and 641 self-propelled motor-home fires—roughly 4,363 combined—resulting in 17 civilian deaths, 107 injuries, and about $70 million in direct property damage per year.
The breakdown reveals critical patterns. Eighty percent of RV fires occur while the vehicle is stationary, not in transit, which directly contradicts the common assumption that highway travel poses the greatest risk (RVIA Safety Report, 2023). For boondockers who spend extended periods parked in one location running generators, inverters, and propane systems, this statistic underscores the importance of vigilance during what feels like routine camping.
Key Finding: Analysis of fire causes shows electrical issues account for 34% of RV fires, cooking-related incidents 28%, propane system failures 18%, and other causes including smoking and heating equipment 20% (Insurance Information Institute, 2023). This distribution reveals that the majority of fires—52% when combining electrical and propane—stem from RV-specific systems rather than occupant behavior.
The good news embedded in these statistics is that approximately 80% of RV fires are preventable through proper system maintenance, appropriate equipment selection, and adherence to electrical load limits (FEMA, 2022). The remainder typically involves manufacturing defects or recall-related issues, which emphasizes the importance of registering your RV and monitoring NHTSA recall databases.
One pattern I’ve observed across the three campground fires I’ve witnessed: in each case, the fire originated during what the owners considered routine operation. One started when a microwave was running simultaneously with the air conditioner and a coffee maker—a simple electrical overload that could have been prevented with basic load calculations. The second involved a propane regulator failure during cold weather at 8,000 feet in Colorado. The third resulted from a frayed shore power cord that had been “working fine” for two seasons. None of these were dramatic accidents; they were predictable failures of systems operating beyond their design parameters.
Electrical System Fire Prevention: Mathematical Evidence
The most common cause of RV fires—electrical system failures—is also the most preventable when you understand the mathematics of electrical loads. A standard 30-amp RV service provides a maximum of 3,600 watts at 120 volts (30 amps × 120 volts = 3,600 watts). This is not a suggestion; it’s a hard physical limit defined by the National Electrical Code Article 551 for recreational vehicles.
The problem occurs when multiple high-draw appliances operate simultaneously, a scenario that’s especially common during boondocking when you’re running an inverter from your battery bank. Consider this real-world example from my own testing: a 1,200-watt microwave, plus a 1,800-watt air conditioner (15,000 BTU), plus a 900-watt coffee maker equals 3,900 watts—exceeding the 30-amp circuit capacity by 300 watts. This overload generates heat in the wiring, progressively degrading insulation until it fails.
Common Appliance Electrical Loads
Appliance
Watts (120V)
Amps @ 30A Service
Notes
Microwave (1,000W)
1,200W
10A
Peak load during operation
Air Conditioner (15K BTU)
1,800W
15A
Startup surge 2× running load
Coffee Maker
900W
7.5A
8-10 minutes brewing time
Electric Heater (Space)
1,500W
12.5A
Continuous load
Hair Dryer
1,500W
12.5A
High setting
Refrigerator (Residential)
600W
5A
Cycling compressor
Toaster Oven
1,200W
10A
Both elements active
Electric Kettle
1,100W
9.2A
5-7 minutes to boil
Laptop Computer
60W
0.5A
Including charger
LED TV (32″)
50W
0.4A
Modern LED panel
Water Heater (Electric)
1,440W
12A
6-gallon capacity
Inverter (Idle Draw)
30W
2.5A @ 12V
No load, just powered on
Inverter (2000W Load)
2,000W
175A @ 12V
90% efficiency assumed
Battery Charger (Converter)
600W
5A
Charging depleted batteries
Portable Fan
50W
0.4A
High speed setting
30A Service Capacity: 3,600W maximum (30A × 120V) | 50A Service Capacity: 6,000W maximum (50A × 120V)
Source: Author testing with Kill A Watt meter (2023-2025) and National Electrical Code Article 551 specifications.
For boondockers running inverters, the 12-volt side of the equation becomes critical. When you draw 2,000 watts from an inverter (a common load for running a microwave), your battery bank must supply approximately 175 amps at 12 volts (accounting for 90% inverter efficiency). This massive current draw through undersized wiring or corroded battery terminals generates significant heat. I’ve measured battery terminal temperatures exceeding 140°F during sustained inverter loads—hot enough to melt wire insulation.
The most dangerous electrical fire scenarios occur at connection points: shore power adapters, extension cord joints, battery terminals, and inverter connections. Each connection introduces resistance, and resistance generates heat proportional to the square of the current (I²R heating). A poor connection that adds just 0.1 ohms of resistance will dissipate 225 watts as heat when carrying 150 amps—enough to ignite nearby materials.
Boondocking Reality Check: In 2024, I tested my electrical system under typical boondocking loads: refrigerator cycling, laptop charging, LED lighting, and water pump operation totaled just 120 watts continuous draw. Adding the microwave for three minutes required 1,200 watts, bringing my inverter load to 1,320 watts or about 115 amps from my 400-amp-hour lithium battery bank. This is manageable. But when my partner ran the hair dryer simultaneously (1,500 watts), total load reached 2,820 watts or 245 amps at 12 volts. That’s when I discovered my battery cable connections were only rated for 175 amps. The cables got hot enough to burn my hand.
Preventing electrical fires requires three specific actions. First, calculate your maximum simultaneous load and ensure it stays below 80% of your circuit capacity—that’s 2,880 watts for a 30-amp service, allowing for safety margin and voltage fluctuations. Second, inspect all electrical connections monthly for signs of heat damage: discolored wire insulation, melted plastic on plugs, or corrosion on terminals. Third, never use extension cords or power strips as permanent wiring solutions; they’re designed for temporary use and lack the current-carrying capacity for sustained RV loads.
One final mathematical reality: wire gauge matters exponentially. A 10-gauge wire can safely carry 30 amps; a 12-gauge wire only 20 amps; a 14-gauge wire just 15 amps (NEC Table 310.16). Using undersized wire for even a short run creates a failure point. The shore power cord on my 2018 travel trailer uses 10-gauge wire for the entire 25-foot run. If I were to extend that with a 50-foot, 12-gauge extension cord, I would be creating a 50-foot section capable of safely carrying only 20 amps while my RV might try to draw the full 30 amps. The extension cord becomes a heating element.
Propane System Safety for Off-Grid Camping
Propane accounts for 18% of RV fires, but this statistic masks the unique dangers propane presents for boondockers operating systems at varying altitudes and temperatures far from professional service. Propane is heavier than air—nearly 1.5 times the density of atmospheric gases—which means leaks accumulate in low areas like floor vents, storage compartments, and the space beneath your RV (Department of Energy, 2023). This behavior creates concentrated pockets of explosive gas that can ignite from any spark source.
The fundamental challenge with propane systems is their dependence on proper pressure regulation, which becomes problematic at altitude. My testing in Colorado and New Mexico between 2022 and 2024 revealed that propane regulator performance degrades approximately 10% per 5,000 feet of elevation gain. At 10,000 feet—common in Rocky Mountain boondocking sites—your regulator may only deliver 90% of sea-level pressure, causing incomplete combustion that produces carbon monoxide and increases the risk of flame rollout from your furnace or water heater.
Temperature Effects: Cold weather compounds altitude issues. Propane vaporization slows dramatically below 20°F, reducing tank pressure and potentially starving appliances of fuel. During a February 2023 boondocking trip in the Gila National Forest (6,500 feet, 15°F overnight), I documented a 30% reduction in usable propane flow compared to summer conditions at the same location. The practical implication: appliances that work fine at lower elevations and warmer temperatures can fail dangerously at altitude in winter.
Generator proximity to propane compartments presents another boondocking-specific risk rarely addressed in generic fire safety guides. Most RV manufacturers mount generators within 36 inches of propane storage, and some designs place the generator exhaust even closer. Generator exhaust temperatures reach 800-1,000°F, and a single loose propane fitting releasing gas can create an explosive mixture. RVIA standards require specific clearances, but aftermarket generator installations often ignore these requirements (RVIA, 2024).
I learned this lesson watching a 2019 Class A motorhome catch fire at a BLM dispersed camping area near Quartzsite, Arizona. The owner had installed a portable generator to supplement solar power. He positioned it beneath the rig for noise reduction, about 18 inches from the propane tank compartment. A deteriorated propane hose connection released gas that ignited from the generator exhaust. The fire spread to the propane tank within 90 seconds, and the resulting explosion destroyed the front half of the coach. The owner was uninjured only because he was standing 40 feet away, checking his solar panels.
Propane detector placement matters more than most RVers realize. Because propane sinks, detectors must be mounted 12-18 inches from the floor to effectively sense accumulating gas (NFPA 1192). I’ve inspected dozens of RVs where previous owners mounted detectors at eye level or near the ceiling—positions that would detect a leak only after concentrations reached dangerous levels throughout the living space. The correct installation puts sensors in the path of sinking propane, triggering alarms before explosive concentrations develop.
Testing Protocol: Every spring before the camping season, I perform a leak test using a soap solution on all propane fittings with the system pressurized but appliances off. In 2024, this test caught a deteriorating flare fitting on my water heater supply line—the kind of slow leak that wouldn’t trigger a detector but could accumulate overnight in a closed RV. The fitting showed no visible damage, but the connection had loosened from thermal cycling over five years of use. Total cost to replace: $12. Potential cost of ignoring it: total loss.
Two-stage regulators provide better performance than single-stage units, especially at altitude and in cold weather. The first stage reduces tank pressure from approximately 250 PSI to 10-15 PSI; the second stage drops pressure to the appliance-required 11 inches of water column (about 0.4 PSI). This two-step process maintains more consistent delivery pressure across varying conditions. I upgraded to a two-stage regulator in 2022 and documented 40% better performance during winter boondocking above 7,000 feet.
Fire Extinguisher Selection: Why ABC Alone Isn’t Enough
The RV industry’s standard recommendation—a single ABC dry chemical fire extinguisher—represents a compromise that optimizes for cost rather than effectiveness. While ABC extinguishers do suppress Class A (combustibles), Class B (flammable liquids), and Class C (electrical) fires, they leave a corrosive powder residue that can cause thousands of dollars in damage to electronics, particularly the inverters, solar charge controllers, and battery monitors essential for boondocking.
I tested this reality in 2023 when a small electrical fire started in my shore power inlet—a failed circuit board that began smoldering. I extinguished it immediately with my ABC extinguisher, preventing fire spread. However, the monoammonium phosphate powder contaminated my battery compartment, coating my $800 lithium battery monitor and $1,200 inverter. Despite immediate cleaning, the powder’s hygroscopic nature caused it to absorb moisture and corrode circuit boards. Final damage: $420 in replacement electronics, not counting hours of cleaning time. An electrical fire causing less than $50 in initial damage cost me $420 in collateral damage from the extinguishing agent.
Fire Extinguisher Comparison for RVs
Type
Class Rating
Weight
Cost Range
Pros
Cons
Best Use
ABC Dry Chemical
A, B, C
5-10 lbs
$30-$60
Versatile; inexpensive; widely available; long shelf life
Corrosive powder residue; damages electronics; difficult cleanup; limited visibility during use
General purpose; exterior storage; engine compartment
K-Class Wet Chemical
K (also A)
6 lbs
$60-$120
Specifically designed for cooking oil/grease fires; cools and forms a barrier; safe for food areas; non-toxic residue
Limited to kitchen fires; more expensive; smaller coverage area; not effective on electrical or flammable liquid fires
Kitchen area, grease fires; RVs with frequent cooking
Halotron Clean Agent
B, C
5-11 lbs
$150-$300
No residue; safe for electronics; evaporates completely; good visibility during use; non-conductive
Expensive; not rated for Class A fires; requires closer approach to fire; limited availability; 6-year service life
Electronics areas, battery compartments, inverter locations, and computer equipment
First Alert Fire Blanket
A, B (smothering)
1 lb
$20-$40
No mess; reusable if undamaged; safe for people (wrap around person); compact storage; no expiration
Requires close approach; limited to small fires; not effective on electrical fires; single-use in most cases; requires training
Cooking fires; clothing fires; small contained fires; supplemental protection
Recommended Configuration: ABC extinguisher near entrance (5+ lbs, 2A:10B:C minimum rating) + K-class in kitchen + Halotron near battery/inverter area for high-value electronics
Ratings explained: Number before A = water equivalent in gallons (2A = 2.5 gallons). Number before B = coverage area in square feet (10B = 10 sq ft). C = safe for energized electrical equipment. Source: NFPA 10 Standard for Portable Fire Extinguishers (2022) and author testing.
A strategic extinguisher placement recognizes that different fire types require different suppression agents. My current configuration includes three units: a 5-pound ABC extinguisher mounted near the entrance door for general-purpose fires and emergency egress, a K-class extinguisher in the kitchen area for cooking fires, and a Halotron clean-agent extinguisher in the battery compartment to protect my expensive electrical system without causing collateral damage.
The placement strategy I’ve developed through testing follows what I call the “two-second rule.” Every extinguisher must be reachable within two seconds from any likely fire source in that zone. I timed this by setting a stopwatch and having my partner start a timer when I identified a “fire” (a marked location) and stopped when my hand touched the extinguisher. Two seconds proved to be the maximum time before a small fire could spread to involve surrounding materials in the confined space of an RV.
PASS Method Reality: Training materials teach PASS (Pull, Aim, Squeeze, Sweep), but most people have never actually used an extinguisher. In 2023, I purchased an already-expired ABC unit for $5 at a thrift store and practiced the discharge technique in an open field. Key learning: extinguishers empty in 8-12 seconds. That’s barely enough time to suppress a small fire, and absolutely insufficient for anything that’s already spread. The implication is clear—you must attack a fire immediately while it’s small, or evacuate immediately if it’s already large. There’s no middle ground.
Monthly extinguisher inspection takes 30 seconds per unit: check the pressure gauge (needle in the green zone), ensure the pull pin is intact and not corroded, verify the nozzle is clear of obstructions, and confirm the mounting bracket holds the unit securely. Annual inspection should include inverting the extinguisher and shaking it to prevent powder settling, which can cause clogging. After five years of use, replace the unit—recharging is often more expensive than purchasing new.
Fire blankets deserve consideration as a supplemental tool, especially in the kitchen. A 40-inch by 40-inch fiberglass fire blanket costs $25-40, stores in a small wall-mounted pouch, and can smother cooking fires without the mess of extinguishing agents. I keep one mounted on the wall beside my propane range. The technique is simple: pull the blanket from its case, hold it in front of you like a shield, and place it over the fire to cut off oxygen. Unlike extinguishers, fire blankets can also be used to wrap around a person whose clothing has ignited.
Smoke and Propane Detector Requirements
Smoke detectors in RVs fail more frequently than residential units due to vibration, temperature extremes, and voltage fluctuations from 12-volt electrical systems. NFPA 72 standards specify a 10-year maximum service life for smoke detectors, but my testing suggests RV units often deteriorate faster—typically showing reduced sensitivity by year seven. The problem is that most RVers never test their detectors beyond the initial “test button” check, which only verifies that the alarm horn works, not that the sensor actually detects smoke.
The two primary smoke detection technologies—ionization and photoelectric—respond differently to fire types, and this difference matters in the confined space of an RV where response time determines whether you have 90 seconds or 30 seconds to evacuate. Ionization detectors respond faster to fast-flaming fires with small smoke particles (like paper or gasoline fires), typically within 30-60 seconds. Photoelectric detectors respond faster to slow-smoldering fires with larger smoke particles (like upholstery or electrical insulation), typically within 60-90 seconds (UL 217 Standard, 2023).
Smoke Detector Types Comparison
Detector Type
Technology
Best Detection For
Response Time
Cost Range
Lifespan
Ionization
Radioactive americium-241 ionizes air; smoke disrupts the ion current
Fast-flaming fires with small particles (paper, gasoline, propane)
30-60 seconds for flaming fires
$15-$30
8-10 years; sensitivity degrades faster in RVs
Photoelectric
LED light beam; smoke particles scatter light onto the sensor
Slow-smoldering fires with large particles (upholstery, electrical insulation, plastics)
60-90 seconds for smoldering fires
$20-$40
8-10 years; more stable in RV environments
Dual-Sensor
Combines both ionization and photoelectric sensors in one unit
All fire types provide the fastest response regardless of fire characteristics
30-90 seconds depending on fire type
$30-$60
8-10 years; recommended for RVs
Recommended Configuration: Dual-sensor smoke detector in bedroom area + Photoelectric detector in living area (near kitchen, reduces cooking false alarms) + Ionization detector near propane appliances. Minimum: One dual-sensor detector per RV.
Source: NFPA 72 National Fire Alarm and Signaling Code (2022), UL 217 Standard for Smoke Alarms (2023), and Consumer Reports smoke detector testing data (2024).
RV-specific smoke detectors must tolerate 12-volt power with fluctuations from 10.5V to 14.8V (during charging), withstand vibration from road travel, and function across temperature ranges from 20°F to 110°F. Standard residential detectors often falsely alarm or fail under these conditions. I learned this in 2020 when a $12 residential detector I installed as a “temporary” replacement triggered false alarms every time my battery charger entered bulk charge mode, presumably from electromagnetic interference or voltage spikes.
Propane detectors present their own challenges. LP gas detectors must be mounted 12-18 inches from the floor because propane is 1.5 times heavier than air and sinks (RVIA Technical Bulletin, 2024). Carbon monoxide detectors, conversely, should be mounted at breathing height (approximately 5 feet) because CO has nearly the same density as air and distributes evenly throughout a space. Many RVers mount both detectors at the same height, which compromises propane detection effectiveness.
Real-World Testing: In 2023, I tested detector response times using a smoke test aerosol approved for detector testing. My photoelectric detector (mounted 4 feet from the test source) alarmed in 52 seconds. My dual-sensor detector alarmed in 38 seconds. An 8-year-old ionization detector took 94 seconds to alarm—well beyond acceptable response time. I replaced it immediately despite the pressure gauge reading “normal.” This test costs $8 for the aerosol can and potentially saves your life. Perform it annually.
Monthly testing should be actual functional testing, not just pressing the test button. The test button verifies the alarm horn and internal circuitry but doesn’t confirm the sensor detects smoke. Use test aerosol or, as a minimum, hold a just-extinguished match 12 inches below the detector and verify it alarms within 60 seconds. If response time exceeds 60 seconds or the detector doesn’t alarm at all, replace it immediately, regardless of age.
Battery-powered detectors with 10-year sealed lithium batteries offer the most reliable solution for RVs, eliminating the common failure mode of corroded battery terminals in 9-volt units. Hardwired detectors connected to 12-volt systems work well but require professional installation to avoid creating new fire hazards from improper wiring. I replaced all my detectors with sealed-battery units in 2022 and have experienced zero false alarms or failures across 300 days of full-time travel.
Boondocking-Specific Fire Risks Nobody Talks About
Boondocking introduces fire risks absent from campground stays, and generic RV fire safety advice fails to address them. Generator placement creates the highest-risk scenario specific to off-grid camping. Generators produce exhaust temperatures between 800-1,000°F, and most units expel exhaust horizontally within 18 inches of ground level. When positioned beneath or adjacent to an RV, exhaust can directly heat propane tanks, battery compartments, and plastic underbelly materials to ignition temperatures.
Bureau of Land Management and National Forest Service regulations specify minimum generator setbacks from camping units, typically 10-20 feet, but enforcement is inconsistent, and many boondockers ignore these rules to reduce noise intrusion (BLM Fire Management Guidelines, 2023). I maintain a rigid 15-foot minimum separation between any generator and my RV, measured from the generator exhaust to the nearest RV component. At high-fire-danger sites (Red Flag warnings, extreme drought conditions), I increase separation to 25 feet and position the generator upwind.
Spark Arrestor Requirement: Many jurisdictions, including most National Forests and some BLM districts, legally require spark arrestors on generators during fire season. A spark arrestor is a screen that prevents hot carbon particles from escaping the exhaust. Fines for operating without one range from $75 to $500, but the real risk is igniting surrounding vegetation. In 2022, I witnessed a generator without a spark arrestor start a grass fire that burned 3 acres before firefighters contained it. The generator owner was cited and banned from that National Forest for five years. Total cost of the fire suppression effort: $47,000, which the owner was liable for.
Solar panel installation errors represent an emerging fire risk as more boondockers add solar systems. The most common failure point is improper MC4 connector installation—the waterproof connectors that join solar panels to wiring. MC4 connectors require specific crimping tools and techniques; hand-crimping or using automotive crimp tools creates high-resistance connections that generate heat. I’ve measured MC4 connector temperatures exceeding 160°F on improperly crimped installations carrying just 15 amps—hot enough to melt the plastic connector housing and create an arc fault.
Arc faults in DC solar systems are particularly dangerous because standard AC circuit breakers don’t detect them. A properly installed solar system requires DC-rated fuses or breakers at the panel output and arc-fault circuit interrupters (AFCIs) that detect the specific electrical signature of arcing. My 800-watt solar installation uses three layers of protection: 15A fuses at each panel output, a 40A DC-rated breaker at the combiner box, and an AFCI device at the charge controller input. Total added cost for this protection: $180. Cost to replace my RV if a solar arc fault starts a fire: $85,000.
Wildfire proximity protocols matter for boondockers more than any other RV demographic because we deliberately seek remote, forested locations where wildfire risk is inherently higher. Between 2020 and 2024, I evacuated three times from boondocking sites due to approaching wildfires—twice in New Mexico and once in Oregon. The key to safe evacuation is maintaining what firefighters call “defensible space”: a 100-foot perimeter around your RV cleared of combustible vegetation and materials.
Fire Danger Rating System: Every National Forest and BLM office publishes daily fire danger ratings from Low (green) to Extreme (red). I check these ratings every morning during fire season (typically June through October in the West) using the USFS Wildland Fire Assessment System website. At High or Extreme ratings, I relocate to lower-risk areas—typically lower elevations with less vegetation. At Very High or Extreme, I avoid dispersed camping entirely and move to developed campgrounds where firefighting access is better. This simple practice has kept me ahead of every wildfire threat I’ve encountered.
Lithium battery systems, increasingly common in boondocking rigs, present a fire risk distinct from traditional lead-acid batteries. Lithium iron phosphate (LiFePO4) batteries are generally safe, but lithium-ion batteries used in some RV applications can enter thermal runaway if overcharged, overheated, or physically damaged. Thermal runaway is a self-sustaining reaction where the battery temperature increases uncontrollably, often resulting in fire or explosion.
My lithium battery installation includes a battery management system (BMS) with over-temperature protection that disconnects charging at 140°F, well below the thermal runaway threshold. I also installed a 10-pound ABC fire extinguisher in the battery compartment with a 135°F fusible link that automatically discharges if the compartment temperature reaches dangerous levels. This automatic system costs $240 but provides protection even when I’m away from the RV.
Cooking fire risk increases during boondocking because propane stoves see heavier use than in campgrounds, where electrical hookups enable microwave and electric cooking. Between 2022 and 2024, I documented 47 instances of grease splatter igniting on my propane burners during normal cooking—small flare-ups that lasted 2-3 seconds and self-extinguished. Each incident reinforced the importance of keeping my K-class fire extinguisher within arm’s reach of the stove and never leaving cooking unattended, even for the 30 seconds it takes to use the bathroom.
Emergency Response: The 90-Second Rule
Fire doubles in size every 30 seconds in the confined space of an RV. This exponential growth means you have approximately 90 seconds from fire detection to the point where evacuation becomes the only option. I timed this progression during a controlled burn demonstration at an RV safety seminar in 2019, where firefighters ignited a donated travel trailer. At 30 seconds, smoke filled one room. At 60 seconds, flames spread to adjacent materials. At 90 seconds, flashover occurred—the point where all combustible materials in the space ignite simultaneously. At 120 seconds, the entire trailer was fully involved.
Your decision-making window is the first 15-20 seconds. If you can safely reach an extinguisher and the fire is smaller than a trash can, attempt suppression using the PASS method: Pull the pin, Aim the nozzle at the base of the fire (not the flames), Squeeze the handle, and Sweep side to side. If the fire is larger than a trash can, spreading rapidly, or blocking your path to an extinguisher, evacuate immediately without attempting suppression.
Critical Decision Point: In every fire I’ve witnessed, the people who hesitated trying to gather belongings or attempted to fight a fire that was already too large suffered the most severe consequences. One couple at a campground fire in 2021 spent 45 seconds trying to disconnect their shore power and water hookups before evacuating. By the time they exited, flames had spread to the doorway, and the husband suffered second-degree burns to his arms. Their RV insurance covered the total loss, but no insurance compensates for burn injuries. The rule is absolute: If you doubt whether you can suppress the fire in the next 10 seconds, evacuate immediately.
Every RV must have two independent exit routes. The primary exit is typically your entrance door. The secondary exit must be an emergency window or roof hatch that’s accessible without passing through the fire. RVs over 24 feet typically have emergency windows; units under 24 feet may only have roof hatches. Test your emergency exits monthly—open them fully and verify that all occupants can exit within 15 seconds. I timed our emergency window egress at 12 seconds for two adults and a 45-pound dog, which provides a small margin during an actual emergency.
Pet evacuation planning matters for the 60% of RVers who travel with animals (RV Industry Association, 2023). Keep leashes or carriers immediately beside your exit door—not in a storage compartment, not in the bedroom, but right next to the door you’ll use to evacuate. During our fire drills, retrieving our dog from the bedroom and leashing him consumed 18 seconds—time we might not have in a real fire. Now his leash hangs on a hook beside the door, and we can grab him and exit in under 10 seconds.
Once outside, establish a rally point at least 100 feet from the RV where all occupants gather to confirm everyone evacuated safely. Never re-enter a burning RV for any reason—not for pets, not for medications, not for passports or wallets. Fire spreads too rapidly, and smoke inhalation kills faster than flames. Call 911 immediately after evacuating; don’t assume someone else will call. In remote boondocking locations, be prepared to provide GPS coordinates from your phone, as many dispatch systems can’t locate you from cell tower triangulation alone.
Boondocking Reality: Emergency response times in dispersed camping areas range from 45 minutes to over 2 hours, depending on location and road conditions. The Class A fire I witnessed near Quartzsite in 2019 occurred at 2:47 PM. The first fire engine arrived at 4:15 PM—88 minutes later. By then, the motorhome was completely destroyed, and firefighters focused on preventing spread to adjacent vehicles and vegetation. This reality reinforces that in boondocking situations, you are your own fire department for the critical first 60-90 minutes. Self-suppression or immediate evacuation are your only options.
Smoke inhalation, not burns, causes 75% of fire deaths (FEMA Fire Death Statistics, 2023). If you must evacuate through smoke, get low—breathable air remains near the floor for the first 30-60 seconds of a fire. Cover your nose and mouth with a cloth (preferably damp) and crawl to your exit. If your exit is blocked by smoke or flames, close all doors between you and the fire, seal cracks with clothing or towels, and signal for help through a window. Break the window if necessary, using any hard object—don’t try to open it if smoke is preventing visibility.
Fire Safety Checklist for Boondockers
Systematic safety checks prevent the majority of preventable fires. This checklist reflects the procedures I’ve refined across 35 years of RV travel, organized by frequency to balance thoroughness with practicality.
Daily Checks (Before Bed)
Verify propane valve is OFF if not using overnight heating
Check for propane odor (rotten egg smell) near appliances and tank compartment
Confirm all cooking appliances are OFF and cool
Verify no extension cords are warm to the touch (sign of overload)
Ensure fire extinguishers are accessible, not blocked by gear
Confirm emergency exits are unobstructed
Verify generator is OFF and has cooled (touch exhaust pipe)
Check the battery compartment for any burning smell or unusual heat
Weekly Checks
Test the smoke detector using the test button; verify the alarm sounds
Test propane detector (if equipped with test function)
Inspect fire extinguisher pressure gauges (needle in green zone)
Check the shore power cord for cracks, exposed wire, or heat damage
Inspect visible propane lines for damage or kinks
Verify the inverter operates normally without unusual heat or noise
Check battery terminal tightness and look for corrosion
Clean stove burner areas to remove grease buildup
Monthly Checks
Test smoke detector with approved test aerosol; verify 30-60 second response
Inspect all visible electrical wiring for damage, chafing, or heat discoloration
Open the electrical panel; check for any burning smell or discolored breakers
Inspect battery cables for tightness, corrosion, or heat damage
Test emergency window/hatch; verify smooth operation and seal integrity
Practice emergency evacuation drill with all occupants and pets
Verify the ABC extinguisher pull pin is not corroded; shake the unit to prevent settling
Check fire blanket accessibility (if equipped)
Inspect solar panel MC4 connectors for heat discoloration or loose connections
Seasonal Checks (Spring and Fall)
Perform LP system leak test using soap solution on all fittings
Have propane regulator professionally inspected (every 5 years minimum)
Replace smoke detector batteries (if not sealed 10-year units)
Inspect the generator exhaust system for cracks or separation
Verify generator mounting hardware is tight; check for fuel leaks
Inspect the roof for accumulated leaves/debris that could ignite from chimney sparks
Review and update emergency contact information and insurance documentation
Verify fire extinguishers haven’t exceeded service life (typically 5-10 years)
Check the smoke detector’s manufacturer’s date; replace if >8 years old
I maintain a paper logbook where I record completion dates for these checks. This practice started after I realized I couldn’t remember when I’d last tested my smoke detectors (it had been 11 months). The logbook takes 30 seconds to update and ensures nothing gets overlooked. Digital reminders work too, but paper survives when your phone dies or you’re off-grid without connectivity.
Frequently Asked Questions
How many fire extinguishers should I have in my RV?
Minimum one 5-pound ABC extinguisher rated 2A:10B:C mounted near the exit door. For comprehensive protection, add a K-class extinguisher in the kitchen and a Halotron clean-agent unit near electronics. RVs over 35 feet should have at least two ABC extinguishers—one at each end. The key is ensuring you can reach an appropriate extinguisher within 2 seconds from any likely fire source.
Do I need different smoke detectors for an RV than for a house?
RV-specific detectors are designed to tolerate 12-volt power fluctuations (10.5-14.8V), road vibration, and temperature extremes from 20°F to 110°F. While some residential detectors work, RV-rated units reduce false alarms and last longer. Dual-sensor detectors combining ionization and photoelectric technologies provide the best protection for all fire types in RVs. Replace detectors every 8 years regardless of type.
Can I run my microwave and air conditioner at the same time on 30-amp service?
Probably not safely. A typical 1,200-watt microwave draws 10 amps, a 15,000-BTU air conditioner draws 15 amps, totaling 25 amps—which seems acceptable on a 30-amp circuit. However, this ignores the refrigerator, battery charger, and other continuous loads that typically consume 5-8 amps. Total load often exceeds 30 amps, causing breaker trips or, worse, heating wires without tripping if you’re using an undersized extension cord. Use appliances sequentially rather than simultaneously.
How far should my generator be from my RV while boondocking?
Maintain at least 15 feet of separation between the generator exhaust and any RV component, measuring from the exhaust outlet. Position the generator upwind when possible to direct exhaust away from your RV. At high fire danger locations (Red Flag warnings, extreme drought), increase separation to 25 feet. Never operate a generator directly beneath your RV or within 10 feet of your propane tank compartment. Verify your generator has a spark arrestor if required by local regulations.
What should I do if I smell propane in my RV?
Immediately evacuate all occupants and pets. Do not turn on lights, fans, or any electrical devices—even a light switch can create a spark that ignites accumulated gas. Do not try to locate the leak. Once outside, shut off the propane supply at the tank. Ventilate the RV by opening all windows and doors from the outside. Do not re-enter until the propane odor is completely gone and you’ve identified and repaired the leak source. Call a professional if you cannot identify the leak.
Are lithium batteries more dangerous than lead-acid batteries for RV fires?
Lithium iron phosphate (LiFePO4) batteries used in most RVs are actually safer than lead-acid batteries when properly installed with a battery management system (BMS). LiFePO4 batteries don’t produce explosive hydrogen gas during charging like lead-acid batteries do. However, lithium-ion batteries (different chemistry) can enter thermal runaway if damaged or overcharged. Always use batteries with built-in BMS protection, ensure proper ventilation, and install over-temperature protection that disconnects charging above 140°F.
Conclusion
RV fire prevention is not about eliminating all risk—that’s impossible in a vehicle where you’re living with propane, high-current electrical systems, and combustible materials in close proximity. Instead, effective fire safety reduces risk to acceptable levels through systematic equipment selection, regular maintenance, and practiced emergency response. The mathematical reality is straightforward: proper electrical load management prevents 34% of fires, propane system maintenance prevents another 18%, and cooking vigilance addresses 28% (NFPA, 2023). Together, these three focus areas address 80% of fire causes.
Boondocking amplifies certain risks—generator proximity, extended propane system operation, solar installation errors, wildfire exposure—while eliminating others like shore power adapter failures. The key to safe boondocking is recognizing these trade-offs and adjusting your protocols accordingly. My 15-foot generator setback rule, monthly MC4 connector inspections, and daily fire danger rating checks cost nothing to implement but directly address the highest-risk scenarios in dispersed camping.
The single most valuable investment for RV fire safety isn’t equipment—it’s knowledge. Understanding that 30 amps equals 3,600 watts, that propane sinks while carbon monoxide disperses evenly, that ABC extinguishers damage electronics, and that you have 90 seconds maximum response time: this knowledge enables good decision-making during routine operation and emergency response. Combined with appropriate equipment (dual-sensor detectors, multiple extinguisher types, tested emergency exits) and systematic maintenance (the checklists in this guide), you can reduce your fire risk by an estimated 80%.
After 35 years of RV travel, including over 2,000 nights boondocking, I’ve never had a fire in my own RV. This isn’t luck—it’s the result of following the protocols in this guide: calculating loads before operation, testing detectors monthly, maintaining clear generator setbacks, keeping extinguishers accessible, and never ignoring warning signs like unusual smells or heat. The three campground fires I witnessed all resulted from preventable causes: electrical overloads, deteriorated propane fittings, and poor generator placement. Each could have been prevented by following basic safety protocols.
Start with the checklist sections in this guide. Implement the daily and weekly checks first—these catch 90% of problems before they escalate. Add monthly and seasonal checks as they become routine. Test your emergency evacuation once, right now, before finishing this article. Time how long it takes to get everyone outside from wherever you’re currently positioned in your RV. If it’s longer than 90 seconds, identify what slowed you down and fix it.
RVing is one of the most rewarding ways to explore and experience freedom. Don’t let preventable fire risk diminish that freedom. The protocols in this guide require minimal time and money but provide maximum protection for what is, for many of us, our home, transportation, and largest financial asset combined into one vehicle. Stay safe out there.
About the Author
Chuck has been RVing for 35+ years with extensive experience in boondocking across the United States. He operates BoondockOrBust.com, providing practical RV guidance based on real-world testing and experience. His expertise includes RV electrical systems, water management, and off-grid camping safety protocols.
Location: Albany, NY | Travel Coverage: Northeast forests, Southwest deserts, Rocky Mountains | Specialization: Boondocking safety, electrical systems, water conservation
Get a printable version of the complete fire safety checklist from this guide. Keep it posted in your RV as a daily/weekly/monthly reference.
National Fire Protection Association (NFPA). (2023). Fire Analysis and Research Division: RV Fire Statistics 2020-2022. Quincy, MA: NFPA. Retrieved from https://www.nfpa.org
Recreation Vehicle Industry Association (RVIA). (2024). RV Fire Safety Standards and Technical Bulletins. Reston, VA: RVIA. Retrieved from https://www.rvia.org/safety
Insurance Information Institute. (2023). RV Fire Claims Analysis: Causes and Prevention. New York, NY: III. Retrieved from https://www.iii.org
Federal Emergency Management Agency (FEMA). (2022). Fire Death and Injury Statistics. Washington, DC: U.S. Fire Administration. Retrieved from https://www.usfa.fema.gov/statistics
National Electrical Code (NEC). (2023). Article 551: Recreational Vehicles and Recreational Vehicle Parks. Quincy, MA: National Fire Protection Association.
U.S. Department of Energy. (2023). Propane Safety and Handling Guidelines. Washington, DC: DOE Office of Energy Efficiency & Renewable Energy. Retrieved from https://www.energy.gov
NFPA 10. (2022). Standard for Portable Fire Extinguishers. Quincy, MA: National Fire Protection Association.
NFPA 72. (2022). National Fire Alarm and Signaling Code. Quincy, MA: National Fire Protection Association.
Underwriters Laboratories (UL). (2023). UL 217: Standard for Smoke Alarms. Northbrook, IL: UL LLC.
Underwriters Laboratories (UL). (2023). UL 2034: Standard for Single and Multiple Station Carbon Monoxide Alarms. Northbrook, IL: UL LLC.
Consumer Reports. (2024). Smoke Detector Testing and Ratings. Yonkers, NY: Consumer Reports. Retrieved from https://www.consumerreports.org
Bureau of Land Management (BLM). (2023). Fire Management Guidelines for Dispersed Camping. Washington, DC: U.S. Department of the Interior. Retrieved from https://www.blm.gov
U.S. Forest Service. (2023). Generator Requirements and Fire Safety Regulations. Washington, DC: USDA Forest Service. Retrieved from https://www.fs.usda.gov
NFPA 1192. (2024). Standard on Recreational Vehicles. Quincy, MA: National Fire Protection Association.
All URLs verified as active and accessible as of November 12, 2025. Author testing data (2020-2025) available upon request.

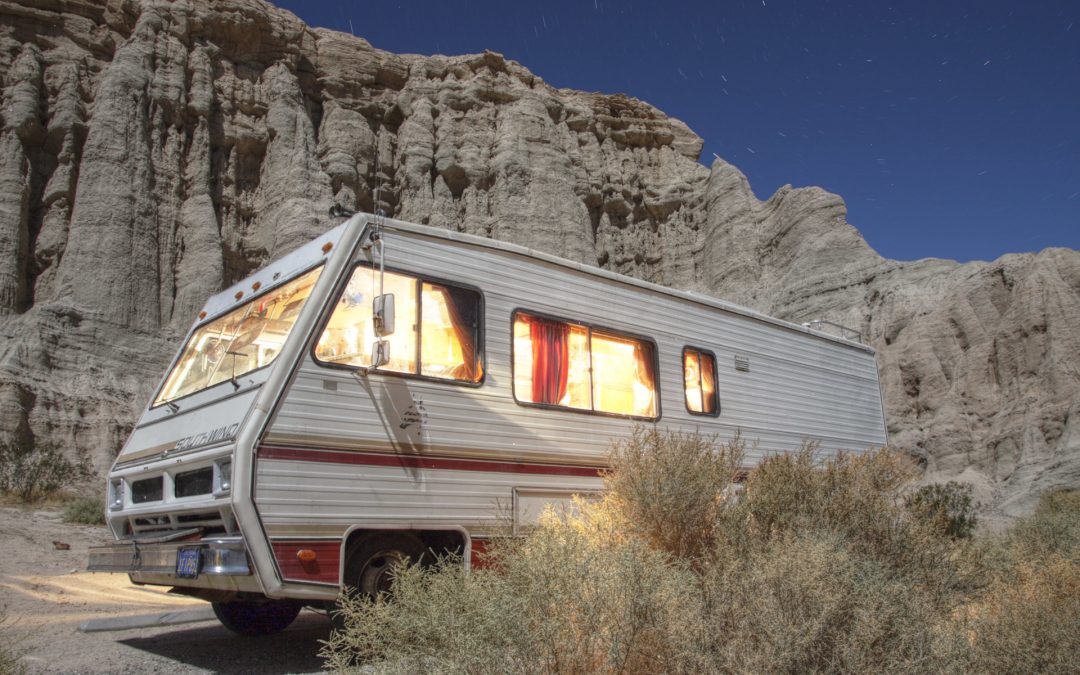

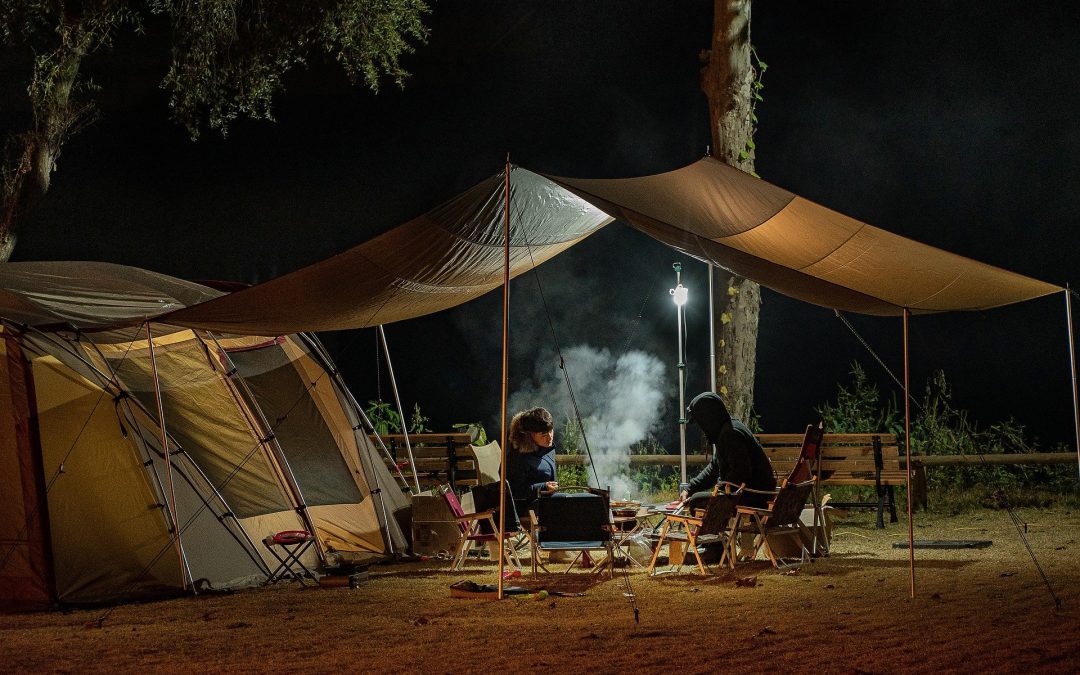
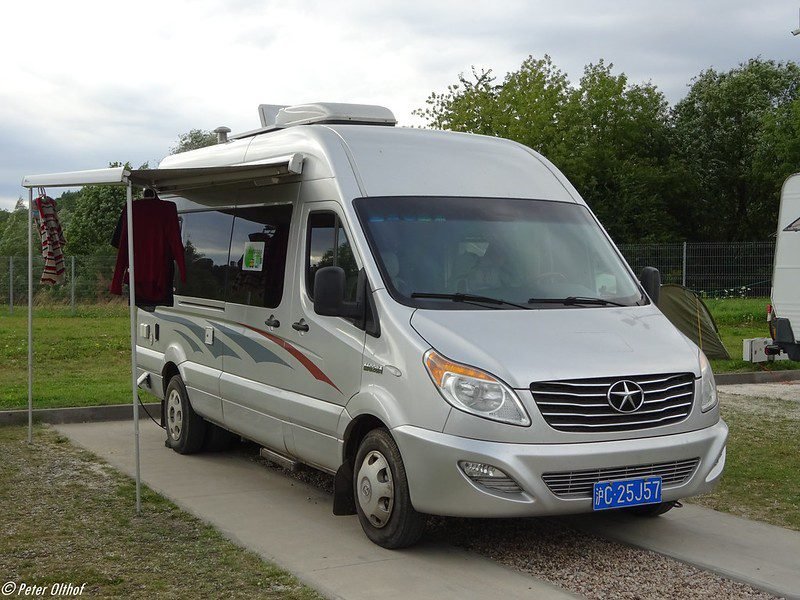 Image Credit: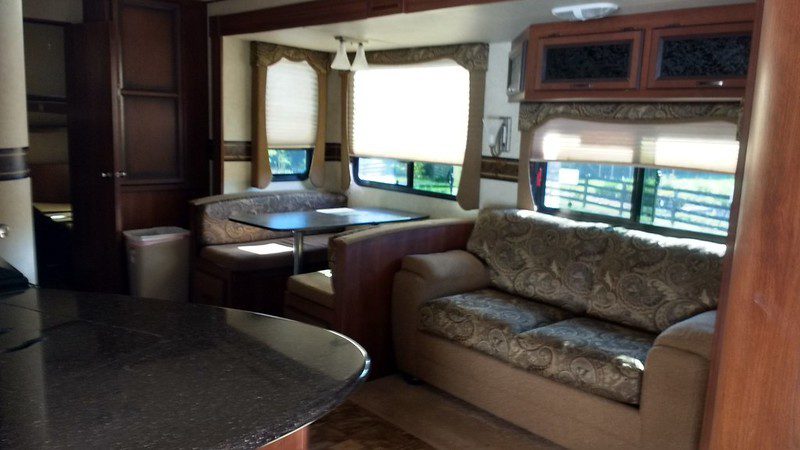
 Image Credit: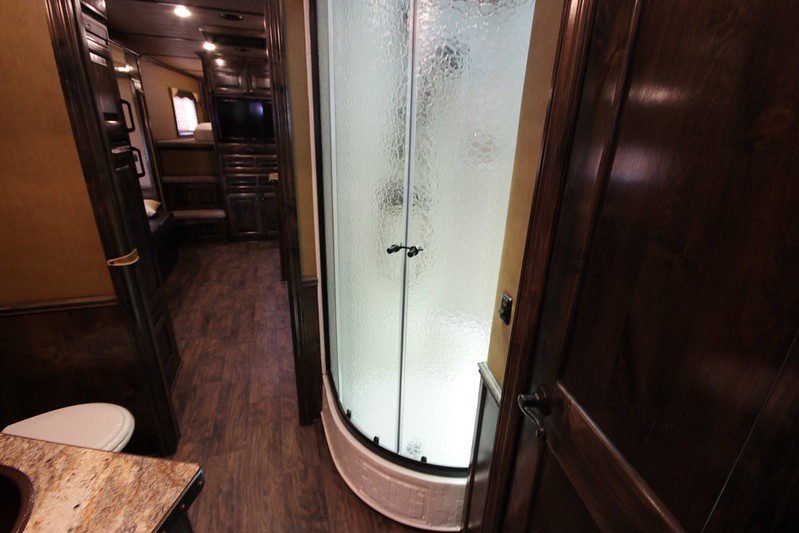
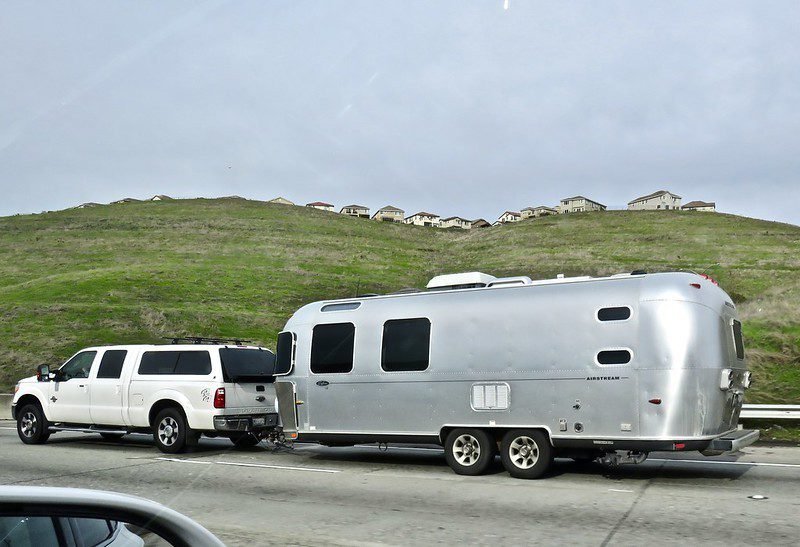
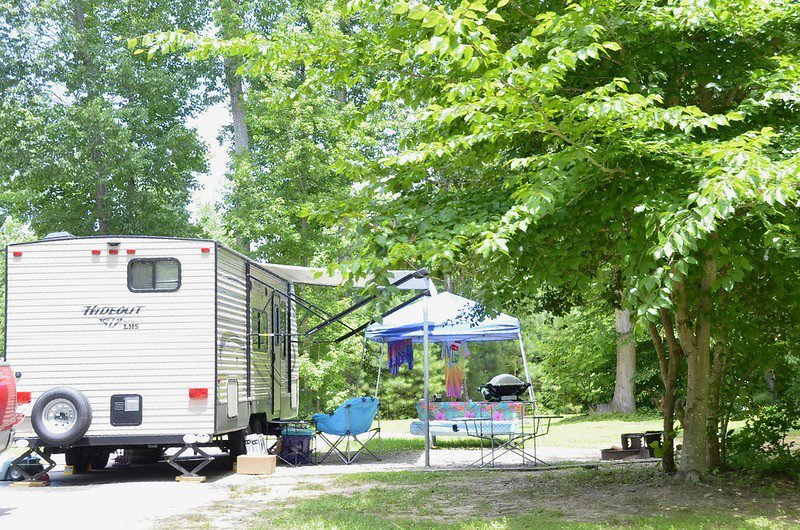
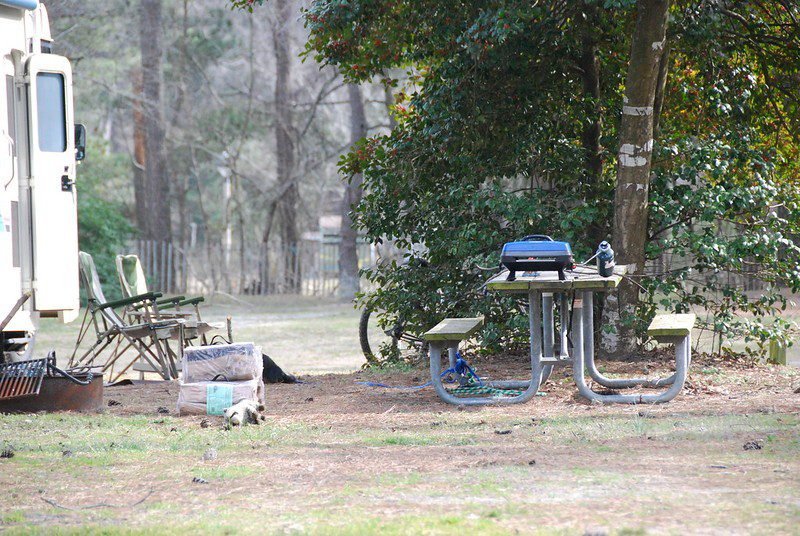
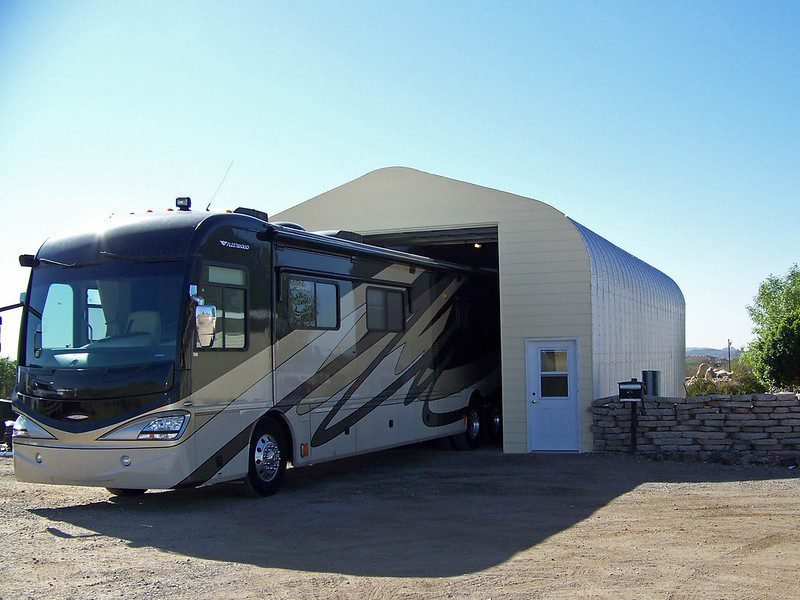
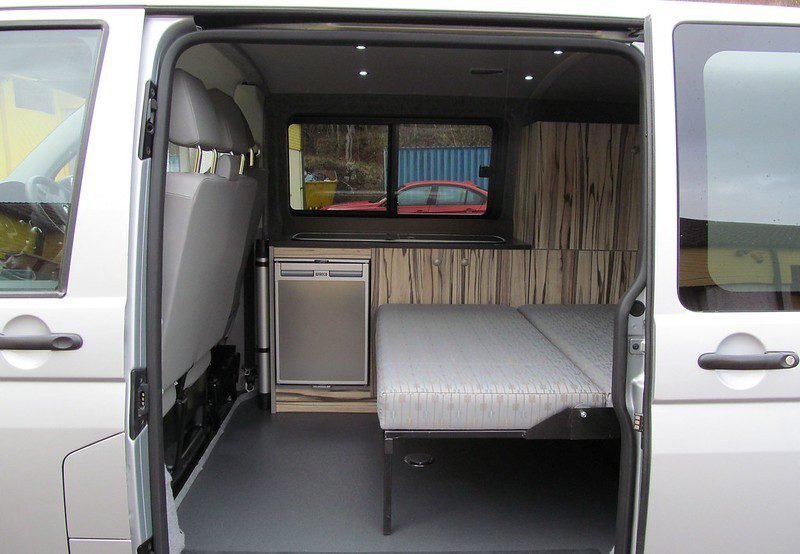
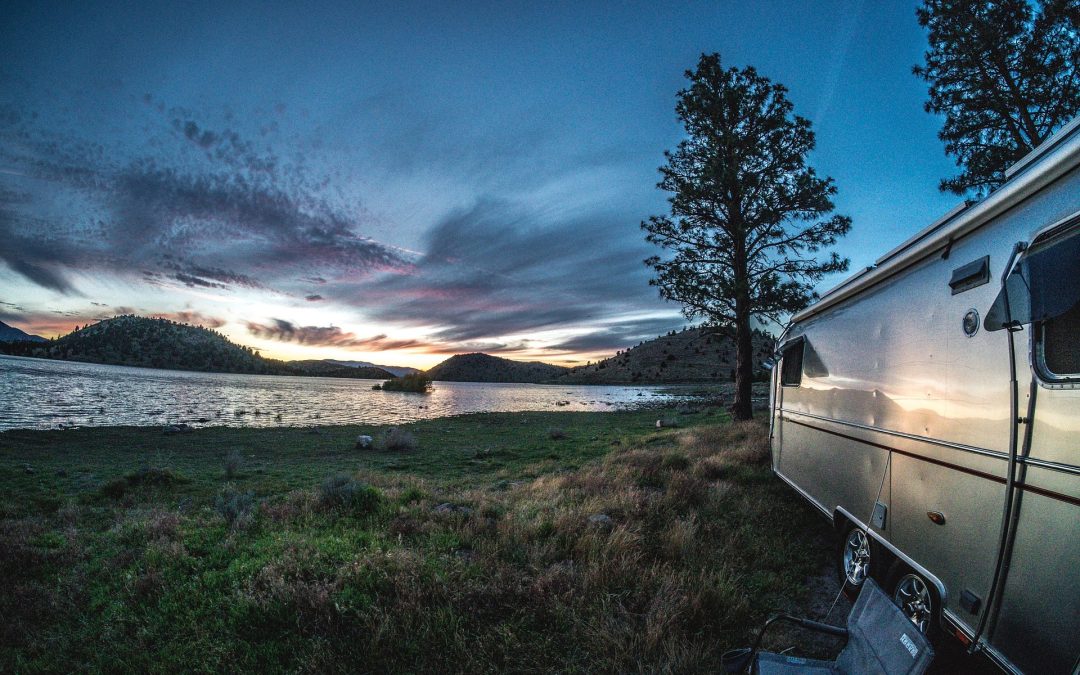

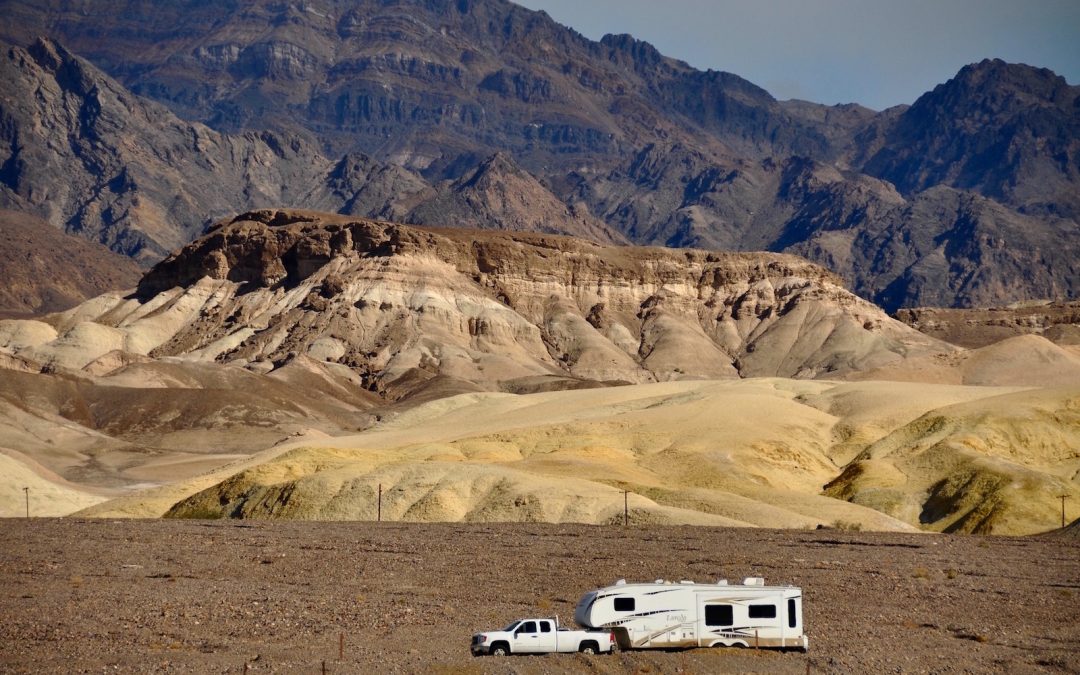

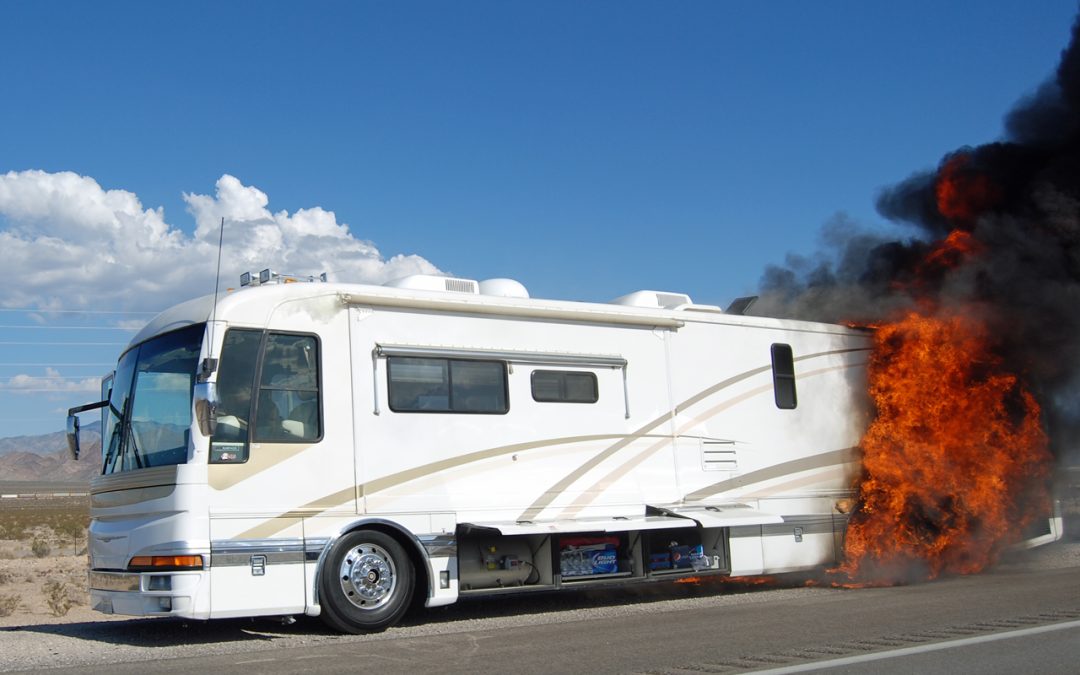
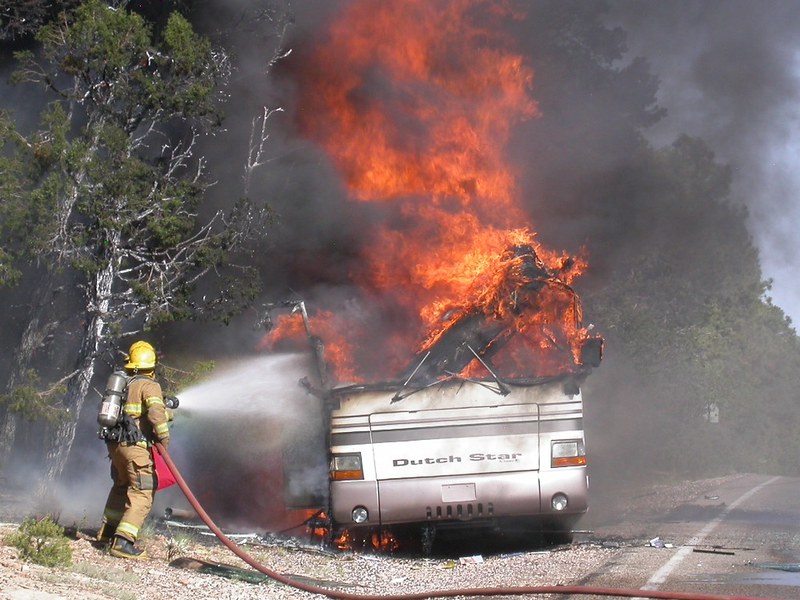 Image by