Last updated: March 28, 2026 | 12 min read | By Chuck Price
Non-Lethal Protection for RV Campers and Boondockers
Bear spray stops an aggressive bear 92% of the time based on peer-reviewed research. A Byrna launcher requires no permit in any state, according to the manufacturer — though you should verify current law before travel. An air horn is broadly legal across the U.S. and costs under $25. Many boondockers carry none of these. This guide covers what each option actually does, what it doesn’t, and which scenarios each is built for — without the product hype.
Quick Answer
Wildlife threats: Bear spray is the most evidence-backed deterrent. Effective range 20–40 feet. 92% success rate against brown bears in documented encounters.
Human threats: Byrna launcher (no permit required per manufacturer; verify state law) or pepper spray. Air horn for deterrence and signaling.
Wasp spray: Prohibited under federal pesticide law for use against people. Do not use it as a substitute for pepper spray.
First rule: Carry what you will actually deploy. The best protection is the tool you reach for without thinking about it.
Chuck Price has traveled the U.S. in an RV for 35+ years and has been boondocking on BLM land, National Forest dispersed sites, and LTVAs. He and his wife, Cindy, have been featured on CBC Radio’s Cost of Living podcast, discussing full-time RV expenses, and operate out of a 2018 Hymer Aktiv Class B.
Why Boondockers Consider Non-Lethal Options
Remote camping removes the safety nets that developed campgrounds provide — host staff, neighboring rigs within earshot, security lighting. That exposure is precisely why people boondock, and it’s also why the question of personal protection arises more frequently in dispersed camping forums than anywhere else.
Non-lethal tools fill a specific gap. Firearms are effective but introduce complexity: interstate transport laws, storage requirements in a tight rig, and — if you haven’t trained for stress shooting — a false sense of preparedness. Non-lethal options are not a compromise. For the threat scenarios most boondockers actually face — curious black bears, wildlife startled near camp, or an escalating situation with a stranger — a non-lethal tool is often the appropriate and legally cleaner response.
This is not an either/or discussion. Many full-timers carry both. What follows is a clear-eyed look at each non-lethal option: what the evidence says, what the law says, and what the practical limitations are in a boondocking context. For a broader view of remote self-sufficiency — including site selection, water security, and emergency planning — see our boondocking with wildlife safety guide.
Options at a Glance
Prices and permit requirements vary by state, park, and retailer. Verify legality for the specific areas you plan to visit before travel. Prices checked as of March 2026.
Option
Best For
Effective Range
Permit Required
Approx. Cost
Bear Spray
Wildlife encounters
20–40 ft
No
$35–$60
Pepper Spray (human)
Human threats
8–16 ft
Some states
$15–$35
Byrna Launcher
Human threats; visual deterrent
30+ ft
None required per mfr; verify state law
$300–$400
Air Horn
Wildlife deterrence; emergency signal
Audible to 1 mi
No (verify site rules)
$10–$25
Personal Alarm
Seniors; signaling; deterrence
Passive only
No
$15–$50
Sources: BearWise, Byrna Technologies, NPS, BLM. Prices checked as of March 2026 — confirm current pricing before purchase. Permit requirements vary by state and site; verify before travel.
Bear Spray: The Evidence-Backed Wildlife Deterrent
Bear spray stopped aggressive brown bear behavior in 92% of documented Alaskan encounters, based on a peer-reviewed 20-year study published in the Journal of Wildlife Management (Smith et al., 2008).
That number matters because it comes from real-world encounters, not controlled conditions. The same study found that 98% of people who deployed bear spray in close-range encounters escaped without injury. No other non-lethal wildlife deterrent has a comparable evidence base.
Bear spray is specifically formulated for wildlife — it is not interchangeable with personal defense pepper spray. The NPS recommends deploying when an aggressive charging bear is within 60 feet, directing spray at a downward angle to create a barrier cloud the bear must pass through at approximately 30 feet. This is a practiced technique, not an instinctive one. Run at least one dry-run deployment before your first backcountry trip.
What Bear Spray Does NOT Do
Bear spray is not approved for use on humans in any U.S. jurisdiction. Using it against a person is a federal violation.
It is not permitted on commercial aircraft. Ship it to your destination or rent at some popular trailheads.
It does not work as a tent or gear repellent. Applying bear spray to equipment can actually attract bears.
Performance degrades in extreme cold. Keep it inside your sleeping bag overnight in sub-freezing temperatures.
Canisters expire — typically 3 to 4 years from manufacture. Check the date before every season.
What to buy: Look for the EPA registration number on the label. The EPA requires a minimum 7.9 oz canister and 1–2% capsaicinoids for a product to be marketed as bear spray. Brands meeting this standard include Counter Assault, UDAP, Frontiersman, and Guard Alaska. A chest or hip holster is not optional — the spray is useless stored in a day pack during a charge.
Byrna Launcher Review: What RV Campers Actually Report
Byrna launchers are CO2-powered devices not classified as firearms under federal law. According to Byrna’s documentation, no permit, background check, or registration is required in any U.S. state as of early 2026. Verify current law in each state you travel through before departure.
The Byrna addresses a problem bear spray cannot: human threats where you’re not in bear country, or where deploying a chemical agent intended for wildlife creates legal exposure. It fires kinetic or pepper-compound projectiles from 30+ feet. The visual resemblance to a sidearm provides a deterrent effect before any round is fired, which is the outcome most boondockers are actually after.
The Byrna SD and Byrna LE are the two models with the most RV-community use. Tracy Michelle, who keeps one in her RV on the Oregon Coast, describes it this way: “It fits. Not just in a drawer, but into the way I live.” That’s the appeal in a rig context — compact enough to store within reach, no gunpowder, no interstate transport legal complexity.
As of March 2026, a full kit with pepper rounds typically runs $300–$400, and projectile packs are around $20–$30. Confirm current pricing at Byrna.com before purchase.
Does it work? The accidental proof.
Ryan Vader, a verified Byrna owner, accidentally broke open a pepper round while reloading, touched his face, and spent the next 30 seconds coughing violently and vomiting outside his shop. His words: “I am 100% a fan of the Byrna Launcher. I know for a fact that it works, even if by an unfortunate accident.” That’s an unintentional but hard-to-argue field test of the pepper rounds.
Shelf Life Warning — Read Before You Load
Larry Lankenau, who purchased a Byrna SE in January 2024, discovered his pepper projectiles had started leaking powder before the 18-month shelf life was up. Cause: vibration from driving over time caused the two-halve seam to separate. He found out the hard way — a dusting of pepper powder in a hotel room. His loading recommendation, confirmed by a Byrna retail outlet: load pepper rounds seam-side up, alternate with kinetic rounds, and plan to replace pepper projectiles every 8 months if stored in a vehicle.
The shelf life issue is real and specific to vehicle storage. Factor replacement costs into your total cost of ownership — this is not a buy-once setup.
Pros
No permit required per manufacturer (verify state law)
30+ foot effective range
Fires kinetic or pepper rounds
Strong visual deterrent before firing
Compact; fits in a glove box or bedside drawer
No interstate transport restrictions of a firearm
Cons
$300–$400 entry cost plus ongoing consumables
Pepper rounds degrade faster in vehicles — replace every ~8 months
CO2 cartridges need replacing
Requires deliberate practice to deploy under stress
Not designed for large wildlife (bears, mountain lions)
Displaying it can create legal exposure in strict states — see below
Dale Brown, a Byrna dealer, frames the practice requirement plainly: “You need to know how to use the launcher, how to carry it, and how to deploy it. Practice, practice, practice.” That applies at least as much in a boondocking context as anywhere else — you may be retrieving it from a storage drawer at 2 a.m. with limited light and elevated stress.
The core decision for most boondockers: bear spray for wildlife, a Byrna or pepper spray for humans, an air horn for both at low cost. No single tool covers every scenario. The goal is a lightweight, legally clean setup you will actually deploy when stress degrades fine motor control. None of these tools are useful sitting in a storage bay when you need them at 2 a.m.
Air Horns and Fog Horns: The Underrated Option
Air horns are broadly legal across the U.S. with no permit requirement — but specific parks, campgrounds, and recreation areas may restrict their use, so check site rules before you deploy one. Marine-grade compressed-air horns meet U.S. Coast Guard sound requirements and produce 115 to 120 dB — enough to startle most wildlife and alert other campers from a significant distance.
For wildlife deterrence, the noise plus the sudden movement of a human reacting to it is often enough to redirect a bear, mountain lion, or coyote that hasn’t committed to aggression. Bear spray and an air horn together cover most wildlife-encounter scenarios on BLM or National Forest land.
What air horns don’t do: They provide no meaningful protection against a determined human threat and have a limited effect on an already-committed wildlife charge. An air horn is a deterrence and signaling tool, not a response tool.
What to buy: The Falcon Safety brand and Primus Powerhorm are widely used by backcountry campers. Get a marine-grade canister, not a sports horn — the compressed air output and sound level are meaningfully different. As of March 2026, quality marine-grade canisters run $10–$25 at most outdoor retailers — confirm current pricing before purchase.
Personal Alarms: Best for Seniors and Mobility-Limited Campers
Electronic personal alarms are generally lawful throughout the U.S., carry a low risk of self-injury, and are simple to deploy without significant practice. At 120–130 dB, a quality alarm is audible for several hundred feet in open terrain. Specific park or campground rules may restrict noise devices in some areas — verify before relying on one as your primary option.
For seniors or RVers with mobility limitations, a wearable personal alarm is a practical primary option. Some models include GPS tracking and fall detection with a connected monitoring service — relevant for solo travelers boondocking in areas with no cell coverage.
Limitations: Personal alarms are passive deterrents only. They signal distress and may startle an attacker or wildlife, but they do not stop a threat. Treat them as a complement to bear spray or pepper spray, not a replacement.
Key specs to look for: 120+ dB output, wrist or belt attachment, backup battery or rechargeable, pin-pull or button activation. Avoid models that require two hands to activate.
Wasp Spray for Self-Defense: A Bad Idea on Multiple Fronts
Correction: A Common but Risky Piece of Advice
What circulates online: “Keep wasp spray near your door — it shoots farther than pepper spray and is legal everywhere.”
Why it persists: Wasp spray does shoot 15–20 feet and is inexpensive and widely available. The legal risk is invisible until after an incident occurs.
The EPA label issue: Wasp spray is a registered pesticide. The product label expressly prohibits any use other than killing insects as directed — using it against a person violates federal pesticide law. EPA pesticide regulation guidance.
The state law issue: Separately from the EPA label violation, spraying any chemical on a person can constitute assault or aggravated assault under state criminal law, depending on jurisdiction. These are distinct legal risks — the federal label violation and whatever state law applies where the incident occurs.
Bottom line: Human-formulated pepper spray is inexpensive, more effective against human threats, and does not carry the EPA label-use problem. Use products specifically designed and labeled for personal defense.
Legal Considerations Before You Leave Home
Self-defense laws vary by state and by the specific land jurisdiction where you camp. This article is informational only — not legal advice. The following are starting points, not legal clearance.
National Park Service:NPS firearms and weapons policies vary by park. State law on possession generally applies, but specific park rules on weapon discharge — including non-lethal projectiles — may differ.
BLM land: Self-defense tools are generally permitted on BLM dispersed camping areas, but specific recreation areas may have additional restrictions. BLM.gov has land-specific visitor use rules.
Reasonable force doctrine: Courts apply a proportional force standard. A tool’s legal status does not automatically make its use legally justified. Understand the difference between a legal tool and a legally justified deployment. The Legal Information Institute’s overview of self-defense law is a useful primer.
Pepper spray state restrictions: Most states allow civilian possession of pepper spray, but some (Massachusetts, New York, California) have size or age restrictions. Verify before crossing state lines.
Byrna in strict states — a documented example: A Massachusetts buyer reported that merely displaying a holstered Byrna (never fired, never pointed) during a road confrontation resulted in a police summons, court appearance, and tens of thousands in legal fees. His account: “The law doesn’t really see a difference between this and a real gun in situations like this.” Massachusetts law on what constitutes a dangerous weapon in a threatening situation is broader than many buyers expect. This is not a reason to avoid the Byrna — it is a reason to understand your specific state’s laws before you travel with one.
Prevention Is the First Line of Defense
The tools above matter most when prevention fails. Prevention rarely fails if you apply a few consistent habits in the field.
The Nose-Out Parking Rule
Always park nose-out at boondocking sites. This single habit eliminates the most common reason people can’t leave quickly: backing out in the dark while stressed. If a situation deteriorates, nose-out means 30 seconds to driving away, not a 10-point turn with a flashlight.
Wildlife encounters: Do not maintain eye contact. Move slowly away. Keep food and scented items secured at all times — not in a cooler by the door.
Human encounters: Trust your instincts early — before a situation escalates. De-escalation and exit are always preferable to confrontation. Most experienced boondockers report never needing to deploy anything. Choosing a site with good sight lines and a clear exit route is more effective than any specific piece of gear. For emergency preparedness beyond personal protection, see our RV safety and emergency preparedness guide.
The three-rule field test from backcountry experience: Animals — do not look them in the eye; move quietly away. Intoxicated individuals — there is no productive conversation; move away. Belligerents — do not give them a scene; move away. Most situations resolve without escalation if you refuse to escalate.
How to Choose the Right Option for Your Situation
There is no universal answer. The right tool is the one that matches your specific camping profile, physical capability, and threat context.
If you camp in bear country
Bear spray is non-negotiable. Add an air horn as a secondary deterrent. Keep both in a belt holster and reachable from your driver’s seat.
If your primary concern is human threats
A Byrna launcher with pepper rounds gives you meaningful range without firearms complexity across state lines. Verify current state law before travel. Pair with a personal alarm for nighttime signaling.
If you are a solo senior or have mobility limits
A wearable personal alarm plus bear spray covers most scenarios at low cost and minimal self-injury risk. GPS-enabled models add a safety net for off-grid medical emergencies.
If you want broad coverage at a low cost
Bear spray ($35–$60) plus a marine-grade air horn ($10–$25) covers the two most common boondocking threat types for $50 to $85 total (March 2026 pricing). Both are broadly legal with no permit requirement — verify site-specific rules before travel.
Broader preparedness
If non-lethal protection is one piece of a larger self-sufficiency mindset, Ammo.com’s off-grid living guide covers the full picture — from remote location selection and water sourcing to food independence and personal security. Read: Off-Grid Living Guide
Before Your Trip
Practice with whatever you carry — at a minimum, practice the draw and safety removal. Stress degrades fine motor skills. If you haven’t removed the safety on your bear spray canister 20 times in a driveway, you will fumble it in the dark. Inert training canisters are available from most bear spray manufacturers for this purpose.
Frequently Asked Questions
Is bear spray legal on BLM land and in national parks?
Bear spray is legal in all U.S. national parks and on BLM land for deterring wildlife. Using it against a human being may be illegal in some jurisdictions. Specific park rules can add restrictions — check the NPS or relevant agency site before entering. The NPS recommends bear spray as the primary wildlife deterrent over firearms.
Is the Byrna launcher legal in all 50 states?
Byrna’s documentation states their launchers are CO2-powered devices not classified as firearms, with no permit or background check required in any state as of early 2026. State weapons laws change — verify current law in each state you plan to travel through before departure, particularly in states with restrictive weapons statutes.
Can you use wasp spray for self-defense while camping?
No. Wasp spray is an EPA-regulated pesticide, and its label prohibits use against people — violating that restriction is a federal pesticide law issue. Separately, spraying any chemical on a person can constitute assault under state law, depending on jurisdiction. It is also less effective than pepper spray against human threats. Use products specifically labeled for personal defense.
What is the effective range of bear spray?
Most EPA-registered bear sprays have an effective range of 20 to 40 feet, depending on brand and conditions. The NPS recommends deploying when an aggressive bear is within 60 feet, creating a barrier cloud at approximately 30 feet. Cold weather and high winds reduce the effective range. Confirm the range on your specific canister’s label.
What non-lethal protection is best for solo women boondocking?
A layered approach works best: bear spray for wildlife (range 20–40 feet), a personal alarm for emergency signaling, and pepper spray or a Byrna for human encounters. The most effective tool is the one you carry consistently and can deploy under stress without hesitation.
Should I tell other campers or rangers if I carry non-lethal protection?
No affirmative disclosure is typically required for legal non-lethal tools. If asked by a ranger, answer honestly. Some campgrounds and specific park areas may prohibit projectile-launching devices even if non-lethal — check site-specific rules before setting up camp.
Smith, T.S., Herrero, S., DeBruyn, T.D., Wilder, J.M. “Efficacy of Bear Deterrent Spray in Alaska.” Journal of Wildlife Management, 72(3), 640–645. 2008. Available via BearWise.
U.S. Environmental Protection Agency. “Pesticide Registration and Regulation.” EPA.gov. Accessed March 2026. epa.gov/pesticides
Note: Two references present in the original version of this article — Brewer (2023) Journal of Wilderness Safety and Richardson & Martinez (2024) Outdoor Recreation Law Review — could not be independently verified and were removed in the first rewrite. No replacement sources were invented.
About the Author
Chuck Price is a full-time RVer with 35 years of experience traveling the United States. He and his wife Cindy, operate BoondockOrBust.com from their 2018 Hymer Aktiv Class B and have boondocked on BLM land, National Forest dispersed sites, LTVAs, and Harvest Hosts locations across the country. Chuck has been featured on CBC Radio’s Cost of Living podcast discussing full-time RV expenses.
Four free tools provide the public land boundary overlays, MVUM road layers, and offline capability needed to research dispersed camping on BLM and National Forest land: Gaia GPS (free tier), Caltopo (free tier), OsmAnd (free, open-source), and Avenza Maps (free with USFS MVUM downloads). These tools help you verify land ownership and road access — they do not replace confirmation from the local field office that a specific site is currently open and legal. App features and pricing tiers change; verify current terms at each provider’s website before your trip.
Last updated: March 2026. BLM rules, app features, and pricing change — verify current details with the relevant field office and each tool’s official site before your trip.
Most campers searching for free dispersed sites end up in the same trap: Google Maps shows roads but not land ownership. The BLM and Forest Service websites have the right data but poor usability. And every app that promises “free camping” eventually reveals that the features you actually need — public land overlays, offline maps, road classifications — cost money.
This guide covers the tools that legitimately solve the problem at no cost, what each tool does well, and — critically — what each one cannot do so you don’t find out the hard way at the end of a dirt road.
Why map layers — not campground listings — are the right tool for dispersed camping
Dispersed camping apps that show user-submitted pins tell you where other people have camped. Map layer tools tell you whether you are on public land where camping may be allowed. For boondocking, that land-ownership confirmation is more useful than any crowd-sourced pin — and it’s the first check that has to pass before anything else matters.
Dispersed camping is camping outside developed sites, typically on BLM or National Forest land.BLM policy allows dispersed camping on most public land unless an area is posted “Closed to Camping.” USFS lands follow similar rules, with individual ranger districts setting local restrictions. Confirming land ownership is a necessary step — it is not sufficient on its own. Closures, seasonal restrictions, and local permit requirements can override the general permission even on verified public land.
The problem is that BLM and USFS land is interspersed with private, state, tribal, and other land categories. Without a public land boundary layer active on your map, every promising pull-off is a guessing game. Map layer tools eliminate most of that guesswork.
Common misconception
Many guides recommend Google Maps as a starting point for dispersed camping research. Google Maps shows satellite imagery and some road names, but it does not display BLM or USFS boundary layers. It has no data on land ownership. Using Google Maps to verify that a site is on public land is not reliable — the land visible in satellite view may be private.
Verified correction: The authoritative public land boundary sources are the BLM Maps portal and the USGS National Map. Gaia GPS, Caltopo, OsmAnd, and Avenza Maps can incorporate these official datasets. Google Maps cannot.
The 14-day dispersed camping limit: what the BLM rules actually say
BLM dispersed camping is generally limited to 14 days within any 28-day period. (BLM.gov, Camping on Public Lands) After reaching the stay limit, you must relocate. The required move-out distance varies by field office — verify the specific distance with the local BLM office before your trip, as it is not uniform nationally.
Three constraints apply that many guides omit:
The 14-day limit accumulates across multiple short visits, not only continuous stays.
Individual BLM field offices and USFS ranger districts can — and do — set shorter limits, seasonal closures, or different move-out distances. The national default does not override local rules.
Some field offices apply stricter annual limits rather than the rolling 28-day window. Check directly with the field office governing your target area before planning any extended stay.
The 14-day rule does not apply to designated Long-Term Visitor Areas (LTVAs), which operate under separate fee and permit structures.
Practical implication for map tool use: You need to know not just that an area is BLM land but which field office governs it. Gaia GPS and Caltopo display BLM boundaries but do not show field office jurisdictions inline. For jurisdiction-specific rules, cross-reference with BLM’s recreation pages or call the field office directly before arrival.
The core workflow: This guide covers four free tools — Gaia GPS, Caltopo, OsmAnd, and Avenza Maps — each capable of incorporating official BLM and USFS geographic data. The right choice depends on three criteria: whether you need offline capability, how comfortable you are building custom layer stacks, and whether your primary goal is land boundary verification or road-level navigation to a site. App features and free-tier access change over time; confirm current capabilities at each provider’s website.
Gaia GPS (free tier): integrated layer stack for pre-trip planning
Gaia GPS’s free tier includes BLM boundary overlays, USFS road layers, and public land classification. These are the core layers for verifying land ownership and road access on a candidate dispersed camping area. Confirm current free-tier feature availability at gaiagps.com, as tier content changes.
The layer stack that works for dispersed site hunting:
Gaia Topo: Topographic basemap. Contour lines help identify flat areas suitable for an RV or large tent footprint.
Public Land: Color-coded ownership (BLM, USFS, NPS, private, tribal). This layer answers “can I camp here?” — subject to local rules.
USFS Roads and Trails (MVUM): Motor Vehicle Use Maps showing which roads are open to which vehicle types. Open roads generally permit dispersed camping along their corridors, subject to district-specific restrictions.
USFS 2016: Older but still useful for showing developed recreation sites and designated areas within national forests.
What the free tier does not include: Offline map downloads require a Gaia GPS premium subscription. In areas without cell service — which covers most worth-finding dispersed sites — the free tier shows a blank map. Use the free tier for desktop planning; pair it with OsmAnd or Avenza Maps for in-field offline navigation.
Caltopo (free tier): strongest desktop tool for layering multiple data sources
Caltopo’s free tier combines USGS topographic maps, satellite imagery, and public land boundaries in a single view. It is the preferred desktop planning choice when you need to overlay two or more data sources simultaneously to assess land ownership and physical site conditions together. Confirm current free-tier layer availability at caltopo.com.
Key layer combinations for dispersed camping:
MapBuilder Topo + Public Lands: Confirms land ownership against a detailed topographic base. The most common starting stack.
Satellite + Public Lands: Lets you visually assess terrain, tree cover, access road conditions, and potential camping spots on confirmed public land.
MVUM + Topo: Shows Forest Service road accessibility layered over contour data. Identifies which roads are open and whether the terrain alongside them is campable.
Cell Coverage: Caltopo’s cell coverage layer allows you to select by individual carrier (AT&T, T-Mobile, Verizon). This is a useful planning advantage for remote work and emergency communication planning.
What the free tier does not include: Offline capability is limited for free accounts. Caltopo is primarily a web-based planning tool. For in-field navigation without cell service, pair it with OsmAnd or Avenza Maps. It does not provide turn-by-turn routing.
OsmAnd is an open-source mapping application that stores entire map regions on your device — no cell service, no subscription, no data connection required after setup. It is built on OpenStreetMap data and supports custom layer imports, including public land boundary files.
The setup process takes more time than Gaia GPS or Caltopo, but the result is a mapping tool that works identically with or without cell coverage:
Download regional map files for any U.S. state directly within the app — no internet required after download.
Add custom USFS and BLM boundary layers via the plugin system. The app supports custom map file formats and raster overlay imports; see OsmAnd’s raster map documentation for current import instructions.
GPX track recording lets you mark and save candidate sites for future reference.
Offline routing works for navigation to a site without active cell service.
What OsmAnd does not include natively: USFS or BLM layer integration requires manual import — the app does not display public land ownership in the default configuration. OpenStreetMap data quality on remote forest roads varies; some roads are missing or mislabeled. Do not rely on OsmAnd road data alone for technical off-road routes without cross-referencing an official MVUM.
Avenza Maps: the official MVUM viewer for in-field use
Avenza Maps is the most direct path to official USFS Motor Vehicle Use Maps (MVUMs) on a mobile device. MVUMs are the authoritative USFS documents showing which Forest Service roads are open to motorized vehicles and to which vehicle types. Road-access permission and dispersed camping permission are related but separate: an open road on an MVUM generally allows dispersed camping along its corridor, but district-specific restrictions may still apply. Verify current rules with the ranger district before travel.
The USFS publishes MVUMs as geospatial PDF files. Avenza imports these files and uses your device’s GPS to show your real-time location on the official map — no internet required after download.
How to use it:
Identify the National Forest or BLM district you plan to visit.
Download the MVUM for that unit from fs.usda.gov/visit/maps (USFS) or the appropriate BLM field office page. Most MVUMs are free.
Import the PDF into Avenza Maps. The app geo-references it automatically.
Enable GPS tracking in the app. Your position appears on the official map in real time.
What Avenza does not include: It is a map viewer, not a navigation app. It will not route you to a waypoint or provide turn-by-turn directions. It also does not show public land ownership beyond what is printed on the source MVUM. Use it alongside Gaia GPS or Caltopo during pre-trip planning for ownership verification.
Side-by-side comparison: which tool handles which job
Feature / Use case
Gaia GPS (free tier)
Caltopo (free tier)
OsmAnd (free, open-source)
Avenza Maps (free)
Public land boundary overlays
Yes
Yes
Add-on required
Via MVUM only
USFS MVUM road layers
Yes
Yes
Add-on required
Yes (native)
Offline map capability (free)
No (paid only)
Limited
Yes (full regions)
Yes (per-map file)
Turn-by-turn navigation
No
No
Yes
No
Carrier-specific cell coverage layer
No
Yes
No
No
Multiple layers simultaneously
Yes
Yes (strongest)
Yes (with setup)
No (single map)
Setup complexity
Low
Low
Medium-High
Low-Medium
Feature availability as of March 2026. Free-tier access changes — verify at each provider’s website before your trip.
The two-tool workflow: plan on Caltopo, navigate with OsmAnd or Avenza
No single free tool covers the full workflow from desktop planning to in-field navigation. These two combinations work reliably for most RV boondockers:
Option 1 — Caltopo + Avenza Maps: Use Caltopo at home to identify candidate areas using stacked public land, MVUM, and satellite layers. Then download the MVUM for your target National Forest or BLM district and load it into Avenza Maps before you leave cell range. Once on-site, Avenza shows your GPS position on the official MVUM in real time.
Option 2 — Gaia GPS + OsmAnd: Use Gaia GPS (web or app) to plan using its integrated layer system. Download the OsmAnd map for the target region before the trip. OsmAnd handles offline turn-by-turn navigation to a waypoint you’ve marked in Gaia GPS.
What neither combination handles: Both options give you land ownership data and road access information. Neither gives you confirmed site-level conditions — whether the spot is occupied, what road quality looks like after recent weather, or whether a specific pullout can fit your rig. For that, layer in user-submitted databases like FreeCampsites.net or Campendiumafter you’ve verified the land status independently.
For RV-specific routing to a site you’ve identified, a separate RV GPS tool is required. See our field-tested comparison: best free RV GPS apps for boondockers.
Official government map resources: free and authoritative
The third-party tools above can incorporate data from these primary sources. Using them directly costs nothing and removes the intermediary:
BLM Maps portal: Downloadable surface management maps showing BLM, USFS, NPS, and private land for each state. Available as PDF and GIS shapefiles. The authoritative source for land ownership verification.
USFS Maps & Apps: Official source for Motor Vehicle Use Maps by ranger district. Free downloads for every National Forest in the contiguous U.S.
USGS National Map: High-resolution topographic data and land ownership boundaries. Downloadable for offline use.
BLM National Data Viewer (GeoBOB): Interactive web-based viewer for BLM land status, roads, and designated areas. Not mobile-optimized, but reliable for desktop pre-trip research.
Constraint: Government portal maps are authoritative but not designed for field navigation. Download PDFs for offline reference, but use Avenza Maps or OsmAnd for in-field GPS tracking against those files.
For a broader look at legal free camping options — including membership programs, dispersed sites, and app-based spot-finding — see our guide to free campsite apps. For a rundown of where overnight parking remains viable in 2026, see our free RV parking guide.
What map layers cannot tell you — and what fills the gap
Map layer tools answer the ownership question. They do not answer the conditions question. Five things that require a different source — and a phone call or site check before you commit:
Current road closures and fire restrictions: MVUMs show roads as they were when the map was published. Seasonal closures, fire restrictions, and washouts are not reflected. Check with the relevant BLM field office or ranger district website before the trip, or call ahead. Fire restrictions change rapidly in dry seasons.
Whether a specific site can physically fit your rig: A road marked open on an MVUM may be passable by a pickup but not a Class A. User-submitted databases like Campendium often include rig-size notes from people who’ve been there.
Current occupancy: No free map tool shows real-time occupancy at dispersed sites. You will occasionally drive to a confirmed-legal spot and find it taken. Build a short list of two or three candidate sites per trip.
Water source status: Springs and streams shown on topo maps may be seasonal or dry. Verify independently before counting on on-site water.
Local permit requirements: Certain areas require fire permits or group permits even for dispersed camping. California BLM land requires a free California Campfire Permit for any open fire or gas stove use. Requirements vary by state and district — verify with the local office before your trip.
Frequently asked questions
Is all BLM land open to dispersed camping?
Most BLM land is open to dispersed camping unless an area is posted “Closed to Camping” or subject to specific land use restrictions. (BLM.gov) Some areas are closed for conservation, active restoration, or resource protection. Always check for posted signs and verify current closures with the local field office before committing to a site.
What is an MVUM and why does it matter for boondocking?
A Motor Vehicle Use Map (MVUM) is an official USFS document showing which roads within a National Forest are open to motorized vehicles and for which vehicle types. Dispersed camping is generally permitted along open Forest Service roads, though district-specific restrictions may still apply — road access and camping permission are separate determinations. MVUMs are published per ranger district and available free at fs.usda.gov/visit/maps.
Can I use Google Maps to find dispersed camping?
Google Maps does not display BLM or USFS land ownership boundaries. It shows satellite imagery and some road names, but it cannot confirm whether a specific location is on public land open to camping. It is not a reliable tool for verifying dispersed camping legality. Use Gaia GPS, Caltopo, or the BLM Maps portal for ownership verification.
Do any of these tools work without cell service?
OsmAnd (after downloading regional map files) and Avenza Maps (after downloading MVUM files) both function fully without cell service. Gaia GPS free tier and Caltopo free tier require an internet connection for map tile loading. Pre-download everything before leaving cell range.
What is the BLM 14-day limit and how is it calculated?
BLM dispersed camping is generally limited to 14 days within any 28-day period. The limit applies cumulatively — multiple short visits count toward it. After reaching 14 days, you must relocate; the required move-out distance varies by field office and is not uniform nationally. Individual field offices may impose shorter limits. Verify the specific rules with the local BLM office before your trip. (BLM.gov)
35+ years of field-tested boondocking knowledge, delivered free.
Get our weekly dispatch — real trips, real rigs, real conditions. No RV park ads, no fluff.
Published: | Last Updated: | Author:Chuck Price — 35+ years RV camping and boondocking experience, featured on CBC Radio’s Cost of Living podcast
Senior Citizen Discounts for RV Camping: The Real Math on What Actually Saves Money
A first-person ROI analysis of the America the Beautiful Senior Pass, AARP, Good Sam, Escapees, Passport America, and state park senior programs — with breakeven math and a self-audit formula for every membership.
Quick answer — 4 things to know before you read:
The America the Beautiful Senior Pass ($80 lifetime) breaks even in roughly 6.7 nights at federal campgrounds — based on an estimated $12/night average savings at qualifying sites.
AARP membership breaks even in just a few nights — verify the current annual rate at aarp.org before calculating. One of the lowest-risk first memberships for most senior RVers.
Stacking a senior rate, a membership discount, and a weekday rate can cut a $42 nightly fee to under $29.
State park senior programs in several states often outperform private campground memberships for regional travelers — most RVers ignore them.
Why the Math Matters More Than the Marketing
Senior camping discount programs are sold on headline percentages. The America the Beautiful Senior Pass offers 50% off federal camping fees. Passport America advertises 50% off participating parks. AARP promises “up to 10% off” thousands of campgrounds. Those numbers look strong on a brochure. They look different when you run them against your actual camping calendar, the parks you visit, and the blackout dates buried in the fine print.
I’ve been camping and boondocking for more than 35 years. I’ve carried most of these memberships at one point or another. The ones that paid off weren’t always the ones with the biggest advertised discount. They were the ones whose participating park networks matched where I actually travel and whose breakeven point I could clear in a normal season.
This article is not a roundup of everything labeled “senior discount.” It’s a first-person ROI breakdown of the programs that actually move the needle — with the math shown so you can run it against your own numbers.
A note on boondocking: When this guide mentions boondocking, it means camping without hookups — usually on public land managed by the Bureau of Land Management (BLM) or the U.S. Forest Service. You handle your own power, water, and waste. It’s quieter, often free, and highly flexible once you know the rules. If you’re new to it, the Reality Check Guide to Boondocking is the right starting point.
The America the Beautiful Senior Pass: Breakeven in About 7 Nights
The America the Beautiful Senior Pass breaks even after fewer than 7 nights at qualifying federal campgrounds. At $80 for a lifetime pass — or $20 annually — the pass provides free entrance to most federal recreation sites and 50% off camping fees at campgrounds operated by six federal agencies. U.S. citizens and permanent residents age 62 or older are eligible. The discount does not apply to utility surcharges, cabins, or group sites billed at a flat rate. Source: USGS Interagency Pass Program (verify current pricing before purchasing).
The six agencies that honor the pass for camping discounts are:
National Park Service (NPS)
U.S. Forest Service (USFS)
Bureau of Land Management (BLM)
U.S. Army Corps of Engineers (USACE)
Bureau of Reclamation
U.S. Fish and Wildlife Service
The Senior Pass gives 50% off “expanded amenity fees” at most participating federal sites. Most basic federal campsites without hookups run between $15 and $30 per night. Using the midpoint of that range, the pass saves roughly $12 per night at the sites where it applies — an estimate, not a universal guarantee.
Breakeven calculation (illustrative estimate):
Lifetime Pass Cost: $80
Assumed Average Savings per Night: ~$12 (midpoint of $15–$30 site range at 50% off)
Breakeven: $80 ÷ $12 = 6.7 nights
Result: At roughly $12/night average savings, seven qualifying federal campground nights pays back the lifetime pass in full. Your actual breakeven depends on the sites you use and current fee rates.
Most RVers hit that breakeven point in their first camping season, not over the span of a decade. Any subsequent federal camping at a discounted site is net positive for the rest of your camping life.
Common misconception: Many RVers assume the biggest Senior Pass value is free park entrance.
The correction: In real-world RV use, camping fee discounts generate far more savings than entrance waivers. A $25 entrance fee waived is a one-time daily benefit. A 50% discount on a $30/night campsite saves $15 every single night you’re parked. Run enough nights and the camping discount dwarfs the entrance benefit by a wide margin.
What the Senior Pass does not cover
The pass discount does not apply to:
Utility surcharges for electricity or sewer when billed separately from the campsite fee
Cabins, yurts, or lodge accommodations
Group campsites billed at a flat rate rather than a per-night per-site fee
State park systems — those operate entirely separate senior programs
The discount applies to the single site you occupy. If you’re caravanning with other rigs, each site needs its own qualifying pass holder to receive the discount on that site.
Annual pass vs. lifetime pass: which one makes sense
The $20 annual pass is a reasonable starting point if your camping volume is uncertain. The math on switching to lifetime is simple:
Annual pass for 4 years: $20 × 4 = $80
Lifetime pass: $80 once
If you plan to camp for more than four more seasons, the lifetime pass wins on day one of year five — assuming the annual pass price stays at its current level. Any future price increase on the annual pass would make that crossover arrive even sooner. For most RVers over 62, it’s an easy call.
Where to buy it
The pass is available online through the USGS online store (with a processing fee) or in person at most national parks, monuments, and federal recreation sites that charge entrance fees (no processing fee). If you’re within driving distance of any federal site, buy in person and skip the fee. Keep the pass in your glove box with your registration and insurance — it’s checked at entry gates, not at checkout.
If you mostly boondock on free BLM land
The Senior Pass ROI looks different for full-time boondockers who rarely use developed federal campgrounds. Where it still pays off:
Developed federal sites for dump station access, water fill, and laundry
A few nights of hookups to recharge after extended off-grid stretches
Popular parks where dispersed options are limited, crowded, or seasonal
Even five or six discounted nights per year keeps pushing the lifetime ROI higher. For how BLM land and dispersed camping work from a practical standpoint, the BLM camping and dispersed sites guide covers the rules in detail.
RV Membership ROI: AARP vs. Good Sam vs. Escapees vs. Passport America vs. AAA
No RV membership pays off unless you camp enough nights at participating parks to exceed its annual cost. Real-world savings per night differ from advertised discount percentages because acceptance rates, blackout dates, and park eligibility vary by network. AARP’s annual renewal price has varied in recent years — verify the current rate at aarp.org/membership before calculating your personal breakeven. At a typical renewal cost and approximately $5 average real-world savings per night, the breakeven is around 4 nights. Canadian RV travelers see different participating park lists and should check the Canadian camping membership guide for region-specific programs.
Five programs dominate the senior RV membership conversation: AARP, Good Sam, Escapees RV Club, Passport America, and AAA. Each targets a different traveler profile. The table below runs the breakeven math so you can compare them on a common basis. Prices were last verified in March 2026 — confirm current rates with each organization before joining, as rates change.
RV Membership ROI Comparison (Verify current pricing before joining)
RVers who need bundled roadside coverage and use hotel/cruise discounts
Escapees RV Club
~$49.95
15–50% at partner parks + member parks + mail forwarding + community
$10–15
3–5 nights
Full-timers and long-haul RVers who travel 60+ nights per year
Good Sam
~$39
10% at affiliated parks + fuel discounts + Camping World savings
$4–5 (camping only)
6–10 nights
High-mileage RVers who drive often and shop at Camping World
Passport America
~$44–49
50% off participating parks (peak-season and weekend restrictions apply)
$15–20 (when accepted)
2–3 nights
Flexible travelers who can camp midweek and off-peak consistently
*Prices last verified March 2026. Confirm current rates directly before joining or renewing: AARP | Good Sam | Escapees | Passport America | AAA. Avg Savings/Night reflects illustrative estimates of real-world dollar discounts at parks that accept each membership — actual savings vary. Assumes a typical $40–45/night campground rate.
AARP: low cost, broad coverage, low risk
AARP is the right first membership for most senior RVers. The breakeven point is low enough that almost any camping season clears it — verify the current annual rate at aarp.org/membership and divide by your realistic per-night savings to run your own number. The coverage network includes KOA, thousands of independent parks, and participating chains. Hotel and travel discounts add secondary value if you fly occasionally or book hotels on trip legs.
Choose AARP when you camp 10 to 50 nights per year at private or chain campgrounds and want a no-risk starting point. Don’t choose AARP as your only membership if you camp exclusively on federal land or free BLM dispersed sites — the discount only applies to participating private and chain parks.
Escapees RV Club: strongest value for full-timers
Escapees offers the best camping discount depth in the group at 15 to 50% off at partner parks, plus a network of member-owned parks with low flat nightly rates. The mail forwarding service — a necessity for full-time RVers who’ve abandoned a fixed address — can justify the membership cost on its own.
Choose Escapees when you camp more than 60 nights per year, are full-timing or close to it, or need mail forwarding and domicile support. Don’t choose Escapees as your only membership if you camp fewer than 30 nights per year and don’t need mail forwarding — the breakeven math still works but the value density is thinner.
Good Sam: fuel savings change the math
Good Sam’s camping discount alone — roughly 10% at affiliated parks — puts its breakeven at 6 to 10 nights. That’s reasonable but not exceptional. Where Good Sam pushes into “no-brainer” territory is for high-mileage RVers who burn significant diesel or gas. A fuel discount of $0.05 to $0.08 per gallon at participating stations can add up quickly on a long season. As an illustrative midpoint: 2,000 gallons at $0.06/gallon saves $120 — more than triple the annual membership cost. At the low end of $0.05/gallon, the same mileage saves $100, still covering the membership fee more than twice over.
Choose Good Sam when you drive 5,000+ RV miles per year and fuel up at participating chains regularly. Don’t choose Good Sam as your primary discount card if you move infrequently and don’t shop at Camping World — the campground-only ROI is middling.
Passport America: best breakeven, strictest restrictions
Passport America’s 50% headline discount gives it the fastest theoretical breakeven — 2 to 3 nights. The catch is that the discount comes with peak-season blackouts, weekend restrictions, and a participating park network that requires advance planning. When the stars align (midweek stays, off-peak season, participating parks on your route), the savings are real and substantial.
Choose Passport America when your travel is genuinely flexible — you camp mostly midweek, travel off-peak, and can plan routes around participating parks. Don’t choose Passport America as a core membership if most of your camping falls on weekends or during July and August — blackout dates will block the discount when you need it most.
AAA: roadside first, camping discounts second
AAA pricing varies by region and local club — the ~$65 figure is a common baseline, but your local club’s rate may differ. At that price point, AAA’s camping discount ROI requires 9 to 13 participating nights just to break even on the membership fee before you factor in what roadside assistance from other sources would cost. The case for AAA is the bundle: roadside coverage, trip planning support, hotel and cruise discounts, and the camping discount together. Bought for campground savings alone, it’s hard to justify over AARP.
Choose AAA when you don’t have separate roadside coverage and you regularly use hotel discounts or travel booking services. Don’t choose AAA if your RV manufacturer or insurance provides roadside coverage and you want campground-only value — AARP delivers comparable camping discounts at a third of the cost.
State Park Senior Discounts: The Underused Tool
Dozens of state park systems offer senior camping discounts that rival or exceed private membership savings. Unlike the federal Senior Pass, state discounts are managed by individual states — eligibility, discount amounts, and residency requirements vary significantly by state and can change without notice. Always verify current terms directly with each state park system before booking. State park discounts are completely separate from and do not stack with the America the Beautiful Senior Pass.
Two examples worth calling out: Florida State Parks offers qualifying resident seniors approximately 50% off camping at many parks (residency proof required). West Virginia State Parks sets the senior discount age at 55 — lower than most other systems — and typically does not require state residency. Both programs are subject to change; verify current eligibility and discount terms directly with each system before booking.
State Park Senior RV Camping Discounts — Illustrative Overview (Verify at each state’s official park website before booking)
Senior discounts at many parks; amount varies by park
Often no
Check each park’s current policy
Strong mix of lakes, forests, and historic sites
California
62+
Modest per-night discounts against high base rates
Often no
Limited availability in popular parks
World-class locations; competitive reservation system
This table is an illustrative overview based on publicly available state park program information last reviewed March 2026. State park policies, residency rules, discount amounts, and availability change without notice. Always verify current senior discount terms at the official state park website before booking: Florida | Louisiana | West Virginia | Maryland | Georgia | Idaho | Arkansas | Washington | Pennsylvania | California.
The pattern I see consistently in RV communities: snowbirds and regional travelers quietly build their entire travel calendar around a handful of senior-friendly state systems. Florida and Louisiana get the most attention. Maryland, Georgia, and Washington attract seniors willing to travel in shoulder seasons — April through May and September through October — when site availability is better and discounts are easier to stack with off-peak rates.
If your travel allows 7 to 14 nights in one park at a stretch, state park senior discounts can out-earn most private membership programs — especially when you factor in that the locations (lakes, mountains, forests) are ones you’d want to visit anyway, and that hiking, paddling, and ranger programs are typically included in the camping fee.
For extended stays on BLM land at the opposite end of the spectrum, the LTVA camping guide for extended stays on public lands covers the federal long-term visitor area programs that run parallel to — and don’t conflict with — state park senior discounts.
Stacking Discounts: Getting Below $30 Per Night
Stacking a senior rate, a membership discount, and a weekday rate can reduce a $42 nightly campground fee to under $29. Independent parks allow stacking more often than corporate chains or federal campgrounds. Federal Senior Pass rates are not stackable — the 50% federal discount is the final rate, and no additional percentage comes off. The best approach is to ask in a single clear question rather than negotiating each discount separately.
How the stacking sequence works
In practice, the most common stacking order at independent private parks is:
Senior discount applied to the base nightly rate.
Membership discount (AARP, Good Sam, or Escapees) applied to the new lower rate.
Off-season or weekday special layered on top when the park allows it.
Worked example: Stacking senior + membership + weekday
Base rate (full hookups): $42/night
Senior discount (10%): $42 × 0.90 = $37.80
Good Sam (10% on discounted rate): $37.80 × 0.90 = $34.02
Weekday rate (15% off Sun–Thu): $34.02 × 0.85 = $28.92
Result: $42 → $28.92/night. Total savings: $13.08/night, or $91.56 over 7 nights.
Combinations that typically do not stack
Passport America + Good Sam: Both are network-based campground discounts. Parks choose which program they participate in — not both.
AARP + AAA at the same property: Most parks honor one or the other, not both simultaneously.
Federal Senior Pass + additional percentage discounts: The 50% federal rate is the final discounted amount. No further percentage applies on top.
How to ask — without making it awkward
The most effective framing I’ve found is a single honest question:
“I’m over 62 and I have a Good Sam card. I’ll be staying midweek for several nights. What’s the best rate you can offer?”
Park staff and owners know exactly which levers they’re allowed to pull. If stacking is possible, they’ll do it. If it isn’t, they’ll say so upfront. No need to negotiate each discount individually.
Managers are consistently more flexible midweek and during shoulder seasons — April through May and September through October. During July and on holiday weekends, demand removes any incentive to discount. In November or early spring at a half-empty park, the calculus is different.
Worth asking about separately
Weekly rates: A flat weekly fee often beats even aggressively stacked daily discounts.
Monthly rates: Parks offering $700–$800 monthly rates can undercut daily stacking math entirely for longer stays.
For a deeper look at finding the campgrounds where stacking is most likely to work, the guide to finding free and low-cost camping sites covers the tools and databases worth building into your pre-trip research.
The Self-Audit Formula: Is Your Membership Actually Paying Off
Every RV membership either pays you back each year or it doesn’t. The breakeven formula is annual membership cost divided by average real-world savings per night at parks where the discount is accepted. “Real-world” means the actual dollar discount you received — not the advertised percentage. Brochure percentages overstate savings because acceptance rates, blackout dates, and eligible-only-on-select-sites clauses reduce what you actually collect.
Breakeven formula:
Breakeven nights = Annual Membership Cost ÷ Average Real Savings Per Night
Step 1: Know your actual camping nights
Most people overestimate. Pull your last 12 months of bank or credit card statements, highlight every campground charge, and count the nights from reservations or trip notes. Weekend warriors typically land at 20 to 40 nights per year. Serious part-timers hit 50 to 80. Full-timers can clear 200.
Step 2: Track real savings, not brochure percentages
Track 10 to 15 stays. Write down the pre-discount nightly rate and the final charged rate. Subtract. Average those differences. If AARP’s advertised discount is 10% but one park gives you 10%, another gives 5%, and a third only honors it on weekdays, your real average might be $4 per night — not $4.50 based on 10% of the average rate.
Step 3: Run the calculation
AARP example (illustrative — verify current price at aarp.org):
Annual cost: [verify current rate]
Average real savings: ~$5.20/night
Breakeven: Annual cost ÷ $5.20 = your personal breakeven nights
At 30 nights/year: 30 × $5.20 = $156 saved. Net after membership cost: significantly ahead.
Step 4: Count the shadow benefits
Some memberships pay off in ways that don’t show on campground receipts:
Good Sam fuel discounts: 2,000 gallons × $0.06/gallon = $120 back — that’s triple the annual membership cost on fuel alone.
Escapees mail forwarding: Price a comparable commercial mail forwarding service and treat that difference as additional savings.
Roadside assistance: One avoided tow call can cover years of membership fees.
Once per year, run this math on every active membership and ask one question: “Knowing what I know now, would I buy this again today?” If the answer is no, cancel it. Habit is expensive. Memberships that made sense at 60 nights per year don’t automatically justify renewal at 25.
Membership Traps: When “Best on Paper” Fails in Practice
Expensive resort-style RV memberships often fail to deliver value when your travel style doesn’t match their network. Blackout dates, geographic concentration near cities and coastal regions, and peak-season restrictions reduce real access below what the brochure suggests. The pattern appears consistently in RV communities: the problem isn’t the discount itself — it’s a mismatch between the membership’s designed use case and how the buyer actually travels.
Three factors account for most membership disappointments:
Geography: The network is concentrated in regions you rarely visit — coastal resort areas, major metros — while you prefer forests, mountains, or the Southwest.
Timing: Blackout dates block the discount during July, August, and holiday weekends — which is when you camp.
Style drift: You bought a private-resort membership and then shifted toward boondocking and state parks, rendering the network irrelevant.
The corrective principle is straightforward: start with how you already like to travel, then find memberships and senior discounts that amplify that pattern. Don’t buy a membership hoping it will change your camping behavior. It usually doesn’t, and the math rarely works when you have to force yourself to use it.
Passport America’s 50% headline discount with peak-season blackouts is the most common version of this trap for senior RVers. The discount is real when it’s accepted — but if 60% of your camping falls on peak-season weekends, your effective discount rate is much lower than 50%.
Your Senior RV Discount Action Plan
Six steps cover most of what senior RVers need to maximize discount ROI. The sequence matters: federal pass first, then low-cost annual memberships, then niche programs matched to your travel style. Some discounts start at 55; the federal Senior Pass and most state programs start at 62. Confirm age thresholds before assuming eligibility.
Get the America the Beautiful Senior Pass. Buy it in person at any federal site to avoid the processing fee. Keep it in your glove box. At $80 lifetime, it’s one of the few one-time purchases in RV life with a near-certain positive ROI.
Add AARP. Low cost, wide coverage, fast breakeven. The baseline membership for most senior RVers whether you self-identify as “an AARP person” or not.
Check state park programs for every state where you’ll spend a week or more. Look for senior passes, off-season deals, and residency requirements that may help or hurt your eligibility.
Add one or two memberships that match your actual travel style. Escapees for full-timers or those close to it. Good Sam if you drive long distances and fuel up at participating chains. Selective use of Passport America if your schedule is genuinely midweek-flexible and off-peak.
Ask for the best rate, not just the discount. One clear question — “I’m over 62 and have [membership]. What’s the best rate for a midweek stay?” — gives the park room to stack what they’re allowed to stack.
Run the annual self-audit. Every membership either crosses its breakeven in a normal year or it doesn’t. Cancel what doesn’t. Don’t carry dead weight into the next season.
For travelers who camp frequently at qualifying sites, successfully stack discounts where allowed, and use both federal and state programs, senior discounts can realistically shave 30% to 50% off annual paid camping costs. For a traveler spending $4,000 per year on campsites, that’s $1,200 to $2,000 back — enough to fund one or two additional trips, bring family along, or extend a season by a month. Casual RVers with lower camping frequency will see proportionally smaller savings.
If you’ve found discount combinations or state park programs that work well for your rig and travel style, the comments section below is worth sharing them in. The more real-world data in the conversation, the more useful this page gets for the next person running these numbers. For the full range of resources we’ve put together for finding free and low-cost camping, the BoondockOrBust resources hub is the right starting point.
Frequently Asked Questions About Senior RV Camping Discounts
At what age do senior discounts start for RV camping?
Most RV camping discounts begin between ages 55 and 62. Many private parks honor AARP-style 55-plus discounts, while the America the Beautiful Senior Pass and most state park systems use 62 as the cutoff. Always confirm age requirements directly with each park when you book — eligibility thresholds are not always clearly posted online.
Can I combine senior discounts with memberships like Good Sam or AARP?
Often, yes. Many independent campgrounds will stack a senior discount with one membership discount and sometimes an off-season rate. Corporate chains and federal campgrounds tend to be stricter. The most effective ask is: “I’m over 62 and have a [membership]. What’s the best rate you can do?” That frames it as a single question instead of a line-by-line negotiation, and it lets the park tell you what they allow.
Does the America the Beautiful Senior Pass work at state parks?
No. The Senior Pass provides entrance and fee discounts at federal recreation lands — national parks, national forests, most Corps of Engineers campgrounds, and similar federal sites. State parks are run by individual states with entirely separate pass systems and senior rules. A handful of states have their own senior passes that are equally valuable within their system, but those are distinct from the federal pass and are not interchangeable with it.
How much can I realistically save each year with senior RV discounts?
It depends on how often you camp and how consistently you use available discounts. A casual RVer camping 25 to 30 nights per year with one or two memberships can easily save several hundred dollars annually. A heavier traveler who leans on state park discounts, the Senior Pass, and stacked membership deals can get into four-figure savings in a busy year. The self-audit formula in the breakeven section of this guide gives you the exact calculation for your own numbers.
Are senior RV discount memberships worth the cost?
They’re worth it when you camp enough nights at participating parks to cross the breakeven point. A low-cost membership like AARP can pay for itself in 3 to 5 nights. Higher-priced memberships need more nights or stronger secondary benefits — fuel discounts, mail forwarding, roadside assistance — to be worthwhile. The only honest answer comes from running your own numbers once a year using actual camping nights and real savings per night, not brochure percentages.
Do I always need to show ID to get senior camping discounts?
Almost always. Expect to show a driver’s license or other photo ID to prove your age, and present the physical pass or membership card when a discount program is involved. Keeping a small folder in the RV with your senior pass, membership cards, and ID copies makes check-in faster and avoids the frustration of digging through the rig at the registration window.
Is the America the Beautiful Senior Pass still $80 for a lifetime pass?
As of March 2026, the lifetime pass is $80 and the annual pass is $20. Prices are established by Congress under the Federal Lands Recreation Enhancement Act and are subject to change. Verify current pricing at store.usgs.gov before purchasing. Buying in person at a federal recreation site avoids the processing fee charged for online orders.
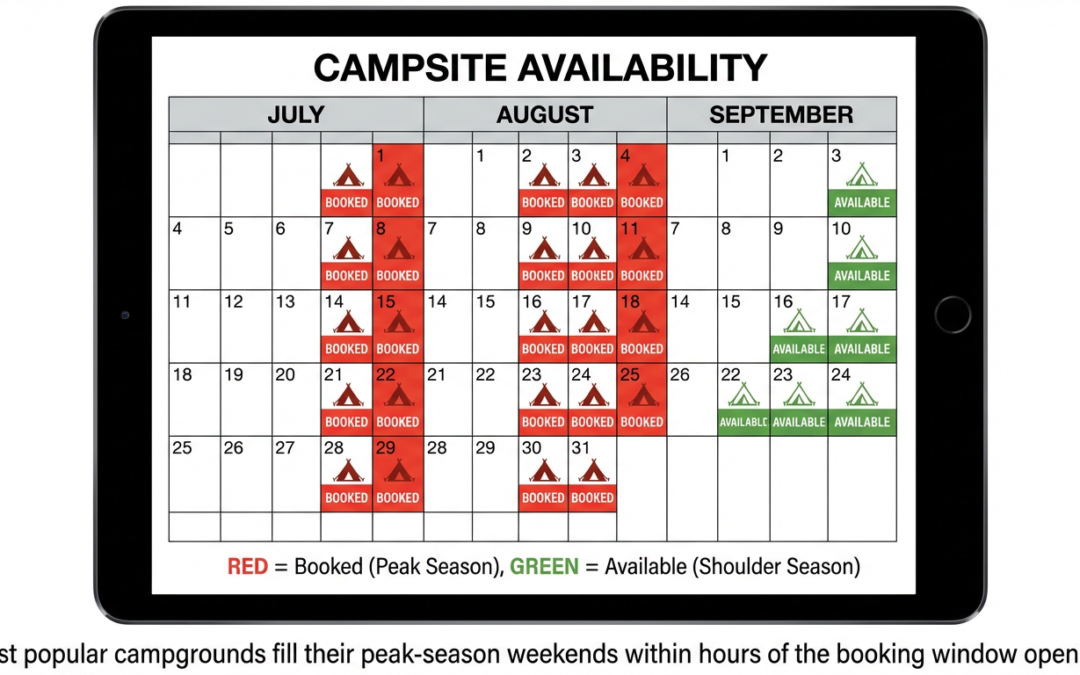
You log in at exactly 10:00am on the day the reservation window opens. The site you want is gone before you can finish clicking. You check again that evening, and for three days after. Nothing.
That experience is not unusual. Industry surveys show 56% of campers reported trouble finding available sites in 2024 because campgrounds were full. But “sold out” does not mean game over. It means your first plan is unavailable.
Most campgrounds release sites back into availability through cancellations, no-show windows, and walk-up inventory. Private campgrounds and BLM public land nearby often have open sites when the federal parks are packed. The difference between campers who get stuck and campers who get out is knowing the system.
This guide covers that system in three parts: how to position yourself to catch sites at booking windows and cancellation drops; how to use the tools that do the monitoring for you; and where to pivot when the primary campground is genuinely unavailable.
Why Campgrounds Sell Out in Minutes
Popular federal campgrounds release reservations on a rolling 6-month window, and high-demand sites can fill within minutes of the daily 10am ET release.
Recreation.gov manages reservations for more than 3,600 facilities and 103,000 individual sites across 14 federal agencies. The platform opens new dates daily. For most campgrounds, that happens at 7am Pacific / 10am Eastern — but not for every campground, and not always at the same time for every facility.
The supply is fixed. The campground inventory does not grow to meet demand. And over the past five years, roughly 11 million more households started camping compared to 2019. That arithmetic explains the sold-out screen.
This is not a competition you win with luck. It is one you win by knowing the exact release time for your target campground, being positioned before it opens, and having your backup sites already identified.
Step 1: Know the Exact Booking Window Before You Do Anything
Most Recreation.gov campgrounds go on sale daily at 7am PT / 10am ET on a rolling 6-month window — but always check the Seasons and Fees tab on the specific campground page before you plan your booking day.
That tab is where facilities post their exact release times, shorter booking windows for walk-up periods, and any seasonal restrictions. Recreation.gov’s official booking guidance recommends synchronizing your clock to Recreation.gov’s own clock (Coordinated Universal Time) rather than trusting your device clock.
Six months out from July 4th means you need to be logged in and ready on January 4th at 7am PT. If you are off by even a few minutes at a high-demand campground, you are competing against the people who were ready.
Before opening day:
Create a Recreation.gov account and log in well in advance — not the morning of
Pre-load your target campground page and have your preferred dates selected
Have your credit card information saved in your profile
Identify at least three alternate sites in case your first choice is gone
Know the exact release time for your specific campground from the Seasons and Fees tab
The competition at the most popular campgrounds is real. Recreation.gov’s FAQ confirms the platform actively manages traffic spikes at high-demand release times. Being prepared does not guarantee success, but showing up unprepared almost always means failure.
What this step does NOT cover: State parks using ReserveCalifornia, Reserve America, or GoingToCamp operate on different schedules, booking windows, and rules. If your target is a state park, verify the booking window directly with that platform.
Step 2: Use Availability Alerts and Cancellation Windows
Recreation.gov’s free Availability Alert feature sends an email notification when a campsite matching your saved preferences becomes available due to a cancellation — but the same alert goes to every other camper who set it for those dates.
This is not a guaranteed reservation. It is a signal. You still have to act immediately.
How to set up Recreation.gov alerts:
Navigate to the campground page
Click the Availability Alert button
Enter your preferred arrival date and length of stay
Add any site filters (hookups, accessibility, site type)
Save — you will receive an email when a matching site opens
When cancellations tend to cluster:
The Recreation.gov cancellation policy creates predictable release patterns. A camper who cancels the day before or day of arrival pays a $10 service fee and forfeits the first night’s use fee. That penalty encourages early cancellations. In practice, cancellations cluster in the 48–72 hours before arrival, when campers have decided the trip is not happening but still want to avoid the full forfeiture.
A no-show is treated differently. Recreation.gov holds a campsite until checkout time on the day after the scheduled arrival date. The no-show is assessed a $20 fee and forfeits the first night’s recreation fee. At staffed campgrounds, rangers may release those sites for walk-up campers. Arriving in the morning and asking about no-show sites is a legitimate tactic at staffed facilities.
Third-party alert tools:
Campnab and Campflare offer SMS-based alerts for Recreation.gov cancellations, which is faster than email for sites that move quickly. These are paid services (typically a few dollars per scan). For a full comparison of campsite-finding apps, see the best apps for finding free campsites.
Correction: The “15-minute cart hold” myth
A widely circulated claim suggests that campsites held in shopping carts return to inventory at the 15-minute mark past the hour, creating a predictable availability window. Recreation.gov’s official FAQ and reservation policy documentation do not describe this as a platform-wide rule. Cart timeout behavior may exist as a technical function, but there is no documented release schedule tied to it. Do not plan your booking strategy around this claim. Use the official Availability Alert feature instead.
Step 3: Split Your Stay Across Multiple Sites
If no single site covers your full trip, book consecutive nights on different sites — Recreation.gov explicitly supports split stays and it is one of the most underused booking tactics.
Recreation.gov’s official tips state directly: “You may have to string together multiple campsites if the site you want is not available for your entire stay. Yes, you’ll have to break camp and move your gear, but you’ll be there.”
In practice, this works as follows: open the campground’s availability grid view (not the standard calendar view), scan for consecutive nights across different numbered sites, and book each segment separately. You may need to move once during the trip. For most RV setups — especially a Class B van — that is a 30-minute process, not a hardship.
Split stay works best when:
Your target campground has partial availability scattered across different sites
You are staying 3 or more nights and can tolerate one move
The campground’s sites are similar enough that any open site meets your needs
Split stay does not solve the problem when:
You have a large rig that requires a specific hookup or pull-through and only one type qualifies
Your trip is a single night (no room to split)
The campground has zero availability on any site for any night of your stay
Step 4: Shift Your Dates, Not Just Your Campground
Weekday and shoulder-season arrivals face significantly less competition because most campers target Friday–Sunday peak windows.
This is the simplest adjustment with the highest impact. Recreation.gov’s own booking guidance explicitly recommends avoiding the crowds by targeting weekdays and shoulder season. Availability alerts filtered for flexible dates (the option to include two days before and after your preferred arrival) can surface openings that rigid date targeting misses entirely.
What shoulder season looks like by region:
Mountain West (Rockies, Tetons, Glacier): late August and September see sharply lower demand compared to peak July
Southwest desert parks (Zion, Arches, Grand Canyon): spring and fall shoulder is October–November; some are busiest in October
Pacific Coast: fall is softer at many coastal campgrounds; June can be foggy and cold, reducing demand vs. August
What this does NOT fix: Yosemite Valley in July, Grand Teton on a July 4th weekend, and similar peak-event windows are sold out on weekdays as well as weekends. Date flexibility helps but is not a universal solution for the highest-demand parks during peak weeks. For those situations, Steps 5 and 6 below are the actual answer.
Step 5: Expand the Map — Private Campgrounds and Nearby Options
Private campgrounds and glamping resorts accounted for 31% of all nights camped in 2024 — the highest share on record — because they often have availability when public parks are fully booked.
The 2025 KOA Camping & Outdoor Hospitality Report shows private campgrounds are absorbing a growing share of camping demand precisely because they are not on the same reservation calendar as federal facilities. When Yosemite Valley is sold out for the next six months, dozens of private campgrounds in the Stanislaus National Forest gateway communities still have sites.
Where to look:
Hipcamp lists private landowner campgrounds, farms, and vineyards not on Recreation.gov
Recreation.gov’s “recommended sites nearby” appears when your primary campground search returns no availability — use it
KOA campgrounds and private RV parks in gateway communities to national parks often have availability during peak public-land blackouts
What private campgrounds do NOT cover: Private sites are not eligible for America the Beautiful pass discounts. Nightly rates at private campgrounds near national parks typically run $40–$80+ per night, versus $25–$35 at federal campgrounds. Amenity levels vary widely. RV length and rig-type restrictions differ by property.
The sold-out campground problem is really three problems stacked together: a booking window problem, a monitoring problem, and a backup-options problem. Mastering the booking window puts you in position to get sites at first release. Alert tools solve the monitoring problem. And knowing where to pivot — to nearby private parks, BLM land, or national forest dispersed sites — means a sold-out calendar is rarely the end of the trip.
Step 6: Use BLM and National Forest Dispersed Camping as Your Backup
Most BLM land allows free dispersed camping for up to 14 days within any 28-day period — a legitimate same-trip backup when nearby campgrounds are fully booked.
Most campground-focused travel articles stop at “try a nearby campground.” Experienced RVers know that dispersed camping on public land is often 20 minutes from the national park entrance, completely free, and available when everything with a reservation system is sold out.
Most BLM land allows dispersed camping unless posted “Closed to Camping”
Stay limit: 14 days within any 28-day period; then must move at least 25–30 miles
Free on most BLM land unless a fee is posted
Vehicles must stay on designated roads and trails
Dispersed camping is for short-term recreation, not long-term living
National forest dispersed camping works similarly but rules vary by ranger district. Always verify with the specific district office before planning a dispersed stay, especially for high-use areas near popular parks.
Most booking failures come from five mistakes: wrong timing, inflexible dates, single-campground focus, ignoring alerts, and not knowing the backup options.
1. Not checking the exact release time for your campground.
The 7am PT / 10am ET default is not universal. Some campgrounds have different release times listed in their Seasons and Fees tab. Showing up 10 minutes after your campground’s actual release time means you are competing against everyone who was there on time.
2. Searching only Friday–Sunday at peak season.
If you will only accept a Friday arrival in July, you are competing against the maximum number of other campers. That is a choice, not a constraint. Tuesday and Wednesday arrivals access the same campground with far less competition.
3. Targeting only one campground with no backup plan.
Popular campgrounds can be sold out for their entire open season by the time the rolling window reaches peak summer dates. A plan with no alternate campgrounds, no nearby private options, and no dispersed-camping knowledge is a plan that fails.
4. Waiting to set availability alerts.
Alerts set the week before your trip compete against alerts set by hundreds of campers who have been monitoring the same dates for months. Set alerts as soon as you know your target dates.
5. Treating the first “Sold Out” as final.
Availability changes every day. Cancellations happen continuously. The sold-out screen on the day you check is not the same as the sold-out screen on arrival day. Keep monitoring.
Quick Backup Decision Tree: What to Do When Everything Is Sold Out
If your target campground is sold out, follow this order: set alerts, try split stays, shift to weekdays, check nearby private campgrounds, and evaluate BLM or national forest dispersed sites.
Set a Recreation.gov Availability Alert for your specific dates — it is free and takes two minutes
Check the availability grid for split-stay openings across multiple sites at the same campground
Search the same campground for Tuesday–Thursday openings if your dates are flexible
Use Recreation.gov’s “nearby facilities” suggestion when primary search returns no availability
Check Hipcamp, Harvest Hosts, and private KOA parks near the area for private alternatives
Evaluate BLM or national forest dispersed camping if your rig is self-contained and the area has open land
Steps 1 through 4 are free and take under 15 minutes. Step 5 requires a quick search. Step 6 requires planning and self-sufficiency — but it is the one that experienced boondockers default to, because public land near popular national parks is almost never actually full.
Frequently Asked Questions
What time does Recreation.gov release campsites?
Most campgrounds release new reservation dates daily at 7am PT / 10am ET on a rolling 6-month window. The exact release time for your specific campground is listed in the Seasons and Fees tab on the campground’s page. Some facilities use shorter booking windows or different release times.
How do campsite availability alerts work?
Recreation.gov’s Availability Alert feature sends a free email notification when a campsite matching your saved date, length, and filter criteria opens up due to a cancellation. Third-party tools like Campnab and Campflare offer SMS-based alerts for faster notification. Alerts do not auto-book — you must complete the reservation manually.
Can I book two different campsites in a row to extend my stay?
Yes. Recreation.gov officially supports this. Use the availability grid view on the campground page to find consecutive nights across different sites. You will need to move your gear once, but you maintain the same campground location.
Is dispersed camping legal near national parks?
Dispersed camping is allowed on BLM and national forest land, subject to local rules and closures. It is not permitted inside national park boundaries. Check with the local BLM field office or ranger district for current restrictions, especially for high-use areas near popular parks.
What happens to no-show campsite reservations?
Recreation.gov holds a reserved campsite until checkout time on the day after the scheduled arrival date. No-shows are assessed a $20 fee and forfeit the first night’s fee. At staffed campgrounds, rangers may release those sites for walk-up campers — arriving in the morning and asking is a legitimate approach.
Do America the Beautiful passes work at private campgrounds?
No. The America the Beautiful Interagency Pass applies only to federal recreation sites participating in the program. Private campgrounds, Hipcamp listings, Harvest Hosts, and commercial RV parks are not eligible for pass discounts.
Chuck Price is the founder of Boondock or Bust and has been RV camping across 47 states for 35+ years. He built KampTrail, a free camping app using the Recreation.gov public data API.
Good Sam vs Harvest Hosts vs RV Overnights: Which Membership Actually Saves Money in 2026?
The math behind Good Sam, Harvest Hosts, and RV Overnights. No fluff. Just current pricing, break-even logic, and where each option actually fits.
Estimated read time: 10 minutes | Updated: March 12, 2026 | Data verified: March 12, 2026
Quick Reference
Best for repeat paid campgrounds: Good Sam Standard
Best for unique one-night stops: Harvest Hosts Classic
Cheapest host-style membership: RV Overnights
Hardest to value cleanly: Good Sam Elite, because public Overnight Stays network size remains unclear
Best money-saving default for some travelers: No membership at all
2026 Membership Snapshot
Program
Public Price
What It Does Best
Transparency Notes
Good Sam Standard
$39/year
10% discount at participating Good Sam campgrounds
Simple value case. Easy to model.
Good Sam Elite
$149/year
Bundled perks plus Overnight Stays
Public Overnight Stays network size is still unclear.
Harvest Hosts Classic
$99/year
Unique one-night host experiences
Strongest experiential brand. Member spending varies by host.
Harvest Hosts All Access
$179/year
Largest combined Harvest Hosts ecosystem
Official page totals vary slightly, but total inventory is clearly above 9,000.
RV Overnights
$49.99/year regular
$34.99 first year promo at time of verification
Budget-friendly host-style overnight stops
Smaller network, but very clear pricing and support expectations.
The core mistake most RVers make is buying the wrong membership for the wrong job. Good Sam, Harvest Hosts, and RV Overnights are not interchangeable. They overlap more than they used to, but they still solve different problems.
If you want to reduce the cost of regular paid campground stays, Good Sam Standard is usually the cleanest answer. If you want memorable one-night stops at wineries, farms, breweries, and similar places, Harvest Hosts still owns that lane. If you want the lowest-cost host-style membership, RV Overnights is the budget play. If you want everything in one Good Sam bundle, Elite now costs enough that the value case needs much more scrutiny than it did before.
The Simple Math: Break-Even by Use Case
Before comparing features, force the decision through a math filter.
Assumptions Used in the Examples Below
Good Sam Standard example uses a $60/night participating campground.
Host-program comparisons use an $80/night commercial campground as the benchmark alternative.
Harvest Hosts examples assume you buy something from the host, but the amount varies by traveler and host.
RV Overnights examples use the platform’s public expectation that members should plan to spend a minimum of $30 per host location.
Membership
Annual Fee
Useful Math
Practical Takeaway
Good Sam Standard
$39
10% off a $60 site saves $6 per night. $39 divided by $6 = 6.5 nights.
If you use participating campgrounds 7 or more nights a year, this can be an easy win.
Good Sam Elite
$149
Elite costs $110 more than Standard. Public Overnight Stays network size is not clearly disclosed.
You are paying a large premium for a bundle whose host-network value is still hard to model cleanly.
Harvest Hosts Classic
$99
If your alternative is an $80 campground and you spend $30 supporting the host, your implied savings is about $50 per stop. $99 divided by $50 = about 2 stays.
Works best when you value the stop itself, not just the cheapest possible overnight.
Harvest Hosts All Access
$179
Using the same $50 implied savings, $179 divided by $50 = about 4 stays.
Better for heavier users who want the broadest combined network.
RV Overnights
$49.99 regular
If your alternative is an $80 campground and you plan on the platform’s public $30 minimum support purchase, implied savings is about $50 per stop. $49.99 divided by $50 = about 1 stay.
Fastest payback on paper, but only if the smaller network actually fits your routes.
What Each Membership Is Actually Good At
Job #1: Lower the cost of multi-night paid campground stays
Best choice: Good Sam Standard
This is the cleanest fit. It is cheap, easy to understand, and built around a straightforward campground discount. If that is the job, you do not need a more complex host-style membership.
Job #2: Find interesting one-night stops on a road trip
Best choice: Harvest Hosts Classic or RV Overnights
Choose Harvest Hosts if you want the broadest unique-host ecosystem. Choose RV Overnights if you want the cheaper host-style membership and can live with a smaller network.
Job #3: Get the broadest host-based inventory
Best choice: Harvest Hosts All Access
This is the wide-net option. It is not the cheapest, but it is the most comprehensive host-style package in the current comparison.
Job #4: Minimize all accommodation costs
Best choice: Often no membership at all
If you already rely on cheaper public camping, state parks, or highly selective pay-as-you-go booking, forcing yourself into a membership can actually increase cost and reduce flexibility.
The Good Sam Elite Problem
Good Sam Elite is no longer a casual add-on. At $149, it is a real spending decision.
The issue is not that Elite lacks perks. It clearly adds perks. The issue is that the public value case for Overnight Stays is still much less transparent than the value case for Good Sam Standard, Harvest Hosts, or RV Overnights. Public Good Sam pages say Elite members get Overnight Stays, unlimited single-night bookings at unique destinations, and access to wineries, distilleries, farms, and other attractions. But the public member-facing pages do not clearly disclose a public total network count, which makes apples-to-apples comparison harder than it should be.
Reality check: The old Elite math is outdated. The relevant premium is no longer $60 over Standard. It is now $110 over Standard.
The Harvest Hosts Trade-off
Harvest Hosts is still the strongest choice if the goal is not just sleep, but a good stop. That is the product’s real advantage. The host ecosystem is larger, more mature, and more experience-driven than the smaller alternatives.
But it only wins cleanly when you are honest about the job. If your goal is pure cheapest overnight, Harvest Hosts is not always the answer. If your goal is experience plus overnight parking, it often is.
The other trade-off is structure. Many Harvest Hosts stays are still designed around short stays. That is a feature for transit travelers and a constraint for destination travelers.
The RV Overnights Trade-off
RV Overnights is easier to model than Good Sam Elite because the pricing is clearer and the platform publicly states that members should expect to spend a minimum of $30 per host location to support hosts. That makes the true-cost conversation more honest.
The catch is density. A smaller host network can still be a smart buy, but only if it lines up with where you actually travel. If it does not, a low annual fee does not save you anything.
Best use case for RV Overnights: budget-conscious travelers who want host-style stops, can plan ahead, and do not need the broadest national coverage.
When Stacking Memberships Makes Sense
Stacking can work when the memberships do different jobs.
Stack That Makes Sense
Good Sam Standard + RV Overnights
This pairing works because one membership handles paid campground savings and the other handles lower-cost host-style transit stops. At regular pricing, the combined annual cost is still below the old mental model many people had for a single premium bundle.
Stack That Only Makes Sense for Heavy Users
Good Sam Standard + Harvest Hosts
This works if you actively want both destination campground discounts and the Harvest Hosts experience. It does not work if you are just collecting overlapping memberships out of fear of missing out.
The Decision Framework
Define the job. Are you trying to save money on campgrounds, find one-night stops, or buy experiences?
Run the break-even math. If you cannot realistically hit the usage threshold, stop there.
Check route fit. Big national numbers mean little if the locations do not match your routes.
Price the restrictions. One-night limits, booking friction, and host support expectations all have a cost.
Compare against no membership. Always compare your paid option against doing nothing.
Decision rule: If you cannot explain exactly how a membership saves you money or improves your trip quality, you probably should not buy it.
Frequently Asked Questions
Is Good Sam membership worth it in 2026?
Good Sam Standard often is. If you use participating campgrounds regularly, the $39 fee is not hard to recover. Good Sam Elite is harder to justify on math alone because it now costs much more and the public Overnight Stays value case is less transparent.
Is Harvest Hosts worth the annual fee?
It can be, but mostly for travelers who value the experience and would otherwise pay commercial campground prices. It is not automatically the cheapest option for strict budget travelers.
What is the difference between Good Sam Standard and Elite?
Standard is the simpler campground-discount membership. Elite is the more expensive bundle that adds Overnight Stays and other perks. The decision comes down to whether you want a focused discount tool or a broader bundle.
How much do you typically spend at Harvest Hosts?
Harvest Hosts expects members to support the host by purchasing something during the stay. The exact amount varies. That makes your actual nightly cost partly a behavior question, not just a membership-fee question.
How does Good Sam Overnight Stays work?
It is an Elite-only feature that gives access to single-night bookings at unique destinations. Public pages describe the feature clearly, but still do not make network-size comparison easy.
Which RV membership saves the most money?
For repeat paid campground users, Good Sam Standard is usually the best value. For host-style memberships, RV Overnights has the lowest upfront fee. For broad experiential inventory, Harvest Hosts wins. For some travelers, the true cheapest answer is no membership.
Bottom Line
Good Sam Standard is still the easiest membership to justify on plain math. Harvest Hosts is still the strongest experience-driven choice. RV Overnights is still the cheapest host-style entry point. Good Sam Elite is now the hardest to defend cleanly because the price jumped while the public host-network transparency still lags.
That does not make Elite bad. It makes it harder to model. And once a membership gets harder to model, the burden shifts back to your actual travel pattern.
If you want the shortest answer: buy Good Sam Standard for campground savings, Harvest Hosts for experiences, RV Overnights for cheaper host-style stops, and nothing at all if your current system is already working.


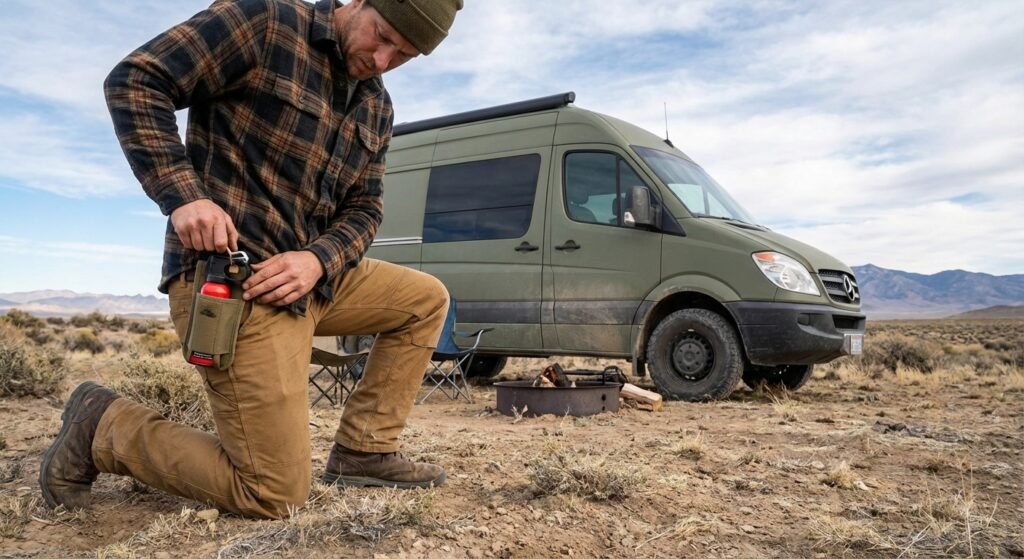

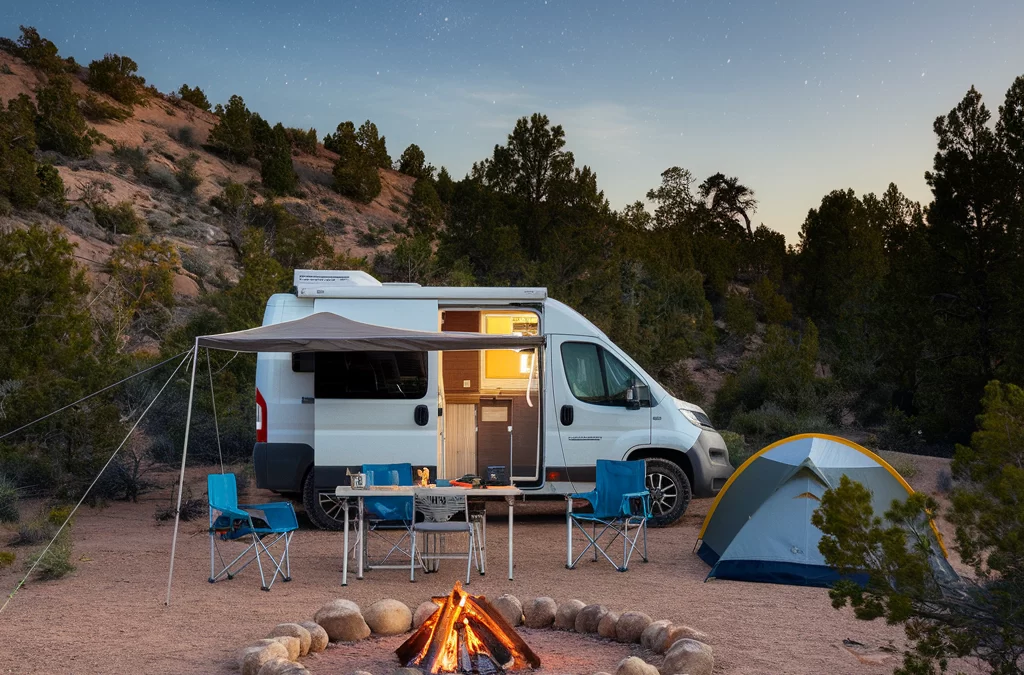
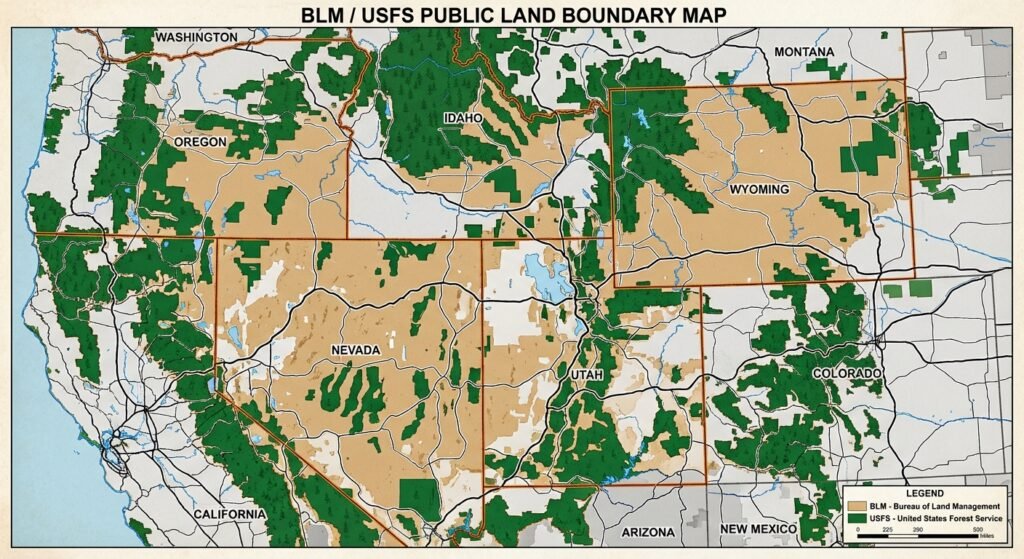
![Gaia GPS public land layer screenshot]](https://boondockorbust.com/wp-content/uploads/2024/10/gaia-gps.jpg)