
Resources
Walmart Overnight RV Parking Policy by State 2026
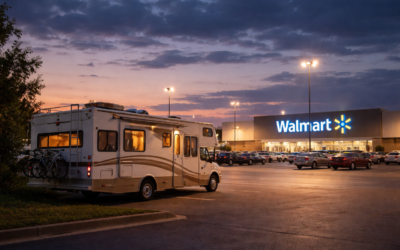
Walmart Overnight RV Parking Policy by State 2026 Quick Answer: Walmart's corporate policy permits overnight RV parking, but approval depends on individual store managers, local ordinances, and parking availability. Of roughly 4,600 U.S. stores, the Walmart Locator...

Flat Towing Compatibility 2025: Ford, Jeep & Chevy Matrix
The 2025-2026 Flat Towing Compatibility Matrix & Equipment Failure Gaps Last Updated: February 15, 2026 Important Legal Disclaimer This article provides general information only and is not legal, mechanical, or professional advice. Federal and state towing...

Can Someone Live in a Camper on My Property?
State-by-State Guide to RV Living Laws on Private Property In my 35+ years of RV camping across federal lands and private properties, I've learned one critical thing about hosting someone in an RV on your property: it's heavily restricted or regulated in many US...

How to Find RV Dump Stations Fast
Apps, Costs & Free Options (2026) Compare the best dump station finders, see real costs at Love's and Flying J, and discover free options along your route By Chuck Price Last updated: February 4, 2026 Chuck Price has 35+ years of RV camping experience...

UTV Street Legal by State 2026
Complete Guide By Chuck Price, Boondock or Bust | Full-time RVer, 35+ years UTV experience, 47 states traveled Last updated: February 2, 2026 Read time: 15 minutes | Key stat: Montana and South Dakota require zero speed restrictions for street-legal UTVs Quick...

3-Day Arches & Canyonlands Itinerary
2026 "Double-Play" Guide By Chuck Price. Updated for 2026 travel. TL;DR: Your Moab Plan in 90 Seconds Stressed about Arches timed entry? Don’t be. This guide gives you the “Moab Double-Play”: hit Arches early for the iconic hikes, then spend your afternoons on the...

Rocky Mountain National Park Guide 2026
1-3 Day Plans, Permits + Altitude Safety By: Chuck Price · Last Updated: January 11, 2026 Estimated read time: 13 minutes Quick Reference (Verify 2026 before travel) Timed entry status for 2026: As of January 11, 2026, confirm the current year’s timed entry season...

2026 Yosemite Reservation Guide: Peak-Hours-Plus Logistics & RV Maps
2026 Yosemite Reservation Guide: Peak-Hours-Plus Logistics & RV Maps Your complete logistics toolkit for navigating the 2026 Yosemite reservation system By Chuck Price. Last updated: January 10, 2026 | Estimated read time: 8 minutes Quick Reference (TL;DR)...

Project 2025 & Public Lands
Project 2025's Impact on Public Lands: 2026 Update on National Monuments and Energy Policy Trump administration actions threaten millions of acres. Real data on tourism revenue, energy jobs, and monument rollbacks Estimated read time: 14 minutes 📋 Quick...

Full-Time RV Living Costs in 2026
A Complete Financial Analysis Social media shows stunning sunset campsite photos, but the spreadsheets tell a different story. Full-time RV living in 2026 costs between $2,500 and $5,000 monthly—and that figure hides a capital investment trap that catches most...