
Banishing the Bogeyman: Conquering RV Bathroom Odors
Ah, the open road… the wind in your hair… the unexpected whiff of sewage from the bathroom? If the dream of RV life sometimes comes face-to-face with reality’s less fragrant aspects, fear not! This guide, is your compass through the sometimes-murky waters of RV toilet odor and tank maintenance. So, grab your rubber gloves, channel your inner MacGyver, and let’s banish those bogeymen for good!
Here’s what you’ll find:
- The Culprits Unmasked: We delve into the mysteries of RV odor, focusing on black tanks and the often troublesome Dometic 300 Series toilet. Understanding the mechanics and common issues is essential.
- Weaponry of Choice: Ditch the harsh chemicals and opt for eco-friendly deodorizers like AquaMax. Discover the power of household items like vinegar (for its odor-neutralizing properties) and baking soda for controlling odors.
- DIY Defense Strategies: Equip yourself with knowledge and skills to tackle RV tank cleaning and toilet seal replacements.
- Preventative Tactics: Learn the secrets of maintaining a fresh environment with simple habits and smart tank maintenance techniques.
So, buckle up, fellow adventurers! Your journey to a fresh and fragrant RV experience starts here. Let’s make those bathroom encounters a thing of the (pleasant) past!
 The Culprits Unmasked: Why Your RV Bathroom Has a Secret Agent Stink
Picture this: fresh air whipping through your open windows, sunlight painting the interior, and… a whiff of something decidedly unpleasant from the bathroom. Don’t panic, brave adventurers! Every RV’s got its secrets, and sometimes, those secrets stink. But fear not, for we’re about to unmask the culprits behind that rogue odor.
The Black Tank: Mastermind of Malodors
First on the suspect list is the notorious black tank, the hidden villain responsible for storing… well, you get the picture. Think of it as your RV’s personal dumpster, and like any neglected dumpster, it can develop quite a stench. Overfilled tanks, infrequent emptying, and the wrong toilet paper can all make this villain sing like a broken drainpipe. Keeping it well-maintained and regularly emptied is key. Here’s a guide on proper black tank maintenance to help you stay ahead of the stink.
The Dometic 300 Series: A Trickster with a Temper
This popular toilet, while reliable for many, can become a sneaky source of odor if neglected. Worn-out seals, improper ventilation, and even the occasional forgotten piece of… evidence can turn this innocent-looking porcelain into a fragrant faux pas factory. A good practice is to regularly check and replace the seals if needed. Here’s how to properly maintain your Dometic 300 Series toilet.
Beyond the Usual Suspects:
But wait, the plot thickens! Sometimes, the stink can have more unconventional origins. Forgotten food scraps lurking in drains, moldy shower curtains, and even faulty plumbing vents can all contribute to that unwelcome ambiance.
The Plot Twist: Unmasking the Good Guys
Don’t despair, fellow explorers! Just like every Batman needs a Robin, every stinky RV needs a team of odor-busting heroes. In the next chapter, we’ll meet the eco-friendly deodorizers, the powerful cleaning solutions, and the DIY maintenance tricks that’ll turn you into a bathroom odor vanquisher!
Effective RV Bathroom Deodorizers and Cleaners:
Get ready to be introduced to some game-changers in the world of RV sanitation. We’re talking about products like Aqua-Kem for potent black tank management, baking soda and vinegar for a natural cleaning solution, and specialized RV shower cleaners like Thetford Premium RV Aqua-Clean Kitchen and Bath Cleaner to keep your space mold and mildew-free.. With these allies in your arsenal, you’ll be well on your way to maintaining a fresh and inviting bathroom environment.

Eco-Friendly Solutions for Battling RV Odor
So, you’ve identified the odor-mongering culprits in your RV bathroom. Now, it’s time to arm yourself with the right weapons to fight back! But not just any weapons, no – we’re talking eco-friendly heroes that banish the stink without harming the environment.
The Green Guardians: Biodegradable Deodorizers
Say goodbye to harsh chemicals and hello to the power of nature! Biodegradable deodorizers like AquaMax, Porta-Pak, and Aqua-Kem are your frontline defense against RV sewer smells. These champions not only mask unpleasant odors but also work hard to break down waste and prevent future buildup. Plus, you can easily find them on platforms like Amazon, so restocking your odor-busting arsenal is a breeze.
- AquaMax: This mighty warrior uses natural enzymes to tackle odor at its source, leaving your bathroom smelling fresh as a mountain meadow.
- Porta-Pak: These pre-measured packets are like tiny odor-fighting ninjas, dissolving quickly and releasing long-lasting freshness.
- Aqua-Kem: A classic in the RV world, Aqua-Kem combines odor control with powerful waste breakdown, making it a one-two punch against bathroom nasties.
DIY Deodorizing Duo: Vinegar and Baking Soda
For the eco-conscious warrior on a budget, the dynamic duo of vinegar and baking soda offers a natural and effective deodorizing solution. Simply mix a cup of vinegar with half a cup of baking soda in a spray bottle and give your tanks and pipes a refreshing spritz. This natural powerhouse not only neutralizes odors but also helps clear drain clogs.
Remember: Always follow the manufacturer’s instructions for any deodorizer, whether commercial or DIY. Some chemicals, even eco-friendly ones, can harm specific RV plumbing systems.
With this green battalion at your side, you’ll be ready to conquer any RV bathroom odor and reclaim your fragrant, fresh-air haven. Onward to the next battlefield – DIY maintenance!
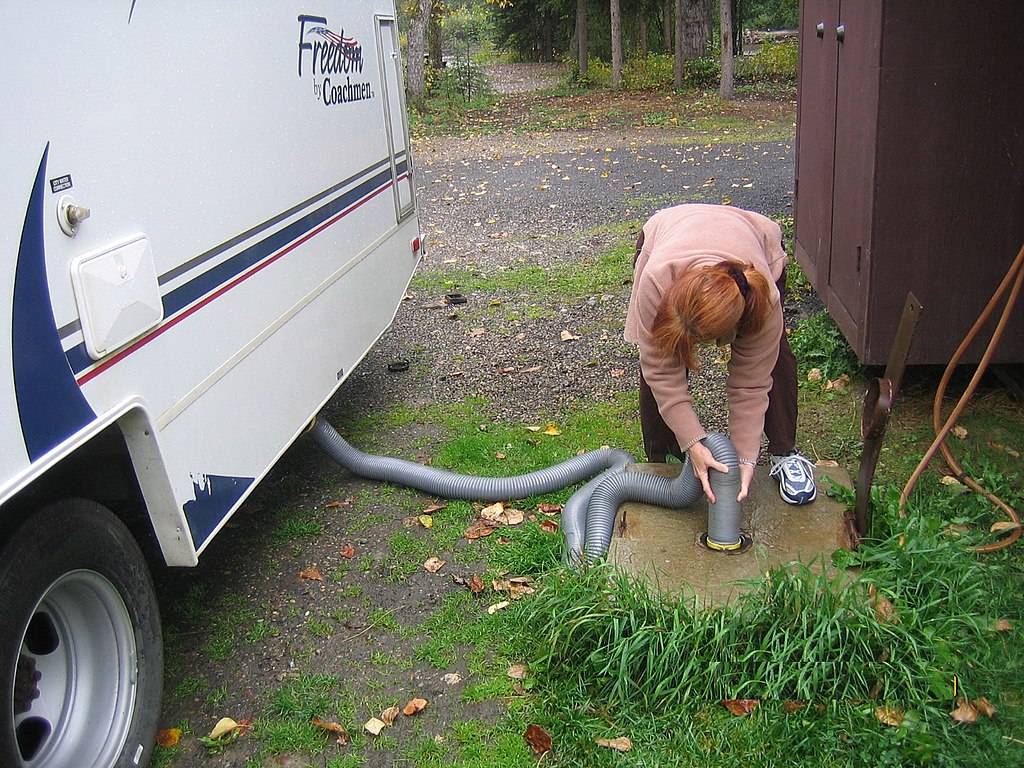
Image by Mandruss Via Wikipedia
RV Sewage Tank Maintenance: A Step-by-Step Guide
Operation Black Tank Blitz: Your Guide to Regular Maintenance
Remember the black tank, that notorious odor mastermind from the previous chapter? Well, keeping it happy (or at least less odorous) requires regular maintenance. Think of it as preventive odor patrol – a proactive approach to ensuring your bathroom stays a fragrant sanctuary.
Step 1: Gear Up for Battle
Before diving into the dirty work, gather your trusty supplies:
- RV septic tank cleaner: Choose an eco-friendly option like Bio-Clean or RV Digest-It, which break down waste naturally. Ditch the harsh chemicals – your tank and the environment will thank you!
- Rubber gloves and mask: Safety first! Protect your hands and lungs from potentially unpleasant fumes.
- Tank flush hose: This connects your freshwater supply to the tank, allowing you to thoroughly rinse and fill it.
- Sewer hose and adapter: These will be your trusty companions when emptying the tank at designated dump stations.
Step 2: The Great Emptying
Find a designated RV dump station and connect your sewer hose. Open the black tank valve slowly, letting gravity do its work. Once empty, close the valve and give the tank a good rinse with the flush hose. Repeat the emptying and rinsing process until the water runs clear.
Step 3: Unleashing the Cleaning Cavalry
Pour your chosen RV septic tank cleaner into the empty tank, following the manufacturer’s instructions. Fill the tank halfway with water, close the valve, and let the cleaner work its magic for the recommended time. This breaks down any lingering waste and keeps your tank smelling fresh.
Step 4: Rinse and Repeat
Empty the tank again, rinse thoroughly, and refill with fresh water. This final rinse ensures the cleaner is flushed out and leaves your tank ready for action.
Step 5: Schedule Your Patrols
Regular maintenance is key! How often you need to clean your tank depends on usage and size. Generally, every 3-5 days for full-time RVing, and weekly for weekend warriors, is a good starting point. Remember, an ounce of prevention is worth a pound (or rather, a gallon) of stink!
With this step-by-step guide and some dedication, you’ll have your RV’s black tank under control and your bathroom smelling like a spring meadow, not a forgotten dumpster. Now, onto the next chapter – unleashing your inner DIY hero!
DIY Solutions for RV Odor Conquest
So, the stink persists even after your valiant tank-taming efforts? Fear not, intrepid adventurer! Sometimes, conquering RV odor requires summoning your inner MacGyver and tackling some DIY repairs. Don’t worry, we’re talking tasks that are more empowering than intimidating, and trust me, the satisfaction of vanquishing the stench yourself is unbeatable.
The Seal Slayer: Replacing Your Toilet’s Leaky Guardian
That persistent whiff coming from the porcelain throne? It might be a culprit called the flush ball seal, a hardworking warrior who keeps nasty gases at bay. Over time, this seal can wear out, creating an olfaction-offensive loophole. But fear not, replacing it is a cinch! Grab your toolbox and follow these steps:
- Gather your troops: Locate your replacement seal (compatible with your toilet model, of course) and some trusty gloves. You can find a variety of seals here.
- Silence the waterworks: Shut off the water supply to your toilet. Here’s a guide on how to do it.
- Disconnect and dethrone: Unscrew the bolts holding the toilet to the floor and gently lift it aside. Place a rag in the black tank opening to contain any unpleasant surprises.
- Unmasking the villain: Locate the old, leaky seal on the bottom of the toilet bowl. It’s usually easy to spot (and smell).
- Farewell, foul fiend: Gently remove the old seal and clean the area thoroughly.
- Hail the new hero: Place the new seal in its rightful position, ensuring it’s snug and secure.
- Reunion and victory lap: Reattach the toilet to the floor, tighten the bolts, and reconnect the water supply. Test your handiwork with a flush (and a celebratory fist pump!).
The Vent Viper: Conquering Clogged Airflow
Sometimes, that funky aroma can also be blamed on a blocked vent pipe. This unsung hero allows fresh air to flow through your plumbing system, preventing stagnation and odor build-up. But leaves, debris, or even pesky critters can create a roadblock. Here’s how to clear the way:
- Locate the lair: Your vent pipe usually sits on the roof of your RV. It’s typically a small, white pipe near the bathroom vent fan.
- Rooftop recon: Climb up there (safely!) and locate the vent pipe opening.
- Tools of the trade: You might need a ladder, gloves, and a long, flexible tool like a vent cleaning brush or auger.
- Operation un-clog: Carefully insert the tool into the vent pipe opening and gently remove any blockages. Be patient and thorough!
- Victory flush: Pour some water down the vent pipe to test the airflow. If it flows freely, you’ve vanquished the odor villain!
Remember, a little DIY can go a long way in keeping your RV bathroom smelling fresh and fabulous. Bonus points if you can fix these issues and still manage to look like a glamorous adventurer after your rooftop battle!
Don’t forget: Check your RV’s user manual or consult a trusted RV repair resource for specific instructions on replacing your toilet seal or cleaning the vent pipe. Safety first, fellow explorers!
With these DIY tips and a healthy dose of MacGyver-esque resourcefulness, you’ll be a bathroom odor-banishing champion in no time. Onward to the final chapter, where we’ll discuss strategies for keeping those smells at bay forever!
Banishing the Bogeyman: A Final Victory Lap over RV Odor
There you have it, fellow adventurers! You’ve unmasked the odor culprits, armed yourself with eco-friendly weapons, tackled tank maintenance like a pro, and even unleashed your inner MacGyver. Now, take a moment to bask in the glorious aroma of victory – your RV bathroom smells like a meadow, not a dumpster!
Remember, keeping those bogeymen at bay is all about consistency. Regular tank cleanings, the right deodorizers, and a watchful eye on seals and vents are your secret weapons. Plus, don’t be afraid to get your hands dirty with a little DIY – replacing a seal or clearing a vent pipe is easier than you think, and the satisfaction is oh-so-sweet!
So, gear up, roll out the welcome mat (not the stink bomb), and embrace the fresh new world of fragrant RV adventures. Happy trails, and may your bathrooms forever stay bogeyman-free!
Resources
- RVshare.com – This site provides practical steps for dealing with RV toilet smells, including tips on cleaning and troubleshooting a clogged black tank (RVshare, n.d.): RV Toilet Smells When Flushed – Solved in 6 Steps
- AxleAddict.com – Offers insight into common reasons for RV toilet odors and suggests steps for remediation: How to Get Rid of RV Toilet Odor in 3 Easy Steps
- CampAddict.com – Discusses various reasons why an RV toilet might smell and how to address these issues: RV Toilet Smells? 8 Reasons Why & How To Fix The Odor
- TravelTrailerPro.com – Provides proven ways to eliminate RV toilet smells, including specific methods for removing blockages: 11 Proven Ways to Eliminate RV Toilet Smells
- Tidbits-Cami.com – Offers solutions for eliminating RV odors and stinky toilet smells: 8 Solutions for Eliminating RV Odors and Stinky Toilet Smells
- Jeffsetter.com – An expert guide on how to clean an RV toilet, which can be helpful in addressing and preventing odors: How To Clean An RV Toilet: An Expert Guide
- AlwaysOnLiberty.com – Provides detailed tips on RV black tank cleaning and maintenance, which is crucial for odor control: RV Black Tank Cleaning and Maintenance Tips
Image Credit: In Post Image 1: Charles Williams via flickr