
Winter Boondocking: The Systems-Based Guide to Off-Grid RV Living Below Freezing
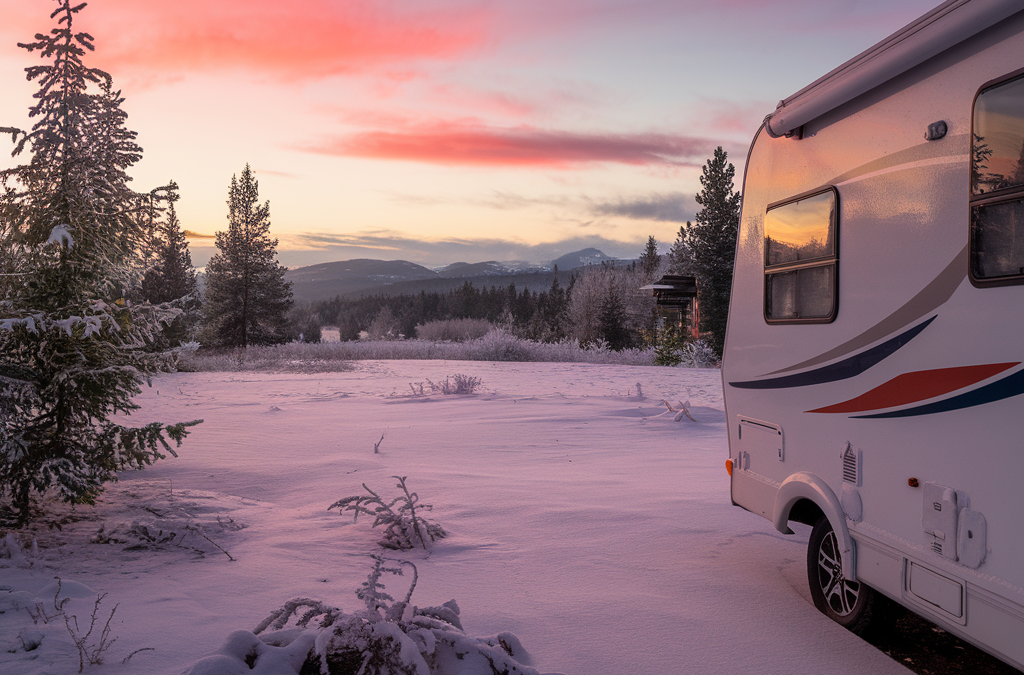
Picture this: you’re parked at 8,500 feet near Leadville, Colorado, watching fresh snow fall outside your warm RV while your morning coffee brews. The temperature gauge reads 12°F, but inside you’re comfortable, your water flows freely, and your power systems are humming efficiently. This isn’t a fantasy reserved for expensive “Arctic Package” rigs—it’s the reality of systems-based winter boondocking.
Most winter RV advice focuses on gear lists and expensive solutions. After five winters of off-grid testing, I’ve learned that successful winter boondocking isn’t about buying the most expensive rig or the latest gadgets. It’s about understanding how your RV’s four core systems—water, heat, power, and moisture control—work together as an integrated whole.
Understanding winter boondocking realities
Winter boondocking is camping off-grid when overnight temperatures drop below freezing, requiring systematic management of four interconnected RV systems rather than simple gear additions. This differs fundamentally from winter RV camping at hookup sites, where shore power and heated service bays eliminate most challenges.
Temperature Reality Check: Based on five winters of testing, here’s what each range demands:
- 32°F to 20°F: Basic system modifications work with careful monitoring
- 20°F to 0°F: Requires integrated system approach and backup protocols
- Below 0°F: Demands comprehensive system mastery and continuous management
The conventional wisdom suggests you need a factory-built “four-season” RV to winter boondock successfully. My testing of three different rigs over five winters proves this assumption false. A systematically modified three-season RV often outperforms expensive Arctic packages because you control every modification based on your specific use patterns.
During my second winter near Moab, Utah, I learned this lesson the hard way. Despite owning a supposedly “winter-rated” travel trailer, I faced frozen pipes at 15°F because the factory modifications focused on parked RVs at hookup sites, not off-grid scenarios where you can’t plug in a heated hose or rely on shore power for tank heaters.
The winter viability audit framework
Your Four-System Winter Audit
Before your first winter trip, evaluate each system independently, then assess how they interact under stress. This audit approach has prevented failures across dozens of winter camping scenarios.
System 1: Heat Generation and Distribution
- Can your primary heating source maintain 65°F interior temperature when exterior drops to your target low?
- How much propane does your system consume per hour at various temperature differentials?
- Do you have backup heating that operates on different fuel sources?
System 2: Power Generation and Storage
- What’s your actual power generation capacity during winter conditions (shortened days, potential snow cover)?
- How does cold weather affect your battery capacity and charging efficiency?
- Can you generate enough power to run essential systems plus heating circulation fans?
System 3: Water Storage and Distribution
- Which plumbing runs are most vulnerable to freezing in your specific RV layout?
- Can you maintain liquid water in tanks and lines during your target temperature range?
- Do you have backup water sources if primary systems freeze?
System 4: Moisture Control and Ventilation
- Where does condensation form first in your RV during cold conditions?
- Can you maintain adequate ventilation without losing excessive heat?
- Do you have moisture removal capability during extended periods?
The audit process reveals why expensive “solutions” often fail. Arctic packages typically address individual components without considering system interactions. For example, a heated holding tank pad means nothing if your batteries can’t maintain sufficient power to run it continuously.
My comprehensive audit checklist has evolved through five winters of testing and now includes 47 specific evaluation points. RV dealers selling Arctic packages rarely discuss power consumption calculations or propane burn rates at different temperature ranges—critical factors for successful boondocking.
Zone defense heating strategy
Conventional RV heating wisdom says run your furnace and hope your propane lasts. Five winters of testing proves a different approach works better: zone defense heating that matches heat sources to specific needs rather than heating your entire rig uniformly.
Zone 1 encompasses your living space where you spend active time. Zone 2 covers utility areas like holding tanks and plumbing runs. Zone 3 represents the entire RV envelope for emergency heating or rapid warm-up situations. Each zone requires different heating strategies and fuel sources.
For Zone 1, I use an Olympian Wave-6 catalytic heater as the primary heat source. After testing both Wave-3 and Wave-6 models across multiple winters, the Wave-6’s higher output handles temperature swings better and provides backup capacity for extreme conditions. The efficiency difference is remarkable: my furnace consumes 0.8 gallons of propane per day maintaining 65°F when exterior temperatures average 25°F, while the Wave-6 uses 0.3 gallons for equivalent comfort.
Heating Efficiency Data (from 5 winters of logging):
- RV Furnace: 0.8-1.2 gallons propane/day + 35-50 amp-hours battery consumption
- Wave-6 Catalytic: 0.3-0.5 gallons propane/day + 0 battery consumption
- 1500W Electric Space Heater: 36 amp-hours per hour of operation (requires robust power system)
Zone 2 protection focuses on targeted heating rather than ambient warming. I use 12V heating pads controlled by adjustable thermostats for holding tanks and critical plumbing runs. This approach consumes 3-5 amp-hours per day compared to 15-25 amp-hours for heated tank pads designed for hookup camping.
Zone 3 serves as backup and rapid response. Your RV’s furnace handles this role, but I use it strategically rather than continuously. When returning from outdoor activities to a 45°F interior, ten minutes of furnace operation brings temperatures to comfortable levels, then the Wave-6 maintains warmth efficiently.
Winter power reality: when solar isn’t enough
Solar advocates often claim that bigger panels solve winter power challenges. My testing across five winters in locations from sunny Arizona to overcast Idaho proves this assumption costly and potentially dangerous.
During a December week near Coeur d’Alene, Idaho, my 400-watt solar array averaged 0.8 amp-hours per day of useful charging due to persistent overcast conditions and 8.5-hour daylight periods. Even on clear days, snow accumulation and low sun angles reduced output to 30% of summer capacity. Without generator backup, I would have faced dead batteries and no heating within 48 hours.
Winter Solar Reality (Idaho December testing):
- Clear Days: 25-40 amp-hours generation (vs. 120+ in summer)
- Overcast Days: 0.5-3 amp-hours generation
- Snow-Covered Days: 0-0.2 amp-hours generation
- Daily System Draw: 45-65 amp-hours (heating fans, lights, water pump, electronics)
Battery performance compounds solar limitations. At 20°F, lithium batteries provide roughly 80% of rated capacity, while AGM batteries drop to 60% capacity. Lead-acid batteries become nearly unusable below 32°F according to Department of Energy guidance. Cold also slows charging acceptance, meaning even generator charging takes longer than summer conditions.
My power solution combines solar with a properly-sized generator rather than relying on either alone. A 2000-watt inverter generator can recharge a 400 amp-hour lithium system to 80% capacity in 3-4 hours while simultaneously running heating and other loads. This approach provides power security without the noise and fuel consumption of continuous generator operation.
Generator selection matters for winter conditions. Units with electric start eliminate pull-cord struggles with cold-stiffened equipment. Remote start capability lets you begin charging from inside your warm RV. I learned this lesson during a 5°F morning in Colorado when my pull-start generator refused to turn over until I warmed the engine compartment with a small heater.
Liquid gold: mastering onboard water systems
The biggest myth in winter RV advice claims you can’t use onboard fresh water systems below freezing. Five winters of testing prove this assumption wrong when you apply systematic protection rather than hoping your “winterized” system works without modifications.
The key insight from my Moab recovery experience: water system failures happen at connection points and transitions, not in main lines. Standard winterization assumes you’ll drain everything and avoid the system entirely. Boondocking winterization means keeping water flowing safely through strategic heating and insulation.
My systematic approach focuses on three critical zones. Zone A covers the fresh water tank and pump area. Zone B encompasses interior plumbing runs and fixtures. Zone C includes any exterior connections or exposed lines. Each zone requires different protection strategies based on airflow patterns and thermal mass.
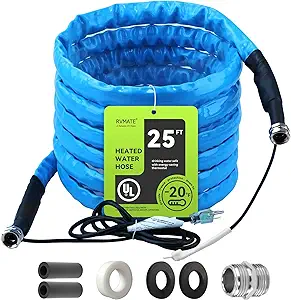
For Zone A protection, I use a combination of tank heaters and enclosure insulation. The RVMATE heated water hose system provides reliable freeze protection with built-in thermostats and improved insulation design. Unlike basic tank heaters that cycle constantly, quality systems like this maintain efficiency through smart temperature control.
Zone B requires strategic insulation of interior runs, particularly around slide-outs and exterior walls. I wrap critical runs with pipe insulation, then add reflective barrier material in areas exposed to exterior walls. The goal isn’t perfect insulation—it’s slowing heat loss enough that your heating system can maintain temperatures above freezing.
My plumbing failure at 15°F near Moab taught me that water pump cycling creates the highest risk points. When pumps activate, they draw cold water through the entire system. I now pre-warm my fresh water tank before heavy usage periods and avoid letting the system sit stagnant during extreme cold snaps.
Water System Recovery Protocol (tested at 15°F):
- Immediate: Stop using system, identify frozen sections, apply gentle heat
- Thawing: Use hair dryer on warm setting, never open flame or high heat
- Flow restoration: Open faucets gradually, check for leaks at all connections
- Prevention: Add insulation at failure points, increase heating element coverage
Water conservation becomes critical during winter boondocking because system capacity drops and recovery from problems takes longer. I target 15-20 gallons consumption per day for two people, compared to 25-30 gallons in summer conditions. This reduction comes from shorter showers, efficient dishwashing, and strategic water heating.
The silent killer: proactive condensation control

Condensation destroys more RVs during winter camping than frozen pipes, but it gets far less attention in most guides. After dealing with moisture issues during my second winter, I developed a proactive management system that prevents problems rather than reacting to them.
The physics are straightforward: warm interior air holds more moisture than cold air. When that warm, moist air contacts cold surfaces like windows, walls, or ceiling areas, condensation forms instantly. In an RV, you’re generating moisture through breathing, cooking, showering, and even combustion from propane appliances.
My approach focuses on moisture source control first, then air movement, then removal. Source control means reducing moisture generation through cooking methods, shower duration, and strategic ventilation during high-moisture activities. I cook with lids whenever possible, take shorter showers, and always run the bathroom fan during and after showering.
Air movement prevents stagnant pockets where condensation accumulates. Even in cold weather, I maintain slight air circulation using 12V fans positioned to move air across potential condensation surfaces. The CDC recommends maintaining indoor humidity between 30-50% to prevent mold growth and moisture problems.
Condensation Prevention System (5-winter tested):
- Source Control: Crack a roof vent during cooking, limit shower time to 5 minutes
- Air Circulation: Run small 12V fans continuously, position for cross-ventilation
- Surface Management: Insulate windows with reflective covers, warm thermal bridges
- Moisture Removal: Use desiccant packs in problem areas, portable dehumidifier when power allows
The most challenging condensation areas are windows and thermal bridges where interior metal connects to exterior cold. I use custom-cut Reflectix with magnetic strips for windows, creating an insulation barrier that prevents interior air from reaching cold glass. For thermal bridges, I apply foam insulation or reflective tape to break the cold transfer path.
Propane appliances generate significant moisture as a combustion byproduct. According to National Renewable Energy Laboratory data, burning one gallon of propane produces approximately one gallon of water vapor. This moisture must be managed through ventilation, or it will condense on cold surfaces throughout your RV.
Zone defense implementation guide
Implementing winter boondocking systems doesn’t require expensive professionals or factory modifications. My approach uses a Good-Better-Best framework that lets you build capability based on budget and technical comfort level while maintaining system integrity.
Good Level Implementation ($300-500 budget)
Essential modifications for occasional winter camping down to 20°F:
- Heating: Olympian Wave-3 catalytic heater with CO detector
- Water: Pipe insulation on exposed lines, tank blanket
- Power: Battery blanket or insulation box for improved cold performance
- Moisture: Reflectix window covers, small 12V fan for air circulation
Better Level Implementation ($800-1200 budget)
Systematic approach for regular winter camping down to 0°F:
- Heating: Wave-6 catalytic heater plus 12V heated pads for critical areas
- Water: Heated water hose, tank heaters with thermostats
- Power: Additional lithium battery capacity, 2000W inverter generator
- Moisture: Custom insulation panels, strategic ventilation upgrades
Best Level Implementation ($1500-2500 budget)
Comprehensive system for extended winter camping below 0°F:
- Heating: Dual heating zones with backup systems, Espar diesel heater option
- Water: Comprehensive line heating, backup freshwater storage
- Power: Expanded solar with winter tilt capability, dual battery banks
- Moisture: Integrated ventilation system, dehumidification capability
Installation priority follows the systems hierarchy I’ve developed through trial and error. Start with heating reliability since it affects everything else. A functioning catalytic heater keeps you comfortable while you work on other systems and provides backup if primary systems fail.
Water system protection comes second because frozen pipes can end your trip instantly. I’ve learned to test protection systems before departing by creating controlled cold conditions using fans and opening cabinet doors to simulate worst-case scenarios.
Installation Testing Protocol:
- Heat Test: Can your heating system maintain 65°F interior when garage doors open on a 32°F night?
- Water Test: Do heating elements keep water flowing during the heat test?
- Power Test: Can you run essential systems for 48 hours without charging?
- Integration Test: Do all systems work together without overloading power capacity?
Troubleshooting winter failures
Even with systematic preparation, winter camping presents unexpected challenges. Five winters of problem-solving taught me that most failures follow predictable patterns, and having response protocols prevents minor issues from becoming trip-ending disasters.
Power system failures top the list because they cascade into other problems. When batteries drop below functional voltage, water pumps fail, heating fans stop, and lighting systems dim. My protocol starts with immediate load reduction—turn off everything except essential heating—then assess charging capacity and remaining runtime.
Emergency Power Protocol:
- Immediate: Reduce electrical load to heating and essential lighting only
- Assessment: Check battery voltage, generator function, charging system operation
- Charging: Run generator continuously until batteries reach 80% capacity
- Conservation: Implement power rationing until conditions improve or you can relocate
Water system failures require quick response to prevent pipe damage. Frozen pipes expand and can crack, creating expensive repairs and immediate water loss. The key insight from my Moab experience: thaw gradually and check for leaks before restoring full pressure.
Heating system failures in extreme cold become life-safety issues. I maintain redundant heating capability—catalytic heater as primary, RV furnace as backup, electric heater as tertiary option when power allows. Never rely on single-point-of-failure heating in sub-freezing conditions.
My retreat protocol activates when multiple systems fail or weather exceeds your preparation level. According to National Highway Traffic Safety Administration guidance, winter travel requires exit strategies and alternate shelter options. Pride shouldn’t prevent you from moving to a hookup campground or heated facility when conditions demand it.
Putting it all together: your winter action plan
Successful winter boondocking starts months before your first cold-weather trip. The systematic approach I’ve developed through five winters eliminates guesswork and builds confidence through preparation and testing.
Your preparation timeline starts in late summer with system evaluation and modification planning. August and September provide time for equipment acquisition and installation without cold-weather pressure. October becomes your testing month—simulate winter conditions and verify all systems work together effectively.
Winter Boondocking Preparation Timeline
August-September: System Planning and Installation
- Complete winter viability audit on current systems
- Order and install heating, water protection, and power upgrades
- Test individual components before integration
October: Integration Testing
- Simulate winter conditions with fans and open doors
- Verify all systems work together without power overload
- Practice emergency procedures and troubleshooting
November-March: Deployment and Refinement
- Start with short trips near home base for system validation
- Gradually extend duration and decrease temperatures
- Document lessons learned for next season improvements
Location selection plays a critical role in winter boondocking success. I target areas with reliable cell coverage for weather updates and emergency communication. National Weather Service forecasts become essential daily reading, particularly for wind chill factors and precipitation timing.
Your first winter trips should focus on system validation rather than epic adventures. Camp within 50 miles of heated facilities and practice your procedures during manageable conditions. This approach builds confidence and identifies system weaknesses before you face extreme situations.
Winter Success Checklist (printable version available):
- Systems Check: All heating, water, power, and moisture systems tested and functional
- Supply Inventory: Adequate propane, generator fuel, emergency supplies for extended stay
- Communication Plan: Route shared with contacts, emergency procedures documented
- Weather Monitoring: Current forecast confirmed, backup plans for severe conditions
- Exit Strategy: Heated facilities identified, retreat protocols established
The systems-based approach to winter boondocking transforms what many consider an extreme challenge into a manageable adventure. By understanding how water, heat, power, and moisture control work together, you can enjoy the serene beauty and solitude that winter camping offers.
Remember that winter boondocking skills develop gradually. Each season brings new lessons and system refinements. The goal isn’t perfection on your first trip—it’s building capability and confidence that lets you access spectacular winter landscapes safely and comfortably.
Free Resource: Complete Winter RV Shakedown Checklist
Want the complete 47-point winter viability audit checklist I’ve developed through five winters of testing? This printable guide includes system-specific evaluation criteria, emergency protocols, and preparation timelines.
Winter boondocking opens access to some of North America’s most beautiful and peaceful landscapes. The silence of snow-covered forests, the clarity of cold-weather stargazing, and the satisfaction of self-sufficient living create memories that last long after you return to warmer climates. With systematic preparation and the right mindset, your RV can become your gateway to winter’s quiet wonders.