Banishing the Bogeyman: Conquering RV Bathroom Odors
Ah, the open road… the wind in your hair… the unexpected whiff of sewage from the bathroom? If the dream of RV life sometimes comes face-to-face with reality’s less fragrant aspects, fear not! This guide, is your compass through the sometimes-murky waters of RV toilet odor and tank maintenance. So, grab your rubber gloves, channel your inner MacGyver, and let’s banish those bogeymen for good!
Here’s what you’ll find:
The Culprits Unmasked: We delve into the mysteries of RV odor, focusing on black tanks and the often troublesome Dometic 300 Series toilet. Understanding the mechanics and common issues is essential.
Weaponry of Choice: Ditch the harsh chemicals and opt for eco-friendly deodorizers like AquaMax. Discover the power of household items like vinegar (for its odor-neutralizing properties) and baking soda for controlling odors.
DIY Defense Strategies: Equip yourself with knowledge and skills to tackle RV tank cleaning and toilet seal replacements.
Preventative Tactics: Learn the secrets of maintaining a fresh environment with simple habits and smart tank maintenance techniques.
So, buckle up, fellow adventurers! Your journey to a fresh and fragrant RV experience starts here. Let’s make those bathroom encounters a thing of the (pleasant) past!
The Culprits Unmasked: Why Your RV Bathroom Has a Secret Agent Stink
Picture this: fresh air whipping through your open windows, sunlight painting the interior, and… a whiff of something decidedly unpleasant from the bathroom. Don’t panic, brave adventurers! Every RV’s got its secrets, and sometimes, those secrets stink. But fear not, for we’re about to unmask the culprits behind that rogue odor.
The Black Tank: Mastermind of Malodors
First on the suspect list is the notorious black tank, the hidden villain responsible for storing… well, you get the picture. Think of it as your RV’s personal dumpster, and like any neglected dumpster, it can develop quite a stench. Overfilled tanks, infrequent emptying, and the wrong toilet paper can all make this villain sing like a broken drainpipe. Keeping it well-maintained and regularly emptied is key. Here’s a guide on proper black tank maintenance to help you stay ahead of the stink.
The Dometic 300 Series: A Trickster with a Temper
This popular toilet, while reliable for many, can become a sneaky source of odor if neglected. Worn-out seals, improper ventilation, and even the occasional forgotten piece of… evidence can turn this innocent-looking porcelain into a fragrant faux pas factory. A good practice is to regularly check and replace the seals if needed. Here’s how to properly maintain your Dometic 300 Series toilet.
Beyond the Usual Suspects:
But wait, the plot thickens! Sometimes, the stink can have more unconventional origins. Forgotten food scraps lurking in drains, moldy shower curtains, and even faulty plumbing vents can all contribute to that unwelcome ambiance.
The Plot Twist: Unmasking the Good Guys
Don’t despair, fellow explorers! Just like every Batman needs a Robin, every stinky RV needs a team of odor-busting heroes. In the next chapter, we’ll meet the eco-friendly deodorizers, the powerful cleaning solutions, and the DIY maintenance tricks that’ll turn you into a bathroom odor vanquisher!
Effective RV Bathroom Deodorizers and Cleaners:
Get ready to be introduced to some game-changers in the world of RV sanitation. We’re talking about products like Aqua-Kem for potent black tank management, baking soda and vinegar for a natural cleaning solution, and specialized RV shower cleaners like Thetford Premium RV Aqua-Clean Kitchen and Bath Cleaner to keep your space mold and mildew-free.. With these allies in your arsenal, you’ll be well on your way to maintaining a fresh and inviting bathroom environment.
So, you’ve identified the odor-mongering culprits in your RV bathroom. Now, it’s time to arm yourself with the right weapons to fight back! But not just any weapons, no – we’re talking eco-friendly heroes that banish the stink without harming the environment.
The Green Guardians: Biodegradable Deodorizers
Say goodbye to harsh chemicals and hello to the power of nature! Biodegradable deodorizers like AquaMax, Porta-Pak, and Aqua-Kem are your frontline defense against RV sewer smells. These champions not only mask unpleasant odors but also work hard to break down waste and prevent future buildup. Plus, you can easily find them on platforms like Amazon, so restocking your odor-busting arsenal is a breeze.
AquaMax: This mighty warrior uses natural enzymes to tackle odor at its source, leaving your bathroom smelling fresh as a mountain meadow.
Porta-Pak: These pre-measured packets are like tiny odor-fighting ninjas, dissolving quickly and releasing long-lasting freshness.
Aqua-Kem: A classic in the RV world, Aqua-Kem combines odor control with powerful waste breakdown, making it a one-two punch against bathroom nasties.
DIY Deodorizing Duo: Vinegar and Baking Soda
For the eco-conscious warrior on a budget, the dynamic duo of vinegar and baking soda offers a natural and effective deodorizing solution. Simply mix a cup of vinegar with half a cup of baking soda in a spray bottle and give your tanks and pipes a refreshing spritz. This natural powerhouse not only neutralizes odors but also helps clear drain clogs.
Remember: Always follow the manufacturer’s instructions for any deodorizer, whether commercial or DIY. Some chemicals, even eco-friendly ones, can harm specific RV plumbing systems.
With this green battalion at your side, you’ll be ready to conquer any RV bathroom odor and reclaim your fragrant, fresh-air haven. Onward to the next battlefield – DIY maintenance!
Operation Black Tank Blitz: Your Guide to Regular Maintenance
Remember the black tank, that notorious odor mastermind from the previous chapter? Well, keeping it happy (or at least less odorous) requires regular maintenance. Think of it as preventive odor patrol – a proactive approach to ensuring your bathroom stays a fragrant sanctuary.
Step 1: Gear Up for Battle
Before diving into the dirty work, gather your trusty supplies:
RV septic tank cleaner: Choose an eco-friendly option like Bio-Clean or RV Digest-It, which break down waste naturally. Ditch the harsh chemicals – your tank and the environment will thank you!
Rubber gloves and mask: Safety first! Protect your hands and lungs from potentially unpleasant fumes.
Tank flush hose: This connects your freshwater supply to the tank, allowing you to thoroughly rinse and fill it.
Sewer hose and adapter: These will be your trusty companions when emptying the tank at designated dump stations.
Step 2: The Great Emptying
Find a designated RV dump station and connect your sewer hose. Open the black tank valve slowly, letting gravity do its work. Once empty, close the valve and give the tank a good rinse with the flush hose. Repeat the emptying and rinsing process until the water runs clear.
Step 3: Unleashing the Cleaning Cavalry
Pour your chosen RV septic tank cleaner into the empty tank, following the manufacturer’s instructions. Fill the tank halfway with water, close the valve, and let the cleaner work its magic for the recommended time. This breaks down any lingering waste and keeps your tank smelling fresh.
Step 4: Rinse and Repeat
Empty the tank again, rinse thoroughly, and refill with fresh water. This final rinse ensures the cleaner is flushed out and leaves your tank ready for action.
Step 5: Schedule Your Patrols
Regular maintenance is key! How often you need to clean your tank depends on usage and size. Generally, every 3-5 days for full-time RVing, and weekly for weekend warriors, is a good starting point. Remember, an ounce of prevention is worth a pound (or rather, a gallon) of stink!
With this step-by-step guide and some dedication, you’ll have your RV’s black tank under control and your bathroom smelling like a spring meadow, not a forgotten dumpster. Now, onto the next chapter – unleashing your inner DIY hero!
DIY Solutions for RV Odor Conquest
So, the stink persists even after your valiant tank-taming efforts? Fear not, intrepid adventurer! Sometimes, conquering RV odor requires summoning your inner MacGyver and tackling some DIY repairs. Don’t worry, we’re talking tasks that are more empowering than intimidating, and trust me, the satisfaction of vanquishing the stench yourself is unbeatable.
The Seal Slayer: Replacing Your Toilet’s Leaky Guardian
That persistent whiff coming from the porcelain throne? It might be a culprit called the flush ball seal, a hardworking warrior who keeps nasty gases at bay. Over time, this seal can wear out, creating an olfaction-offensive loophole. But fear not, replacing it is a cinch! Grab your toolbox and follow these steps:
Gather your troops: Locate your replacement seal (compatible with your toilet model, of course) and some trusty gloves. You can find a variety of seals here.
Silence the waterworks: Shut off the water supply to your toilet. Here’s a guide on how to do it.
Disconnect and dethrone: Unscrew the bolts holding the toilet to the floor and gently lift it aside. Place a rag in the black tank opening to contain any unpleasant surprises.
Unmasking the villain: Locate the old, leaky seal on the bottom of the toilet bowl. It’s usually easy to spot (and smell).
Farewell, foul fiend: Gently remove the old seal and clean the area thoroughly.
Hail the new hero: Place the new seal in its rightful position, ensuring it’s snug and secure.
Reunion and victory lap: Reattach the toilet to the floor, tighten the bolts, and reconnect the water supply. Test your handiwork with a flush (and a celebratory fist pump!).
The Vent Viper: Conquering Clogged Airflow
Sometimes, that funky aroma can also be blamed on a blocked vent pipe. This unsung hero allows fresh air to flow through your plumbing system, preventing stagnation and odor build-up. But leaves, debris, or even pesky critters can create a roadblock. Here’s how to clear the way:
Locate the lair: Your vent pipe usually sits on the roof of your RV. It’s typically a small, white pipe near the bathroom vent fan.
Rooftop recon: Climb up there (safely!) and locate the vent pipe opening.
Tools of the trade: You might need a ladder, gloves, and a long, flexible tool like a vent cleaning brush or auger.
Operation un-clog: Carefully insert the tool into the vent pipe opening and gently remove any blockages. Be patient and thorough!
Victory flush: Pour some water down the vent pipe to test the airflow. If it flows freely, you’ve vanquished the odor villain!
Remember, a little DIY can go a long way in keeping your RV bathroom smelling fresh and fabulous. Bonus points if you can fix these issues and still manage to look like a glamorous adventurer after your rooftop battle!
Don’t forget: Check your RV’s user manual or consult a trusted RV repair resource for specific instructions on replacing your toilet seal or cleaning the vent pipe. Safety first, fellow explorers!
With these DIY tips and a healthy dose of MacGyver-esque resourcefulness, you’ll be a bathroom odor-banishing champion in no time. Onward to the final chapter, where we’ll discuss strategies for keeping those smells at bay forever!
Banishing the Bogeyman: A Final Victory Lap over RV Odor
There you have it, fellow adventurers! You’ve unmasked the odor culprits, armed yourself with eco-friendly weapons, tackled tank maintenance like a pro, and even unleashed your inner MacGyver. Now, take a moment to bask in the glorious aroma of victory – your RV bathroom smells like a meadow, not a dumpster!
Remember, keeping those bogeymen at bay is all about consistency. Regular tank cleanings, the right deodorizers, and a watchful eye on seals and vents are your secret weapons. Plus, don’t be afraid to get your hands dirty with a little DIY – replacing a seal or clearing a vent pipe is easier than you think, and the satisfaction is oh-so-sweet!
So, gear up, roll out the welcome mat (not the stink bomb), and embrace the fresh new world of fragrant RV adventures. Happy trails, and may your bathrooms forever stay bogeyman-free!
Resources
RVshare.com – This site provides practical steps for dealing with RV toilet smells, including tips on cleaning and troubleshooting a clogged black tank (RVshare, n.d.): RV Toilet Smells When Flushed – Solved in 6 Steps
Discover the secrets of America’s state parks, each a canvas of breathtaking landscapes and untold adventures. Whether you’re an adrenaline junkie, a family seeking memorable outings, or a nature lover craving tranquility, state parks offer a gateway to diverse experiences. This guide is your key to unlocking the myriad of park passes, discounts, and hidden gems that await your discovery.
Day Passes: Perfect for day-trippers, these passes are designed for single visits. They’re ideal for a quick escape to nature, offering access to park facilities for a day.
Activity-Specific Passes: Tailored for enthusiasts, these passes provide access to specific activities like fishing, boating, or hiking in designated areas. States like Colorado and Minnesota offer special fishing and boating passes for anglers and water sports enthusiasts.
Special Discounts: Seniors, veterans, and individuals with disabilities can often access state parks at reduced rates or even for free. This initiative makes parks more accessible and enjoyable for everyone.
Pro Tip: Research Your Target State
Different states offer various pass options, each with unique perks and restrictions. For the most accurate and up-to-date information, visit the official state park websites.
Spotlight on Unique State Pass Perks
Texas Fishing Freedom
The Texas Fishing Pass offers anglers access to over 1,200 freshwater lakes and streams. This pass not only grants entry but also provides discounts on fishing licenses and gear, making it a fantastic deal for fishing enthusiasts. Discover More about the Texas Fishing Pass and its benefits.
Oregon’s Tribute to Veterans
Oregon shows appreciation for its veterans by offering discounted camping fees in its state parks. This perk allows veterans and their families to enjoy the scenic beauty of places like Crater Lake at a more affordable rate. Learn About Oregon Parks and the various benefits available for veterans, including reduced rates for outdoor activities and unique opportunities for hunting, fishing, hiking, and other recreations at state and national parks, as well as on other public lands.”
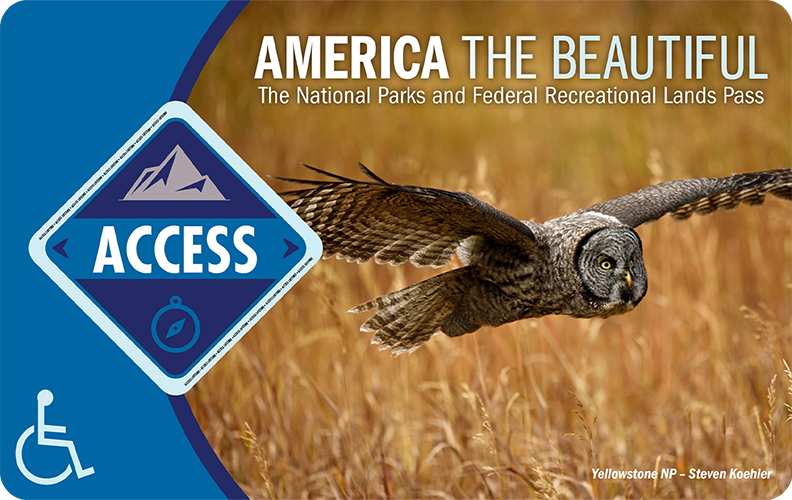
The Oregon Department of Veterans’ Affairs partners with various departments to provide these benefits, and there are several passes and discounts available for veterans, including the America the Beautiful National Parks & Federal Recreational Lands Annual Pass and the Special Access Pass for Veterans with Disabilities.
Hidden Gems in New Mexico & Georgia
New Mexico’s Starry Nights
In New Mexico, the night sky is an unforgettable experience. With the New Mexico Annual Camping Pass, campers can enjoy stargazing and overnight stays in all 33 state parks. This pass is especially popular among RV travelers and campers who enjoy desert landscapes and clear, starry nights. Explore New Mexico Parks to learn more about the Annual Camping Pass, which costs $180 for in-state residents and $225 for out-of-state residents. The pass allows for unlimited camping at state parks and is ideal for those who appreciate New Mexico’s unique terrain and clear skies, perfect for stargazing.”
This pass is an excellent opportunity for camping enthusiasts, especially RV travelers, to explore the natural beauty of New Mexico’s state parks, which are known for their stunning night skies. Sites like the Cosmic Campground offer exceptional stargazing opportunities, being located far from significant sources of electric light and known as the first International Dark Sky Sanctuary in the U.S.
Georgia’s Weekday Retreats
Georgia encourages weekday exploration with special rates and volunteer opportunities in its state parks. This initiative allows visitors to enjoy the parks’ natural beauty during quieter times while also giving back to the community. Georgia State Parks Info
Practical Online Resources for Trip Planning
Effective planning can greatly enhance your state park experience. Here are some key resources:
State Park Agencies: For accurate and detailed information on passes, fees, and park-specific amenities, the USA State Parks website is an invaluable tool.
National Park Service: The NPS website offers comprehensive information on nationwide passes, such as the America the Beautiful Pass, which can be useful for planning multi-state trips.
Recreation.gov: A central platform for booking campsites, tours, and exploring federal lands, Recreation.gov is a one-stop resource for reservations and information.
Mobile Apps: Enhance your outdoor adventures with tools like AllTrails, offering detailed trail maps and reviews, and Gaia GPS, which is excellent for offline navigation.
Unlocking More Discount Opportunities
Weekday and Off-Season Savings: Many state parks offer reduced rates during weekdays and off-peak seasons. Visiting during these times not only helps avoid crowds but also makes for a more affordable and serene experience. Check with individual parks for specific discount details.
Exploring Nearby Overlooked Recreation Options: Beyond state parks, public forests and local recreation areas can provide free or low-cost access to the outdoors. They offer a variety of activities like hiking, bird watching, and picnicking, making them perfect for budget-friendly adventures.
Responsible Recreation: Licenses, Regulations, and Ethics
Responsible recreation is key to preserving the natural beauty of state parks. Be sure to stay informed about the necessary licenses for activities like fishing or boating, as these vary by state. Practicing ethical behaviors, such as following Leave No Trace principles, is crucial for the sustainability of these natural areas.
Inclusive Facilities and Accessibility Options
Accessibility is a priority in many state parks. Facilities such as wheelchair-accessible campgrounds, pathways, and restrooms are increasingly common. These features ensure that all visitors, regardless of physical ability, can enjoy the splendor of nature.
Outsmarting the Crowds: Peak Season Tips
Navigating peak seasons requires strategy:
Book Early: Advance reservations are crucial for securing the best spots during popular times.
Opt for Weekdays: Weekday visits typically mean fewer crowds and a more peaceful experience.
Explore Lesser-Known Areas: Seeking out less popular areas within the park can lead to discovering hidden gems and tranquil spots.
State-Specific Resident Perks: Local Treasures
Many states offer unique benefits to their residents, adding extra value to state park visits. These perks can include reduced entry fees, access to special events, and more. It’s worth exploring what your home state has to offer at its state parks and local cultural attractions.
Volunteering: Giving Back and Gaining More
Volunteering in state parks is not only a way to contribute to the preservation of natural resources but also an opportunity to gain unique experiences. Many parks offer perks like camping discounts, educational opportunities, and behind-the-scenes access to volunteers. For those interested, volunteer.gov is a great place to start looking for opportunities.
Conclusion: The Journey Awaits
State parks are more than just scenic views; they are gateways to new adventures, opportunities for connection with nature, and sources of unforgettable memories. With the information and resources provided in this guide, you are well-equipped to explore, discover, and cherish the wonders that America’s state parks have to offer. So pack your bags, grab your map, and embark on a journey that promises to enrich your life in countless ways.
The go-to site for finding volunteer opportunities in U.S. federal and state parks, providing insights into how volunteering can enhance park experiences.
Leave No Trace Center for Outdoor Ethics – lnt.org
A resource for understanding and practicing ethical outdoor recreation to help preserve natural spaces.
The open road beckons, whispering tales of adventure and freedom. RV boondocking, with its promise of untamed landscapes and self-sufficiency, holds a particular allure for many travelers. Yet, beneath the romantic notion of off-grid living lies a crucial aspect: resource management, especially freshwater.
Unlike the familiar amenities of traditional campgrounds, boondocking requires a mindful approach to water usage. Gone are the days of endless showers and overflowing sinks; boondockers must become stewards of their resources, ensuring a sustainable and enjoyable adventure.
This guide serves as your roadmap to freshwater management in the world of RV boondocking. We will delve into the intricacies of understanding your needs, sourcing water, maximizing storage, and implementing water-saving techniques. We’ll also explore methods for maintaining water quality and navigating common challenges, equipping you with the knowledge and skills to navigate the wonders of boondocking without compromising on comfort or sustainability.
So, whether you’re a seasoned adventurer or a curious newcomer, prepare to embark on a journey towards responsible water management and unlock the full potential of your RV boondocking experience.
Before embarking on your boondocking adventure, accurately estimating your daily water usage is crucial. This ensures you bring enough water and plan your resupply stops accordingly. Here are some factors to consider:
Number of people: This is the most significant factor. A general rule of thumb is to allocate 2 gallons of water per person per day for basic hygiene and cooking. However, individual needs can vary based on age, activity level, and showering habits. Factor in additional water for children who may require more frequent bathing or infants who need formula preparation.
Duration of your trip: The longer your boondocking stay, the more water you’ll need. Plan your water usage based on the number of days you’ll be off-grid.
Activities: Certain activities demand more water than others. Consider how much water you’ll use for:
Cooking: Simple meals require less water than elaborate dishes.
Dishwashing: Opt for water-saving techniques like using a dishwashing pan and minimizing rinsing.
Cleaning: Utilize cleaning cloths and sprays instead of running water whenever possible.
Laundry: Hand washing clothes instead of using a washing machine saves significant water.
Showering: Short showers with low-flow showerheads are essential for water conservation.
Personal hygiene: Brushing teeth and shaving can be done efficiently with minimal water.
Factors Affecting Water Consumption:
Several factors can influence your actual water usage beyond the initial estimations:
Weather conditions: Hot weather typically leads to increased water usage for hydration and showering. Colder weather may require less water for hygiene but might necessitate using more water for hot showers or heating dishes.
Personal habits: Water-conscious individuals naturally use less water than those with less awareness. Implement water-saving practices like turning off the tap while brushing teeth or taking shorter showers.
Types of appliances: Low-flow faucets, showerheads, and washing machines significantly reduce water consumption compared to standard models. Consider investing in these water-saving appliances for your RV.
By carefully considering these factors and implementing water-saving strategies, you can accurately estimate your freshwater needs for a comfortable and sustainable boondocking experience.
Finding reliable freshwater sources is key to a successful boondocking adventure. Researching ahead of time is crucial, as remote areas might not always offer readily accessible water. Here are some helpful tips:
RV Parks and Campgrounds: These typically offer water fill stations for a fee. Consider joining RV memberships for discounted rates.
Public Lands: National forests, state parks, and recreation areas often have designated water sources, sometimes free of charge. Check online maps and park websites for specific locations.
Local Businesses: Restaurants, gas stations, and convenience stores might allow you to refill your water containers for a small fee, especially in rural areas.
Private Land: With permission from landowners, you might be able to access wells or springs on their property. Always be respectful and inquire about water quality before filling up.
Water Treatment for Specific Sources:
Not all water sources are safe for consumption without treatment. Understanding the potential contaminants in different sources allows you to choose the appropriate treatment method.
Rivers and Lakes: These sources can contain bacteria, parasites, and other contaminants. Boiling water for at least 1 minute is the simplest and most effective treatment method. Alternatively, consider using a portable water filter designed for backcountry use.
Wells: Well water can be contaminated with bacteria, nitrates, or heavy metals. Testing your water source for specific contaminants is crucial before consumption. Depending on the results, you might need to use a filtration system, reverse osmosis, or other purification methods.
Municipal Water Sources: Water from towns and cities is typically treated and safe to drink. However, carrying a water filter for additional peace of mind is always a good idea.
Safety Considerations in Water Refilling:
Always prioritize safety when sourcing water. Here are some essential precautions:
Inspect the source for potential contaminants. Look for signs of pollution, such as algae blooms, animal waste, or industrial runoff.
Use dedicated water containers. Avoid using containers that previously held chemicals or other substances.
Clean and disinfect your water containers regularly.
Follow proper water treatment procedures based on the source.
Consider using a water quality testing kit to confirm the safety of your water.
Greywater Reuse:
Conserving freshwater is vital in boondocking. Greywater, the wastewater from sinks, showers, and washing machines, can be reused for non-potable purposes, such as:
Flushing toilets. Many RV toilets can be flushed with greywater, reducing your reliance on freshwater for this function.
Watering plants. Greywater is a natural fertilizer for your RV garden or potted plants.
Washing your RV. Use greywater to wash the exterior of your RV, saving freshwater for cleaning dishes and other essential needs.
Cleaning tools and equipment. Greywater is suitable for rinsing tools and equipment after outdoor activities.
Remember to check local regulations regarding greywater usage before implementing this practice. Be mindful of the potential for odors and use proper sanitation methods to prevent the spread of bacteria.
By understanding your water needs, researching available sources, and implementing safe water treatment and conservation strategies, you can ensure a sustainable and enjoyable boondocking experience.
Choosing the right storage solution for your freshwater needs is crucial for boondocking. Here are the key types and their pros and cons:
Built-in RV Tanks:
Pros: Convenient, integrated into your RV, and often offer multiple tanks for fresh and greywater.
Cons: Limited capacity, may not be easily accessible for cleaning or maintenance, and prone to freezing in cold weather.
Portable Containers:
Pros: Offer flexibility and additional storage capacity, easy to clean and maintain, and can be winterized more readily.
Cons: Take up valuable space inside or outside the RV, require additional handling for refilling and emptying, and may not be compatible with all RV water systems.
Collapsible Containers:
Pros: Lightweight, compact when empty, ideal for maximizing space, and easy to transport and store.
Cons: May not be as durable as rigid containers, susceptible to punctures, and may not be suitable for long-term storage.
Choosing the right solution depends on factors like:
Your RV’s available space and weight capacity.
Your desired water storage capacity.
Your budget and personal preferences.
Maximizing Storage Space in an RV:
Limited space is often a challenge in RVs. Here are some strategies to maximize your freshwater storage:
Utilize unused spaces: Look for hidden nooks or compartments under beds, seats, or dinettes where you can fit water containers.
Invest in space-saving solutions: Consider multi-purpose furniture with built-in water storage or collapsible containers that can be tucked away when not in use.
Organize your storage: Implement a system to keep your water containers and accessories neatly organized and easily accessible.
Utilize external storage: If permitted by your RV model, consider mounting additional water tanks or containers on the exterior for extra storage.
Water Storage Considerations for Winter Boondocking:
Water freezes at 32°F, so winter boondocking requires special attention to your freshwater storage. Here are some tips:
Insulate your water tanks and lines: This helps prevent freezing and ensures a consistent water supply.
Use heated water hoses: These hoses prevent freezing during the filling process.
Drain and winterize your water system: This involves removing all water from your tanks and lines to prevent damage from freezing.
Consider using a portable heated water tank: This can provide a backup water source if your RV’s built-in system freezes.
By carefully planning your storage solutions and implementing these winterization techniques, you can ensure your freshwater supply stays safe and accessible throughout your boondocking adventures.
Simple changes in your daily habits can significantly reduce your water consumption while boondocking. Here are some practical tips:
In the kitchen:
Wash dishes in a basin: Fill a basin with soapy water instead of using running water for washing and rinsing.
Use disposable plates and utensils: This eliminates the need for dishwashing and saves water.
Cook one-pot meals: This minimizes the number of dishes and utensils requiring cleaning.
Defrost frozen food in the refrigerator: Avoid using running water to thaw food.
Scrape food scraps into the trash instead of rinsing them down the drain.
In the bathroom:
Take shorter showers: Every minute saved translates to water conservation.
Turn off the faucet while brushing your teeth or shaving.
Use a water-saving showerhead: This reduces water flow without impacting your showering experience.
Install a low-flow faucet aerator: This reduces water flow for handwashing and other tasks.
Consider using a composting toilet: This significantly reduces water usage compared to traditional toilets.
General practices:
Fix leaky faucets and hoses promptly. Even a small leak can waste gallons of water.
Turn off the water when not in use: This applies to brushing your teeth, shaving, washing dishes, etc.
Use a water dispenser instead of running the tap for drinking water.
Hang clothes to dry instead of using a washing machine.
Collect rainwater for non-potable uses.
Water-Saving Devices and Gadgets:
Investing in water-saving devices can further reduce your water usage:
Low-flow showerheads: These can reduce water flow by up to 50% without compromising shower pressure.
Faucet aerators: These reduce water flow by mixing air into the water stream.
Water-saving spray nozzles for hoses: These are perfect for washing dishes, rinsing vegetables, and cleaning your RV.
Water flow timers: These help you monitor and manage your water usage, preventing overconsumption.
Greywater recycling systems: These systems filter and treat greywater for reuse in flushing toilets or watering plants.
By adopting these practical tips and utilizing water-saving devices, you can make a significant impact on your water consumption while boondocking. Remember, every drop counts towards a sustainable and responsible RV experience.
Ensuring the quality of your freshwater is paramount for your health and safety while boondocking. Implementing proper purification, filtration, and maintenance practices safeguards you from harmful contaminants and keeps your water systems functioning optimally.
Purification and Filtration Methods:
Depending on your water source and desired level of protection, various purification and filtration methods are available:
Boiling: This simple method destroys bacteria and parasites but does not remove other contaminants.
Chemical Treatment: Tablets or drops containing chlorine or iodine disinfect water for safe consumption.
Portable Filtration Systems: These systems utilize filters to remove sediment, bacteria, parasites, and even viruses from your water, offering superior protection.
Reverse Osmosis: This advanced technology removes virtually all contaminants, including dissolved minerals and chemicals, providing the highest level of water purity.
Choosing the right method depends on factors like:
The quality of your water source.
Your desired level of protection.
Your budget and personal preferences.
Regular Maintenance of Water Systems:
Proper maintenance of your RV’s water systems is essential for preventing contamination and ensuring their longevity. Here are some key tasks:
Clean and disinfect your freshwater tanks and lines regularly. This removes biofilm and sediment buildup that can harbor bacteria.
Inspect and replace filters as recommended by the manufacturer.
Check for leaks and repair them promptly.
Flush your water heater periodically to remove sediment and prevent corrosion.
Clean your water pump and strainer to ensure optimal performance.
Winterization of Water Systems:
Preparing your water systems for freezing temperatures is crucial to prevent damage from bursting pipes. Winterization involves:
Draining all water from your tanks and lines.
Pumping antifreeze through the system.
Bypassing the water heater.
Disconnecting and storing external hoses.
Following these maintenance and winterization procedures ensures your water systems function efficiently and provide you with safe, clean water throughout your boondocking adventures.
Addressing Common Freshwater Management Challenges
Troubleshooting Common Issues:
Even with careful planning and preparation, freshwater management challenges can arise during your boondocking adventures. Here are some common issues and tips for troubleshooting them:
Leaks:
Identify the source of the leak: Check for visible signs of water damage or listen for dripping sounds.
Tighten loose connections: Use wrenches or screwdrivers to tighten any loose fittings or hose connections.
Replace damaged components: If the leak persists, replace the faulty O-rings, seals, or hoses.
Pump Failures:
Check for airlocks: Air trapped in the system can prevent the pump from functioning properly. Consult your RV manual for bleed procedures.
Clean the pump filter: A clogged filter can restrict water flow and impede pump operation. Clean or replace the filter as needed.
Check the fuse: A blown fuse can also cause pump failure. Replace the fuse with the correct amperage.
Freezing Pipes:
Identify frozen areas: Look for visible frost or ice formation on pipes and lines.
Apply heat: Use a hairdryer or warm compress to thaw frozen sections.
Increase water flow: Once thawed, slowly open faucets to allow water to flow and prevent refreezing.
Winter Boondocking Challenges and Solutions:
Winter boondocking presents unique water management challenges. Here are some tips for overcoming them:
Invest in additional insulation: Wrap exposed pipes and tanks with insulation materials to prevent freezing.
Use heated water hoses and cables: These prevent water from freezing in the hose and connection points.
Skirt your RV: This helps maintain warmer temperatures underneath the RV, protecting your water systems from freezing.
Monitor water levels closely: Regularly check your water tanks to ensure they do not run low and freeze.
Consider alternative water sources: If your built-in systems freeze, utilize portable water containers stored inside the RV where they are less susceptible to freezing.
Learning from the experiences of seasoned boondockers can offer invaluable insights and practical solutions to freshwater management challenges. Here are some real-life examples from the Good Sam community showcasing successful water conservation strategies, overcoming freshwater management challenges, and unique water sourcing methods:
Successful Water Conservation Strategies:
Minimizing shaving water: One boondocker shares how they use a large plastic cup for hot water instead of filling the entire sink, significantly reducing water usage for shaving.
Reusing dishes: Another individual mentions using shallow trays for dishwashing and reusing slightly dirty dishes for subsequent meals, especially when water levels are low.
Dishwashing tip: A boondocker suggests using a spray bottle filled with soapy water instead of running water when washing dishes, further reducing water waste.
Utilizing graywater: An experienced boondocker installs a graywater system that filters and reuses graywater for toilet flushing and plant watering, minimizing freshwater consumption.
Overcoming Freshwater Management Challenges:
Maximizing water usage: A clever boondocker suggests knowing the location of the water pick-up tube in their freshwater tank. Tilting the RV slightly towards the side where the tube is located allows for maximum water utilization before needing a refill.
Energy conservation and water usage: Another boondocker highlights the connection between energy and water conservation. By using LED lights and minimizing high-energy appliances, they indirectly reduce water usage by lowering overall energy consumption.
Winterizing water systems: A seasoned winter boondocker recommends using a heated water hose and cable to prevent freezing during cold weather and ensure water availability.
Troubleshooting pump failures: One boondocker shares their experience with resolving pump failures by checking for airlocks in the system and following proper bleed procedures as outlined in the RV manual.
Unique Water Sourcing Methods:
Repurposing boiled water: One creative boondocker uses water from boiling pasta or potatoes to pre-rinse dishes, effectively reusing water that would otherwise be discarded.
Extended water supply for showers: Another boondocker sets up an additional 34-gallon water tank under their trailer, connected to an external water pump. This provides them with an extended water supply for showers, offering a camp-style solution to off-grid showering needs.
Collecting rainwater: A resourceful boondocker utilizes a tarp and container to collect rainwater, supplementing their freshwater supply and reducing reliance on other sources.
These case studies not only provide valuable inspiration but also offer practical advice for boondockers at all levels to effectively manage freshwater and enjoy their off-grid adventures. The shared experiences emphasize the importance of innovative thinking and adaptability in the face of limited resources, demonstrating how small changes in daily habits can lead to significant water conservation and a more sustainable and enjoyable boondocking experience.
Conclusion
This comprehensive guide has delved into the intricacies of freshwater management for RV boondockers. From understanding your needs and sourcing water to implementing innovative storage solutions and practicing water conservation techniques, we’ve equipped you with the knowledge and skills necessary to navigate the challenges and enjoy the rewards of off-grid living.
Remember, responsible water management is not just about securing your own comfort; it’s about preserving the natural resources we cherish for future generations. By embracing sustainable practices and following the guidance presented in this guide, you can contribute to a responsible boondocking community and ensure the timeless pleasures of off-grid adventure remain accessible for years to come.
So, embark on your next boondocking adventure with confidence, knowing you are equipped to manage your freshwater resources efficiently and enjoy a sustainable and unforgettable journey.
Resources for further information:
Websites:
Heartland RVs – Boondocking 101: Water and Waste Management: This Heartland RVs page provides practical tips for water conservation and management during boondocking, including where to refill water and how to efficiently use water resources.
RV With Tito – How To Refill Fresh Water Tank While Boondocking: On this RV With Tito page, you’ll find detailed advice on freshwater management, including the use of collapsible water containers and tips for finding water while boondocking. It also discusses water transfer methods and equipment.
Boondock or Bust – Water Management and Conservation Techniques for RV Boondocking: This Boondock or Bust guide covers various aspects of water management in RV boondocking, including storage capacity, filtration systems, and minimizing environmental impact. It also links to resources like the EPA’s WaterSense program and other informative RV blogs.
U.S. Environmental Protection Agency (EPA) – WaterSense: The U.S. Environmental Protection Agency’s WaterSense program offers information and tips on water conservation for various purposes, including RV use. It’s a valuable resource for understanding the environmental impact of water usage and finding strategies to minimize it.
The great outdoors has always held a special allure for many individuals, offering a respite from the hustle and bustle of everyday life and a chance to reconnect with nature’s tranquility. However, for LGBTQIA+ individuals, the camping experience has not always been one of inclusivity and safety. To appreciate progress, it’s essential to reflect on the history of LGBTQIA+ individuals in outdoor recreation. This journey, marked by challenges and triumphs, demonstrates the evolving landscape of inclusivity in the great outdoors.
A Legacy of Exclusion and a Journey Towards Inclusivity: LGBTQIA+ Experiences in Outdoor Recreation
For decades, LGBTQIA+ individuals have faced significant barriers to participation in outdoor recreation due to widespread discrimination and exclusion. These barriers have ranged from overt forms of prejudice, such as being denied service at campgrounds or being subjected to harassment on trails, to more subtle forms of exclusion, such as a lack of representation in outdoor media and a scarcity of LGBTQIA+-friendly outdoor organizations.
The exclusion of LGBTQIA+ individuals from outdoor recreation has had a profound impact on their ability to connect with nature, build community, and experience the joys of outdoor pursuits. It has also contributed to a sense of isolation and marginalization, further compounding the challenges faced by LGBTQIA+ individuals.
However, the past few decades have seen a growing movement towards inclusivity in outdoor recreation, with the rise of LGBTQIA+-specific organizations, like the Trevor Project, the increasing visibility of LGBTQIA+ outdoor enthusiasts, and the growing commitment of outdoor recreation providers to creating more welcoming spaces.
This progress has been driven by the collective efforts of LGBTQIA+ individuals, allies, and organizations who have tirelessly advocated for change. Their efforts have resulted in a more inclusive outdoor recreation landscape, with more opportunities for LGBTQIA+ individuals to connect with nature, build community, and experience the joys of outdoor pursuits.
Despite the progress that has been made, the journey towards full inclusivity in outdoor recreation is ongoing. There continues to be a need for more inclusive policies, practices, and representation in the outdoor recreation industry. Additionally, ongoing education and awareness-raising are crucial to combating prejudice and fostering a truly welcoming outdoor environment for all, as highlighted by initiatives like Outdoors for All.
By understanding the historical context of LGBTQIA+ experiences with outdoor recreation, we can better appreciate the significance of inclusive camping initiatives and recognize the ongoing need for creating more welcoming outdoor spaces for all individuals.
Cultivating Inclusive Campgrounds: A Haven for All
At the core of an inclusive camping experience lies an unwavering commitment to creating welcoming and affirming environments where every camper feels embraced and respected. LGBTQIA+ inclusive campgrounds transcend mere tolerance; they actively cultivate spaces that celebrate diversity, cherish individuality, and foster a profound sense of belonging for all.
The hallmarks of inclusive campgrounds extend far beyond physical amenities; they encompass a comprehensive approach to inclusivity, prioritizing the creation of welcoming spaces that embrace diversity, celebrate individuality, and foster a profound sense of belonging for all campers. These campgrounds recognize that inclusivity is not a one-time effort but an ongoing journey that requires continuous commitment and action.
A crucial element of fostering inclusive campgrounds is prioritizing comprehensive staff training. This training should equip staff with the knowledge and skills to create a welcoming and respectful atmosphere for all campers, regardless of their gender identity, sexual orientation, or any other personal characteristic. Staff training should cover topics such as LGBTQIA+ terminology, cultural sensitivity, creating gender-neutral facilities, and addressing unconscious bias.
Beyond staff training, LGBTQIA+ inclusive campgrounds implement inclusive policies that cater to the needs of diverse campers, including those with disabilities. These policies may include:
Gender-neutral restrooms: Gender-neutral facilities are not just a matter of convenience; they are a vital aspect of ensuring comfort and safety for all campers, regardless of gender identity. More about gender-neutral facilities can be found on the National Center for Transgender Equality website.
Flexible camping options for families and solo travelers: Inclusive campgrounds recognize the diverse needs of different camper groups. They offer flexible camping options that accommodate families of all structures, as well as solo travelers seeking a welcoming and supportive environment.
Inclusive recreational activities: Recognizing that individuals have diverse interests and abilities, inclusive campgrounds offer a range of recreational activities that cater to a variety of preferences and physical limitations. This ensures that all campers have the opportunity to participate in enjoyable and accessible outdoor activities.
By prioritizing staff training, implementing inclusive policies, and cultivating a welcoming atmosphere, LGBTQIA+ inclusive campgrounds not only provide a safe and enjoyable outdoor experience for LGBTQIA+ individuals but also set an example for the broader camping community, fostering a more inclusive and equitable outdoor world for all.
To showcase the diverse landscape of LGBTQIA+ inclusive campgrounds, here are a few examples that embody the spirit of inclusivity:
Oz Campground, located in Unadilla, Georgia, exemplifies the spirit of inclusivity by providing a vibrant and welcoming atmosphere for all campers.
Rainbow Ranch, nestled in Groesbeck, Texas, offers a tranquil retreat for LGBTQIA+ campers seeking a peaceful escape into nature, with amenities like a swimming pool, a sauna, and a meditation garden.
Campit Outdoor Resort in Saugatuck, Michigan, is known for its friendly environment and diverse range of lodging options, catering to all preferences within the LGBTQIA+ community.
The Woods Campground in Lehighton, Pennsylvania, provides a unique blend of natural beauty and inclusive community activities, making it a popular destination for LGBTQIA+ campers.
Circle JJ Ranch Campground in Scio, Ohio, offers a rustic and scenic camping experience with a strong sense of community and inclusivity, perfect for those looking to connect with nature and fellow campers.
Roseland Resort & Campground in Proctor, West Virginia, features a variety of amenities and outdoor activities, set in a picturesque landscape that welcomes LGBTQIA+ individuals and their allies.
These campgrounds aren’t just about amenities; they’re about experiences.
Exploring Inclusive Camping Opportunities
Finding Your Perfect Campsite
Navigating the vast array of campgrounds can be daunting, particularly for first-time campers or those seeking specific amenities and tailored experiences that align with their preferences and needs. Fortunately, the digital age has provided a plethora of tools and resources to streamline the campground search process, making it easier than ever to find inclusive and welcoming campsites. To further assist in your search, consider LGBTQIA+-friendly camping guides like Hipcamp, which often list inclusive sites and provide user reviews.
An integral aspect of inclusivity is ensuring accessibility for campers with disabilities. When embarking on your campground search, consider these tips for locating campsites that cater to a range of mobility and accessibility needs:
Seek out detailed campsite information: Before making a reservation, thoroughly research the campground’s website or contact them directly to gather detailed information about the accessibility of facilities, activities, and terrain. Inquire about accessible campsites, restrooms, showers, and recreational areas.
Utilize online accessibility resources: Leverage online resources like the National Park Service’s Accessibility Guide and the Recreation.gov website to identify campgrounds that meet your specific accessibility needs. These resources provide comprehensive accessibility information, including details on accessible trails, picnic areas, and visitor centers.
Connect with the campground community: Engage with local LGBTQIA+ camping groups or online forums to gain insights from fellow campers with disabilities. These communities can provide valuable recommendations for accessible campgrounds and share their experiences navigating different campsites.
Consider the terrain: Assess the terrain of the campground to ensure it aligns with your mobility needs. If you have limited mobility or use mobility aids, opt for campgrounds with paved pathways, gentle slopes, and accessible campsites.
Inquire about adaptive equipment rentals: Check if the campground offers adaptive equipment rentals, such as all-terrain wheelchairs, beach wheelchairs, or shower chairs. This can significantly enhance your camping experience and allow you to fully participate in various activities.
Communicate your needs clearly: When making a reservation, clearly communicate your accessibility needs to the campground staff. This allows them to provide any necessary accommodations and ensure a comfortable and enjoyable camping experience for you.
Remember, finding an inclusive campground extends beyond physical amenities; it’s about creating a welcoming and supportive environment where everyone feels valued and respected. By carefully considering accessibility factors and utilizing available resources, you can navigate the vast expanse of campgrounds and discover your ideal inclusive retreat. For those looking to delve deeper into LGBTQIA+ inclusive camping, numerous organizations and resources are available. Groups like CampOut and GayOutdoors provide information on LGBTQIA+-friendly campgrounds, organize events, and foster a community of like-minded outdoor enthusiasts.
Leveraging Community Insights
The LGBTQIA+ community is a rich source of knowledge and support, and tapping into local LGBTQIA+ groups and exploring online forums can offer valuable insights into identifying inclusive campsites. These communities often maintain lists of recommended campgrounds that have been vetted for their welcoming atmosphere and inclusive policies.
Tailoring Your Camping Adventure
Inclusive Packing List
Whether embarking on a maiden camping adventure or refining your existing gear, crafting a comprehensive packing list is essential for a successful and enjoyable experience, ensuring you have the necessary equipment and supplies tailored to your specific camping trip and preferences. For a detailed guide on what to include, see the REI Camping Checklist. Consider different camping styles when packing. For instance, backpacking requires compact, lightweight gear, while family camping may focus on comfort and convenience. Tailoring your packing list to the type of camping trip can enhance your overall experience. Remember, inclusive camping also means being mindful of others’ needs. Pack items like pronoun pins for yourself and others, or consider bringing games and activities that are inclusive of all genders and orientations.
Navigating Your Safe Space
Fostering a respectful and inclusive camping environment is paramount for ensuring a safe and enjoyable experience for all campers. Learn more about creating safe and inclusive outdoor spaces at Leave No Trace.
Building Inclusive Outdoor Communities Building LGBTQIA+ Outdoor Networks
The great outdoors offers a unique opportunity for LGBTQIA+ individuals to connect with others, share experiences, and celebrate their identities in an inclusive and supportive environment. LGBTQIA+ outdoor networks play a crucial role in fostering this sense of community and providing a platform for individuals to explore their passions for nature, adventure, and camaraderie. Additionally, LGBTQIA+-led outdoor adventure companies, such as HeTravel, play a significant role in creating tailored outdoor experiences that cater to the LGBTQIA+ community.
One such organization is the Venture Out Project, which offers guided backpacking trips specifically for the LGBTQ+ community. These trips provide opportunities for individuals of all experience levels to explore new destinations, build connections with fellow LGBTQ+ outdoor enthusiasts, and develop outdoor skills in a supportive environment.
Another notable example is Queer Nature, a non-profit organization that organizes retreats, workshops, and other immersive experiences focused on connecting LGBTQ+ individuals with nature and empowering them to become environmental stewards. Their programs emphasize personal growth, community building, and environmental awareness, fostering a deeper connection to the natural world.
In addition to these national organizations, there are numerous local LGBTQ+ outdoor groups that offer a variety of activities and events. These groups often provide opportunities for hiking, camping, kayaking, biking, and other outdoor pursuits, catering to diverse interests and skill levels.
Here are some additional examples of successful LGBTQIA+ outdoor groups/events:
Wild Diversity: This organization focuses on creating inclusive outdoor experiences for BIPOC and LGBTQ2S+ communities, offering a range of activities and programs that promote diversity and inclusion in the outdoors. More information can be found on Wild Diversity’s website.
OUT for Sustainability: This group organizes outdoor adventures that combine recreation with environmental education, promoting sustainable practices and stewardship of the natural world among LGBTQ+ individuals. Learn more about their initiatives at OUT for Sustainability.
Benny’s Club: This organization hosts social events and outdoor activities for LGBTQ+ men, providing a space for camaraderie, connection, and personal growth. Discover more about Benny’s Club and their events on Benny’s Club website.
Queer Surf: This group offers surf lessons and events for LGBTQ+ individuals, promoting inclusivity and access to the sport of surfing. Check out Queer Surf for more details.
QPOC Hikers: This organization specifically caters to queer and trans people of color, providing a safe and supportive space for them to enjoy hiking and other outdoor activities. Follow their adventures and join their hikes through QPOC Hikers.
These examples demonstrate the vibrant and diverse landscape of LGBTQIA+ outdoor communities, offering a multitude of opportunities for individuals to connect, explore, and celebrate their identities in the natural world.
Whether through national organizations, local groups, or self-organized gatherings, the pursuit of outdoor experiences provides a powerful platform for LGBTQIA+ individuals to build connections, foster a sense of belonging, and celebrate their identities in an inclusive and supportive environment.
Allyship in Action
Allyship plays a pivotal role in cultivating a genuinely inclusive and welcoming outdoor experience for LGBTQIA+ individuals. Being an effective ally involves not only supporting LGBTQIA+ individuals but also actively challenging prejudice, discrimination, and exclusionary practices in outdoor spaces. The Human Rights Campaign’s guide to being an LGBTQ ally provides valuable insights into this important role.
Venturing beyond the campsite can further enrich the camping experience, offering opportunities to explore local communities, patronize queer-friendly businesses, and discover hidden gems that embody diversity and inclusivity, fostering a sense of belonging and connection with the local community. For discovering such places, consider using resources like Purple Roofs, which lists LGBTQ-friendly accommodations and travel options. Additionally, supporting local LGBTQIA+ businesses during your travels not only enriches your camping experience but also strengthens community ties. Look for queer-owned establishments, from cafes to outdoor gear shops, to immerse yourself in the local culture and contribute to the community.
Upholding Your Rights and Celebrating Protections
Understanding and exercising your rights as an LGBTQIA+ individual is paramount for a safe and enjoyable outdoor experience. Legal protections vary across different regions, so it’s essential to be aware of your rights in your chosen camping destination. A useful guide for this can be found on the ACLU’s LGBT Rights page.
Global Perspectives on Legal Rights and Protections
The legal landscape for LGBTQIA+ rights in outdoor recreation is diverse. In some countries, comprehensive anti-discrimination laws offer strong protections, while in others, such protections may be limited. Familiarize yourself with the local legal framework to understand your rights and prepare to assert them if necessary.
Resource List for Understanding and Asserting Rights
Field Mag: List of LGBTQ+ Outdoor Groups Supporting & Celebrating Diversity in Nature
Tailored Resources for Different Camper Types
Each camper’s needs can vary, so here are some tailored resources:
For Families: QueerFamily and Family Equality provide support and resources for LGBTQIA+ families, helping them find inclusive camping options and community support.
For Solo Travelers: Online communities like Queer Nature and Gay Travel forums are great for finding inclusive campgrounds and solo-friendly activities, offering a wealth of information and advice.
For Experienced Adventurers: Organizations like Outward Bound offer tailored outdoor education and leadership opportunities, catering to those seeking more challenging and skill-building experiences.
Celebrating Protections and Advocating for Progress
While celebrating the strides made in LGBTQIA+ rights in outdoor recreation, remember that the journey towards full equality continues. Here’s how you can contribute:
Support LGBTQIA+ organizations: Engage with and support groups like GLAAD and The Trevor Project.
Educate others: Share resources from PFLAG to help educate those around you about LGBTQIA+ issues.
Challenge discrimination: Learn about and advocate against discrimination with resources from the ACLU.
Advocate for inclusive policies: Stay informed on policy changes and advocacy through Human Rights Campaign.
By understanding their rights and advocating for progress, LGBTQIA+ individuals and allies can ensure that outdoor spaces remain welcoming and inclusive for everyone to explore and enjoy.
Helpful Resources for LGBTQIA+ Inclusive Camping
ILGA World – International Advocacy for LGBTQIA+ Rights
Description: Offers detailed information on LGBTQIA+ rights globally, serving as an essential resource for understanding diverse legal landscapes in outdoor recreation.
Description: Advocates for LGBTQIA+ families, offering invaluable support and resources, ideal for families seeking inclusive camping experiences.
Outward Bound – Tailored Outdoor Education and Leadership
Description: Provides outdoor education and leadership opportunities, including programs designed for the LGBTQIA+ community, suitable for experienced adventurers.
Description: A leading organization in the UK advocating for the equality of lesbian, gay, bi, and trans people across Britain.
These resources have been carefully selected to enhance your camping experience, ensuring that you have access to safe, inclusive, and welcoming outdoor environments. Whether you’re a first-time camper or an experienced adventurer, these links provide valuable insights and support for a memorable and inclusive camping journey. We hope you find this comprehensive list of LGBTQIA+ camping resources, including online forums, equipment guides, and community networks helpful.
RV Boondocking Electrical Systems: A Comprehensive Guide to Off-Grid Power
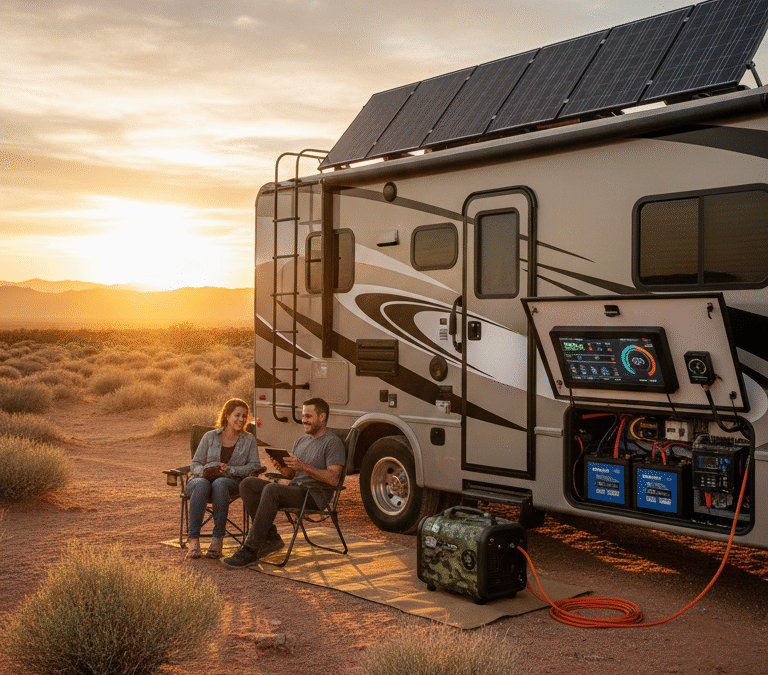
Boondocking gives you maximum freedom – and maximum responsibility for your own power. This guide walks you step-by-step through designing, building, and managing an RV electrical system that actually works off-grid: from power audits and battery banks to solar, generators, smart monitoring, and real-world setups.
Watch: A visual walkthrough of boondocking power basics before you dive into the details below.
This guide provides a comprehensive overview of RV boondocking electrical systems, essential for comfortable and safe off-grid exploration. It covers power audits, battery selection and sizing, charging sources, power conversion, management, conservation, and troubleshooting.
This guide provides a comprehensive overview of RV boondocking electrical systems, essential for comfortable and safe off-grid exploration. It covers power audits, battery selection and sizing, charging sources, power conversion, management, conservation, and troubleshooting.
RV Boondocking Electrical System Diagram
Phase 1: Conducting Your RV Power Audit – Understanding Your Needs
A power audit is crucial to understand daily energy consumption and peak load requirements, ensuring the electrical system is correctly sized.
Calculating Daily Watt-Hour Consumption: This involves listing all appliances, estimating their run time, and multiplying wattage by hours of use to get total watt-hours. A detailed spreadsheet or template is recommended.
Identifying Peak Load Requirements: This determines the maximum power needed at any given time, essential for sizing the inverter. It involves summing the wattage of appliances that might run simultaneously, noting any surge requirements (which can be 2–3 times running wattage).
Essential Appliances and Their Power Draw: Power draw varies significantly. LED lights are more efficient than incandescent. 12V refrigerators are more efficient than residential fridges run through an inverter. Water pumps have intermittent use. Propane can be used for water heaters and refrigerators to conserve electricity.
Worksheet/Template for Power Audit: A worksheet should list devices, wattage, and daily usage hours. Wattage × hours = daily watt-hours per device. Summing these gives total daily consumption. A 20% safety margin for unexpected usage and system losses is advised.
Phase 2: The Heart of Your System – Choosing and Sizing Your Battery Bank
The battery bank stores energy and is central to the RV’s electrical system.
Battery Chemistry Deep Dive: Pros and Cons:
Lead-Acid (Flooded, AGM, Gel): Affordable but have shorter lifespans and lower usable capacity (around 50%). Flooded require maintenance; AGM and Gel are sealed. They are heavier than lithium options.
Lithium Iron Phosphate (LiFePO4): Offer longer lifespans (3000+ cycles), higher usable capacity (80–100%), lighter weight (up to 60% less), and faster charging. Higher initial cost but better long-term value. More resistant to temperature extremes.
Understanding Battery Ratings:
Amp-hours (Ah): Total energy storage capacity.
Depth of Discharge (DoD): Percentage of capacity safely discharged (e.g., 50% for lead-acid, 80–100% for LiFePO4).
C-Rating: Rate of charge/discharge relative to capacity (e.g., 1C for a 100Ah battery means 100 amps).
Sizing Your Battery Bank: Calculate total amp-hours needed for daily consumption × desired days of autonomy. Divide by the usable DoD of the chosen battery type. Example: 50Ah/day × 3 days autonomy ÷ 0.80 DoD (LiFePO4) = 187.5Ah minimum capacity.
Battery Management Systems (BMS): Essential for LiFePO4 batteries, protecting against overcharging, over-discharging, and extreme temperatures by monitoring cell voltages, current, and temperature.
Series vs. Parallel Wiring:
Series: Increases voltage, maintains Ah capacity.
Parallel: Increases Ah capacity, maintains voltage. RV systems typically use 12V, so batteries are wired in parallel for capacity. Use identical batteries.
Phase 3: Charging Your Batteries – Comprehensive Energy Sources
Recharging the battery bank is achieved through various sources.
Solar Power Systems
Components: Solar panels, charge controller, wiring.
Panel Types:
Monocrystalline: Higher efficiency, sleek, more expensive.
Polycrystalline: More affordable, slightly less efficient.
Flexible: Lightweight, conform to surfaces, shorter lifespan.
Charge Controllers:
PWM (Pulse Width Modulation): Less expensive, less efficient, especially in cooler temps.
MPPT (Maximum Power Point Tracking): More efficient, maximizes power transfer, recommended for larger arrays and off-grid systems.
Sizing Solar Array and Wire Gauges: Based on daily amp-hour consumption and peak sun hours. Use online calculators. Proper wire gauge selection is crucial to minimize voltage drop and prevent overheating.
Mounting and Positioning: Fixed or adjustable mounts. Aim for south-facing (northern hemisphere) at an angle equal to latitude for optimal year-round performance. Avoid shading.
Generator Power
Generator power provides backup charging, especially when solar is limited.
Inverter Generators vs. Conventional: Inverter generators produce cleaner, more stable power (safer for electronics), are quieter, and more fuel-efficient. Conventional generators are less expensive but have higher total harmonic distortion (THD).
Sizing Generator: Calculate total wattage of simultaneous devices + 20% safety margin for surges.
Noise, Emissions, and Regulations: Consider low decibel ratings and mufflers. Ensure compliance with emissions standards and campground quiet hours.
Alternator Charging (DC-DC Chargers)
Alternator charging tops up house batteries while driving. DC-DC chargers regulate voltage/current from the vehicle’s alternator. This is crucial for hybrid systems, preventing starting battery drain and ensuring the correct charge profile for AGM or LiFePO4 batteries.
Shore Power and Converters/Chargers
Shore power connects the RV to an external power source. Converters/chargers convert 120V AC to 12V DC for battery charging and powering DC appliances.
Alternative/Hybrid Charging Sources
Wind and hydro power can be viable in specific locations but are highly dependent on environmental conditions. Hybrid systems combining multiple sources (solar, alternator, generator, shore) offer the most reliability.
Phase 4: Converting Power – Inverters and Their Role
Inverters convert 12V DC battery power to 120V AC for household appliances.
Pure Sine Wave vs. Modified Sine Wave:
Pure Sine Wave: Produces clean, stable power identical to shore power; ideal for sensitive electronics (laptops, TVs, medical devices).
Modified Sine Wave: Less expensive, higher THD; can damage some sensitive devices. Pure sine wave is recommended for most RV applications.
Sizing Your Inverter: Calculate total continuous wattage of simultaneous AC appliances + 20% safety margin. Check surge rating for appliances like air conditioners.
Installation Best Practices and Safety: Mount in a well-ventilated area, away from moisture and extreme temperatures. Use appropriately sized cables and fuses. Ensure proper grounding. Follow manufacturer instructions.
Phase 5: Management, Monitoring, and Conservation for Extended Boondocking
Effective management, monitoring, and conservation maximize battery life and extend off-grid time.
Battery Monitors and System Gauges: Provide real-time data on battery voltage, current, state of charge, and remaining capacity for informed usage decisions. Advanced monitors offer data logging and alerts.
Smart RV Technology: Offers remote monitoring and control. Smart power strips turn off unused devices; smart thermostats optimize heating/cooling. Some systems integrate with smartphone apps.
Advanced Conservation Strategies: Use LED lighting, minimize water usage (reduces pump use), cook outdoors, unplug unused chargers to eliminate phantom loads.
Building in Redundancy and Reliability: Have backup charging sources (generator, extra solar), spare fuses, cables, and connectors. Regularly inspect and maintain the system.
Real-World Case Studies: RVers’ Off-Grid Power Setups
Examining successful systems provides inspiration and practical insights.
Case Study 1: Solar-Dominant System: An RV setup primarily using solar power, including panel wattage, battery capacity, charge controller type, and powered appliances. This highlights strengths, weaknesses, and key takeaways such as quiet operation and low ongoing costs, with weather dependence as the main limitation.
Case Study 2: Hybrid Solar–Generator System: An RV setup combining solar and generator power, including panel wattage, battery capacity, generator size, and integration methods. This highlights strengths, weaknesses, and key takeaways such as resilience in poor weather and the trade-off of fuel use and noise.
Key Takeaways from Successful Systems: Proper planning, component selection, installation, and maintenance are crucial principles in every reliable off-grid electrical system.
Common Pitfalls and Troubleshooting Your RV Electrical System
Addressing common issues helps maintain system functionality.
Overcoming Under-Sizing and Compatibility Issues: Ensure all components are adequately sized with a safety margin and verify compatibility between them (voltage, charge profiles, wire gauge, and fuse ratings).
Diagnosing Charging Problems: Check for faulty panels, controllers, alternators, or corroded connections. Use a multimeter to test voltage/current, check fuses and breakers, and inspect wiring for damage or loose connections.
Safety Considerations and Best Practices: Always disconnect power before maintenance. Use appropriate fuses and breakers. Wear safety glasses and gloves. Ensure proper ventilation for generators to prevent carbon monoxide poisoning.
Comparison Table: RV Battery Types
Feature / Type
Lead-Acid (Flooded)
AGM
LiFePO4 (Lithium)
Cost
Low
Medium
High
Lifespan
2–5 years
5–7 years
10–15 years
Usable Capacity
50%
50%
80–100%
Weight
High
Medium
Low
Charging Speed
Slow
Medium
Fast
Maintenance
High
Low
None
Cold Weather Performance
Poor
Fair
Good
Safety
Fair
Good
Excellent
RV Off-Grid Power Planner
Estimate daily power use, usable battery capacity, solar production, off-grid runtime, and generator load.
Adjust the example values to match your RV and equipment.
Battery Bank
Default usable-capacity values are planning assumptions. Use your battery manufacturer’s specification when available.
Solar and Generator
Peak sun hours are not daylight hours. Generator comparison uses running watts only and does not include startup surge.
Daily Appliance Use
Edit, remove, or add loads to match your setup.
Daily Energy
0 Wh
Usable Battery
0 Wh
Solar Harvest
0 Wh/day
Off-Grid Runtime
0 days
System Sizing
Battery bank for one no-solar day 0 Ah
Solar needed to replace daily use 0 W
Daily battery draw after solar 0 Wh
AC Load Check
AC running watts if all AC loads run together 0 W
Generator running-watt margin 0 W
Planning tool only. Actual results vary with temperature, battery age, wiring losses, inverter behavior,
appliance cycling, solar conditions, and startup surge. Verify equipment limits before operating high-load appliances.
Conclusion: Powering Your Ultimate Boondocking Adventures
A well-designed and managed electrical system is key to successful boondocking.
Recap of Key Principles: Power audit, battery selection and sizing, charging sources, inverter choice, and management/conservation are fundamental. Prioritize safety and regular inspection.
Future Trends in RV Off-Grid Power: Expect continued advancements in battery technology (LiFePO4 and beyond), solar panel efficiency, and integrated smart power management systems that tie everything together in a single dashboard.
Frequently Asked Questions
How do I calculate my RV’s daily power consumption for boondocking?
List every device, find its wattage, and estimate hours of use per day. Multiply watts by hours to get daily watt-hours for each device, then total everything. Divide total watt-hours by system voltage (typically 12V) to get daily amp-hours. Add around 20% extra for system losses and unplanned usage.
What are the key differences between AGM and Lithium (LiFePO4) batteries for RVs?
AGM batteries are sealed lead-acid units with medium cost, about 50% usable capacity, and moderate lifespan. LiFePO4 batteries have higher upfront cost but offer 80–100% usable capacity, much longer cycle life, lower weight, and faster charging. For frequent boondocking, lithium typically provides better long-term value.
Can I mix different types of charging sources in my RV boondocking electrical system?
Yes. Many systems combine solar, alternator (via DC-DC charger), shore power, and a generator. The important part is that each charging source is correctly sized, properly fused, and set to the appropriate charge profile for your battery chemistry.
What is the importance of a pure sine wave inverter for an RV?
Pure sine wave inverters produce clean AC power that closely matches grid/shore power. This is safer for sensitive electronics like laptops, TVs, CPAP machines, and many battery chargers. Modified sine wave inverters are cheaper but can cause noise, overheating, or long-term damage in some devices.
How can I maximize my RV’s power conservation while boondocking?
Switch all lighting to LEDs, run water heaters and fridges on propane when possible, minimize electric resistance heating, unplug chargers and electronics when not in use, cook outside to reduce cooling loads, and monitor your battery state of charge so you can adjust habits before you run low.
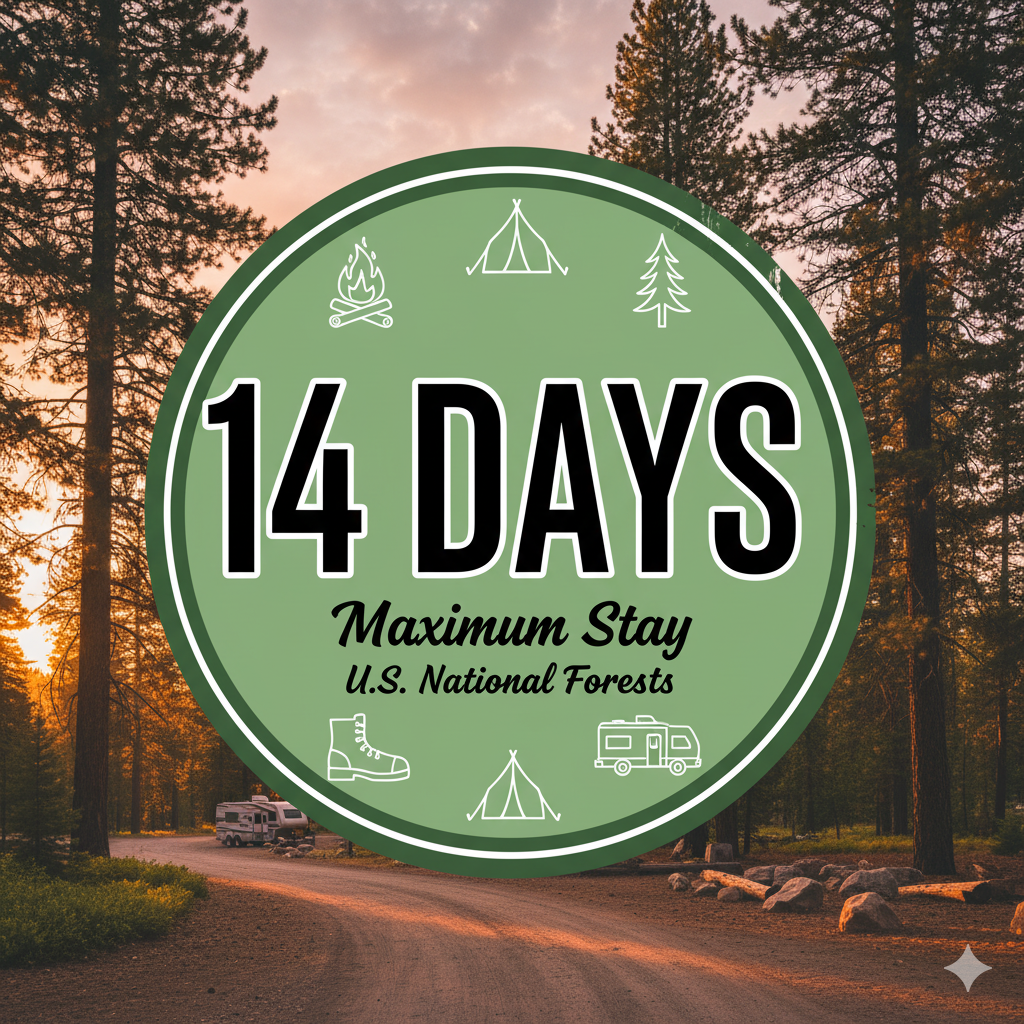
Are you dreaming of a long, adventurous journey through America’s National Forests? Many travelers and campers share the allure of exploring these vast natural landscapes. A common question that arises is: Can you travel from one National Forest campground to another, staying up to 14 days at each for free? The answer is yes, with some important details to consider.
Understanding the 14-Day Rule
The most well-known rule about camping in National Forests is the 14-day stay. However, this isn’t a one-size-fits-all regulation. The allowed duration can vary significantly from one forest to another, ranging from as few as 5 days to as long as 30 days. Each forest and grassland sets its own occupancy rules, which may include specifics on how long you can camp within their boundaries, when you can return to the same site, and the total days allowed for camping throughout the year.
Dispersed Camping
For those interested in ‘dispersed camping’ or ‘boondocking,’ these areas in National Forests usually permit camping up to 14 days. This type of camping means setting up in previously-used sites off forest service roads, though there are exceptions to this as well.
Permits and Passes:
While most National Forests don’t require a fee or permit for camping, there are exceptions. Depending on the area, you may need an Adventure Pass or an America the Beautiful Pass. The Adventure Pass, typically used in designated recreation areas, might be free or cost up to $30 per day. For extended stays, consider an annual pass. The America the Beautiful Pass grants access to over 2,000 federal recreation sites and is valid for a year.
Dealing with Fire Restrictions
In areas with fire restrictions, like during droughts or high fire danger ratings, a Campfire Permit might be necessary. This permit allows campfires outside of designated rings and outlines other regulations, such as food storage requirements.
Planning Your Trip
Before you set off on your National Forest adventure, research is key. Knowing the specific permits and passes required for your intended camping area is crucial. These permits can often be purchased online or at ranger stations near your destination.
Adhering to Specific Rules
It’s important to note that National Forest camping rules can be more lenient than those in National Parks. Activities like hunting, having dogs on trails, and using motorized vehicles might be permissible in National Forests. However, strict rules are in place for designated wilderness areas and other sensitive regions.
Booking and Fees
Lastly, not all National Forest campgrounds are free, especially those offering more amenities. Some may require reservations or have associated fees, so it’s essential to check this information in advance.
Conclusion
Embarking on a camping journey through America’s National Forests can be an enriching and memorable experience. By understanding the specific rules, permits, and conditions of each forest and campground, you can fully enjoy the beauty and serenity of these natural treasures. Happy camping!
Resources
U.S. Forest Service (USFS) Official Site: This government website provides official information about National Forests, including rules, permits, and camping guidelines.
National Park Service (NPS) Official Site: As a federal agency that manages all national parks and many national monuments, the NPS site offers authoritative information on camping in natural reserves.
Recreation.gov: This site is an interagency collaboration that provides information on outdoor recreation opportunities and reservation services for federal lands, including National Forests.
USDA Forest Service – Dispersed Camping Guidelines: This page specifically focuses on dispersed camping guidelines in National Forests, providing detailed and reliable information.
America the Beautiful Pass Official Information: For detailed information about the pass that grants access to federal recreation sites, including National Forests.

 The Culprits Unmasked: Why Your RV Bathroom Has a Secret Agent Stink
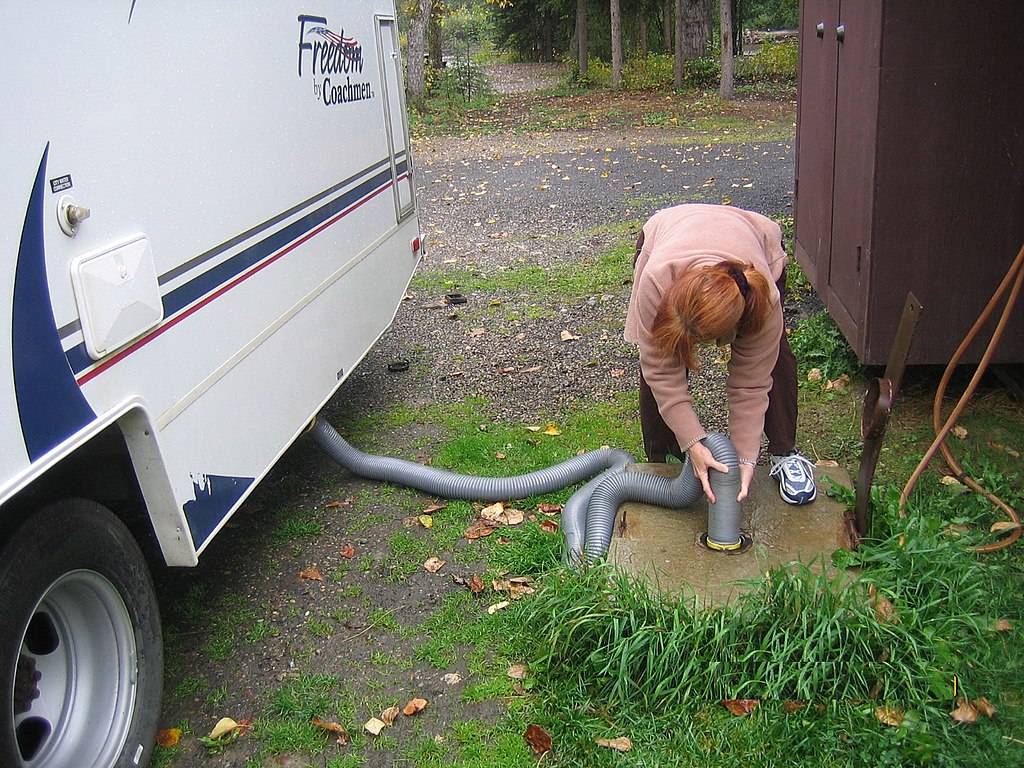
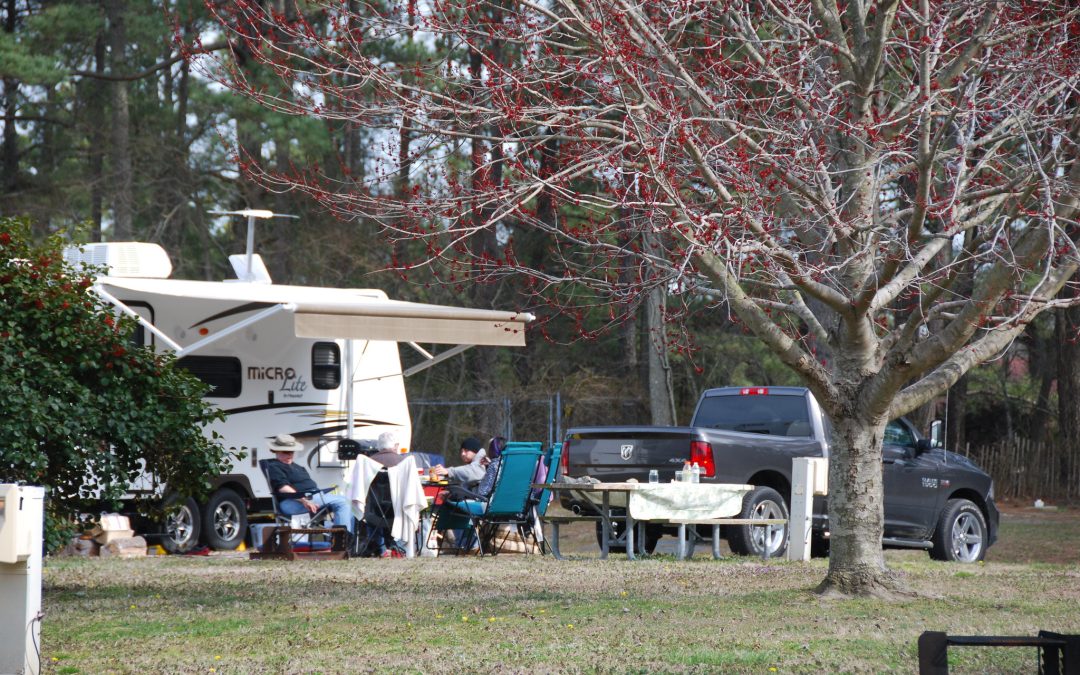
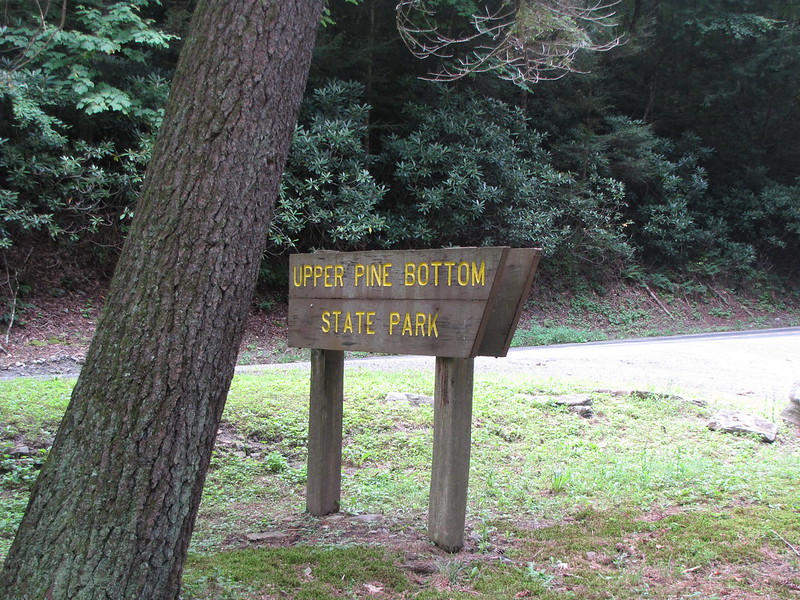 Upper Pine Bottom State Park Image by
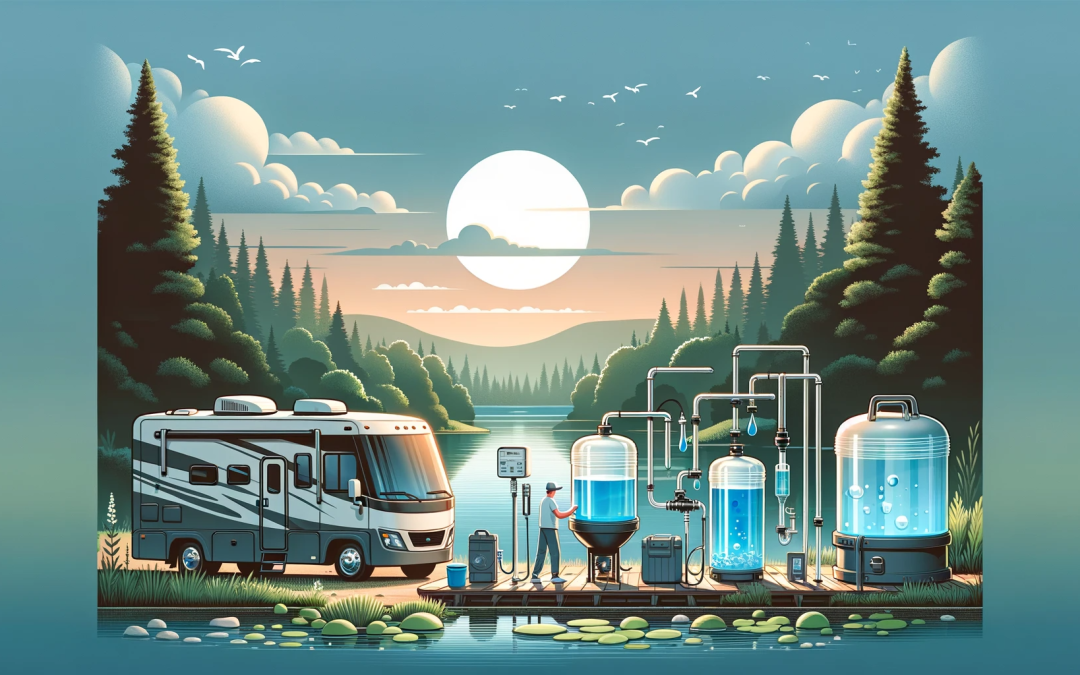
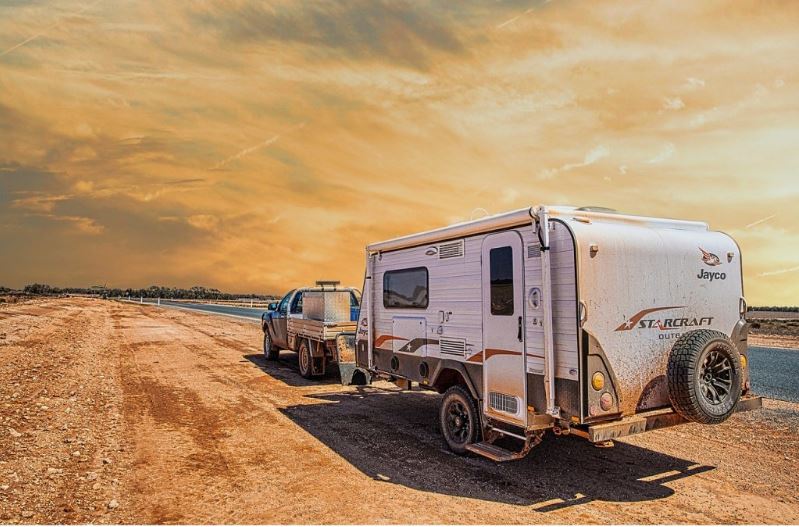
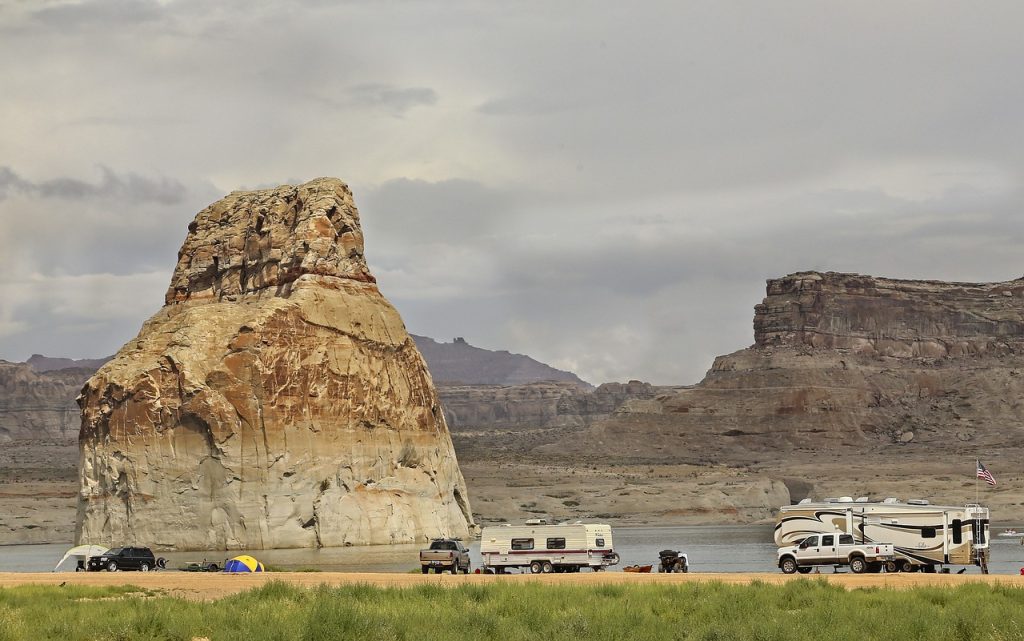
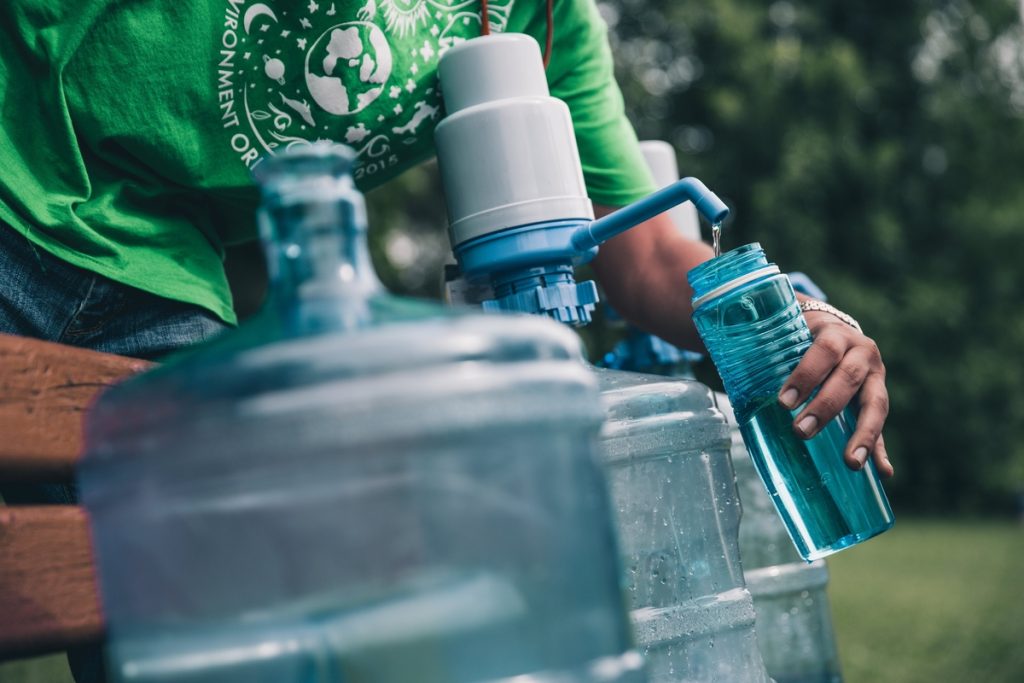 Image by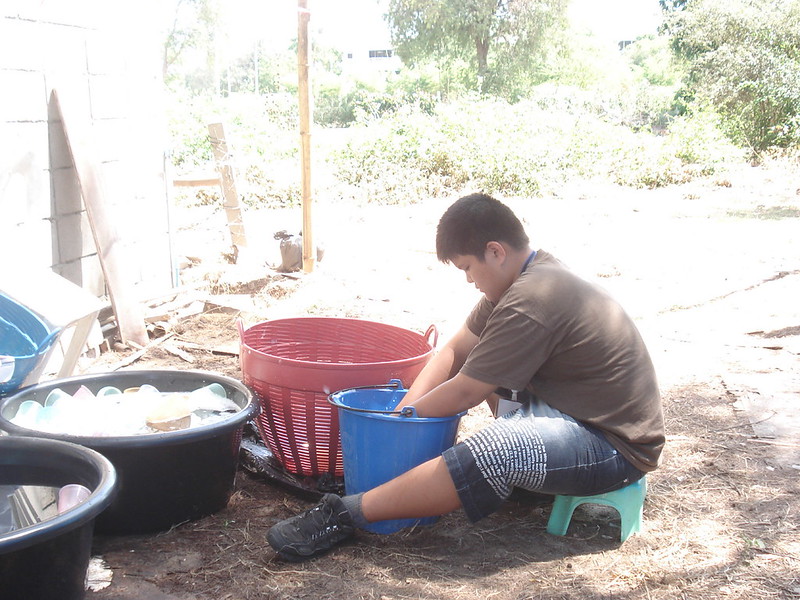
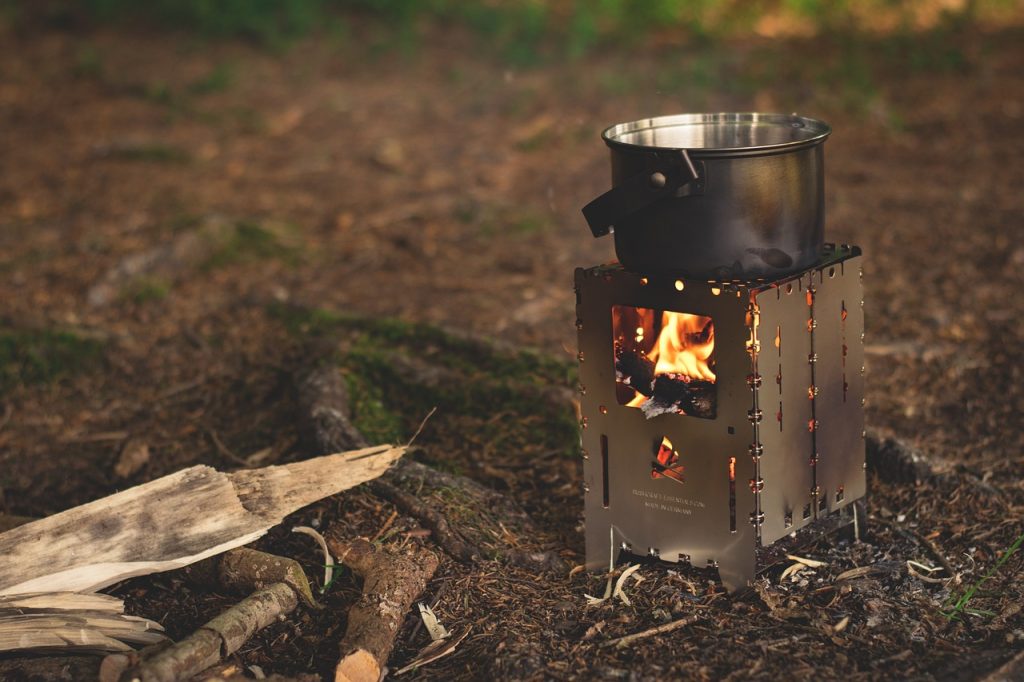
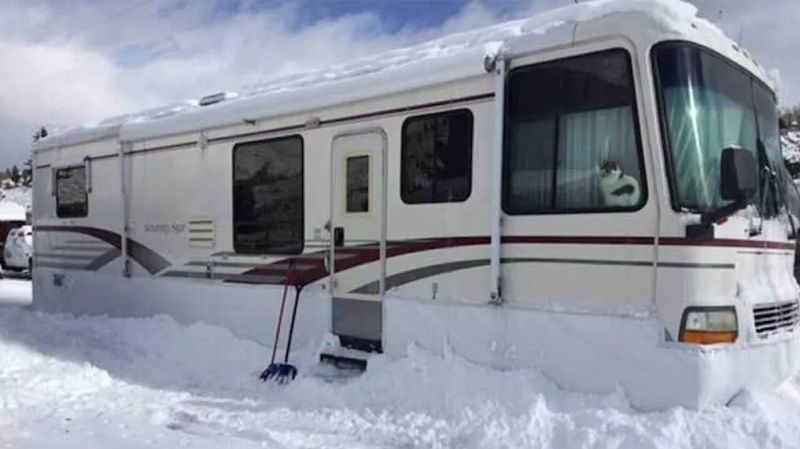

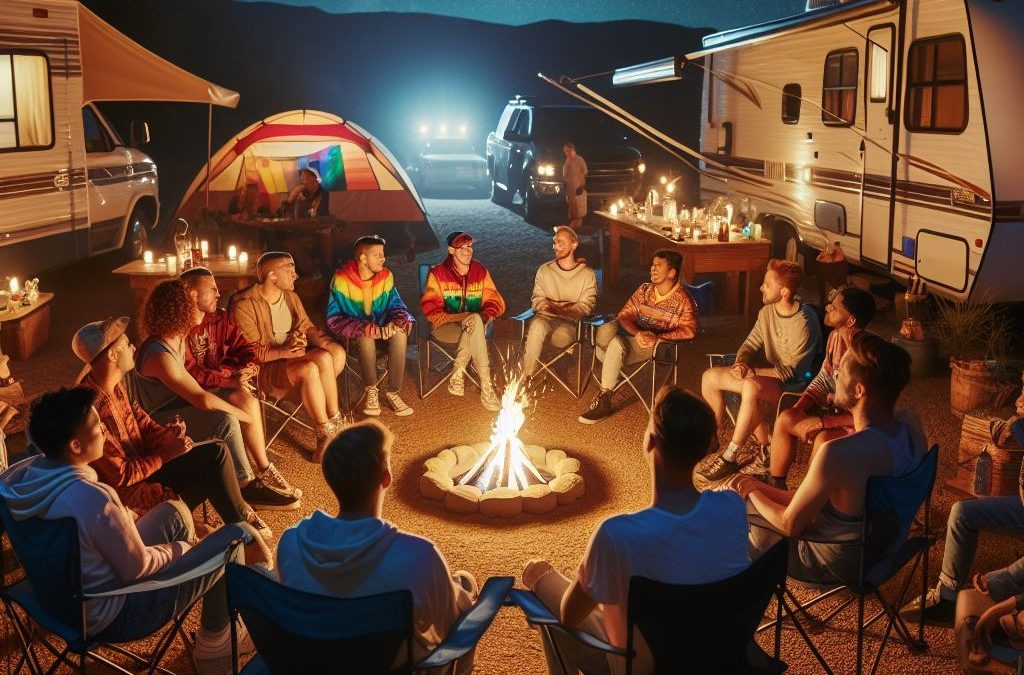
 For decades, LGBTQIA+ individuals have faced significant barriers to participation in outdoor recreation due to widespread discrimination and exclusion. These barriers have ranged from overt forms of prejudice, such as being denied service at campgrounds or being subjected to harassment on trails, to more subtle forms of exclusion, such as a lack of representation in outdoor media and a scarcity of LGBTQIA+-friendly outdoor organizations.
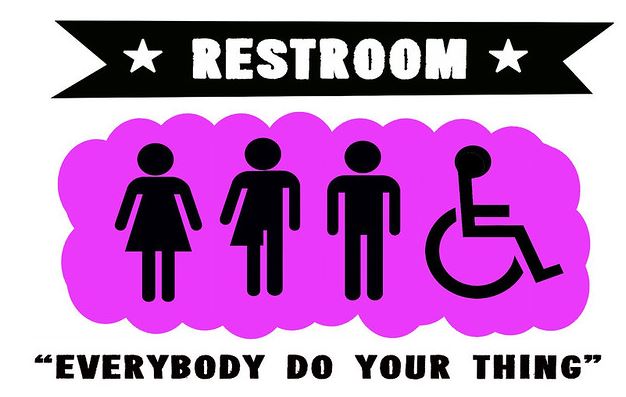 Image by